
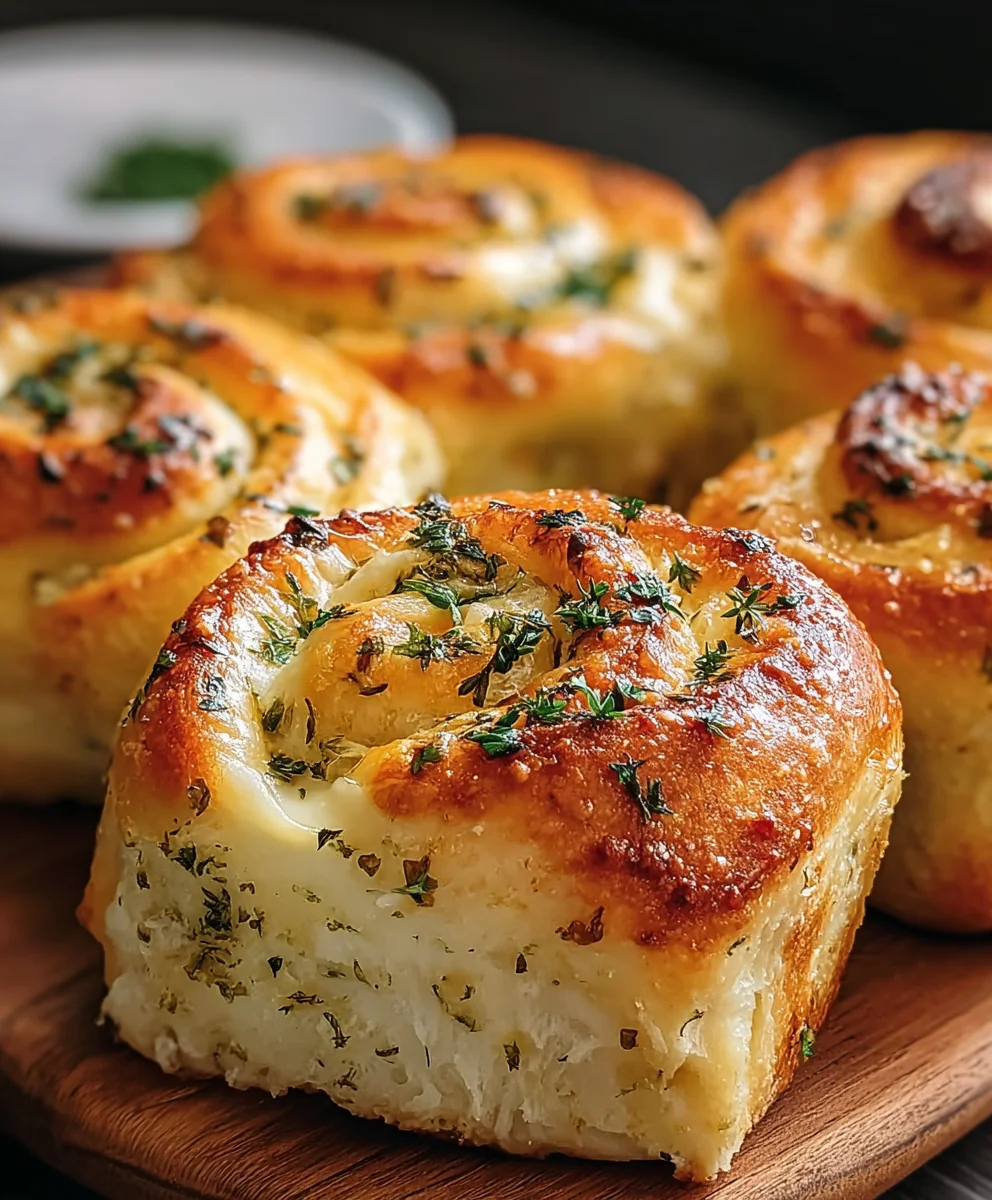
Sourdough Herb And Cheese Rolls are more than just a baked good; they are an invitation to experience pure culinary delight. Imagine the tantalizing aroma wafting through your kitchen, drawing everyone closer, eager for that first warm bite. This isn’t just any roll; it’s a testament to the timeless art of sourdough baking, a tradition cherished for centuries, now elevated with vibrant herbs and rich, gooey cheese.
Discover the Magic of Homemade Sourdough Rolls
I find immense joy in crafting these rolls, watching the dough transform into something truly magical. The unique tang of the sourdough perfectly complements the savory notes of fresh herbs like rosemary and thyme, while generous pockets of melted cheese create an irresistible texture and flavor explosion. People adore these Sourdough Herb And Cheese Rolls because they offer the perfect blend of sophisticated flavor, comforting warmth, and an incredible tender crumb. They’re ideal for breakfast, a hearty side to any meal, or simply as a satisfying snack on their own. Get ready to impress your family and friends with this artisanal treat, bringing the comforting elegance of a bakery-fresh item right to your table.
Ingredients:
- Active Sourdough Starter: 150 grams (approximately 2/3 cup, fed 4-6 hours prior and very active, bubbly, and passes the float test with ease)
- Warm Water: 300 grams (approximately 1 1/4 cups, ideally around 90-95°F or 32-35°C to encourage starter activity)
- Bread Flour: 400 grams (approximately 3 1/4 cups, a good quality strong bread flour with 12-14% protein content will give the best structure for these Sourdough Herb And Cheese Rolls)
- Whole Wheat Flour (Optional): 50 grams (approximately 1/3 cup, adds a lovely nutty depth and slight chew, but you can substitute with more bread flour if preferred)
- Fine Sea Salt: 10 grams (approximately 1 3/4 teaspoons, essential for flavor and dough structure)
- Olive Oil: 15 grams (approximately 1 tablespoon, extra virgin, for adding richness and tenderness to the dough)
- Mixed Cheese: 150 grams (approximately 1 1/2 cups, freshly shredded. I love a blend of sharp cheddar, nutty Gruyère, and a touch of Parmesan for maximum flavor in our Sourdough Herb And Cheese Rolls)
- Fresh Herbs: 2-3 tablespoons, finely chopped (I typically use a combination of fresh rosemary, thyme, and chives. Parsley or oregano would also be wonderful additions to complement the cheese.)
- Minced Garlic: 1-2 cloves (optional, but highly recommended for an extra savory kick that truly enhances the herb and cheese profile)
- For Brushing (Optional):
- Melted Butter: 2 tablespoons (for brushing the warm rolls after baking, adds shine and an irresistible buttery finish)
- Egg Wash: 1 large egg whisked with 1 tablespoon water or milk (for a golden, shiny crust before baking)
Mixing the Dough: From Autolyse to Final Inclusion
Creating these delightful Sourdough Herb And Cheese Rolls begins with a mindful mixing process. This initial stage is crucial for developing the dough’s strength and integrating all the wonderful flavors.
- The Autolyse Phase: Preparing the Foundation
In a large mixing bowl, combine the bread flour and the optional whole wheat flour. Pour in the warm water and mix them together with your hands or a Danish dough whisk until no dry spots of flour remain. At this point, it will look like a shaggy, wet mass, and that’s exactly what we want. This step, known as the autolyse, allows the flour to fully hydrate and begin to develop gluten without the presence of salt or starter. It makes the final mixing much easier and results in a more extensible dough. Cover the bowl with a clean kitchen towel or plastic wrap and let it rest at room temperature for 30 minutes to 1 hour. This resting period is key for a tender crumb in your Sourdough Herb And Cheese Rolls.
- Introducing the Starter and Salt: Awakening the Dough
After the autolyse, add your active sourdough starter directly onto the rested dough. Sprinkle the fine sea salt over the top. Now, thoroughly mix the starter and salt into the dough. I prefer to use my hands for this, squeezing and folding the dough repeatedly until the starter is fully incorporated and the salt is dissolved. This can take about 5-7 minutes of consistent mixing. The dough will feel a bit sticky at first, but keep going until it starts to come together and feels slightly smoother. Ensure that you don’t feel any gritty salt crystals when you pinch a small piece of dough.
- Enriching with Olive Oil: Adding Tenderness
Once the starter and salt are incorporated, pour the olive oil over the dough. Again, use your hands to work the olive oil into the dough. It might feel slippery at first, but with continued folding and kneading within the bowl, the oil will be absorbed. This step adds a wonderful richness and helps create a tender crumb in our Sourdough Herb And Cheese Rolls. Continue mixing for another 3-5 minutes until the dough feels more cohesive and elastic.
- Folding in the Flavor Powerhouses: Herbs, Cheese, and Garlic
This is where our Sourdough Herb And Cheese Rolls truly come to life! Add the freshly shredded mixed cheese, finely chopped fresh herbs, and minced garlic (if using) to the dough. Gently fold them into the dough, trying to distribute them as evenly as possible without overworking the dough too much. I usually do this with a few gentle folds, then pick up sections of the dough and tuck the inclusions into the center. Be patient; it might take a few minutes to get everything well distributed. Once they’re mixed in, the dough is ready for its bulk fermentation.
Bulk Fermentation and Dough Development: Building Strength and Flavor
The bulk fermentation, often called the first rise, is a critical phase where the sourdough yeast and bacteria get to work, producing gases and developing complex flavors. It’s also when we actively strengthen the dough through a series of stretch and folds.
- Initial Rest: Getting Started
After mixing in the inclusions, cover your bowl and let the dough rest for 30 minutes at room temperature. This initial rest allows the gluten to relax and prepares the dough for its first set of stretch and folds. The ideal room temperature for bulk fermentation is around 75-78°F (24-26°C); if your kitchen is cooler, the process will take longer.
- The First Set of Stretch and Folds: Building Structure
After 30 minutes, perform your first set of stretch and folds. With wet hands (to prevent sticking), grab a portion of the dough from one side, stretch it upwards gently, and then fold it over onto itself in the center of the bowl. Rotate the bowl a quarter turn and repeat this process three more times, effectively folding all four “sides” of the dough into the center. After the fourth fold, flip the dough over so the seam side is down. This completes one set. Cover the bowl and let it rest for another 30 minutes.
- Subsequent Stretch and Folds: Developing Elasticity
Repeat the stretch and fold process (Step 6) every 30-45 minutes for a total of 4-5 sets. As you progress through the sets, you will notice a significant change in the dough. It will become noticeably stronger, smoother, more elastic, and less sticky. The inclusions (herbs and cheese) will also become more integrated into the dough structure. By the third or fourth set, the dough should be able to hold its shape better and resist tearing when stretched. This methodical strengthening is what gives our Sourdough Herb And Cheese Rolls their beautiful rise and texture.
- The Final Bulk Rise: Observing the Transformation
After the final set of stretch and folds, cover the bowl and let the dough continue its bulk fermentation without interruption. This final phase can take anywhere from 2 to 4 hours, depending on your starter’s activity and your kitchen temperature. You are looking for the dough to increase in volume by about 30-50% (it won’t necessarily double for sourdough enriched with inclusions), become visibly bubbly, feel lighter, and have a domed top. When gently jiggled, it should slightly wobble. This stage is crucial for developing the characteristic sourdough tang and the tender, open crumb we desire in these savory rolls.
Shaping Your Sourdough Herb And Cheese Rolls: Crafting Individual Portions
Once your dough has completed its bulk fermentation, it’s time to divide and shape it into individual rolls. This step requires a gentle touch to maintain the gas bubbles developed during bulk fermentation.
- Preparing Your Workspace and Dough
Lightly flour your clean work surface. Gently turn the fermented dough out onto the floured surface. Avoid pressing all the air out. Shape it into a rough rectangle or log using the bench scraper. Handle the dough with care to preserve the airy structure you’ve worked hard to create for your Sourdough Herb And Cheese Rolls.
- Dividing the Dough: Achieving Uniformity
Using your bench scraper, divide the dough into 12-16 equal pieces. For precise and uniform rolls, you can weigh each piece to about 65-80 grams, depending on how large you want your rolls to be. I find weighing them ensures even baking and consistent size for sharing these delicious Sourdough Herb And Cheese Rolls.
- Pre-Shaping (Optional, but Recommended)
For each piece, gently gather the edges towards the center and lightly form it into a loose ball. This pre-shaping helps to create some surface tension and makes the final shaping easier. Cover the pre-shaped balls with a clean kitchen towel and let them rest on your counter for 15-20 minutes. This rest allows the gluten to relax, making the dough more pliable for final shaping.
- Final Shaping: Creating Taut Rolls
After the rest, take one piece of dough at a time. With lightly floured hands (or just slightly damp hands), gently cup the dough with your palm and fingers. Using minimal pressure, rotate the dough against the counter in a circular motion, pulling the edges underneath and towards the center. You want to create a taut, smooth surface on top and a well-sealed seam on the bottom. The goal is to build significant surface tension, which will help the rolls hold their shape and achieve a beautiful rise. Repeat for all pieces.
- Arranging for Proofing
Line a baking sheet with parchment paper. Arrange the shaped Sourdough Herb And Cheese Rolls on the prepared baking sheet, leaving about 1-2 inches of space between them to allow for expansion during proofing and baking. If you want them to touch and form a pull-apart loaf, you can place them closer together.
Proofing Your Sourdough Herb And Cheese Rolls: The Final Rise
The final proof is where your shaped rolls prepare for their grand oven spring, developing their full volume and tender texture.
- The Cold Fermentation (Recommended for Flavor and Convenience)
Loosely cover the baking sheet with plastic wrap or a large plastic bag, ensuring it doesn’t stick to the dough. Place the rolls in the refrigerator for an overnight cold proof, typically 8-16 hours. This cold fermentation dramatically enhances the flavor of your Sourdough Herb And Cheese Rolls, leading to a more complex tang and a superior texture. It also provides incredible scheduling flexibility, allowing you to bake fresh rolls whenever you’re ready.
- The Warm Proof (Faster Alternative)
If you’re eager to bake sooner, you can opt for a warm proof. Cover the rolls and let them proof at room temperature (around 75-78°F or 24-26°C) for 2-4 hours. Keep a close eye on them. The rolls are ready when they look visibly puffed up, feel soft and airy, and a gentle poke with a floured finger leaves a slight indentation that slowly springs back about halfway (the “poke test”). Be careful not to overproof, as this can lead to deflated rolls.
- Preheating Your Oven: Getting Ready to Bake
About 45-60 minutes before you plan to bake, preheat your oven to 425°F (220°C) with a rack in the middle position. If you have a baking stone or steel, place it in the oven during preheating for an even more intense heat transfer, though it’s not strictly necessary for rolls. Having the oven fully preheated is vital for achieving a good oven spring and a crispy crust on your Sourdough Herb And Cheese Rolls.
Baking Your Sourdough Herb And Cheese Rolls: The Moment of Truth
This is where all your hard work comes to fruition, transforming the proofed dough into golden, aromatic Sourdough Herb And Cheese Rolls.
- Preparing for the Oven
If you opted for a cold proof, take the rolls directly from the refrigerator and proceed to this step – no need to bring them to room temperature. This also helps maintain their shape. If desired, gently brush the tops of the rolls with the egg wash for a beautiful golden-brown, shiny crust. You can also sprinkle a little extra grated Parmesan cheese or coarse sea salt on top for added texture and flavor.
- The Initial Bake: Steam for a Crispy Crust (Optional but Recommended)
Carefully place the baking sheet with your Sourdough Herb And Cheese Rolls into the preheated oven. For a crispier crust, you can create steam. You can achieve this by pouring about 1/2 cup of hot water into a cast-iron pan or an oven-safe dish placed on the bottom rack of your oven immediately after placing the rolls inside. Close the oven door quickly to trap the steam. Be careful of the hot steam!
- Baking Process: Timing and Temperature Adjustments
Bake at 425°F (220°C) for 10-15 minutes with steam (if used). Then, carefully remove the steam tray (if used) and reduce the oven temperature to 375°F (190°C). Continue to bake for another 15-25 minutes, or until the rolls are deeply golden brown on top and bottom, and sound hollow when tapped. The rich color is a sign of a perfectly baked Sourdough Herb And Cheese Roll. If you have an instant-read thermometer, the internal temperature should register around 200-210°F (93-99°C).
- Finishing Touches: A Buttery Glaze (Optional)
Once baked to perfection, remove the Sourdough Herb And Cheese Rolls from the oven. If desired, immediately brush the tops with melted butter. This adds an extra layer of richness, a beautiful sheen, and keeps the crust soft. The butter will soak into the warm rolls, infusing them with an irresistible aroma.
Cooling and Enjoying Your Sourdough Herb And Cheese Rolls: The Reward
The hardest part is often waiting to enjoy your freshly baked goods, but proper cooling is essential for the best texture and flavor.
- Cooling Down Properly
Transfer the baked Sourdough Herb And Cheese Rolls from the baking sheet to a wire cooling rack immediately. Allow them to cool for at least 30-45 minutes before attempting to slice or tear into them. This cooling period is crucial, as the internal structure of the rolls is still setting, and residual heat continues to cook them. Slicing too early can result in a gummy texture.
- Serving Suggestions: Delight in Every Bite
Once cooled, these Sourdough Herb And Cheese Rolls are absolutely divine on their own, perhaps with a little extra butter. They make a fantastic accompaniment to soups, stews, salads, or any savory meal. They are also wonderful served warm with a charcuterie board or as a gourmet snack. Leftovers, if there are any, can be stored at room temperature in an airtight container for 2-3 days or frozen for longer enjoyment. Reheat gently in the oven for a “just baked” experience. Get ready to savor the incredible aroma and taste of your homemade Sourdough Herb And Cheese Rolls!
Conclusion:
If you’ve followed along with me on this baking adventure, you’ve witnessed the magic that happens when simple, wholesome ingredients are brought together with a little time, a lot of love, and the incredible power of sourdough. There are countless bread recipes out there, but these aren’t just any rolls. These are truly special. I genuinely believe that once you pull a batch of these glorious rolls from your oven, you’ll understand exactly why they are an absolute must-try for any home baker, whether you’re a seasoned sourdough enthusiast or just beginning to explore its wonderful world.
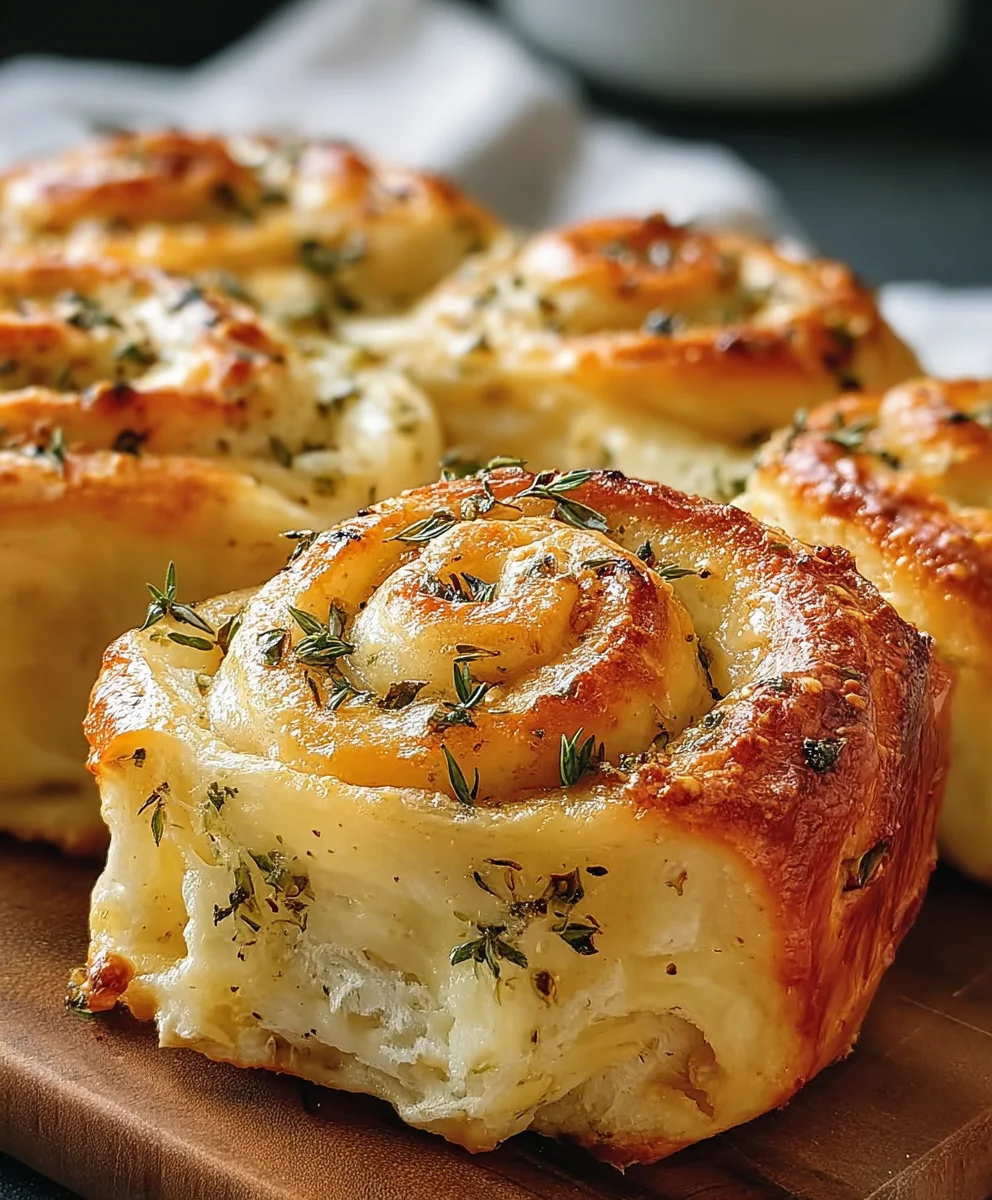
What makes these particular rolls stand head and shoulders above the rest? It’s the exquisite symphony of flavors and textures that dance on your palate. Imagine biting into a roll with a perfectly golden, slightly crisp crust, giving way to an interior that is unbelievably soft, airy, and wonderfully chewy. That signature, subtle tang from the sourdough starter provides an incredible depth, a nuanced background note that elevates every other flavor. Then, the aromatic burst of fresh herbs, whether it’s the woody earthiness of rosemary, the delicate warmth of thyme, or the bright, oniony whisper of chives, weaves through each bite. Finally, the rich, savory pockets of melted cheese add that irresistible gooey indulgence, creating a truly comforting and satisfying experience. These aren’t just a side dish; they’re a star in their own right, capable of transforming an ordinary meal into something truly memorable. The satisfaction of creating something so utterly delicious, so perfectly balanced in flavor and texture, is a reward in itself. Trust me when I say, your kitchen will be filled with an aroma so divine, it will draw everyone in, eager for a taste of your masterpiece.
Now, let’s talk about how to truly make these your own, and how best to enjoy them. While the recipe for our Sourdough Herb And Cheese Rolls is fantastic as written, part of the joy of home baking is the freedom to experiment and customize. For serving, these rolls are incredibly versatile. They are, of course, the quintessential accompaniment to a hearty bowl of soup – think a rich, creamy tomato bisque or a rustic, slow-cooked beef stew. They’re equally magnificent alongside a vibrant, crisp salad, adding a comforting counterpoint to the fresh greens. Don’t hesitate to serve them as a proud center-piece bread for any dinner party; they’re guaranteed to impress. But don’t limit them to dinner! Imagine them warmed gently for breakfast, perhaps alongside scrambled eggs and crispy bacon, or simply slathered with a pat of good quality butter. For a simple snack, tear one open and dip it into a flavorful olive oil, or even create a mini sandwich with some thinly sliced cured meats.
When it comes to variations, the possibilities are almost endless! Feel free to switch up your cheese – a sharp cheddar will give you a bolder, more pungent flavor, while Gruyère offers a beautiful nutty note, and smoked Gouda adds an intriguing depth. For a tangy twist, crumbled feta would be divine. As for herbs, experiment with what you love: fresh dill would pair wonderfully, or a blend of Italian herbs like oregano and basil could transport you straight to the Mediterranean. If you’re feeling adventurous, consider adding other mix-ins to the dough. Sun-dried tomatoes, finely chopped and rehydrated, would add a lovely sweet-tart burst. A sprinkle of red pepper flakes could introduce a subtle heat, or even finely diced pickled jalapeños for a more pronounced kick. Caramelized onions or roasted garlic cloves, mashed into a paste, would also be phenomenal additions, deepening the savory profile. You could even try shaping the dough into a beautiful pull-apart loaf for a different presentation, perfect for sharing. The key is to have fun and let your culinary creativity shine!
So, dear baker, I implore you: don’t let this recipe be just another bookmark in your browser. Take the plunge! Gather your ingredients, dust off your sourdough starter, and dedicate some time to this truly rewarding process. There is immense satisfaction in transforming simple flour, water, and salt into something so spectacular, and the feeling of accomplishment when you pull those fragrant, perfectly baked rolls from your oven is unparalleled. I promise you, the aroma, the taste, and the sheer joy of sharing these homemade delights with friends and family will make every moment worthwhile. Once you’ve created your own batch of these delightful Sourdough Herb And Cheese Rolls, I would absolutely love to hear about your experience. Did you make any exciting substitutions? What wonderful meal did you serve them with? Please, don’t be shy! Share your photos, your stories, and your tips in the comments or on your favorite social media platform. Let’s celebrate the joy of baking together. Your journey to creating truly unforgettable rolls begins now!
Sourdough Herb & Cheese Rolls
Warm, cheesy, and flavorful Sourdough Herb & Cheese Rolls, combining the unique tang of sourdough with fresh herbs and rich melted cheese for a delightful culinary experience. Perfect for breakfast, a hearty side, or a satisfying snack.
Ingredients
-
150g (2/3 cup) active sourdough starter
-
300g (1 1/4 cups) warm water (90-95°F / 32-35°C)
-
400g (3 1/4 cups) bread flour
-
50g (1/3 cup) whole wheat flour (optional)
-
10g (1 3/4 tsp) fine sea salt
-
15g (1 tbsp) extra virgin olive oil
-
150g (1 1/2 cups) freshly shredded mixed cheese (e.g., cheddar, Gruyère, Parmesan)
-
2-3 tbsp finely chopped fresh herbs (e.g., rosemary, thyme, chives)
-
1-2 cloves minced garlic (optional)
-
Optional for brushing:
-
2 tbsp melted butter
-
1 large egg whisked with 1 tbsp water or milk (for egg wash)
Instructions
-
Step 1
Combine flours and warm water in a large bowl for autolyse; rest 30 min – 1 hour. Add active sourdough starter and salt, mixing thoroughly for 5-7 min. Incorporate olive oil for 3-5 min. Gently fold in shredded mixed cheese, chopped fresh herbs, and optional minced garlic until evenly distributed. -
Step 2
Cover dough and rest 30 min. Perform 4-5 sets of stretch and folds every 30-45 min. After final fold, cover and bulk ferment at 75-78°F (24-26°C) for 2-4 hours until 30-50% increased in volume, bubbly, and light. -
Step 3
Lightly flour surface, gently turn out dough. Divide into 12-16 equal pieces (65-80g each). Optionally, pre-shape into loose balls and rest 15-20 min. Then, create taut, smooth, round rolls with a sealed seam by rotating dough against the counter. Arrange on a parchment-lined baking sheet, 1-2 inches apart. -
Step 4
Choose proofing method: **Cold Proof (Recommended):** Loosely cover and refrigerate 8-16 hours. **Warm Proof (Faster):** Cover and proof at 75-78°F (24-26°C) for 2-4 hours until puffed and airy (poke test). -
Step 5
Preheat oven to 425°F (220°C) for 45-60 min. Optionally, brush rolls with egg wash and sprinkle toppings. For crispy crust, prepare a steam pan with 1/2 cup hot water. Bake rolls at 425°F (220°C) for 10-15 min (with steam if used). Remove steam, reduce oven to 375°F (190°C), and bake for another 15-25 min until deeply golden brown (internal temp 200-210°F / 93-99°C). Immediately brush warm rolls with melted butter if desired. -
Step 6
Transfer baked rolls to a wire rack and cool for at least 30-45 min before slicing or tearing. Serve warm, on their own, or as an accompaniment to meals. Store leftovers in an airtight container at room temperature for 2-3 days or freeze for longer enjoyment.
Important Information
Nutrition Facts (Per Serving)
It is important to consider this information as approximate and not to use it as definitive health advice.
Allergy Information
Please check ingredients for potential allergens and consult a health professional if in doubt.


Leave a Comment