
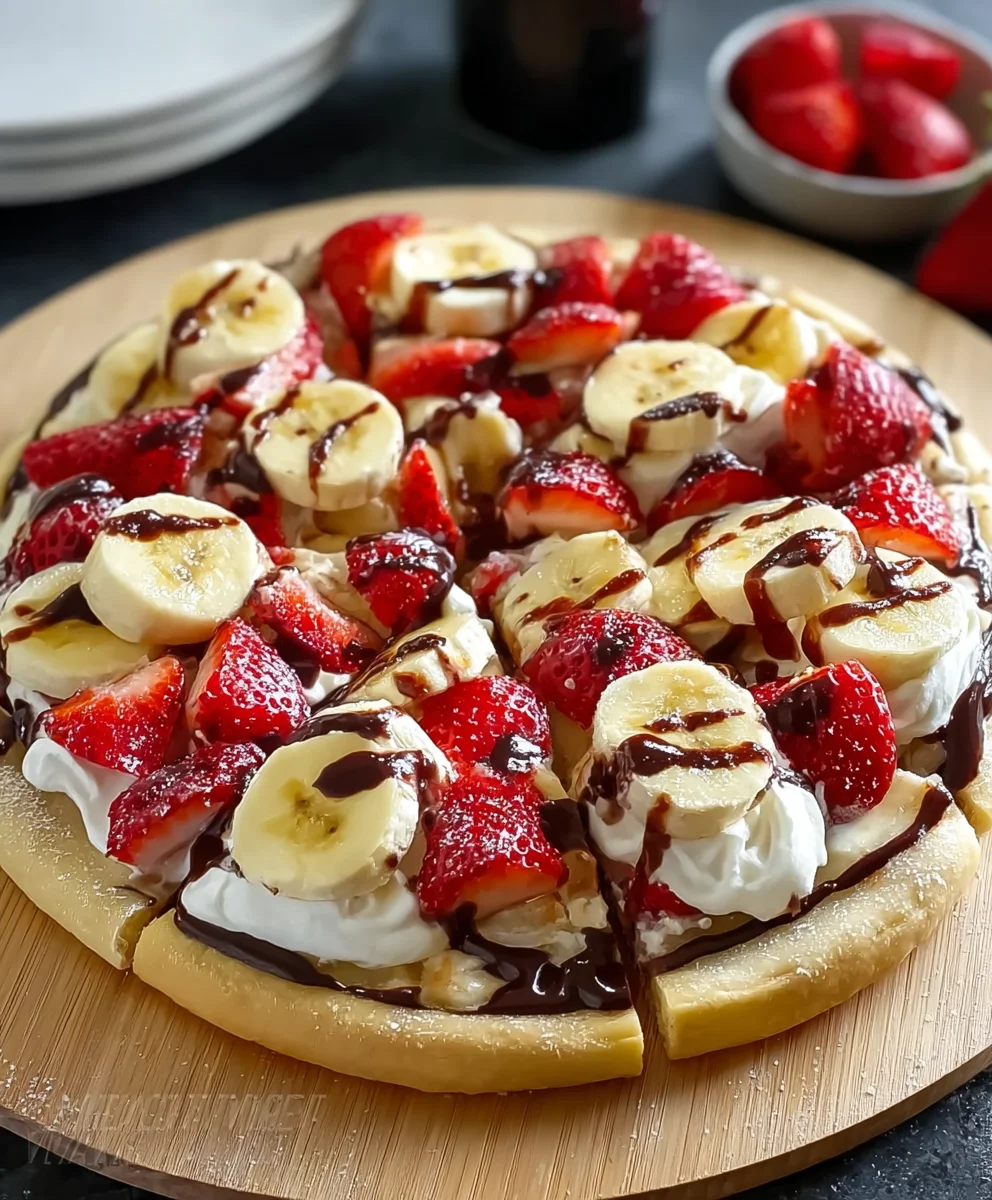
Banana Split Fruit Pizza is not just a dessert; it’s a vibrant celebration on a cookie crust, an ingenious culinary fusion that perfectly marries two beloved classics. Imagine all the nostalgic charm and delightful flavors of a traditional banana split – the sweet bananas, juicy strawberries, tangy pineapple, and creamy whipped topping – brilliantly reimagined atop a tender, often sugar cookie-based crust. This innovative creation transforms a scoop-and-serve treat into a beautiful, shareable masterpiece that captivates both the eyes and the palate.
While the banana split itself boasts a rich history dating back to the early 20th century, becoming an iconic symbol of American soda fountain culture, the fruit pizza emerged as a lighter, more versatile alternative to heavy traditional desserts. This particular rendition, the Banana Split Fruit Pizza, elevates both concepts by combining their best attributes. People adore this dish for countless reasons: its stunning visual appeal makes it the centerpiece of any gathering, while its refreshing taste profile offers a delightful contrast of textures – a crisp crust, a smooth, creamy “ice cream-like” frosting, and the burst of fresh, ripe fruit. It’s the ultimate crowd-pleaser, convenient for picnics, potlucks, or simply a joyful family treat, promising a burst of summer sunshine in every bite.
Ingredients:
-
For the Sugar Cookie Crust:
- 1 cup (2 sticks) unsalted butter, softened
- 1 ½ cups granulated sugar
- 2 large eggs
- 2 teaspoons pure vanilla extract
- 3 cups all-purpose flour
- 1 teaspoon baking powder
- ½ teaspoon salt
-
For the Cream Cheese Frosting:
- 16 ounces (2 blocks) cream cheese, softened
- ½ cup (1 stick) unsalted butter, softened
- 4 cups powdered sugar (confectioners’ sugar)
- 2 teaspoons pure vanilla extract
-
For the Banana Split Toppings:
- 4-5 ripe bananas (medium size), peeled and sliced
- 1 pound fresh strawberries, washed, hulled, and sliced
- 1 (15-ounce) can crushed pineapple, well-drained
- 1 (10-ounce) jar maraschino cherries, well-drained and halved (or fresh cherries, pitted)
- Optional garnishes for the full Banana Split experience:
- Chocolate syrup or hot fudge sauce
- Caramel sauce
- Chopped nuts (pecans or walnuts)
- Rainbow sprinkles
- Whipped cream (for serving)
Preparing the Cookie Crust: The Foundation of Your Banana Split Fruit Pizza
-
Preheat and Prepare Your Pan:
Let’s get started on the base of our incredible Banana Split Fruit Pizza! First things first, preheat your oven to 375°F (190°C). While the oven is warming up, take a 12 to 14-inch pizza pan and lightly grease it. You can use a bit of butter or a non-stick cooking spray for this. If you prefer, line it with parchment paper for effortless removal and cleanup. This initial step is crucial for ensuring our crust bakes evenly and doesn’t stick.
-
Creaming the Butter and Sugar:
In a large mixing bowl, or the bowl of your stand mixer fitted with the paddle attachment, combine the softened unsalted butter and granulated sugar. It’s really important that your butter is properly softened – not melted, but soft enough to easily indent with your finger. Beat these two ingredients together on medium speed for about 2-3 minutes, until the mixture becomes wonderfully light, fluffy, and visibly paler in color. This process incorporates air, which is key to a tender cookie crust that will perfectly complement the creamy topping and fresh fruit.
-
Adding Wet Ingredients:
Next, crack in the two large eggs, one at a time, beating well after each addition to ensure they are fully incorporated into the butter and sugar mixture. Then, stir in the pure vanilla extract. Vanilla is a flavor powerhouse here, adding warmth and depth to our cookie base. Continue to beat until everything is smoothly combined, scraping down the sides of the bowl as needed to catch any stray bits.
-
Combining Dry Ingredients:
In a separate medium bowl, whisk together the all-purpose flour, baking powder, and salt. Whisking ensures these dry ingredients are evenly distributed, so you don’t end up with pockets of baking powder in your dough. This combination of ingredients will give our crust its structure and a delicate rise.
-
Gradually Add Dry to Wet:
Now, with your mixer on low speed, gradually add the dry ingredient mixture to the wet ingredients, a little at a time. Mix only until just combined. It’s essential not to overmix the dough at this stage. Overmixing can develop the gluten in the flour too much, resulting in a tough, dense crust, which is the last thing we want for our delicate fruit pizza. Once no streaks of flour remain, stop mixing. The dough will be soft and pliable.
-
Pressing the Dough:
Carefully transfer the cookie dough to your prepared pizza pan. Using your clean hands or the back of a spoon, press the dough evenly across the bottom of the pan, forming a consistent layer. Try to create a slight edge or rim around the perimeter, about ¼ to ½ inch high, to act as a barrier for our frosting and fruit. This uniform thickness is important for even baking and a beautiful presentation.
-
Baking the Crust:
Place the pan in your preheated oven and bake for 12-18 minutes. Baking times can vary depending on your oven, so start checking around the 12-minute mark. You’re looking for the edges to be lightly golden brown and the center to be set. The crust should feel firm to the touch when gently pressed.
-
Cooling Completely:
Once baked, remove the cookie crust from the oven and place it on a wire rack to cool completely. This step is absolutely critical. Do not attempt to frost the crust while it’s warm, as the frosting will melt and create a messy situation. Patience here will be rewarded with a perfectly set pizza. Allow at least an hour for it to cool down to room temperature. You can even pop it in the refrigerator for 20-30 minutes if you’re in a hurry, just to ensure it’s thoroughly chilled. A cool crust is the secret to a perfect “Banana Split Fruit Pizza.”
Crafting the Cream Cheese Frosting: The Dreamy Layer
While your cookie crust is cooling, let’s turn our attention to the glorious cream cheese frosting that will serve as the luscious canvas for our fruit toppings. This frosting is the heart of the creamy texture in our Banana Split Fruit Pizza.
-
Soften Cream Cheese and Butter:
Just like with the butter for the crust, it’s vital that your cream cheese and unsalted butter for the frosting are properly softened to room temperature. This ensures a smooth, lump-free frosting that’s easy to spread. If your cream cheese is cold, it will result in a clumpy frosting. Take it out of the fridge about an hour before you plan to mix.
-
Whip the Cream Cheese:
In a large mixing bowl, or the bowl of your stand mixer with the paddle attachment, beat the softened cream cheese on medium speed for about 2-3 minutes until it becomes wonderfully smooth and fluffy. You really want to get it light and airy at this stage; this helps to prevent lumps later on.
-
Add the Butter:
Now, add the softened unsalted butter to the bowl with the cream cheese. Continue to beat on medium speed for another 1-2 minutes, until the butter is fully incorporated and the mixture is well-combined and uniformly creamy. Scrape down the sides of the bowl to ensure everything is getting mixed.
-
Gradually Add Powdered Sugar:
With the mixer on low speed, begin to gradually add the powdered sugar, one cup at a time. I find it helpful to drape a clean kitchen towel over my mixer during this step to prevent a cloud of powdered sugar from coating my kitchen (and me!). Once each cup is mostly incorporated, you can increase the speed slightly. Continue beating until all the powdered sugar has been added and the frosting is smooth.
-
Introduce Vanilla:
Stir in the pure vanilla extract. This adds a beautiful aromatic quality to our frosting, perfectly complementing the rich cream cheese flavor and preparing our taste buds for the fruity delight to come.
-
Beat Until Light and Fluffy:
Finally, increase the mixer speed to medium-high and beat the frosting for an additional 2-3 minutes. This final beating aerates the frosting, making it incredibly light, fluffy, and spreadable. The texture should be dreamy and cloud-like, a perfect contrast to the firm cookie crust and fresh fruit. Set this aside, or if you’re not assembling immediately, cover it and place it in the refrigerator. If chilled, you might need to let it sit at room temperature for a few minutes and give it a quick whip before spreading to restore its smooth consistency.
Assembling Your Banana Split Fruit Pizza Masterpiece: The Fun Begins!
Now for the most exciting part – bringing all the components together to create your vibrant and delicious Banana Split Fruit Pizza! This is where your creativity can truly shine.
-
Prepare Your Fruits:
Before you start assembling, ensure all your fruits are prepped. Wash and thoroughly dry the strawberries and cherries. Hull and slice the strawberries. If using fresh cherries, pit and halve them. Drain the crushed pineapple exceptionally well; excess liquid can make your pizza soggy.
For the bananas: This is a key step for a “Banana Split Fruit Pizza.” Slice your bananas just before you are ready to arrange them on the pizza. Bananas brown very quickly once cut due to oxidation. If you want to delay browning, you can lightly toss them in a small amount of lemon juice, but for a fruit pizza that is likely to be consumed quickly, this isn’t always necessary and might alter the flavor slightly. -
Spread the Frosting:
Once your cookie crust is completely cool – I really can’t stress this enough – it’s time to spread that luscious cream cheese frosting. Dollop the frosting generously onto the center of the cooled crust. Using an offset spatula or the back of a spoon, gently spread the frosting evenly all the way to the edges, creating a beautiful, smooth, white canvas. Take your time to ensure an even layer, as this will provide a consistent base for your fruit toppings and is a core component of the “Banana Split Fruit Pizza” flavor profile.
-
Arrange the Fruit – The Banana Split Vibe:
Now, unleash your inner artist! The goal is to arrange the fruit in a way that evokes the classic “banana split” aesthetic.
- Start with the Bananas: I like to place the banana slices first, perhaps in two or three rows down the middle, or in sections, to really emphasize the banana split theme.
- Add the Strawberries: Next, artfully arrange your sliced strawberries. You can create concentric circles, or divide the pizza into sections and dedicate a section to strawberries, mimicking the scoops of ice cream. Their vibrant red color is truly eye-catching.
- Pineapple for Tang: Sprinkle the well-drained crushed pineapple over the pizza. Its tropical sweetness and slight tang are a perfect complement. You can spread it evenly or concentrate it in certain areas.
- Cherry on Top: Finally, dot the halved maraschino cherries (or fresh cherries) strategically over the entire pizza. These little ruby-red jewels are the quintessential “cherry on top” for any banana split inspired dessert. They add a pop of color and a distinct sweetness.
- Be Creative! You can create patterns, alternate fruit types, or simply arrange them beautifully. Just make sure there’s a good distribution so every slice gets a taste of everything. This visual appeal is what makes a fruit pizza so special.
-
Chill (Optional, but Recommended):
Once all your fruit is beautifully arranged, you can choose to chill the Banana Split Fruit Pizza in the refrigerator for at least 30 minutes to an hour. This helps the frosting to firm up slightly and allows the flavors to meld together even more beautifully, making for cleaner slices and a more refreshing treat. If you’re eager to serve, you can skip this, but I find it really elevates the experience.
Finishing Touches and Serving Your Banana Split Fruit Pizza
The final steps are all about adding those delicious extra touches that scream “banana split” and getting ready to enjoy your magnificent creation!
-
Add the Classic Banana Split Garnishes:
Just before serving, drizzle chocolate syrup and/or caramel sauce generously over the top of the fruit pizza. You can zig-zag it across or create a more elaborate pattern. This really brings home the classic banana split flavor profile. Sprinkle chopped nuts (if using) and rainbow sprinkles over the entire pizza for extra texture, flavor, and a festive look.
-
The Whipped Cream Moment:
Add whipped cream only just before serving each slice. If you add whipped cream too early, it will deflate and make your pizza watery. You can either pipe dollops directly onto individual slices as you serve them, or place a bowl of freshly whipped cream alongside the pizza for everyone to add as they please. This ensures the whipped cream remains light and airy, providing that perfect cloud-like finish.
-
Slicing and Serving:
To serve your Banana Split Fruit Pizza, use a sharp knife or pizza cutter to slice it into wedges, just like you would a traditional pizza. Take care when slicing through the crust and the fruit layers. Serve immediately and watch it disappear! This dessert is best enjoyed fresh to appreciate the crisp crust, creamy frosting, and vibrant, juicy fruits at their peak.
-
Storage Instructions:
If by some miracle you have any leftovers, cover the fruit pizza tightly with plastic wrap and store it in the refrigerator. It will keep well for 2-3 days, though the bananas might start to brown slightly, and the crust may soften over time due to the moisture from the fruit and frosting. It’s still absolutely delicious, but freshest is always best for this kind of treat.
Conclusion:
Well, my friends, we’ve reached the sweet end of our journey, and I genuinely hope you’re feeling inspired to roll up your sleeves and bring this delightful creation to life in your own kitchen. After all, what we’ve just explored isn’t just another recipe; it’s an experience waiting to happen. I’m talking about a dessert that consistently steals the show, a vibrant spectacle of flavors and textures that genuinely brings smiles to every face around the table. From the moment you lay out that golden, buttery crust, to the luscious swoop of creamy frosting, and finally, the colorful mosaic of fresh, ripe fruit, every step in making this dessert is a joy. It’s simple enough for a novice baker to master, yet impressive enough to wow even the most discerning dessert connoisseur.
The beauty of this particular dessert lies in its remarkable balance. You get the comforting sweetness of the cookie crust, perfectly complemented by the tangy, light cream cheese topping. Then, the fresh fruit bursts with natural sweetness and a refreshing juiciness that cuts through any richness, creating a harmonious blend that keeps you coming back for just one more slice. It’s truly a celebration of contrasting elements that come together in a symphony of taste. I’ve seen it disappear from platters at family gatherings faster than I can say “seconds,” and it’s become a personal go-to for impromptu potlucks because of its universal appeal and stunning presentation. Trust me, it’s more than just a treat; it’s a conversation starter, a mood lifter, and a testament to how incredible simple ingredients can be when combined with a little creativity.
Serving Suggestions & Creative Variations to Elevate Your Banana Split Fruit Pizza:
Now that you’re practically drooling, let’s talk about how to make your Banana Split Fruit Pizza an even more versatile star in your culinary repertoire. This dessert is absolutely perfect for almost any occasion. Imagine it as the vibrant centerpiece of a brunch spread, a refreshing finish to a summer barbecue, or a delightful addition to a celebratory potluck. It’s best served chilled, straight from the refrigerator, allowing the frosting to set perfectly and the fruits to maintain their crisp, cool freshness. I often slice it into generous wedges, but for larger gatherings or children’s parties, cutting it into smaller, bite-sized squares makes for easier individual servings, reducing mess and maximizing enjoyment.
Endless Customization Options:
But don’t stop there! This recipe is a fantastic canvas for your own culinary artistry. Here are some of my favorite ways to shake things up and make it uniquely yours:
- Crust Alternatives: While a classic sugar cookie crust is divine, consider a graham cracker crust for a cheesecake-like twist, or even a pre-made chocolate chip cookie dough for a richer, more decadent base. For those avoiding gluten, many excellent gluten-free cookie dough options are available that work just as beautifully.
- Frosting Fantasies: The cream cheese frosting is heavenly as is, but a splash of almond extract, a hint of lemon zest, or even a tablespoon of cocoa powder can transform its flavor profile entirely. For a lighter touch, you might even consider a Greek yogurt cream cheese blend.
- Fruit Frenzy: While the banana split theme calls for specific fruits, feel free to adapt to seasonal availability or personal preference. Swap strawberries for raspberries, add slices of kiwi for a tangy zing, or even incorporate segments of mandarin oranges. Just remember to pat wetter fruits dry to prevent sogginess.
- Topping Transformations: Beyond the standard chocolate syrup and sprinkles, think outside the box! A drizzle of warm caramel sauce, a sprinkle of toasted shredded coconut, a handful of mini chocolate chips, or even chopped pecans or walnuts can add incredible depth and texture. A dollop of fresh whipped cream on each slice just before serving truly mimics the classic banana split experience.
- Portion Control Perfection: For individual desserts, press smaller rounds of cookie dough into muffin tins or use large cookie cutters on a sheet of dough to create mini fruit pizzas. These are incredibly charming and perfect for portion control at parties.
Your Kitchen, Your Masterpiece!
Ultimately, this Banana Split Fruit Pizza recipe is more than just a guide; it’s an invitation to experiment, to play, and to make something truly special. It’s incredibly forgiving, allowing you to personalize it to your heart’s content, catering to different tastes, allergies, or simply what you have on hand. Don’t be afraid to deviate from the script – that’s where the real magic happens in cooking!
So, what are you waiting for? I wholeheartedly encourage you to give this recipe a try this week. Experience the joy of creating something so visually appealing and utterly delicious. I promise you, the reward of seeing happy faces light up with each bite is priceless. Once you’ve whipped up your own masterpiece, I would absolutely love to hear about it! Please, share your experience in the comments below – what fruits did you use? Did you try a unique topping? Did it become an instant family favorite? Better yet, snap a photo and share it with us! Your creativity and feedback inspire not just me, but our entire community of enthusiastic home bakers. Happy baking, and enjoy every single delightful slice!
Banana Split Fruit Pizza
A vibrant celebration on a cookie crust, this Banana Split Fruit Pizza ingeniously fuses the nostalgic charm and delightful flavors of a traditional banana split with a tender sugar cookie base. Topped with sweet bananas, juicy strawberries, tangy pineapple, and creamy frosting, it’s a beautiful, shareable masterpiece perfect for any gathering.
Ingredients
-
1 cup unsalted butter, softened (for crust)
-
1 ½ cups granulated sugar (for crust)
-
2 large eggs (for crust)
-
2 tsp vanilla extract (for crust)
-
3 cups all-purpose flour (for crust)
-
1 tsp baking powder (for crust)
-
½ tsp salt (for crust)
-
16 oz cream cheese, softened (for frosting)
-
½ cup unsalted butter, softened (for frosting)
-
4 cups powdered sugar (for frosting)
-
2 tsp vanilla extract (for frosting)
-
4-5 medium ripe bananas, sliced (for topping)
-
1 lb fresh strawberries, sliced (for topping)
-
1 (15 oz) can crushed pineapple, well-drained (for topping)
-
1 (10 oz) jar maraschino cherries, halved (for topping)
-
Optional garnishes: chocolate syrup, caramel sauce, chopped nuts, rainbow sprinkles, whipped cream
Instructions
-
Step 1
Preheat oven to 375°F (190°C). Lightly grease a 12-14 inch pizza pan. In a large bowl, cream 1 cup softened butter and 1 ½ cups granulated sugar until light and fluffy. Beat in 2 large eggs, then 2 tsp vanilla extract until smooth. In a separate bowl, whisk together 3 cups all-purpose flour, 1 tsp baking powder, and ½ tsp salt. Gradually add the dry ingredients to the wet, mixing on low speed until just combined. Press dough evenly into the prepared pan, forming a slight rim. -
Step 2
Bake the crust for 12-18 minutes, or until the edges are lightly golden brown and the center is set. Remove from oven and transfer to a wire rack to cool completely for at least 1 hour before frosting. -
Step 3
While the crust cools, beat 16 oz softened cream cheese in a large bowl until smooth and fluffy (2-3 minutes). Add ½ cup softened unsalted butter and beat for another 1-2 minutes until well-combined and creamy. Gradually add 4 cups powdered sugar, one cup at a time, mixing on low speed until smooth. Stir in 2 tsp vanilla extract. Increase mixer speed to medium-high and beat for 2-3 minutes until the frosting is light, fluffy, and spreadable. -
Step 4
Wash, hull, and slice strawberries. Drain crushed pineapple and maraschino cherries exceptionally well to prevent sogginess. Slice bananas just before assembly to prevent browning. -
Step 5
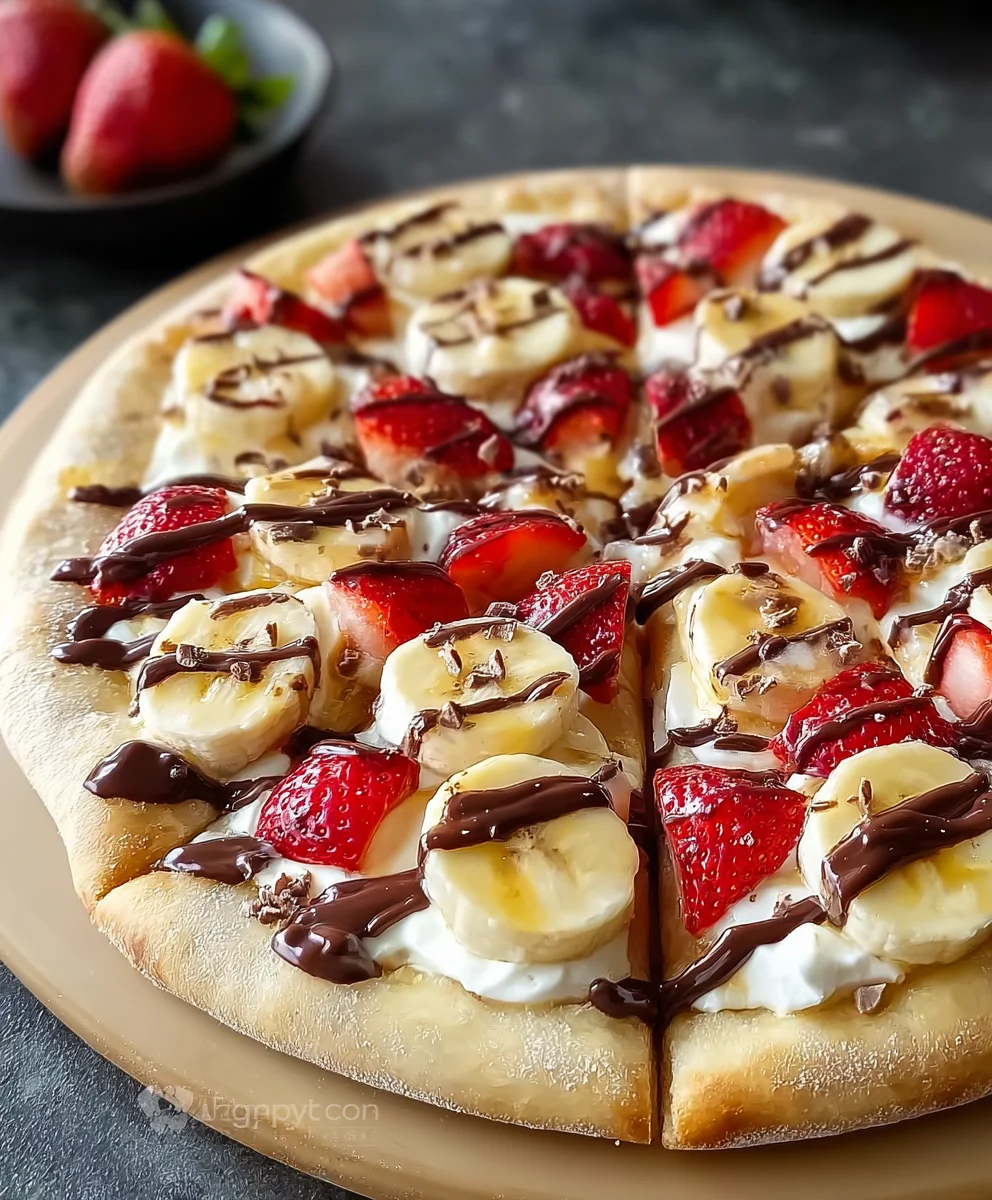
Once the cookie crust is completely cool, dollop the cream cheese frosting onto the center and spread evenly to the edges with an offset spatula. Arrange the banana slices first, then artfully place the sliced strawberries, well-drained crushed pineapple, and halved maraschino cherries over the frosting to create a vibrant design reminiscent of a banana split. -
Step 6
For best results and cleaner slices, chill the assembled fruit pizza in the refrigerator for at least 30 minutes to an hour to allow the frosting to firm up and flavors to meld. -
Step 7
Just before serving, drizzle with chocolate syrup and/or caramel sauce. Sprinkle with chopped nuts and rainbow sprinkles, if desired. Serve individual slices with a dollop of freshly whipped cream. Slice into wedges and serve immediately. -
Step 8
Cover any leftover Banana Split Fruit Pizza tightly with plastic wrap and store in the refrigerator for 2-3 days. Note that bananas may brown slightly and the crust may soften over time.
Important Information
Nutrition Facts (Per Serving)
It is important to consider this information as approximate and not to use it as definitive health advice.
Allergy Information
Please check ingredients for potential allergens and consult a health professional if in doubt.


Leave a Comment