
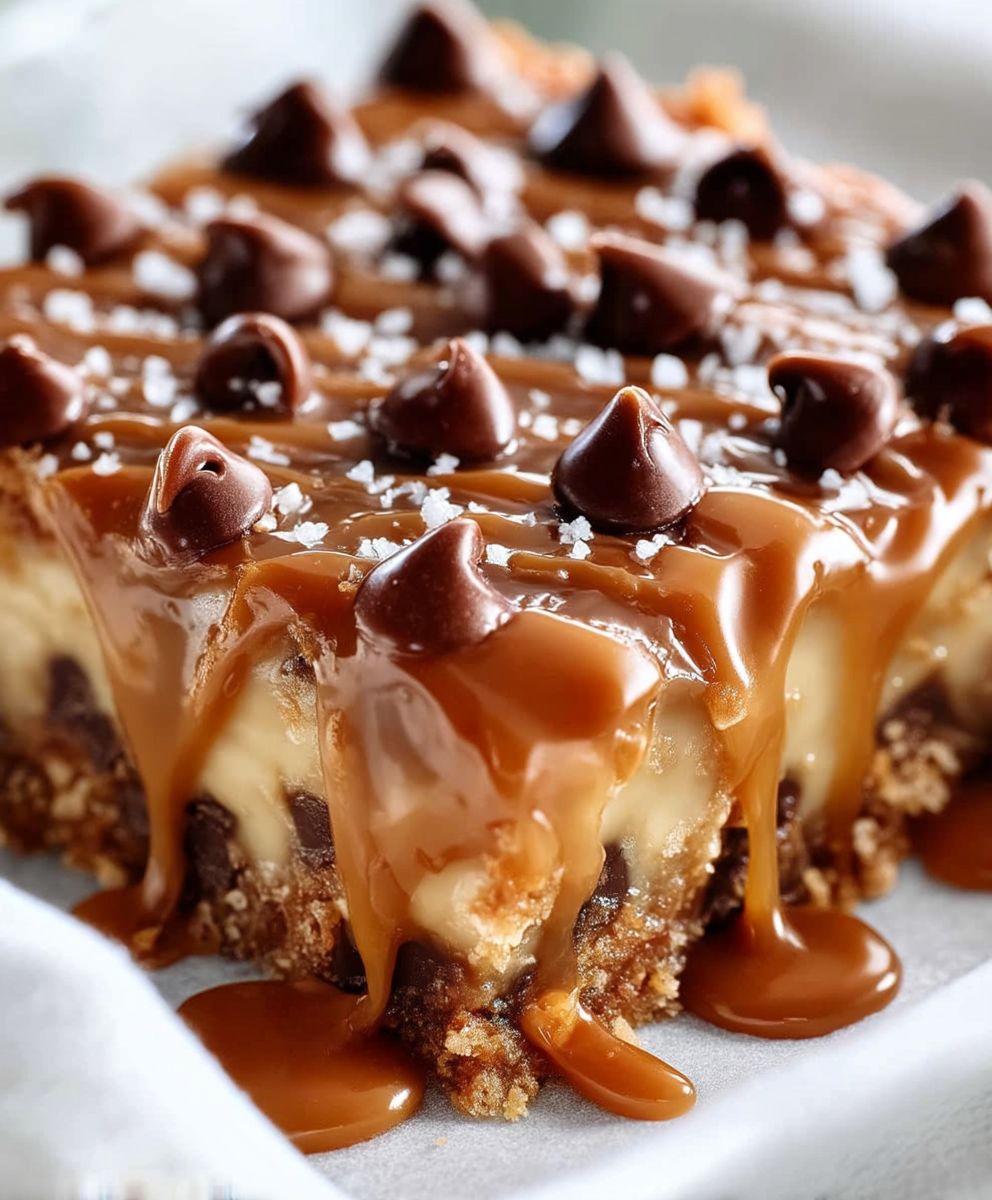
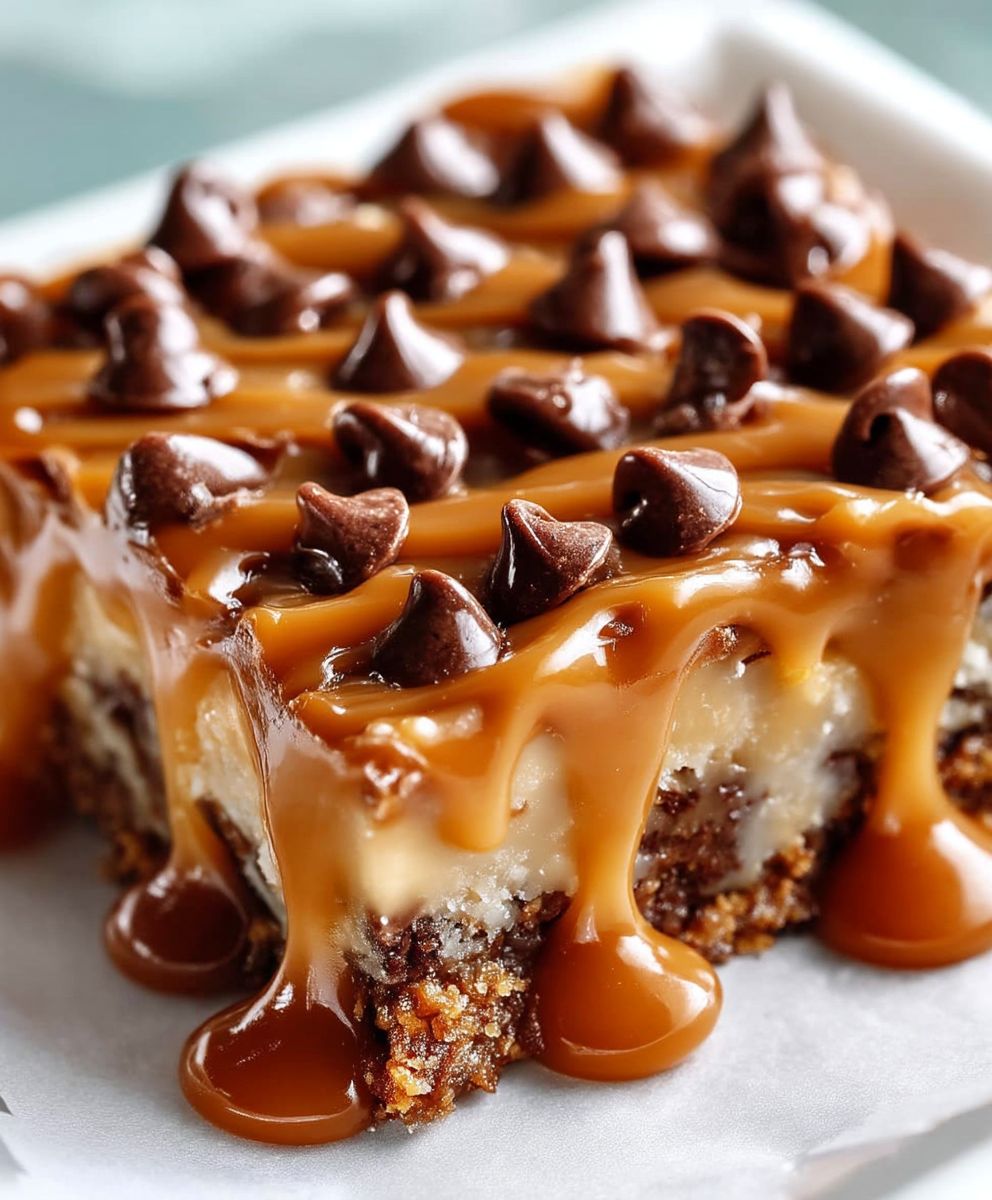
Irresistible Caramelitas, that’s exactly what you’ll call these once you’ve tasted them! Imagine sinking your teeth into a buttery, oat-filled crust, giving way to a gooey river of caramel, studded with chocolate chips and pecans, all topped with another layer of that same delicious oat mixture. Are you drooling yet? I know I am just thinking about them!
While the exact origins of Caramelitas are a bit hazy, they’ve become a beloved treat across generations, often appearing at potlucks, bake sales, and holiday gatherings. Their comforting flavors and satisfying textures evoke a sense of nostalgia and home-baked goodness. Some believe they evolved from similar layered bar cookies popular in the Midwest, where oats and caramel are pantry staples.
People adore irresistible Caramelitas for so many reasons. The combination of textures the chewy oats, the smooth caramel, the crunchy pecans, and the melty chocolate is simply divine. Plus, they’re incredibly easy to make, requiring minimal effort for maximum reward. They’re perfect for satisfying a sweet craving, bringing to a party, or simply enjoying with a cup of coffee on a cozy afternoon. Get ready to experience a taste of pure bliss with this recipe!
Ingredients:
- For the Crust:
- 1 cup (2 sticks) unsalted butter, softened
- 1 cup packed light brown sugar
- 1 large egg
- 1 teaspoon vanilla extract
- 2 cups all-purpose flour
- 1 teaspoon baking soda
- 1/2 teaspoon salt
- For the Caramel Filling:
- 1 cup (2 sticks) unsalted butter
- 1 cup packed light brown sugar
- 1 cup light corn syrup
- 1 (14 ounce) can sweetened condensed milk
- 1 teaspoon vanilla extract
- 1/2 teaspoon salt
- For the Chocolate Topping:
- 1 1/2 cups semi-sweet chocolate chips
- 1/4 cup heavy cream
Preparing the Crust:
Alright, let’s get started with the foundation of these amazing Caramelitas the crust! This is a simple, buttery crust that perfectly complements the gooey caramel and rich chocolate. Don’t skip the softening of the butter; it’s crucial for a smooth and even dough.
- Cream the Butter and Sugar: In a large mixing bowl, cream together the softened butter and light brown sugar until light and fluffy. This usually takes about 3-5 minutes with an electric mixer on medium speed. You want it to be well combined and almost airy. Don’t rush this step!
- Add the Egg and Vanilla: Beat in the egg and vanilla extract until fully incorporated. Make sure to scrape down the sides of the bowl to ensure everything is evenly mixed.
- Combine Dry Ingredients: In a separate bowl, whisk together the flour, baking soda, and salt. Whisking helps to evenly distribute the baking soda and salt throughout the flour, which is important for the texture and flavor of the crust.
- Gradually Add Dry Ingredients to Wet Ingredients: Gradually add the dry ingredients to the wet ingredients, mixing on low speed until just combined. Be careful not to overmix! Overmixing can develop the gluten in the flour, resulting in a tough crust. Stop mixing as soon as the flour is incorporated.
- Press Half the Dough into the Pan: Press half of the dough evenly into the bottom of a greased and lightly floured 9×13 inch baking pan. I like to use my fingers to press it in, but you can also use the back of a spoon or a measuring cup. Make sure the crust is even in thickness.
- Bake the Crust: Bake in a preheated oven at 350°F (175°C) for 10-12 minutes, or until lightly golden brown. The crust should be set but not fully cooked, as it will bake again with the filling. Let it cool slightly while you prepare the caramel filling.
Making the Caramel Filling:
Now for the star of the show the caramel! This is a rich, gooey, and utterly irresistible caramel filling that will make you want to lick the spoon (and the pan!). Don’t be intimidated by the ingredients; it’s actually quite simple to make.
- Combine Ingredients in a Saucepan: In a medium saucepan, combine the butter, brown sugar, corn syrup, and sweetened condensed milk.
- Cook Over Medium Heat: Cook over medium heat, stirring constantly, until the butter is melted and the sugar is dissolved.
- Bring to a Boil: Bring the mixture to a boil, stirring constantly, and continue to cook for 5-7 minutes, or until the caramel is thickened and a deep golden brown color. Be careful not to burn the caramel! It should be bubbling vigorously, but you need to keep stirring to prevent it from sticking to the bottom of the pan.
- Remove from Heat and Stir in Vanilla and Salt: Remove the saucepan from the heat and stir in the vanilla extract and salt. The vanilla adds a lovely flavor, and the salt helps to balance the sweetness of the caramel.
- Pour Caramel Over Crust: Pour the caramel filling evenly over the partially baked crust.
- Crumble Remaining Dough Over Caramel: Crumble the remaining dough evenly over the caramel filling. You can do this by breaking off small pieces of dough and scattering them over the caramel. Don’t worry about making it perfect; a little variation in the size of the crumbles is fine.
- Bake Again: Bake in the preheated oven for another 20-25 minutes, or until the topping is golden brown and the caramel is bubbly. The topping should be set, but the caramel will still be soft.
- Cool Completely: Let the Caramelitas cool completely in the pan before adding the chocolate topping. This is important because the caramel needs to set up properly. If you try to add the chocolate while the caramel is still hot, it will melt and run everywhere. I know it’s hard to wait, but trust me, it’s worth it!
Creating the Chocolate Topping:
The final touch a smooth and decadent chocolate topping! This adds a layer of richness and complements the caramel perfectly. You can use any kind of chocolate chips you like, but I prefer semi-sweet for a good balance of sweetness and bitterness.
- Combine Chocolate Chips and Heavy Cream: In a microwave-safe bowl, combine the chocolate chips and heavy cream.
- Microwave in Intervals: Microwave in 30-second intervals, stirring after each interval, until the chocolate is melted and smooth. Be careful not to overheat the chocolate, as it can burn. If the chocolate is not melting evenly, you can add a teaspoon of vegetable oil to help it melt smoothly.
- Pour Chocolate Over Caramelitas: Pour the melted chocolate evenly over the cooled Caramelitas.
- Spread Evenly: Spread the chocolate evenly with a spatula or the back of a spoon.
- Let Chocolate Set: Let the chocolate set completely before cutting into squares. This usually takes about 30 minutes at room temperature, or you can speed up the process by refrigerating the Caramelitas for 15-20 minutes.
Cutting and Serving:
Now for the best part cutting and serving these irresistible Caramelitas! I like to cut them into squares, but you can cut them into any shape you like. Just make sure to use a sharp knife to get clean cuts.
- Cut into Squares: Cut the Caramelitas into squares. I usually cut them into 24 squares, but you can make them smaller or larger depending on your preference.
- Serve and Enjoy: Serve and enjoy! These Caramelitas are best served at room temperature. They are perfect for parties, potlucks, or just a sweet treat for yourself.
Tips and Variations:
Here are a few tips and variations to make these Caramelitas even more amazing:
- Use Different Chocolate: Try using milk chocolate, dark chocolate, or even white chocolate for the topping.
- Add Nuts: Add chopped nuts, such as pecans or walnuts, to the caramel filling or the chocolate topping.
- Add Sea Salt: Sprinkle a little sea salt over the chocolate topping for a salty-sweet flavor.
- Make it Gluten-Free: Use gluten-free flour blend in the crust.
- Storage: Store leftover Caramelitas in an airtight container at room temperature for up to 3 days, or in the refrigerator for up to a week.
Enjoy your homemade Caramelitas!
Conclusion:
Okay, friends, let’s be honest: you’ve made it this far, so you’re clearly intrigued by these Irresistible Caramelitas. And trust me, you absolutely should be! This isn’t just another dessert recipe; it’s a symphony of textures and flavors that will have everyone begging for more. The buttery, crumbly oat base, the gooey, decadent caramel center, and the rich chocolate topping it’s a trifecta of deliciousness that’s surprisingly easy to achieve. Seriously, don’t let the layers intimidate you. This recipe is designed for success, even if you’re not a seasoned baker.
Why are these Caramelitas a must-try? Because they offer that perfect balance of sweet and salty, chewy and crunchy, all in one delightful bite. They’re the kind of treat that evokes feelings of warmth and comfort, perfect for sharing with loved ones or indulging in a little self-care. Plus, they’re incredibly versatile!
Serving Suggestions and Variations:
Think of this recipe as a starting point for your own Caramelita adventures. Want to take things to the next level? Here are a few ideas:
* Ice Cream Dream: Serve warm Caramelitas with a scoop of vanilla bean ice cream and a drizzle of extra caramel sauce. The contrast of hot and cold is simply divine.
* Nutty Delight: Add chopped pecans, walnuts, or almonds to the oat mixture for an extra layer of texture and flavor. Toasted nuts are especially delicious!
* Espresso Boost: Incorporate a teaspoon of instant espresso powder into the chocolate topping for a mocha-inspired twist.
* Salted Caramel Sensation: Sprinkle a pinch of flaky sea salt over the finished Caramelitas to enhance the caramel flavor and create a truly irresistible treat.
* Holiday Cheer: For a festive touch, add a dash of cinnamon or nutmeg to the oat mixture during the holidays. You could even use gingerbread spice!
* Chocolate Chunk Upgrade: Instead of chocolate chips, use chopped dark chocolate or milk chocolate chunks for a richer, more intense chocolate experience.
* Gluten-Free Option: Substitute the all-purpose flour in the oat mixture with a gluten-free all-purpose blend. Be sure to use certified gluten-free oats as well.
Don’t be afraid to experiment and find your own perfect Caramelita combination! The possibilities are endless.
I truly believe that these Irresistible Caramelitas will become a new favorite in your household. They’re perfect for potlucks, bake sales, holiday gatherings, or simply a cozy night in. They’re also a fantastic homemade gift that’s sure to impress.
So, what are you waiting for? Gather your ingredients, preheat your oven, and get ready to experience the magic of these incredible bars. I’m confident that you’ll be absolutely delighted with the results.
And most importantly, I want to hear about your Caramelita creations! Did you try any of the variations I suggested? Did you come up with your own unique twist? Share your photos and stories in the comments below. I can’t wait to see what you come up with! Happy baking! Let me know how your Irresistible Caramelitas turn out!
Irresistible Caramelitas: The Ultimate Recipe and Baking Guide
Gooey, decadent Caramelitas with a buttery crust, rich caramel filling, and smooth chocolate topping. A perfect sweet treat for any occasion!
Ingredients
- 1 cup (2 sticks) unsalted butter, softened
- 1 cup packed light brown sugar
- 1 large egg
- 1 teaspoon vanilla extract
- 2 cups all-purpose flour
- 1 teaspoon baking soda
- 1/2 teaspoon salt
- 1 cup (2 sticks) unsalted butter
- 1 cup packed light brown sugar
- 1 cup light corn syrup
- 1 (14 ounce) can sweetened condensed milk
- 1 teaspoon vanilla extract
- 1/2 teaspoon salt
- 1 1/2 cups semi-sweet chocolate chips
- 1/4 cup heavy cream
Instructions
- Preheat oven to 350°F (175°C). Grease and lightly flour a 9×13 inch baking pan.
- In a large mixing bowl, cream together the softened butter and light brown sugar until light and fluffy (3-5 minutes).
- Beat in the egg and vanilla extract until fully incorporated. Scrape down the sides of the bowl.
- In a separate bowl, whisk together the flour, baking soda, and salt.
- Gradually add the dry ingredients to the wet ingredients, mixing on low speed until just combined. Do not overmix.
- Press half of the dough evenly into the bottom of the prepared baking pan.
- Bake for 10-12 minutes, or until lightly golden brown. Let cool slightly.
- In a medium saucepan, combine the butter, brown sugar, corn syrup, and sweetened condensed milk.
- Cook over medium heat, stirring constantly, until the butter is melted and the sugar is dissolved.
- Bring to a boil, stirring constantly, and continue to cook for 5-7 minutes, or until the caramel is thickened and a deep golden brown color. Be careful not to burn the caramel.
- Remove from heat and stir in the vanilla extract and salt.
- Pour the caramel filling evenly over the partially baked crust.
- Crumble the remaining dough evenly over the caramel filling.
- Bake for another 20-25 minutes, or until the topping is golden brown and the caramel is bubbly.
- Let the Caramelitas cool completely in the pan.
- In a microwave-safe bowl, combine the chocolate chips and heavy cream.
- Microwave in 30-second intervals, stirring after each interval, until the chocolate is melted and smooth.
- Pour the melted chocolate evenly over the cooled Caramelitas.
- Spread the chocolate evenly with a spatula or the back of a spoon.
- Let the chocolate set completely before cutting into squares (about 30 minutes at room temperature or 15-20 minutes in the refrigerator).
- Cut the Caramelitas into squares and serve.
Notes
- Use softened butter for the crust to ensure a smooth dough.
- Don’t overmix the crust dough to avoid a tough crust.
- Stir the caramel constantly while cooking to prevent burning.
- Let the Caramelitas cool completely before adding the chocolate topping to prevent it from melting too much.
- For variations, try using different chocolate, adding nuts, or sprinkling with sea salt.
- For a gluten-free version, use a gluten-free flour blend in the crust.
- Store leftover Caramelitas in an airtight container at room temperature for up to 3 days, or in the refrigerator for up to a week.


Leave a Comment