
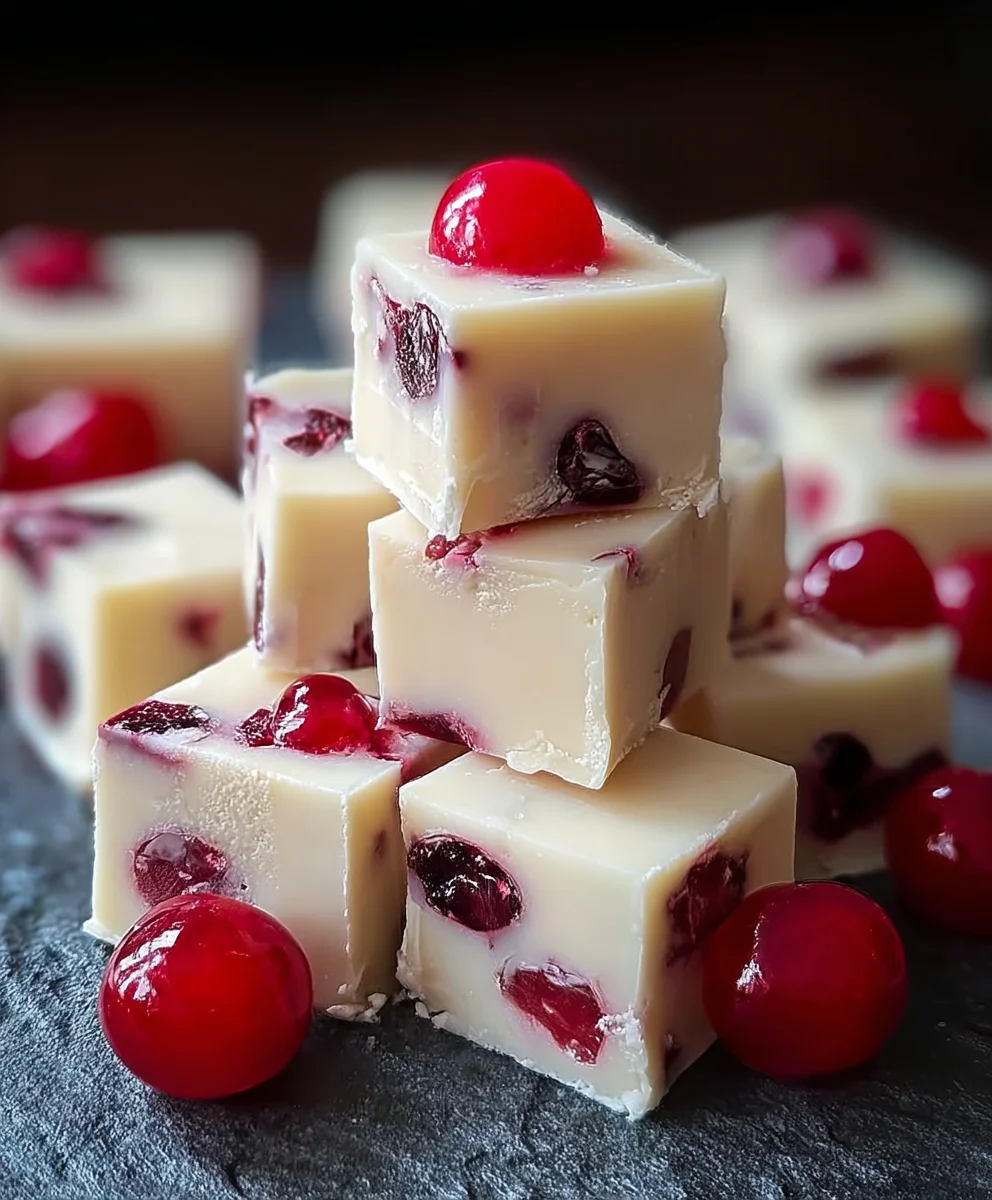
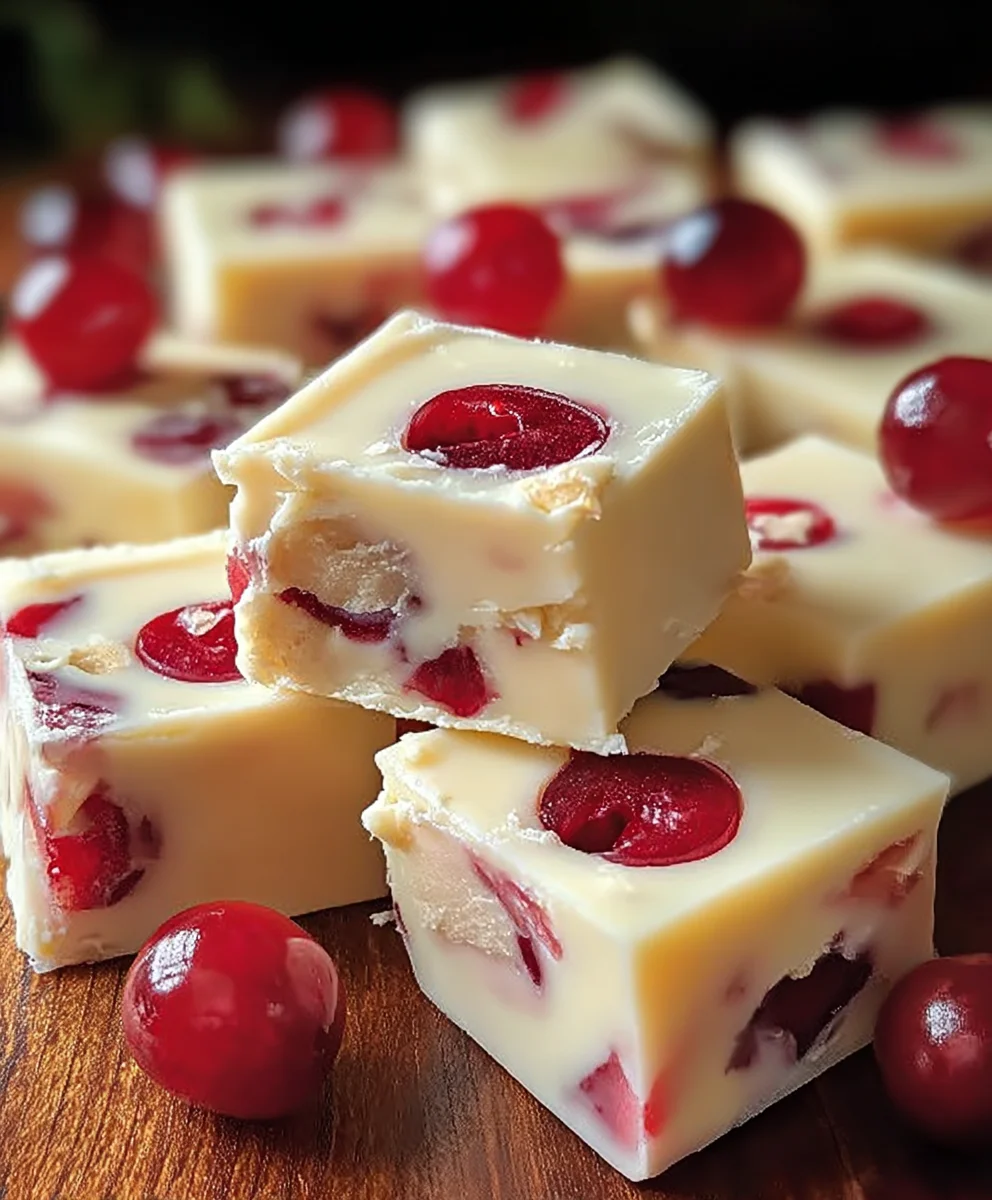
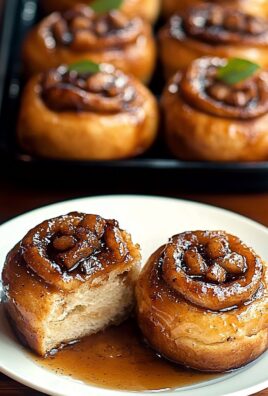
Cherry White Chocolate Fudge – it’s a phrase that immediately evokes images of something truly special, a treat that transcends the ordinary. Imagine a confection that perfectly balances vibrant fruit with luxurious sweetness, all melting delightfully on your tongue. This isn’t just any sweet treat; it’s an experience, a symphony of flavors and textures that captivates from the very first bite.
Fudge itself boasts a charming, almost accidental origin story, often attributed to a “botched batch” of caramels in the late 19th century. From that serendipitous mistake, a beloved American confection was born, evolving over generations to embrace countless innovative flavor combinations. Our rendition, the Cherry White Chocolate Fudge, takes this classic comfort to new heights, blending tradition with vibrant contemporary taste.
People adore this dish for countless reasons. The vibrant tartness of plump cherries beautifully cuts through the rich, creamy sweetness of the white chocolate, creating an incredibly balanced and addictive profile. Its stunning ruby red and pristine white hues make it a visual masterpiece, perfect for festive gatherings, thoughtful gifts, or simply a moment of personal indulgence. The satisfyingly smooth, melt-in-your-mouth texture, coupled with a surprisingly straightforward preparation process, makes it an accessible delight for both seasoned confectioners and enthusiastic home bakers. It’s a sweet escape, easy to make and impossible to resist.
Ingredients:
- 3 cups (about 600g) Granulated Sugar: I always use high-quality granulated sugar for a smooth texture and consistent sweetness in my Cherry White Chocolate Fudge.
- 1 cup (240ml) Heavy Cream: Full-fat heavy cream is essential for the rich, creamy consistency we’re aiming for. Don’t skimp on this!
- 1/2 cup (113g) Unsalted Butter: I prefer unsalted so I can control the overall saltiness. Cut it into tablespoon-sized pieces for easier melting.
- 1/2 teaspoon Salt: A touch of salt is crucial to balance the sweetness and really bring out the flavors.
- 1 (7-ounce / 200g) Jar Marshmallow Fluff (or 4 cups miniature marshmallows): This is my secret ingredient for consistently soft, smooth fudge. It adds a wonderful lightness.
- 1 teaspoon Pure Vanilla Extract: Use good quality vanilla; it makes a noticeable difference in the final flavor profile.
- 12 ounces (340g) High-Quality White Chocolate: This can be in the form of chips, chopped bars, or even a good quality baking block. I recommend using a brand you love the taste of, as it’s a prominent flavor in our Cherry White Chocolate Fudge.
- 1 cup (about 150g) Dried Cherries: Roughly chop them if they are very large. Dried cherries provide an intense burst of fruity flavor and a lovely chewiness. I always ensure they are plump and fresh.
- Optional: 1/2 teaspoon Cherry Extract: For an extra boost of cherry flavor, especially if you want a really pronounced cherry note. I sometimes add this if I feel my dried cherries aren’t as flavorful as I’d like.
- Optional Garnish: 1/4 cup Additional White Chocolate Chips and 1/4 cup Additional Dried Cherries: For sprinkling on top, adding a lovely visual appeal and extra texture.
Equipment You’ll Need:
- 9×13-inch Baking Pan: Or an 8×8-inch pan if you prefer thicker fudge. I generally use a 9×13-inch for a more traditional fudge thickness.
- Parchment Paper or Aluminum Foil: For lining the pan, making removal and cutting incredibly easy.
- Large, Heavy-Bottomed Saucepan (4-quart or larger): Essential for even heat distribution and preventing scorching. Trust me, you don’t want burnt fudge!
- Candy Thermometer: Absolutely crucial for achieving the perfect fudge consistency. This isn’t a step I recommend eyeballing unless you’re a seasoned fudge artisan.
- Wooden Spoon or Heat-Proof Spatula: For stirring.
- Whisk (optional): For initial mixing of dry ingredients.
- Measuring Cups and Spoons: For accurate ingredient proportions.
- Sharp Knife: For cutting the cooled fudge.
- Cutting Board: For safe and easy cutting.
Preparation: Getting Everything Ready
Before I even think about turning on the stove, I like to get all my ducks in a row. This ‘mise en place’ approach makes the entire fudge-making process so much smoother and helps prevent any last-minute scrambling, which can be disastrous when you’re dealing with precise temperatures for fudge.
- Line Your Pan: First things first, prepare your baking pan. I take my 9×13-inch baking pan and line it with parchment paper or aluminum foil, ensuring there’s an overhang on the sides. This overhang acts as little handles, making it incredibly simple to lift the set fudge out of the pan later. If you’re using foil, I highly recommend greasing it lightly with butter or a non-stick cooking spray to prevent the fudge from sticking. With parchment paper, this step isn’t usually necessary, but a tiny spritz can’t hurt for extra assurance.
- Measure All Ingredients: Now, measure out all your ingredients precisely. Have your granulated sugar, heavy cream, butter (cut into pieces), and salt ready. Open your jar of marshmallow fluff (or have your mini marshmallows measured out in a bowl). Chop your white chocolate if it’s in a bar form, and have your white chocolate chips ready. Roughly chop your dried cherries and place them in a separate bowl. Measure out your vanilla extract and cherry extract (if using). Having everything pre-measured and within arm’s reach ensures you can add ingredients quickly at the correct stages, which is vital for fudge making.
- Prepare Your Candy Thermometer: Attach your candy thermometer to the side of your large, heavy-bottomed saucepan. Make sure the tip of the thermometer doesn’t touch the bottom of the pan, as this can give you an inaccurate reading. It should be submerged enough to accurately measure the temperature of the liquid fudge mixture. Double-check that it’s securely fastened.
- Clear Your Workspace: Fudge making, especially at the crucial boiling stage, requires your full attention. I always make sure my counter space is clear and clean, ready for when the hot mixture needs to be handled and poured. A clear workspace minimizes accidents and allows for smooth transitions between steps.
The Heart of the Cherry White Chocolate Fudge: Making the Base
This is where the magic truly happens! Getting the base right is absolutely essential for that perfectly creamy, non-grainy Cherry White Chocolate Fudge. Pay close attention to the temperatures and timings here.
- Combine Wet and Dry Ingredients (Initial Cook): In your large, heavy-bottomed saucepan, combine the granulated sugar, heavy cream, cubed unsalted butter, and salt. I always start with these foundational ingredients. Place the saucepan over medium heat.
- Bring to a Rolling Boil: Stir the mixture constantly with your wooden spoon or heat-proof spatula. This is important to help dissolve the sugar and prevent it from scorching on the bottom of the pan. Keep stirring until the butter is completely melted and the sugar is fully dissolved. You’ll know the sugar is dissolved when the mixture looks smooth and no longer feels grainy when you rub a tiny bit between your fingers (be careful, it’s hot!). Once the sugar is dissolved, stop stirring. Insert your candy thermometer into the mixture, ensuring it doesn’t touch the bottom. Bring the mixture to a full, rolling boil. A rolling boil means that even when you stir, the bubbles don’t subside.
- Cook to the Perfect Temperature: Continue to boil the mixture, without stirring, until your candy thermometer registers 238°F (114°C). This temperature is commonly known as the “soft ball” stage, and it’s absolutely critical for the texture of your fudge. Cooking it too little will result in fudge that doesn’t set properly, and cooking it too much will yield a hard, crumbly product. This step usually takes me about 8-12 minutes, but timing can vary depending on your stove and saucepan. I recommend staying right by the stove during this period, keeping a close eye on that thermometer.
- Remove from Heat and Prepare for Additions: As soon as the mixture hits 238°F (114°C), immediately remove the saucepan from the heat. This quick action prevents it from overcooking. Carefully remove the candy thermometer from the pan.
Adding the Flavor & Finishing Touches
Now comes the exciting part – infusing our fudge base with the signature flavors of white chocolate and cherries! This stage also requires quick action to ensure everything is perfectly incorporated.
- Incorporate Marshmallow Fluff and White Chocolate: While the mixture is still piping hot, immediately add the marshmallow fluff (or miniature marshmallows) to the saucepan. Then, add the high-quality white chocolate chips or chopped white chocolate. Do not stir yet. I like to let the residual heat from the cooked sugar mixture gently melt these ingredients for about 2-3 minutes. This little waiting period helps to soften everything, making the subsequent stirring much easier and preventing the fudge from becoming grainy.
- Stir Until Smooth and Creamy: After the brief melting period, begin to stir the mixture vigorously with your wooden spoon or spatula. Stir continuously until everything is completely melted and thoroughly combined. You’re looking for a smooth, glossy, and luxurious consistency, with no streaks of marshmallow or unmelted white chocolate remaining. This usually takes me about 2-3 minutes of active stirring. The mixture will start to thicken slightly as it cools and emulsifies. This vigorous stirring is key to achieving that velvety texture in your Cherry White Chocolate Fudge.
- Fold in Vanilla, Cherries, and Optional Cherry Extract: Once the fudge base is perfectly smooth, it’s time for the final flavorings! Stir in the pure vanilla extract. If you’re using it, now is also the time to add the optional cherry extract for that intensified cherry burst. Finally, gently fold in the dried cherries. I like to make sure they are evenly distributed throughout the fudge, so every bite gets a delightful pop of fruit. Don’t overmix at this stage; just enough to distribute everything.
- Pour into Prepared Pan: Working quickly (as the fudge will start to set), immediately pour the entire mixture into your prepared 9×13-inch baking pan. Use your spatula to scrape every last bit of that delicious fudge from the saucepan into the pan.
- Smooth and Garnish (Optional): Once in the pan, use the back of your spatula or a buttered offset spatula to spread the fudge evenly into all corners of the pan. Aim for a smooth, level top. If you’re adding optional garnishes, now is the time to sprinkle the additional white chocolate chips and dried cherries evenly over the top of the warm fudge. Gently press them down slightly so they adhere.
Setting and Serving Your Cherry White Chocolate Fudge
Patience is a virtue, especially when it comes to setting fudge! Resist the urge to cut into it too soon; proper cooling is essential for the best texture.
- Cool and Set: This is arguably the hardest part – waiting! Allow the fudge to cool completely and set at room temperature for at least 4-6 hours. For best results, I often let it set overnight. If you’re in a hurry, you can place it in the refrigerator for 2-3 hours, but I find that room temperature setting often results in a creamier texture for Cherry White Chocolate Fudge. Make sure it’s fully firm before proceeding.
- Lift and Cut: Once the fudge is completely firm, use the parchment paper or foil overhangs to carefully lift the entire slab of fudge out of the pan and onto a clean cutting board.
- Slice into Squares: Using a sharp, large knife, cut the fudge into desired squares. I typically go for 1-inch to 1.5-inch squares, as fudge is quite rich. For cleaner cuts, you can run your knife under hot water and wipe it clean between each cut. This helps prevent sticking and makes for beautiful, precise pieces of your homemade Cherry White Chocolate Fudge.
- Serve and Store: Arrange your beautiful fudge squares on a serving platter and enjoy! This fudge is perfect for sharing, gifting, or simply indulging yourself.
- Storage: Store any leftover Cherry White Chocolate Fudge in an airtight container at room temperature for up to 1 week. If you need to keep it longer, you can store it in the refrigerator for up to 2-3 weeks, or even freeze it for several months. If refrigerating, I recommend letting it come to room temperature for about 15-30 minutes before serving for the best texture.
Conclusion:
So, there you have it – my absolute favorite recipe for a treat that truly stands out in a crowded field of confections. I truly believe that once you try this, it will quickly become a cherished addition to your own recipe collection. What makes this recipe an undeniable must-try, you ask? Well, it’s not just one thing; it’s a harmonious symphony of flavors and textures that simply captivates the palate. Imagine the luxurious creaminess of white chocolate, melting effortlessly on your tongue, perfectly complemented by the delightful chew and subtle tartness of dried cherries. This isn’t just any fudge; it’s a gourmet experience disguised in a remarkably simple preparation. I’ve found that many traditional fudge recipes can be intimidating, requiring precise temperatures and constant stirring, but I’ve streamlined this one to ensure a foolproof process without compromising on that coveted, smooth texture. The vibrant crimson of the cherries against the pristine white of the fudge also makes it an absolute visual stunner, effortlessly elevating any dessert spread. It’s sweet, but not cloyingly so, with the cherries providing that essential counterpoint that keeps you coming back for just one more piece. It’s the kind of treat that looks incredibly impressive, yet comes together with surprising ease, making you feel like a master confectioner in your own kitchen.
Now, let’s talk about how you can enjoy this delightful creation and make it uniquely yours. While a simple square of this fudge is a joy in itself, there are so many wonderful ways to serve it, and even more opportunities to experiment with variations. For a casual indulgence, I love to pair a small piece with a freshly brewed cup of coffee or a comforting mug of herbal tea – the rich flavors just meld together beautifully. It’s also an exceptional addition to any holiday cookie platter or dessert buffet, offering a burst of color and a sophisticated taste that will surely draw compliments. Thinking about gifting? These squares, neatly packaged in a decorative box or clear cellophane bags tied with a ribbon, make for an incredibly thoughtful and personal present that truly says, “I care.”
Creative Serving & Variation Ideas for Your Fudge:
Don’t stop at the basic recipe! Here are some ideas to inspire your culinary creativity:
- Nutty Additions: For an extra layer of texture and flavor, consider folding in a handful of finely chopped pistachios or toasted slivered almonds along with the cherries. The subtle crunch and nutty aroma add another dimension that’s simply divine. Macadamia nuts would also be a luxurious choice, complementing the white chocolate beautifully.
- Citrus Zest Brightness: To add a wonderful zing that cuts through the richness, try folding in a teaspoon of fresh orange or lemon zest just before pouring the mixture into your pan. The bright, aromatic oils will lift the entire flavor profile.
- Chocolate Drizzles & Toppings: Once your fudge has set, melt a small amount of dark or milk chocolate and drizzle it decoratively over the top. This not only adds a beautiful visual contrast but also introduces another layer of chocolatey goodness. A light dusting of edible glitter or some holiday-themed sprinkles could also add a festive touch.
- Extracts for Depth: While vanilla extract is standard, consider adding a touch of almond extract (just a quarter to half a teaspoon) to enhance the cherry flavor even further. A hint of rosewater could also introduce a sophisticated floral note, especially if you’re looking for something truly unique.
- Different Dried Fruits: While cherries are king here, you could experiment with other dried fruits for a twist. Dried cranberries or blueberries could work, though I find the tartness of the cherry is particularly well-suited to the white chocolate.
- Individual Servings: Instead of cutting into squares, spoon the warm fudge mixture into mini paper cupcake liners for perfectly portioned, easy-to-grab treats. This is especially great for parties!
- Fudge Bites: Once chilled, use small cookie cutters (think stars, hearts, or tiny circles) to create charmingly shaped fudge bites for a whimsical presentation.
Your Culinary Adventure Awaits!
I genuinely hope you’re feeling inspired to roll up your sleeves and give this extraordinary Cherry White Chocolate Fudge recipe a try. It’s more than just a sweet treat; it’s an invitation to create something truly special and delicious that will bring joy to both you and your loved ones. There’s an immense satisfaction that comes from creating something so beautiful and tasty from scratch, and I promise you, this recipe delivers on that feeling in spades.
Once you’ve whipped up your batch, I would absolutely love to hear about your experience! Did you stick to the classic recipe, or did you venture into one of the variations I suggested? Perhaps you even came up with a brilliant new twist of your own! Please don’t hesitate to share your thoughts, your successes, and even your “lessons learned” in the comments section below. I adore seeing your culinary creations, so if you snap a photo, please do share it! Your feedback and shared experiences not only make my day but also inspire other home bakers in our wonderful community. Happy baking, my friends!
Cherry White Chocolate Fudge
A decadent and easy-to-make fudge, perfectly balancing the vibrant tartness of plump dried cherries with the rich, creamy sweetness of high-quality white chocolate. It’s a visually stunning treat, ideal for festive gatherings, thoughtful gifts, or a personal indulgence, offering a satisfyingly smooth, melt-in-your-mouth texture.
Ingredients
-
3 cups Granulated Sugar
-
1 cup Heavy Cream
-
1/2 cup Unsalted Butter
-
1/2 teaspoon Salt
-
1 (7-ounce) Jar Marshmallow Fluff (or 4 cups miniature marshmallows)
-
1 teaspoon Pure Vanilla Extract
-
12 ounces High-Quality White Chocolate (chips or chopped)
-
1 cup Dried Cherries (roughly chopped)
-
Optional: 1/2 teaspoon Cherry Extract
-
Optional Garnish: 1/4 cup Additional White Chocolate Chips
-
Optional Garnish: 1/4 cup Additional Dried Cherries
Instructions
-
Step 1
Line a 9×13-inch baking pan with parchment paper, leaving an overhang. Prepare all ingredients (chop white chocolate/cherries) and attach a candy thermometer to a large, heavy-bottomed saucepan. -
Step 2
In the saucepan, combine granulated sugar, heavy cream, cubed unsalted butter, and salt. Cook over medium heat, stirring constantly, until butter melts and sugar completely dissolves. -
Step 3
Stop stirring and bring the mixture to a full, rolling boil. Continue boiling without stirring until the candy thermometer registers 238°F (114°C) (soft ball stage), which takes approximately 8-12 minutes. -
Step 4
Immediately remove the saucepan from heat and remove the thermometer. Add the marshmallow fluff and white chocolate. Let sit undisturbed for 2-3 minutes to allow the residual heat to gently melt these ingredients. -
Step 5
Stir the mixture vigorously with a wooden spoon or spatula until everything is completely melted, smooth, glossy, and thoroughly combined (about 2-3 minutes). -
Step 6
Stir in the pure vanilla extract, optional cherry extract (if using), and gently fold in the roughly chopped dried cherries until evenly distributed. Do not overmix. -
Step 7
Quickly pour the entire fudge mixture into the prepared baking pan. Use a spatula to spread it evenly and smooth the top. If garnishing, sprinkle additional white chocolate chips and dried cherries over the warm fudge and gently press them down. -
Step 8
Allow the fudge to cool completely and set at room temperature for at least 4-6 hours, or preferably overnight, until fully firm. -
Step 9
Once set, use the parchment paper overhangs to carefully lift the fudge slab out of the pan and onto a clean cutting board. Cut into 1-inch to 1.5-inch squares using a sharp knife for serving. -
Step 10
Serve and store any leftover Cherry White Chocolate Fudge in an airtight container at room temperature for up to 1 week. For longer storage, refrigerate for 2-3 weeks or freeze for several months.
Important Information
Nutrition Facts (Per Serving)
It is important to consider this information as approximate and not to use it as definitive health advice.
Allergy Information
Please check ingredients for potential allergens and consult a health professional if in doubt.
Leave a Comment