
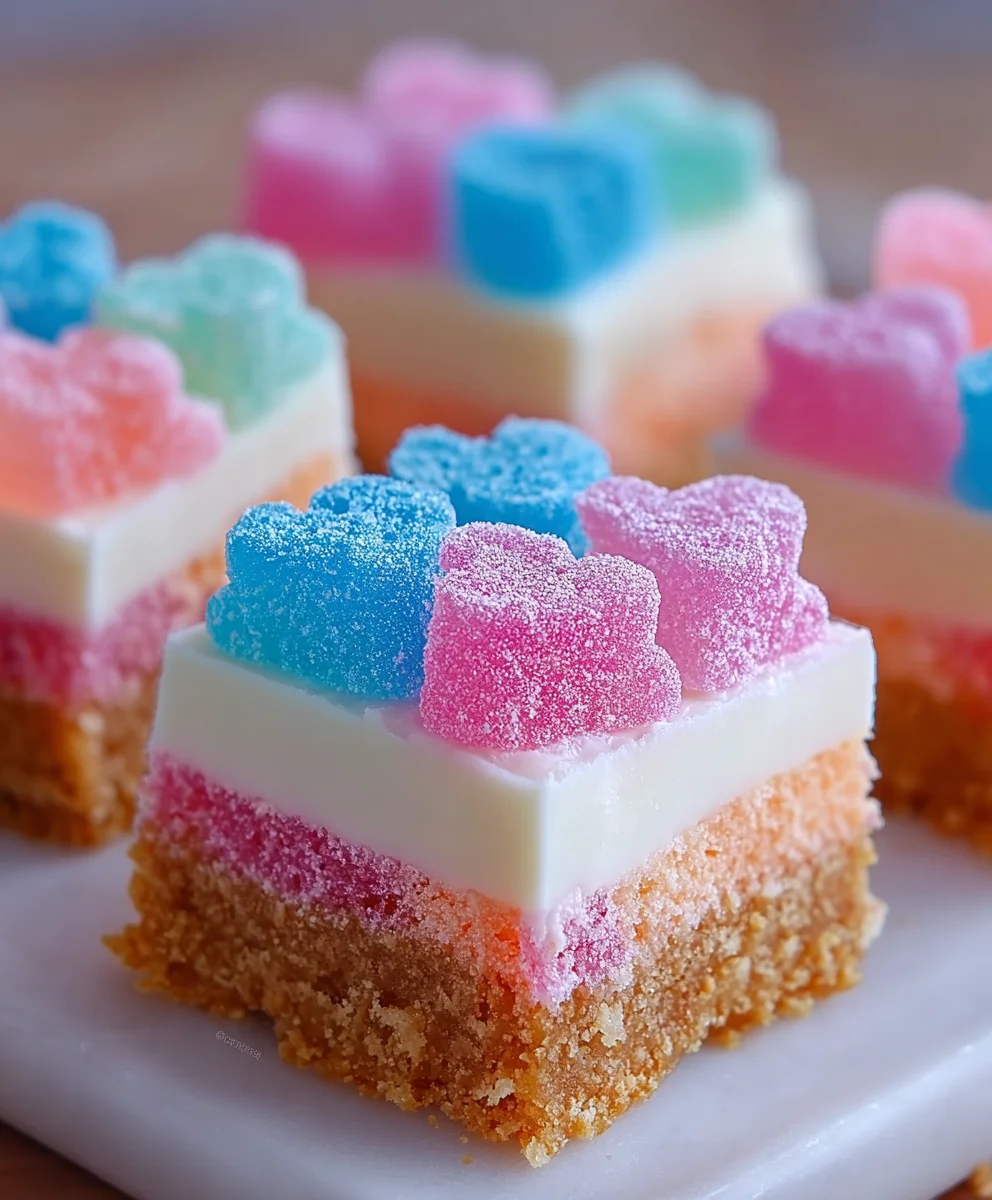
Gummy Cotton Candy Cheesecake Bites are not just a dessert; they are a ticket to a whimsical flavor adventure, promising to enchant your taste buds and brighten any occasion. Have you ever yearned for a treat that flawlessly combines the nostalgic delight of a bustling carnival with the sophisticated comfort of a classic dessert? I know I have, and this recipe delivers precisely that!
The enchanting wisp of cotton candy has charmed generations at fairs and celebrations, a pure symbol of joyous abandon. Simultaneously, the humble cheesecake, a dessert with origins tracing back to ancient Greece, has evolved into a global icon of creamy indulgence. Our innovative creation gracefully fuses these two beloved worlds, offering an irresistible experience that is both familiar and excitingly new.
Why Everyone Falls in Love with This Unique Dessert
People absolutely adore these delightful bites because they offer an extraordinary symphony of textures and tastes in every single morsel. Imagine the airy, sugary whisper of cotton candy dissolving on your tongue, followed by the rich, tangy creaminess of a perfectly set cheesecake, all punctuated by the playful chew of gummy candies. It’s a truly unique sensation! Moreover, their convenient, individual serving size makes these Gummy Cotton Candy Cheesecake Bites the ultimate showstopper for parties, potlucks, or simply a luxurious personal indulgence. Get ready to embark on a culinary journey where joy and gourmet artistry collide!
Ingredients:
-
For the Graham Cracker Crust:
- 1 ½ cups (about 180g) finely crushed graham cracker crumbs (from approximately 10-12 full sheets of graham crackers) – I love using a food processor for this, it gets them perfectly fine!
- ¼ cup (50g) granulated sugar – just a touch of sweetness to complement the crackers.
- 6 tablespoons (85g) unsalted butter, melted – and then just slightly cooled, so it doesn’t cook the crumbs.
- A pinch of salt (optional, but I find it really enhances the flavor of the crust).
-
For the Cotton Candy Cheesecake Filling:
- 3 (8-ounce) packages (678g total) full-fat cream cheese, softened to room temperature – this is crucial for a smooth, lump-free filling!
- 1 cup (200g) granulated sugar – to give our cheesecake that wonderful sweet balance.
- 2 large eggs, also at room temperature – always best to have your dairy and eggs at room temp for baking.
- 1 teaspoon pure vanilla extract – for that classic, comforting aroma.
- ¼ cup (60g) full-fat sour cream – this adds a delightful tang and helps with the creamy texture.
- 1 teaspoon cotton candy extract or flavoring – this is where the magic happens for that distinct taste! Make sure it’s a good quality extract.
- A few drops pink or blue gel food coloring (optional, but it really makes them look like cotton candy!) – I sometimes do a swirl of both for extra fun.
-
For the Gummy & Cotton Candy Topping:
- ½ cup to 1 cup various colorful gummy candies (bears, worms, rings – whatever makes you smile!)
- 1-2 ounces fresh cotton candy, pulled apart gently – make sure to buy this fresh or prepare it right before serving as it melts quickly.
- Optional: Sprinkles for an extra festive touch!
Preparing the Graham Cracker Crust
-
Preheat and Prepare Your Muffin Tins:
Before we dive into mixing, I always like to get my oven ready. Preheat your oven to 350°F (175°C). While that’s heating up, line a 12-cup standard muffin tin with paper liners. For these cheesecake bites, I highly recommend using liners because it makes removing them so much easier and keeps the crust intact. If you’re using a mini muffin tin, you’ll likely get more bites, so have a second tin or be ready to bake in batches. I personally find the standard size to be perfect for a satisfying bite.
-
Crush Your Graham Crackers:
Now for the crust! Take your graham crackers and turn them into fine crumbs. My favorite method for this is a food processor. Just toss the graham cracker sheets in and pulse until they resemble fine sand. If you don’t have a food processor, no worries! You can place them in a zip-top bag and crush them with a rolling pin or the bottom of a heavy glass. The key here is consistency; we want them finely crushed so the crust holds together beautifully. This step is super important for the texture of the finished crust.
-
Combine Crust Ingredients:
In a medium-sized bowl, combine your finely crushed graham cracker crumbs with the granulated sugar and that tiny pinch of salt (trust me, it makes a difference!). Give these dry ingredients a good stir to ensure they’re well mixed. Then, slowly pour in your melted butter. Stir everything together thoroughly until all the crumbs are moistened and resemble wet sand. You should be able to squeeze a handful, and it will hold its shape. If it feels too dry, you can add another half tablespoon of melted butter, but be careful not to make it greasy.
-
Form the Crust Base:
Now for the fun part – forming our crusts! Spoon about 1 to 1 ½ tablespoons of the graham cracker mixture into the bottom of each prepared muffin liner. Use the back of a spoon or a small, flat-bottomed glass to press the crumbs down firmly into an even layer. The firmer you press, the less likely your crust will crumble when you bite into your cheesecake. This creates a sturdy foundation for our creamy filling.
-
Pre-Bake the Crusts:
Pop your muffin tin with the pressed crusts into the preheated oven for about 5-7 minutes. This quick pre-bake helps the crust set and become slightly golden, preventing it from getting soggy once the cheesecake filling is added. It also enhances the nutty flavor of the graham crackers. Once baked, remove the tin from the oven and let the crusts cool completely on a wire rack while you prepare the filling. This cooling period is important to prevent the warm crust from prematurely heating the cheesecake batter.
Crafting the Cotton Candy Cheesecake Filling
-
Cream the Cream Cheese:
In a large mixing bowl, using an electric mixer (either a stand mixer with the paddle attachment or a hand mixer), beat your softened cream cheese on medium speed until it’s completely smooth and creamy, with no lumps at all. This usually takes about 2-3 minutes. Having your cream cheese at room temperature is absolutely non-negotiable here! Cold cream cheese will result in a lumpy batter, no matter how long you beat it. I always set mine out on the counter for at least an hour, sometimes two, before I plan to bake. Scrape down the sides of the bowl frequently to ensure everything is getting properly incorporated.
-
Add the Sugar:
Once your cream cheese is wonderfully smooth, gradually add the granulated sugar to the bowl, continuing to beat on medium-low speed. Mix until the sugar is fully incorporated and the mixture looks light and fluffy. This step might take another 2-3 minutes. Again, scrape down the sides of the bowl to ensure all the sugar is blended in, leaving no granules behind. We’re building a smooth, luscious foundation for our cheesecake.
-
Incorporate the Eggs:
This is a delicate step. Add the eggs one at a time, mixing on low speed only until each egg is just combined. Overmixing eggs into cheesecake batter can introduce too much air, which can lead to cracks in your finished cheesecakes. So, add one egg, mix until just blended, scrape down the bowl, then add the second egg and repeat. We want smooth, not airy!
-
Stir in the Flavorings:
Now for the magical flavors! Add the vanilla extract, sour cream, and the star of the show, the cotton candy extract, to the cream cheese mixture. Mix on low speed until just combined. The sour cream adds a wonderful richness and a slight tang that balances the sweetness, while the vanilla provides a comforting base note. The cotton candy extract will really start to infuse that nostalgic flavor! Don’t overmix – we’re just looking for everything to come together.
-
Add a Pop of Color (Optional):
If you’re opting for the visually stunning cotton candy effect, now is the time to add a few drops of gel food coloring. I love using pink or blue, or even splitting the batter into two bowls and coloring half pink and half blue for a swirled effect later. Gel food coloring provides vibrant color without adding much liquid, which is perfect for cheesecake. Mix on low speed until the color is evenly distributed. This makes them so much more exciting and clearly signals the flavor profile!
-
Fill the Crusts:
Carefully spoon the cotton candy cheesecake filling over your cooled, pre-baked graham cracker crusts in the muffin liners. Fill each liner about ¾ full. I find using an ice cream scoop helps with portioning and keeps things tidy. Gently tap the muffin tin on the counter a few times to release any air bubbles and settle the filling. This also helps create a smooth top surface for your cheesecakes.
Baking the Cheesecake Bites
-
Prepare for Baking (Water Bath Optional but Recommended):
While not strictly necessary for individual bites, a water bath can still significantly improve the texture and prevent cracking, even in smaller cheesecakes. If you want to use one, place your muffin tin inside a larger roasting pan. Carefully pour hot water into the roasting pan, ensuring it comes about halfway up the sides of the muffin tin. This creates a humid environment that helps the cheesecakes bake evenly and prevents them from drying out or cracking. If you skip the water bath, that’s fine too, just ensure your oven temperature is stable.
-
Bake the Cheesecake Bites:
Carefully transfer the roasting pan with your muffin tin (or just the muffin tin if skipping the water bath) to the preheated oven. Bake for approximately 20-25 minutes for standard-sized bites, or 15-20 minutes for mini bites. The cheesecakes are done when the edges are set, but the centers still have a slight jiggle to them when you gently shake the pan. It’s crucial not to overbake cheesecakes! Overbaking can lead to a dry texture and, you guessed it, cracks.
-
Cooling Process, Phase One:
Once baked, turn off your oven but leave the cheesecakes inside with the oven door propped open slightly (I usually use a wooden spoon to keep it ajar) for about 10-15 minutes. This slow cooling prevents a drastic temperature change, which can also contribute to cracking and helps them set gently. If you used a water bath, carefully remove the muffin tin from the roasting pan before this step.
-
Cooling Process, Phase Two:
After the initial cooling in the oven, remove the muffin tin from the oven and place it on a wire rack to cool completely at room temperature. This will take at least 1-2 hours, possibly more. Resist the urge to rush this step! They need to come down to room temperature slowly.
-
Chilling for Perfection:
Once fully cooled to room temperature, transfer the muffin tin to the refrigerator. Chill the cheesecake bites for at least 4 hours, but preferably overnight. This chilling period is essential for the cheesecake to fully set and develop its rich, creamy texture. It also makes them much easier to handle and ensures they’re firm enough for our delightful toppings. I usually cover the tin loosely with plastic wrap to prevent any fridge odors from permeating the cheesecakes.
The Magical Cotton Candy Topping & Assembling the Gummy Cotton Candy Cheesecake Bites
-
Preparing the Toppings:
Once your “Gummy Cotton Candy Cheesecake Bites” are perfectly chilled and firm, it’s time for the fun, vibrant toppings! This is where they truly transform into a whimsical dessert. First, gather your colorful gummy candies. If you have larger gummies, you might want to cut them into smaller, bite-sized pieces so they’re easier to eat and fit nicely on top of your cheesecake. For the fresh cotton candy, prepare to use it right before serving, as it is notoriously delicate and will begin to dissolve with exposure to air and moisture. I often keep the cotton candy in its sealed bag until the last possible moment.
-
Arranging the Gummies:
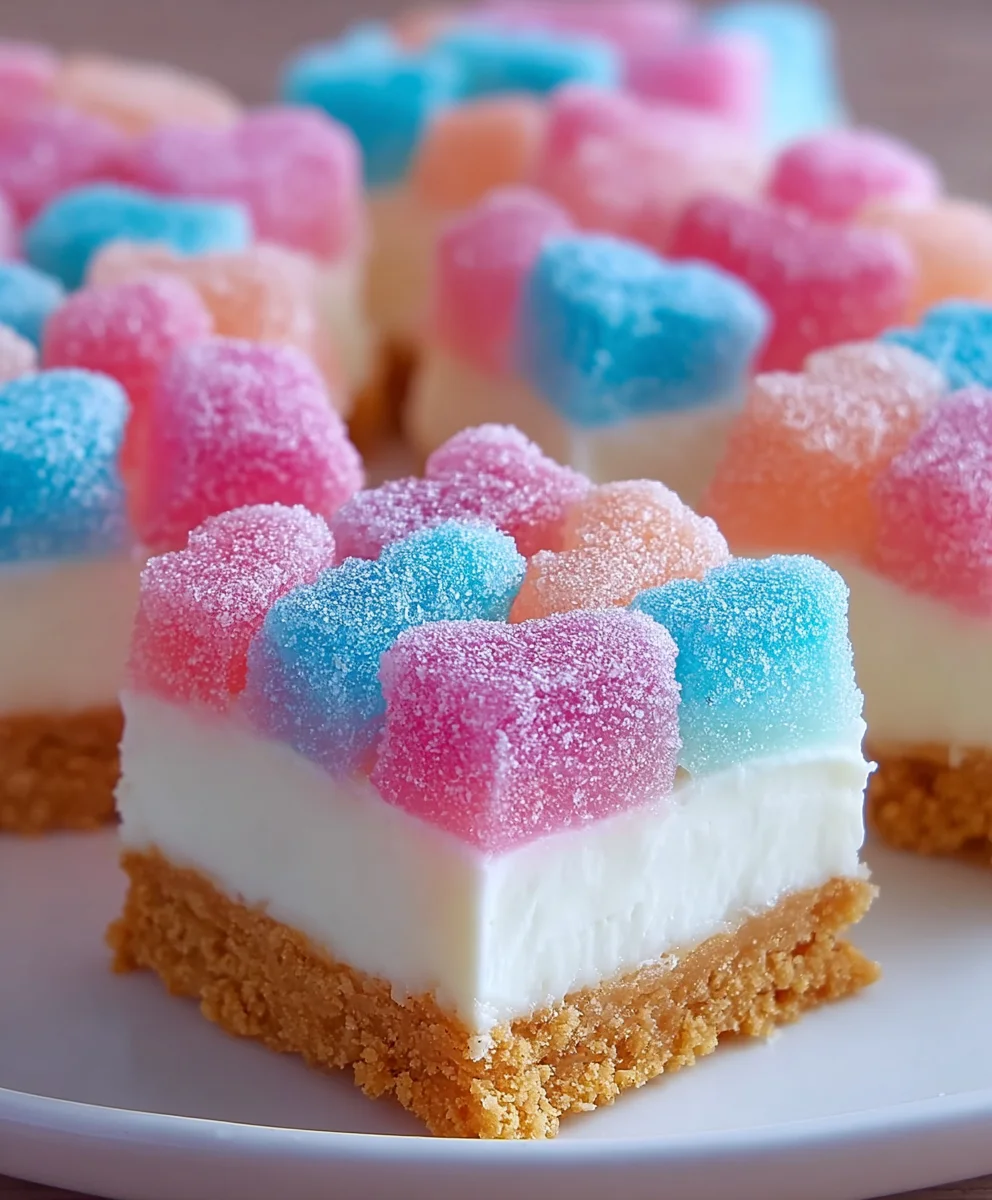
Carefully remove the chilled cheesecake bites from their muffin liners. They should pop out easily if you used paper liners. Place them on a serving platter. Now, let your creativity shine with the gummy candies! Arrange them artfully on top of each cheesecake bite. You can place one larger gummy in the center, or sprinkle several smaller ones around the edges. I love using a variety of colors and shapes – gummy bears, worms, rings, whatever brings joy! This not only adds a delightful chewiness but also a fantastic visual pop. The vibrant colors of the gummies complement the cotton candy theme beautifully.
-
Adding the Fresh Cotton Candy:
This is the most theatrical part! Just before serving (and I mean just before, guests arriving in 5 minutes is perfect), gently pull apart small tufts of fresh cotton candy. You want fluffy, airy clouds. Lightly place a tuft of cotton candy on top of each cheesecake bite, nestling it slightly around the gummies. The cotton candy provides that unmistakable aroma and melt-in-your-mouth texture that truly defines “Gummy Cotton Candy Cheesecake Bites.” It’s ethereal and adds a fantastic whimsical touch. Remember, cotton candy will shrink and eventually dissolve if left out for too long, especially in humid conditions, so timing is key here for the best experience!
-
Final Touches (Optional):
If you want to go all out, a tiny sprinkle of edible glitter or some coordinating sprinkles (like nonpareils or jimmies in pinks, blues, and purples) can really enhance the festive appearance of your “Gummy Cotton Candy Cheesecake Bites.” This is entirely optional, but it adds another layer of visual appeal that children and adults alike will adore.
-
Serving and Storage:
Serve your “Gummy Cotton Candy Cheesecake Bites” immediately after topping with the cotton candy for the freshest, fluffiest experience. These bites are best enjoyed cold. If you happen to have any leftovers before adding the fresh cotton candy, they can be stored in an airtight container in the refrigerator for up to 3-4 days. However, once the cotton candy has been added, they really need to be eaten promptly. The cotton candy will condense and disappear within a short time in the fridge or even at room temperature, especially if it’s humid. If you anticipate leftovers, it’s best to top only the cheesecakes you plan to serve immediately, leaving the rest plain in the fridge and adding cotton candy and gummies as needed for future servings. This ensures every “Gummy Cotton Candy Cheesecake Bite” is enjoyed at its peak whimsical deliciousness!
Conclusion:
And there you have it, my friends! We’ve journeyed together through the whimsical creation of these truly extraordinary treats. I sincerely hope you’ve enjoyed every step of this delightful culinary adventure. When I first envisioned this recipe, I wanted to create something that wasn’t just delicious, but also brought a smile to everyone’s face, something that evoked a sense of playful nostalgia while offering a sophisticated flavor profile. And I truly believe these bites deliver on all fronts. They are an absolute triumph of texture and taste, a symphony of creamy cheesecake, airy cotton candy, and the delightful chew of gummies, all perfectly encapsulated in a single, irresistible mouthful. It’s a dessert that transcends the ordinary, transforming simple ingredients into something truly magical and memorable.
What makes this recipe a definite must-try, you ask? Well, beyond the obvious visual appeal — those vibrant colors and charming presentation — it’s the unexpected harmony of flavors that truly sets it apart. The subtle tanginess of the cream cheese cuts beautifully through the sweetness of the cotton candy, preventing it from being overly cloying, while the graham cracker crust provides that essential grounding texture. Then, the surprise element of the gummies adds a playful bounce and an extra layer of fruitiness that just brightens the whole experience. It’s a dessert that doesn’t just satisfy your sweet tooth; it sparks joy and invites conversation. Imagine the look on your guests’ faces when they encounter these little masterpieces! They are perfect for birthdays, baby showers, summer garden parties, or even just a fun weekend treat to brighten a dreary afternoon. Trust me, these are more than just a dessert; they are an experience, a little moment of pure, unadulterated happiness.
Serving Suggestions and Creative Variations:
Now that you’ve mastered the art of creating these delightful bites, let’s talk about how to present them and how you can make them uniquely yours. For serving, I always recommend ensuring they are thoroughly chilled. This not only enhances their structural integrity but also maximizes that refreshing, melt-in-your-mouth cheesecake experience. Arrange them artfully on a clean white platter to really let their colors pop, or for a more whimsical touch, consider mini cupcake liners if you used a muffin tin. A delicate sprinkle of edible glitter or a few extra wisps of fresh cotton candy on top, just before serving, can elevate their visual appeal even further. For a contrasting texture and a touch of freshness, a small raspberry or a sliver of strawberry placed alongside each bite makes for an elegant garnish. Or, if you’re feeling extra indulgent, a light drizzle of a raspberry coulis or a simple vanilla bean syrup could add another layer of flavor. They pair wonderfully with a tall glass of cold milk, a refreshing sparkling lemonade, or even a light, unsweetened iced tea to balance the sweetness.
But don’t stop there! The beauty of this recipe lies in its adaptability. While I adore the classic combination, feel free to unleash your inner pastry artist with these variations. Instead of the standard fruit-flavored gummies, why not experiment with sour gummies for an extra tangy kick, or perhaps some gummy bears in a specific color theme for a themed party? You could even try cutting thin strips of your favorite licorice for a different texture and flavor profile, though be mindful of its stronger taste. As for the cotton candy, while a vibrant blue or pink is iconic, consider using grape-flavored purple cotton candy for a deeper hue, or even green apple cotton candy for an unexpected twist. For the crust, feel free to swap out graham crackers for vanilla wafers or even shortbread cookies for a richer, buttery base. If you’re feeling adventurous, a hint of almond extract or even a touch of rosewater in the cheesecake filling could add a sophisticated dimension, transforming them from playful treats into elegant petit fours. You could also make a larger version of this recipe, turning it into a full-sized cotton candy cheesecake, perhaps in a springform pan, and then cutting it into slices. Imagine dipping half of each finished bite into melted white chocolate and then coating it with finely chopped pistachios or even more sprinkles for an extra layer of indulgence and visual appeal. The possibilities are truly endless, limited only by your imagination!
Your Turn to Create and Share!
So now, it’s your turn. Don’t just admire these fantastic treats from afar; roll up your sleeves and dive into the delightful process of making your very own Gummy Cotton Candy Cheesecake Bites. I promise you, the joy of creating something so utterly unique and utterly delicious is incredibly rewarding. I’m confident that this recipe will quickly become a favorite in your household, a go-to for celebrations, or simply for those moments when you crave something truly special and out of the ordinary. Once you’ve whipped up your batch, I would absolutely love to hear about your experience! Did you stick to the recipe, or did you venture into your own creative variations? What was the reaction of your friends and family? Share your photos and your stories! There’s nothing more satisfying for a recipe developer than seeing others enjoy and personalize their culinary creations. So go ahead, bake, share, and spread the sweet, whimsical joy!
Gummy Cotton Candy Cheesecake Bites
These Gummy Cotton Candy Cheesecake Bites flawlessly combine the whimsical delight of cotton candy with the sophisticated comfort of classic cheesecake, creating a fun, sweet, and irresistible dessert. Perfect for parties, potlucks, or a luxurious personal indulgence.
Ingredients
-
1 ½ cups (180g) finely crushed graham cracker crumbs
-
¼ cup (50g) granulated sugar
-
6 tablespoons (85g) unsalted butter, melted
-
Pinch of salt (optional)
-
3 (8-ounce) packages (678g) full-fat cream cheese, softened
-
1 cup (200g) granulated sugar
-
2 large eggs, room temperature
-
1 teaspoon pure vanilla extract
-
¼ cup (60g) full-fat sour cream
-
1 teaspoon cotton candy extract or flavoring
-
Few drops pink or blue gel food coloring (optional)
-
½ cup to 1 cup colorful gummy candies (bears, worms, rings)
-
1-2 ounces fresh cotton candy, pulled apart
-
Optional: Sprinkles
Instructions
-
Step 1
Preheat oven to 350°F (175°C). Line a 12-cup standard muffin tin with paper liners. -
Step 2
Finely crush graham crackers. In a medium bowl, combine crumbs, ¼ cup granulated sugar, and salt. Stir in melted butter until all crumbs are moistened. -
Step 3
Press 1 to 1 ½ tablespoons of the crust mixture firmly into the bottom of each prepared muffin liner. Pre-bake for 5-7 minutes; cool completely on a wire rack. -
Step 4
In a large mixing bowl, beat softened cream cheese until smooth. Gradually add 1 cup granulated sugar, beating until light and fluffy. -
Step 5
Add eggs one at a time, mixing on low speed only until just combined. Stir in vanilla extract, sour cream, and cotton candy extract until just incorporated. -
Step 6
(Optional) Add a few drops of pink or blue gel food coloring and mix on low speed until evenly distributed. -
Step 7
Spoon the cheesecake filling ¾ full into the cooled crusts. Gently tap the muffin tin on the counter to release any air bubbles. -
Step 8
(Optional water bath) Place the muffin tin inside a larger roasting pan. Carefully pour hot water into the roasting pan, halfway up the sides of the muffin tin. -
Step 9
Bake for approximately 20-25 minutes. Cheesecakes are done when edges are set but centers still have a slight jiggle. Do not overbake. -
Step 10
Turn off the oven, prop the door open slightly, and cool cheesecakes inside for 10-15 minutes. Remove and cool completely at room temperature on a wire rack (1-2 hours). -
Step 11
Transfer the muffin tin to the refrigerator and chill for at least 4 hours, preferably overnight. Cover loosely. -
Step 12
Once chilled, carefully remove cheesecake bites from liners. Arrange colorful gummy candies artfully on top of each cheesecake. -
Step 13
Just before serving, gently pull apart small tufts of fresh cotton candy and lightly place one on top of each cheesecake bite, nestling it around the gummies. -
Step 14
(Optional) Add sprinkles for an extra festive touch. Serve immediately after topping for the freshest, fluffiest experience. -
Step 15
Store any untopped leftovers in an airtight container in the refrigerator for up to 3-4 days. Once cotton candy is added, cheesecakes must be eaten promptly as it will condense and disappear.
Important Information
Nutrition Facts (Per Serving)
It is important to consider this information as approximate and not to use it as definitive health advice.
Allergy Information
Please check ingredients for potential allergens and consult a health professional if in doubt.


Leave a Comment