
Mini Butterscotch Tarts are a delightful confection that promises to transport your taste buds to a realm of pure, buttery bliss with every bite. I am incredibly excited to share this recipe, which I believe perfectly encapsulates the comforting warmth and rich indulgence we all crave in a dessert. There’s something undeniably charming about a miniature treat, making these tarts not just delicious, but also visually appealing and incredibly convenient for any gathering. While the exact origins of the butterscotch tart are intertwined with the broader history of English tarts and the enduring popularity of butterscotch as a flavor profile – a rich blend of brown sugar and butter often associated with traditional sweets – this particular bite-sized rendition brings a fresh, modern twist to a beloved classic.
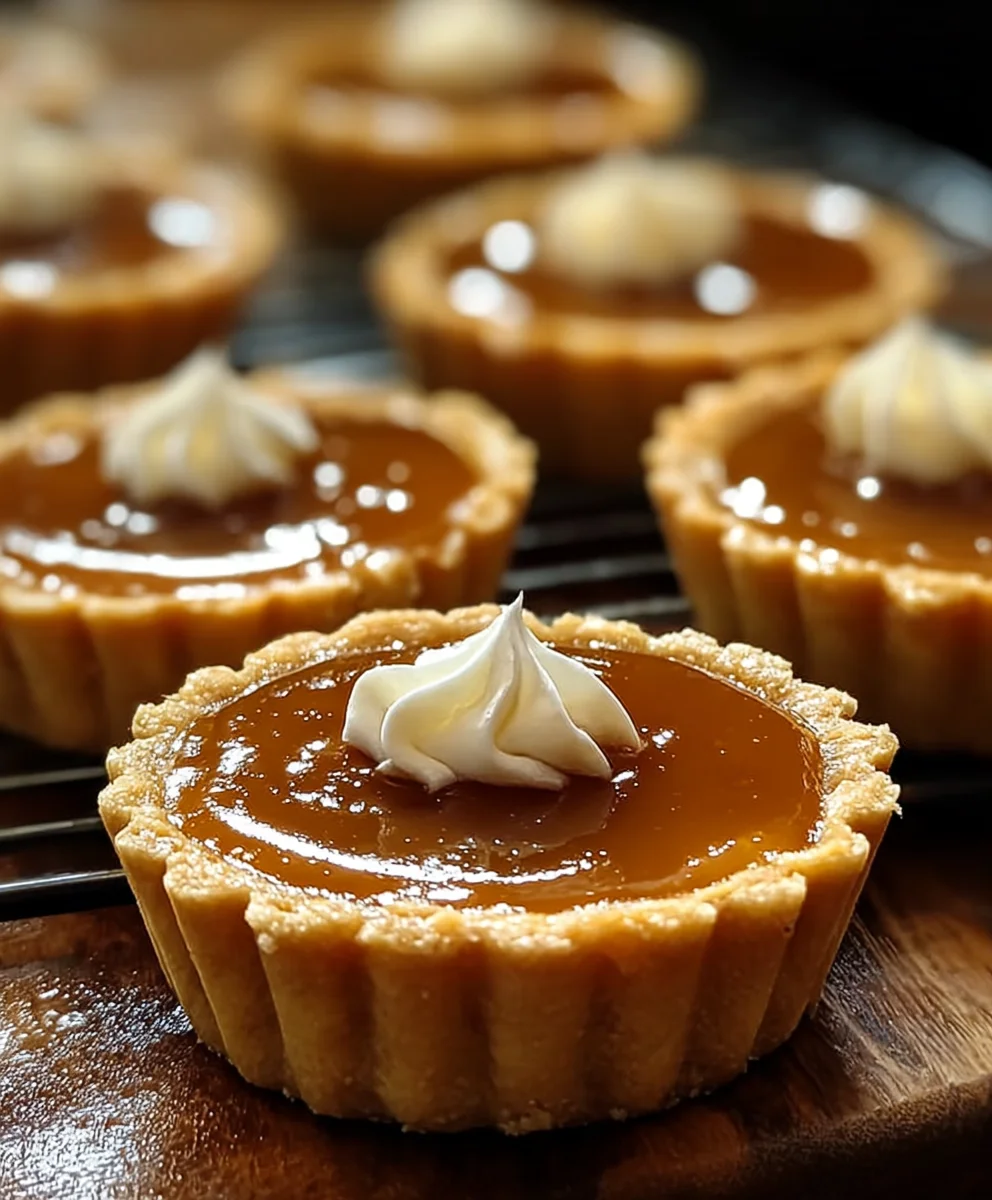
What truly makes people fall in love with these Mini Butterscotch Tarts is their exquisite balance of textures and flavors. Imagine a delicate, flaky pastry shell cradling a luscious, smooth butterscotch filling that melts in your mouth, leaving behind that signature sweet and salty caramel-like finish. They offer the perfect portion control, are ideal for high tea, potlucks, or simply as a comforting treat with your afternoon coffee. The ease of preparation, combined with their crowd-pleasing appeal, ensures they are a staple in my baking repertoire. You’ll find yourself reaching for just one more, time and again.
Ingredients:
-
For the Flaky Tart Shells:
- 2 ½ cups (300g) all-purpose flour, plus more for dusting
- 1 teaspoon granulated sugar
- ½ teaspoon salt
- 1 cup (226g) unsalted butter, very cold and cut into ½-inch cubes
- 6-8 tablespoons ice water, divided
- 1 large egg yolk, lightly beaten (for egg wash, optional)
-
For the Rich Butterscotch Filling:
- ½ cup (113g) unsalted butter
- 1 cup (200g) packed light brown sugar
- ½ teaspoon salt
- 1 cup (240ml) heavy cream
- ¼ cup (60ml) whole milk
- 2 tablespoons cornstarch (cornflour)
- 2 large egg yolks
- 1 ½ teaspoons pure vanilla extract
-
Optional Garnishes:
- Whipped cream
- Flaky sea salt
- Chocolate shavings
Crafting the Flaky Tart Shells for Your Mini Butterscotch Tarts:
Making the perfect tart shell is the first crucial step to ensure your Mini Butterscotch Tarts are an absolute delight. I love a buttery, flaky crust that just melts in your mouth, offering a beautiful contrast to the smooth, rich filling.
- Prepare Your Dough: In a large mixing bowl, I start by whisking together my all-purpose flour, granulated sugar, and salt. It’s important to get these dry ingredients well combined before introducing the butter. Next, I add the very cold, cubed unsalted butter. Using a pastry blender, two knives, or even your fingertips (working quickly so the butter doesn’t get too warm), cut the butter into the flour mixture until it resembles coarse crumbs, with some pea-sized pieces of butter still visible. This is key for flakiness! If the butter melts completely into the flour, you’ll end up with a tough crust.
- Introduce the Ice Water: Now, it’s time to add the ice water, one tablespoon at a time. I usually start with about 6 tablespoons and mix gently with a fork or my hands until the dough just comes together. Be careful not to add too much water; the dough should be cohesive but not sticky. If it’s too dry and crumbly, add another tablespoon of ice water. Once it forms a shaggy ball, I gently press it together, without overworking it, and flatten it into a disk.
- Chill the Dough: This step is non-negotiable for tender tart shells. Wrap the dough disk tightly in plastic wrap and refrigerate it for at least 30 minutes, or preferably for an hour. This resting period allows the gluten to relax, making the dough easier to roll out, and ensures the butter stays cold, which contributes to that wonderful flaky texture we’re aiming for in our Mini Butterscotch Tarts. You can even make this dough a day ahead!
- Preheat and Prepare for Baking: While your dough is chilling, I recommend preheating your oven to 375°F (190°C). Then, grab your mini muffin tins – the standard 24-cup ones work perfectly for these bite-sized treats. Lightly grease them if they aren’t non-stick, though I often find this isn’t necessary with a good non-stick tin.
- Roll and Cut Your Dough: Once the dough is properly chilled, lightly flour a clean surface or a large piece of parchment paper. Roll out your dough to about 1/8-inch thick. I find that a 2.5-inch to 3-inch round cutter is ideal for creating the perfect sized circles for mini muffin tins. If you don’t have a round cutter, the rim of a small glass or even a cookie cutter with a similar diameter will work just fine. Re-roll any scraps, but try not to overwork the dough.
- Form the Tart Shells: Carefully place each dough circle into the cups of your mini muffin tin. Gently press the dough down into the bottom and up the sides of each cup, ensuring there are no air bubbles. You want them to be snug and evenly distributed.
- Blind Bake for Perfection: To prevent soggy bottoms (which is a real tragedy for any tart!), we need to blind bake the shells. Lightly prick the bottom of each shell a few times with a fork. You can then line each shell with a small piece of parchment paper or a coffee filter and fill it with pie weights, dried beans, or rice. Bake for 10-12 minutes, or until the edges are lightly golden. Remove the pie weights and parchment, and if desired, brush the bottoms of the shells with the lightly beaten egg yolk – this creates a seal and further prevents sogginess. Return to the oven for another 3-5 minutes, until the bottoms are set and lightly golden. Remove the shells from the oven and let them cool completely in the tins before carefully removing them. Allowing them to cool in the tins prevents breakage.
Whipping Up the Irresistible Butterscotch Filling:
Now that we have our beautiful tart shells ready, it’s time for the star of the show: the rich, creamy, and utterly decadent butterscotch filling. This is where the magic truly happens for our Mini Butterscotch Tarts!
- Melt and Dissolve: In a medium saucepan, I melt the unsalted butter over medium heat. Once melted, add the packed light brown sugar and salt. Stir constantly until the sugar is completely dissolved and the mixture is smooth and glossy. This usually takes about 2-3 minutes. It’s important not to rush this step; you want the sugar to fully integrate to avoid a grainy filling.
- Combine Liquids and Cornstarch: In a separate small bowl, whisk together the heavy cream and whole milk with the cornstarch until there are no lumps. Cornstarch is our secret weapon for a perfectly thick and stable filling.
- Introduce Cream Mixture: Gradually pour the cream and milk mixture into the brown sugar mixture in the saucepan, whisking continuously. Bring the mixture to a gentle boil, then reduce the heat to low and continue to cook, stirring frequently, for about 5-7 minutes, until the mixture has thickened considerably. It should coat the back of a spoon. Don’t stop stirring, as butterscotch can easily scorch on the bottom!
- Temper the Egg Yolks: While the butterscotch mixture is thickening, lightly whisk the two large egg yolks in a small bowl. Tempering the egg yolks is crucial to prevent them from scrambling when added to the hot mixture. Slowly, in a thin stream, ladle about ½ cup of the hot butterscotch mixture into the egg yolks while whisking vigorously. This gradually brings the temperature of the yolks up.
- Return Yolks to Pan: Once tempered, slowly pour the egg yolk mixture back into the saucepan with the remaining butterscotch, whisking constantly. Continue to cook over low heat, stirring constantly, for another 2-3 minutes, until the filling is very thick and glossy. The addition of the egg yolks not only enriches the flavor but also contributes to the silky smooth texture of our Mini Butterscotch Tarts.
- Finish with Vanilla: Remove the saucepan from the heat and stir in the pure vanilla extract. I always add vanilla last to preserve its delicate flavor.
- Cool the Filling: Pour the butterscotch filling into a heatproof bowl. To prevent a skin from forming on top, press a piece of plastic wrap directly onto the surface of the filling. Let it cool at room temperature for about 30 minutes, then refrigerate for at least 1-2 hours, or until completely chilled and firm enough to scoop. A well-chilled filling is much easier to work with.
Assembling and Baking Your Scrumptious Mini Butterscotch Tarts:
Now for the exciting part – bringing all the components together to create your delectable Mini Butterscotch Tarts! This final stage is quick and incredibly rewarding.
- Fill the Tart Shells: Once both your tart shells and butterscotch filling are completely cooled, it’s time to fill. Use a small spoon or a piping bag (if you want a very neat finish) to generously fill each blind-baked tart shell with the chilled butterscotch filling. I usually mound the filling slightly to give them a lovely domed appearance.
- Final Chill (Optional but Recommended): For the best texture and to ensure the filling is perfectly set, I recommend chilling the assembled tarts in the refrigerator for at least another 30 minutes before serving. This allows the butterscotch to fully firm up, giving you a clean bite every time.
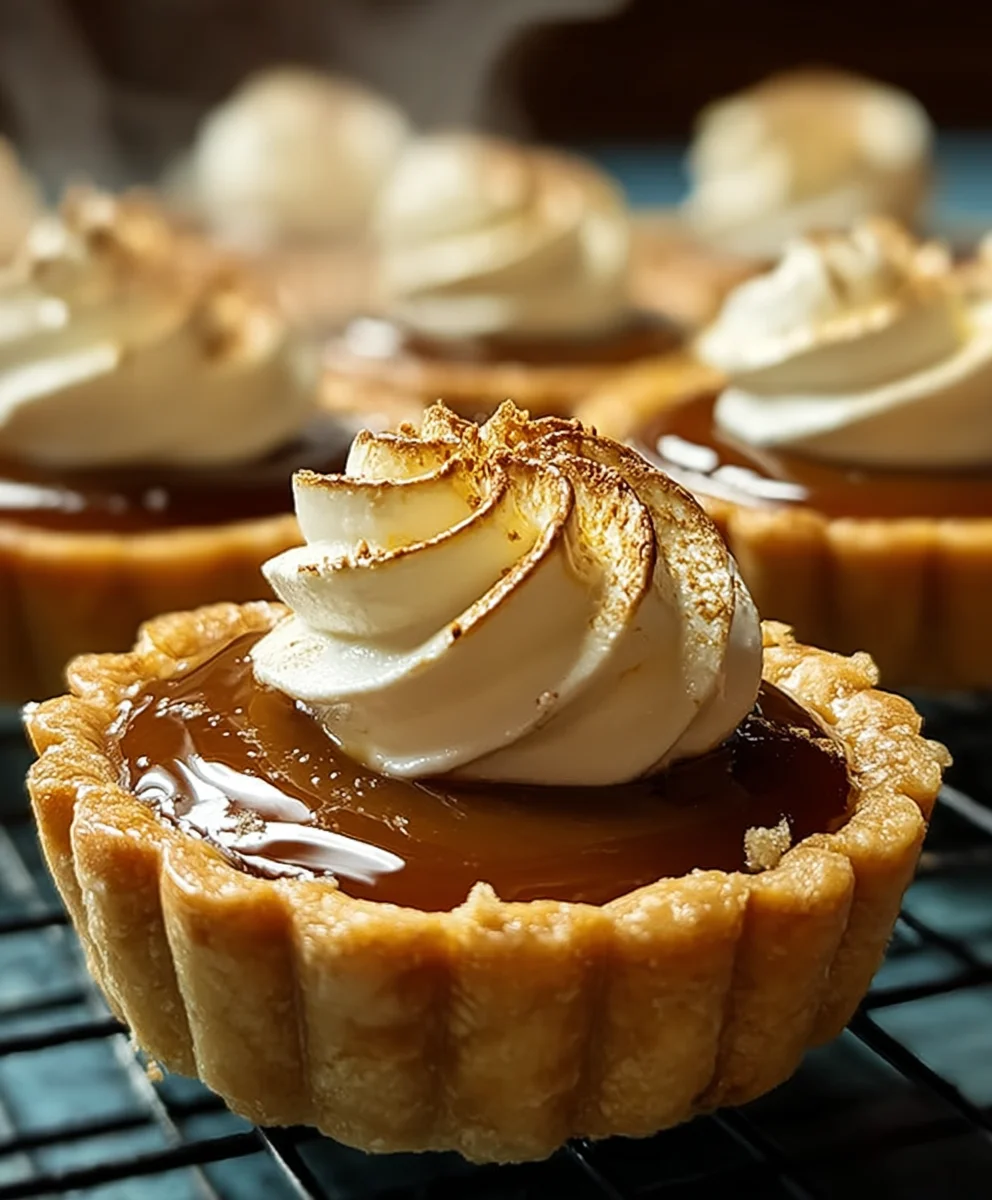
- Garnish and Serve: These Mini Butterscotch Tarts are absolutely heavenly on their own, but a little garnish can elevate them even further. A dollop of freshly whipped cream, a sprinkle of flaky sea salt (which beautifully enhances the butterscotch flavor!), or some delicate chocolate shavings are all fantastic options. I find the salty crunch of flaky sea salt particularly irresistible.
Tips for Perfect Mini Butterscotch Tarts Every Time:
Achieving bakery-quality Mini Butterscotch Tarts is surprisingly simple with a few key techniques. Over the years, I’ve learned some valuable tips that I’m excited to share to help you master this recipe.
- Keep Everything Cold for the Pastry: This is arguably the most important tip for a flaky crust. Ensure your butter is straight from the fridge and cut into small cubes. Use ice-cold water, and handle the dough as little as possible. The colder the butter, the more steam it creates in the oven, leading to those wonderful layers of flakiness that define a truly great tart shell. If your kitchen is warm, you can even chill your flour and mixing bowl for 10-15 minutes before starting.
- Do Not Overwork the Dough: When mixing the pastry dough, stop as soon as it comes together. Overworking develops the gluten, which will result in a tough, chewy crust instead of the tender, flaky texture we desire for our Mini Butterscotch Tarts. Gentleness and speed are your friends here.
- Blind Baking is Essential: Skipping the blind-baking step is a common pitfall. For any tart with a wet filling, blind baking prevents the crust from becoming soggy. The initial bake sets the crust, and using pie weights ensures it holds its shape. The optional egg wash after removing the weights creates an extra barrier against moisture.
- Stir Constantly for the Filling: When making the butterscotch filling, especially after adding the brown sugar and then the cream mixture, constant stirring is crucial. Brown sugar can easily burn and stick to the bottom of the pan, leading to a scorched taste. A silicone spatula or a whisk that reaches all corners of the pan is your best tool.
- Temper the Egg Yolks Carefully: This step prevents scrambled eggs in your filling. Gradually introducing the hot butterscotch to the egg yolks while whisking vigorously brings their temperature up slowly. If you add cold yolks directly to the hot mixture, they will cook unevenly and create undesirable lumps. Patience here ensures a silky-smooth butterscotch filling.
- Allow Adequate Cooling Time: Both the tart shells and the butterscotch filling need to be completely cooled before assembly. Hot filling will make the crust soggy, and warm filling will be too runny to set properly. Patience during cooling will be rewarded with perfectly set, beautifully structured Mini Butterscotch Tarts that are easy to handle and a joy to eat.
Conclusion:
If there’s one recipe I genuinely hope you carve out some time for in your kitchen, it’s this one. I’m truly convinced that these delightful tarts are more than just a dessert; they’re a little parcel of pure joy, a comforting embrace in every single bite. The irresistible blend of a perfectly flaky, buttery crust hugging a rich, creamy butterscotch filling is something truly special. It’s a classic flavor elevated, delivering that nostalgic warmth we all crave, yet presented in an elegant, bite-sized form that makes them simply irresistible. I’ve personally made these countless times for gatherings, for a simple treat after a long day, or just because, and they never fail to disappear almost as quickly as they appear on the table. They strike that perfect balance: sweet enough to satisfy any craving, yet sophisticated enough to impress even the most discerning palate. Trust me, the aroma alone as they bake will have you, and anyone else in your home, eagerly awaiting their first taste. These aren’t just any ordinary sweets; they are the quintessential example of comfort food perfected, scaled down to a charming, individual portion.
When it comes to serving these glorious treats, the beauty of these Mini Butterscotch Tarts truly shines through in their versatility. Of course, they are absolutely divine enjoyed simply as they are, fresh from the oven or at room temperature. The warm, gooey center and crisp crust need no embellishment to delight. However, if you’re looking to elevate the experience further, a delicate dollop of freshly whipped cream, perhaps infused with a hint of vanilla or a touch of bourbon, can add a luxurious counterpoint to the butterscotch richness. For an extra special indulgence, consider pairing them with a scoop of premium vanilla bean ice cream or even a coffee-flavored gelato; the cold, creamy contrast against the sweet tart is simply heavenly. They also make a fantastic addition to a dessert platter for any festive occasion, sitting pretty alongside other mini treats, or as a sophisticated accompaniment to your afternoon tea or after-dinner coffee. I’ve even served them chilled on a hot summer’s day, and they were surprisingly refreshing!
But why stop there? The world of flavor is your oyster, and these tarts are wonderfully adaptable to a few creative variations. For those who appreciate a salty-sweet symphony, a delicate sprinkle of flaky sea salt on top of each tart just after they come out of the oven will truly make the butterscotch sing. You could also fold in some finely chopped toasted pecans or walnuts into the butterscotch filling for an added layer of texture and nutty depth. For the chocolate lovers among us, a light drizzle of melted dark chocolate across the cooled tarts creates an exquisite visual and flavor combination. And for an adults-only version, a splash of good quality rum or a robust bourbon can be stirred into the butterscotch filling during the cooking process, lending a sophisticated warmth that’s utterly captivating. Imagine a ginger-snap crust replacing the traditional pastry for a spicy kick, or even a hint of cardamom or cinnamon for an unexpected aromatic twist. Don’t be afraid to experiment; that’s part of the fun of baking!
So, now it’s your turn! I genuinely hope you feel inspired to roll up your sleeves and give this recipe for Mini Butterscotch Tarts a try. I promise you, the effort is minimal compared to the incredible reward of sinking your teeth into these golden delights. There’s a special kind of satisfaction that comes from creating something so delicious from scratch, and these tarts offer that in spades. Whether you’re baking for a crowd, for your family, or simply for yourself (and trust me, you deserve it!), these mini tarts are a guaranteed hit. Once you’ve whipped up your own batch, I would absolutely love to hear about your experience. Did you add any unique twists? What did your family and friends think? Please, share your baking adventures and your beautiful creations. Connect with us, leave a comment below, or even share a photo. Your feedback and stories truly inspire me and our community of fellow food lovers. Happy baking, my friends!
Mini Butterscotch Tarts
These delightful Mini Butterscotch Tarts feature delicate, flaky pastry shells cradling a luscious, smooth butterscotch filling that melts in your mouth. They offer a perfect balance of sweet and salty caramel-like flavor, ideal for gatherings or as a comforting treat.
Ingredients
-
2 ½ cups (300g) all-purpose flour
-
1 teaspoon granulated sugar
-
½ teaspoon salt
-
1 cup (226g) unsalted butter, very cold, cubed
-
6-8 tablespoons ice water
-
1 large egg yolk, lightly beaten (for egg wash, optional)
-
½ cup (113g) unsalted butter
-
1 cup (200g) packed light brown sugar
-
½ teaspoon salt
-
1 cup (240ml) heavy cream
-
¼ cup (60ml) whole milk
-
2 tablespoons cornstarch
-
2 large egg yolks
-
1 ½ teaspoons pure vanilla extract
-
Whipped cream (optional garnish)
-
Flaky sea salt (optional garnish)
-
Chocolate shavings (optional garnish)
Instructions
-
Step 1
Whisk flour, granulated sugar, and salt in a bowl. Cut in very cold, cubed unsalted butter until coarse crumbs with pea-sized pieces remain. Gradually add 6-8 tablespoons ice water, mixing until dough just comes together. Form into a disk, wrap tightly, and refrigerate for at least 30 minutes (preferably 1 hour). -
Step 2
Preheat oven to 375°F (190°C). Lightly grease mini muffin tins if not non-stick. -
Step 3
On a lightly floured surface, roll chilled dough to about 1/8-inch thick. Use a 2.5-inch to 3-inch round cutter to cut circles. Carefully place each dough circle into the cups of the mini muffin tin, gently pressing to fit snugly. -
Step 4
Lightly prick the bottom of each shell with a fork. Line each with a small piece of parchment paper and fill with pie weights (or dried beans/rice). Bake for 10-12 minutes, or until edges are lightly golden. Remove weights and parchment. If desired, brush the bottoms with lightly beaten egg yolk and return to oven for another 3-5 minutes until set. Cool completely in the tins before removing. -
Step 5
In a medium saucepan, melt ½ cup unsalted butter over medium heat. Add 1 cup packed light brown sugar and ½ teaspoon salt. Stir constantly for 2-3 minutes until sugar is completely dissolved and the mixture is smooth and glossy. -
Step 6
In a separate small bowl, whisk together 1 cup heavy cream, ¼ cup whole milk, and 2 tablespoons cornstarch until lump-free. Gradually pour this mixture into the brown sugar mixture in the saucepan, whisking continuously. Bring to a gentle boil, then reduce heat to low and cook, stirring frequently, for 5-7 minutes until the mixture has thickened considerably and coats the back of a spoon. -
Step 7
Lightly whisk 2 large egg yolks in a small bowl. Slowly ladle about ½ cup of the hot butterscotch mixture into the egg yolks while whisking vigorously. Once tempered, slowly pour the egg yolk mixture back into the saucepan with the remaining butterscotch, whisking constantly. Continue to cook over low heat, stirring for another 2-3 minutes until the filling is very thick and glossy. -
Step 8
Remove the saucepan from the heat and stir in 1 ½ teaspoons pure vanilla extract. Pour the butterscotch filling into a heatproof bowl. Press plastic wrap directly onto the surface to prevent a skin from forming. Cool at room temperature for about 30 minutes, then refrigerate for at least 1-2 hours, or until completely chilled and firm enough to scoop. -
Step 9
Once both tart shells and butterscotch filling are completely cooled, generously fill each blind-baked tart shell with the chilled butterscotch filling using a small spoon or piping bag. Mound the filling slightly for a domed appearance. -
Step 10
For best texture and to ensure the filling is perfectly set, chill the assembled tarts in the refrigerator for at least another 30 minutes before serving. Garnish with a dollop of freshly whipped cream, a sprinkle of flaky sea salt, or delicate chocolate shavings, if desired.
Important Information
Nutrition Facts (Per Serving)
It is important to consider this information as approximate and not to use it as definitive health advice.
Allergy Information
Please check ingredients for potential allergens and consult a health professional if in doubt.


Leave a Comment