
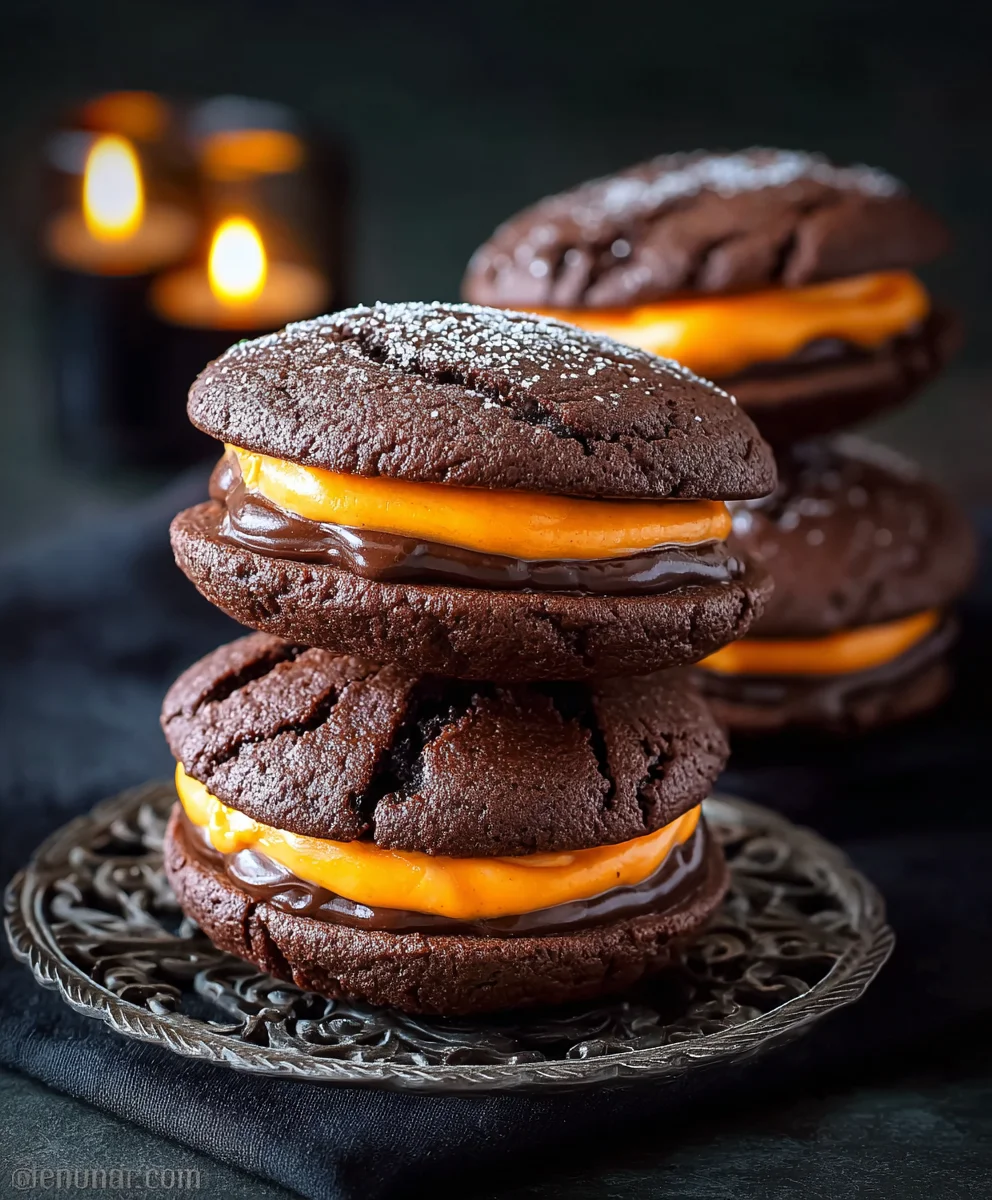
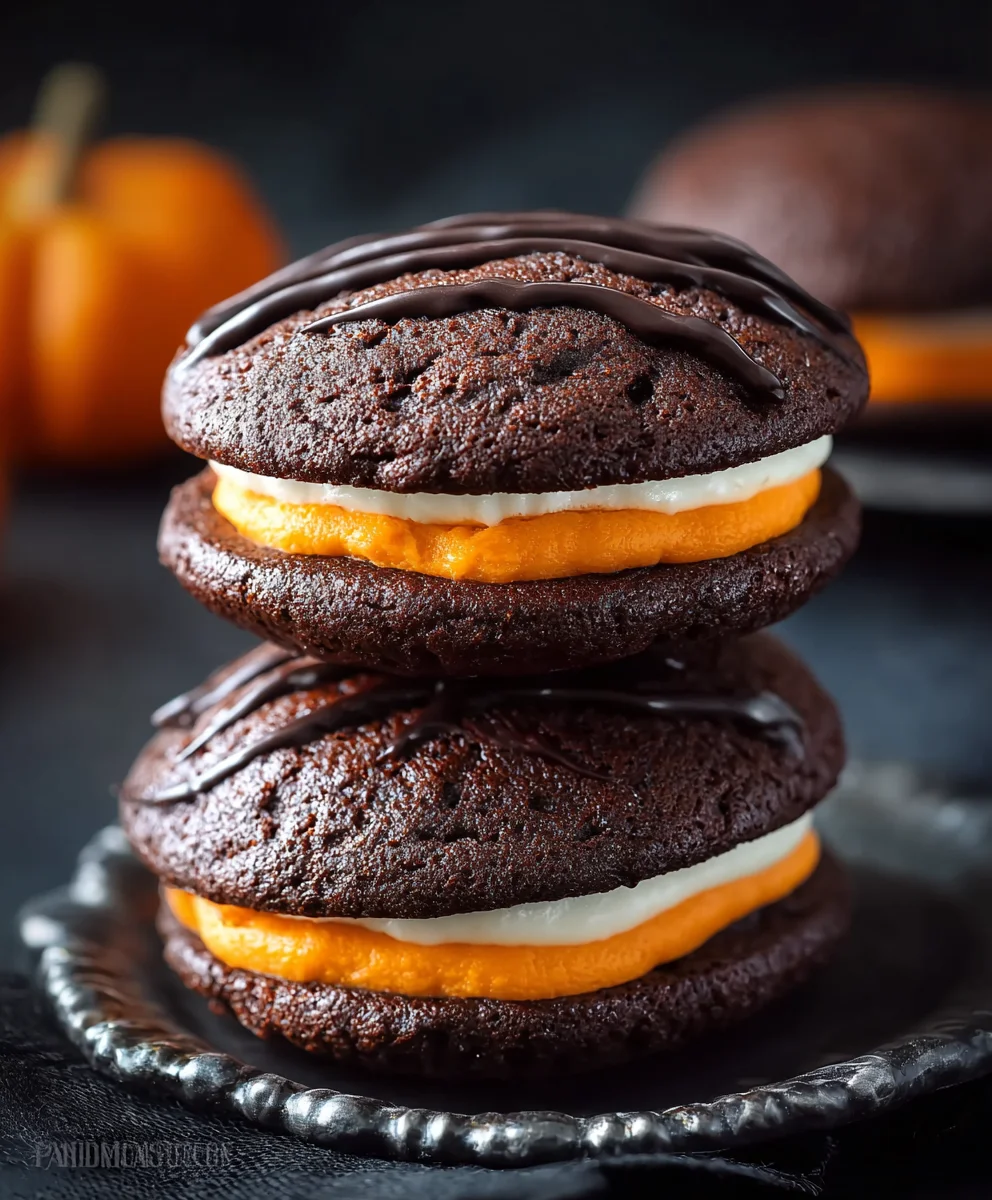
Halloween Whoopie Pies are more than just a spooky treat; they’re a portal to childhood delight and festive cheer. These little sandwiched delights capture the magic of the season, transforming humble ingredients into edible works of art that sparkle with Halloween spirit. There’s an undeniable joy in biting into a soft, cake-like cookie that yields to a creamy, sweet filling, and when you add the playful decorations of Halloween, the experience is elevated to pure enchantment. We love them because they’re incredibly customizable, allowing for a burst of creativity to match any Halloween theme, from ghostly white to monstrous green. What makes these Halloween Whoopie Pies truly special is their ability to bring people together, sparking smiles and creating lasting memories around the kitchen table or at any festive gathering.
Ingredients:
- 2 cups all-purpose flour
- 1/2 cup unsweetened cocoa powder
- 1 1/4 teaspoons baking soda
- 1/2 teaspoon baking powder
- 1/4 teaspoon salt
- 1/2 cup unsalted butter, softened (for the cookie dough)
- 1 cup granulated sugar
- 1 large egg
- 1 teaspoon vanilla extract (for the cookie dough)
- 1 cup whole milk
- 1/2 cup unsalted butter, softened (for the filling)
- 1 1/2 cups powdered sugar
- 1 teaspoon vanilla extract (for the filling)
- 2-3 tablespoons heavy cream
- Orange food coloring
Preparing the Spooky Cookie Dough
Preheat your oven to 350°F (175°C). Line two baking sheets with parchment paper. This is a crucial step to prevent sticking and ensure your Halloween Whoopie Pies lift off the sheet perfectly. In a medium bowl, whisk together the all-purpose flour, unsweetened cocoa powder, baking soda, baking powder, and salt. Whisking these dry ingredients ensures they are evenly distributed, which is key for consistent rise and texture in your whoopie pies. Set this bowl aside.
In a large bowl, cream together the softened 1/2 cup of unsalted butter and the granulated sugar using an electric mixer. Beat them until the mixture is light and fluffy, which usually takes about 2-3 minutes. This creaming process incorporates air into the butter and sugar, contributing to the tender texture of the cookies. Next, beat in the large egg and the 1 teaspoon of vanilla extract until well combined. Make sure the egg is fully incorporated before moving on to the next step.
Gradually add the dry ingredient mixture to the wet ingredients, alternating with the whole milk. Begin extract and end with the dry ingredients. This means you’ll add about a third of the dry ingredients, mix until just combined, then add half of the milk, mix, then another third of the dry, mix, the remaining milk, mix, and finally the last of the dry ingredients. Mix until just combined; overmixing can develop the gluten in the flour too much, resulting in tough cookies. The batter will be quite soft, almost like a thick cake batter, which is exactly what you want for soft and chewy whoopie pie cookies.
Baking the Halloween Whoopie Pie Shells
Drop rounded tablespoons of the cookie dough onto the prepared baking sheets, spacing them about 2 inches apart. I like to use a small cookie scoop to ensure uniform size, which helps with even baking and matching up the tops and bottoms later. You should aim for about 12-15 cookies per sheet, depending on how large you make your dollops.
Bake for 10-12 minutes, or until the edges are set and a toothpick inserted into the center comes out with moist crum extractbs attached. Be careful not to overbake, as this will result irum extractry, crumbly cookies instead of the soft, cake-like texture we’re aiming for in our Halloween Whoopie Pies. Let the cookies cool on the baking sheets for 2-3 minutes before transferring them to a wire rack to cool completely. It’s important that they cool fully before you attempt to fill them, otherwise, the filling will melt.
Crafting the Eerie Orange Filling
While the cookie shells are cooling, prepare the vibrant orange filling. In a large bowl, beat the softened 1/2 cup of unsalted butter until creamy and smooth. This forms the base of our delicious filling. Add the powdered sugar, 1 tablespoon at a time, mixing on low speed until it’s incorporated. As you add the powdered sugar, the mixture will become thicker.
Add the 1 teaspoon of vanilla extract and 2 tablespoons of heavy cream. Beat on medium-high speed until the filling is light and fluffy. If the filling is too thick, you can add the remaining tablespoon of heavy cream, a teaspoon at a time, until you reach your desired consistency. The filling should be smooth, spreadable, and hold its shape.
Now for the fun part: coloring! Add a few drops of orange food coloring to the filling. Start with a small amount and gradually add more until you achieve a bold, Halloween-worthy orange hue. Beat until the color is evenly distributed. Taste the filling and adjust sweetness if necessary, though the balance of butter, sugar, and vanilla is typically perfect for these Halloween Whoopie Pies.
Assembling the Spooky Treats
Once the cookie shells are completely cool, it’s time to assemble these delightful Halloween Whoopie Pies. Pair up your cooled cookie halves, trying to match similar sizes. Take one cookie half and spread a generous dollop of the orange filling onto the flat side. You can use a piping bag for a neater finish, or simply a spoon or offset spatula.
Gently place the matching cookie half on top of the filling and press down lightly to spread the filling to the edges. Repeat this process with the remaining cookie halves and filling. Ensure the filling peeks out slightly from the sides for that classic whoopie pie look. For an extra festive touch, you could gently press Halloween-themed sprinkles onto the sides of the filling before topping with the second cookie half. Store your completed Halloween Whoopie Pies in an airtight container in the refrigerator until ready to serve. They are best enjoyed within a few days.
Conclusion:
And there you have it – your very own batch of delightful Halloween Whoopie Pies! We’ve journeyed through creating these perfectly soft, cake-like cookies and their creamy, dreamy filling, transforming them into festive treats that are sure to be the star of any Halloween gathering. The vibrant colors and playful designs make them as fun to look at as they are to eat. Remember, the beauty of these Halloween Whoopie Pies lies in their versatility. Feel free to experiment with different food coloring for the filling or even add a touch of spice like cinnamon to the cookie dough for an extra layer of flavor. Don’t be afraid to get creative with your decorating! Whether you’re assembling them for a party or just enjoying a sweet afternoon treat, these Halloween Whoopie Pies are a guaranteed crowd-pleaser. So, go forth and bake with spooky glee!
Frequently Asked Questions:
Can I make the Halloween Whoopie Pies ahead of time?
Absolutely! You can bake the cookie portions up to two days in advance and store them in an airtight container at room temperature. The filling can also be made a day ahead and refrigerated. Assemble the Halloween Whoopie Pies just before serving for the best texture, or up to a few hours beforehand if you prefer them fully assembled.
What are some other decorating ideas for Halloween Whoopie Pies?
Beyond the classic frosting swirls, consider using edible googly eyes, sprinkles in Halloween themes (bats, ghosts, pumpkins), a drizzle of contrasting colored frosting, or even small candy pumpkins or ghosts pressed into the filling. You can also divide the filling into smaller portions and color them differently for a multi-colored effect.
Spooky Halloween Whoopie Pies – Easy & Delicious Treat
Delicious and easy Halloween-themed whoopie pies with a spooky orange filling.
Ingredients
-
2 cups all-purpose flour
-
1/2 cup unsweetened cocoa powder
-
1 1/4 teaspoons baking soda
-
1/2 teaspoon baking powder
-
1/4 teaspoon salt
-
1/2 cup unsalted butter, softened
-
1 cup granulated sugar
-
1 large egg
-
1 teaspoon vanilla extract
-
1 cup whole milk
-
1/2 cup unsalted butter, softened (for filling)
-
1 1/2 cups powdered sugar (for filling)
-
1 teaspoon vanilla extract (for filling)
-
2-3 tablespoons heavy cream (for filling)
-
Orange food coloring (for filling)
Instructions
-
Step 1
Preheat oven to 350°F (175°C). Line two baking sheets with parchment paper. Whisk together flour, cocoa powder, baking soda, baking powder, and salt in a medium bowl. Set aside. -
Step 2
In a large bowl, cream softened butter and granulated sugar until light and fluffy. Beat in the egg and 1 teaspoon vanilla extract until well combined. -
Step 3
Gradually add the dry ingredients to the wet ingredients, alternating with the milk, beginning and ending with dry ingredients. Mix until just combined. -
Step 4
Drop rounded tablespoons of dough onto prepared baking sheets, about 2 inches apart. Bake for 10-12 minutes, until edges are set and a toothpick comes out with moist crumbs. Cool on baking sheets for 2-3 minutes, then transfer to a wire rack to cool completely. -
Step 5
While cookies cool, beat softened butter for the filling until creamy. Gradually add powdered sugar, mixing on low speed. Add 1 teaspoon vanilla extract and 2 tablespoons heavy cream. Beat on medium-high speed until light and fluffy. Adjust consistency with additional heavy cream if needed. Add orange food coloring and beat until evenly distributed. -
Step 6
Assemble the whoopie pies by spreading filling onto the flat side of one cookie half and gently placing a matching cookie half on top. Store in an airtight container in the refrigerator.
Important Information
Nutrition Facts (Per Serving)
It is important to consider this information as approximate and not to use it as definitive health advice.
Allergy Information
Please check ingredients for potential allergens and consult a health professional if in doubt.

Leave a Comment