
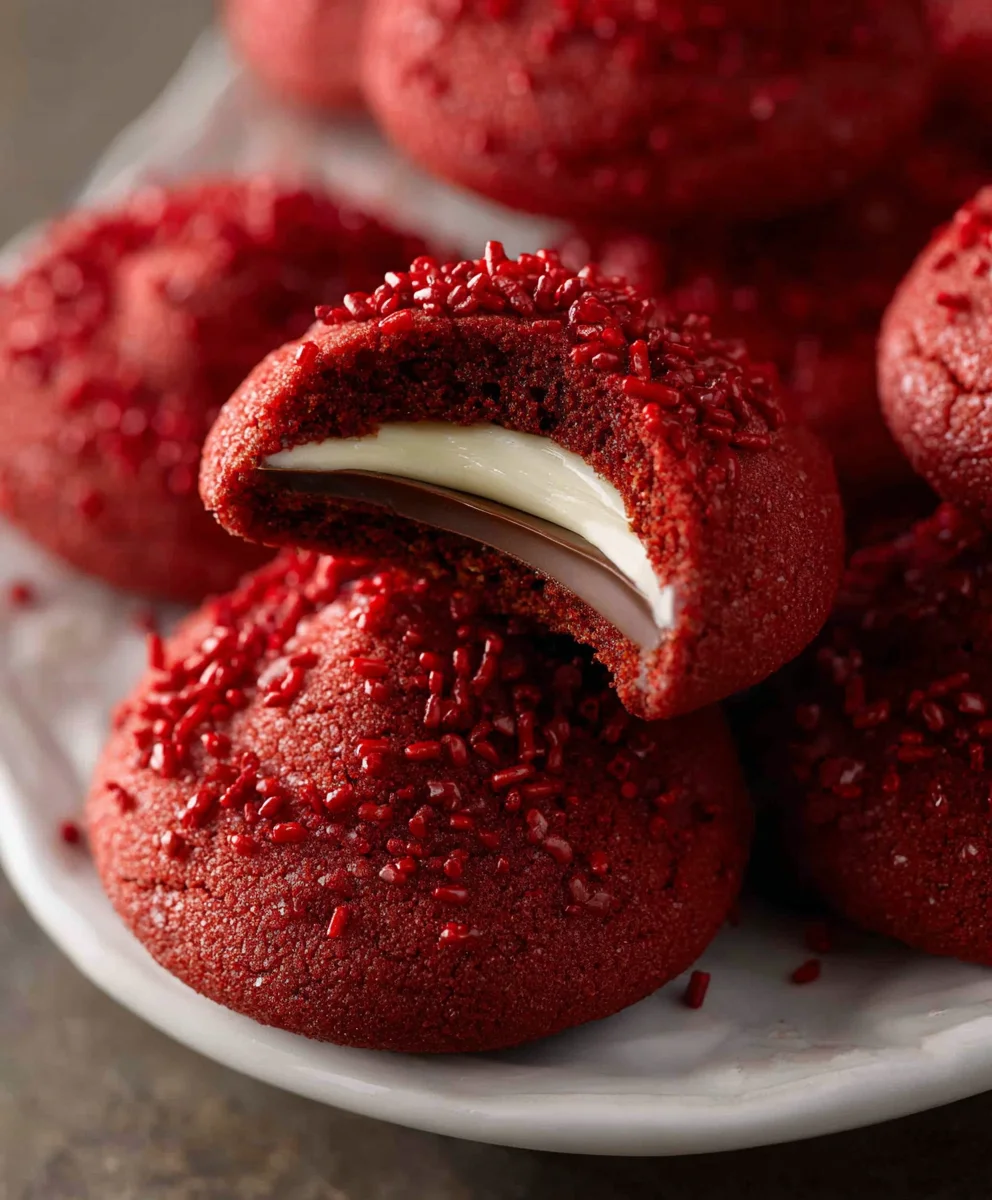
Hershey’s red velvet blossoms are more than just a cookie; they are a delightful explosion of festive flavor and a testament to classic baking with a vibrant twist. Imagin extracte the deep, rich hue of red velvet cake, infused with the unmistakable tang of cream cheese, all brought together in a perfectly formed, bite-sized blossom. What truly makes these Hershey’s red velvet blossoms so universally adored is their irresistible combination of textures and tastes. The slightly crisp edges give way to a wonderfully soft, chewy center, while the iconic Hershey’s Kiss nestled atop adds a burst of pure chocolatey bliss. It’s a harmonious dance of sweet and slightly tart, familiar yet exciting, making them a must-have for holidays, celebrations, or simply when you crave a touch of homemade magic. This recipe ensures you can capture that perfect balangin extract bringing a little piece of joy to your kitchen with every batch of Hershey’s red velvet blossoms.
Ingredients:
- 7 tablespoons butter (salted or unsalted, softened)
- 1/2 cup packed brown sugar
- 2 tablespoons granulated sugar
- 1 teaspoon vanilla extract
- 1 large egg yolk
- 1/4 teaspoon red food coloring gel
- 1 cup all-purpose flour
- 1 tablespoon unsweetened cocoa powder
- 1/2 teaspoon baking powder
- 1/4 teaspoon salt
- 1/4 cup red sanding sugar
- 18 Hershey’s chocolate kisses
Making the Red Velvet Dough
The foundation of these delightful Hershey’s red velvet blossoms lies in a tender, flavorful cookie dough. We’ll start by creaming the butter and sugars together to create a light and airy base. In a medium-sized mixing bowl, add your softened butter. Ensure it’s truly softened – not melted, but yielding to the touch – for the best creaming results. Add the packed brown sugar and granulated sugar to the bowl with the butter. Using an electric mixer on medium speed, or a sturdy whisk and some elbow grease, cream these ingredients together for about 2 to 3 minutes until the mixture is light in color and fluffy in texture. This step is crucial for creating a cookie that has a good crum extractb.
Next, we’ll incorporate the wet ingredients. Add the large egg yolk and vanilla extract to the creamed butter and sugar mixture. Beat on medium speed until well combined and no streaks of egg yolk remain. Now, for the signature color and subtle chocolate undertones of our Hershey’s red velvet blossoms, we add the red food coloring gel. Start with 1/4 teaspoon of red food coloring gel. It’s best to use gel coloring as it’s more concentrated and won’t add excess liquid to your dough, which can affect the texture. Mix until the color is evenly distributed throughout the dough, creating a vibrant, festive hue.
In a separate bowl, whisk together the dry ingredients: all-purpose flour, unsweetened cocoa powder, baking powder, and salt. Whisking these together ensures that the leavening agents and salt are evenly dispersed throughout the flour, preventing pockets of bitterness or uneven rising in your finished cookies. Gradually add this dry mixture to the wet ingredients, mixing on low speed until just combined. Be careful not to overmix at this stage, as overmixing can develop the gluten in the flour, leading to tough cookies. We want tender, melt-in-your-mouth red velvet blossoms!
Shaping and Baking the Blossoms
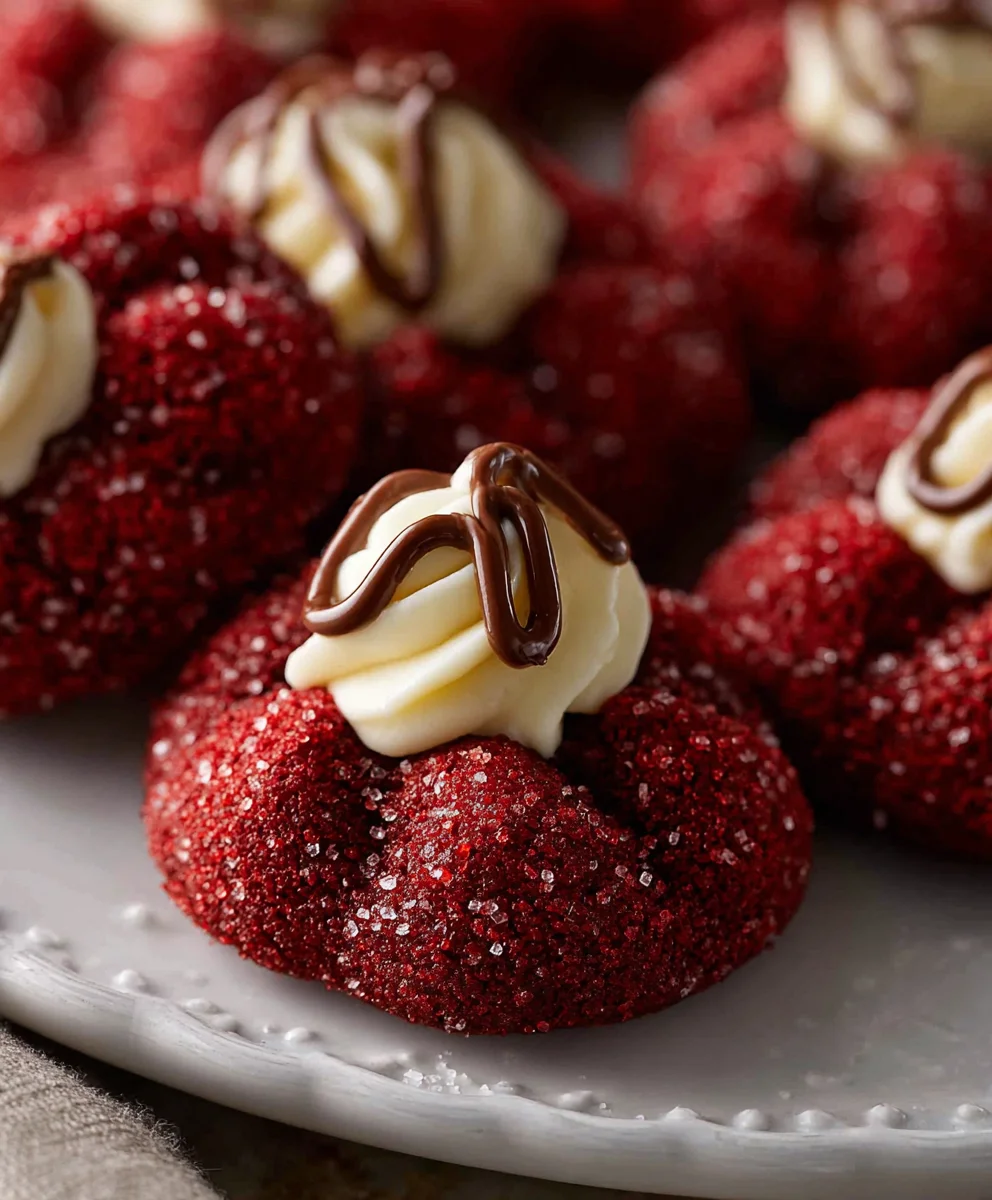
Once your red velvet dough has come together, it’s time to shape these beautiful cookies. Place the red sanding sugar in a shallow dish. This sugary coating will give our Hershey’s red velvet blossoms a lovely sparkle and a delightful crunch. Roll the dough into small balls, about 1 inch in diameter. You can use a cookie scoop for uniform size, or simply roll them between your palms. Once you have a dough ball, gently roll it in the red sanding sugar, ensuring it’s evenly coated on all sides.
Arrange the sugar-coated dough balls onto a baking sheet lined with parchment paper or a silicone baking mat. Leave about 2 inches of space between each cookie to allow for spreading. Now for the magic touch that makes these “blossoms.” Gently press one Hershey’s chocolate kiss into the center of each dough ball. Push it down just enough so it’s nestled into the dough, but not so far that it touches the baking sheet. The heat of the oven will melt the chocolate, allowing it to bloom outwards.
Preheat your oven to 350°F (175°C). Bake for 9 to 11 minutes, or until the edges of the cookies are set and the centers look slightly soft. The cookies will continue to cook and firm up as they cool. It’s important not to overbake them, as this can lead to dry cookies and hardened chocolate. As soon as they come out of the oven, you might notice the chocolate kisses have softened beautifully.
Cooling and Enjoying Your Hershey’s Red Velvet Blossoms
Allow the Hershey’s red velvet blossoms to cool on the baking sheet for a few minutes before carefully transferring them to a wire rack to cool completely. This initial cooling period on the baking sheet helps them set up properly. As they cool, the melted chocolate will firm up slightly, creating that iconic “blossom” appearance. You can gently press the chocolate again if it hasn’t spread as much as you’d like, but be careful as the dough will be hot. The contrast between the slightly crisp, red velvet cookie and the smooth, melted Hershey’s chocolate is simply irresistible.
These Hershey’s red velvet blossoms are perfect for holidays, parties, or just a special treat. They store well in an airtight container at room temperature for up to 3 days. Enjoy the festive color and the classic combination of red velvet and chocolate!
Conclusion:
I hope you’ve enjoyed learning how to create these delightful Hershey’s red velvet blossoms! They truly are a showstopper, perfect for any occasion from holiday gatherings to a simple sweet treat for yourself. The rich chocolate flavor of the Hershey’s Kiss perfectly complements the slightly tangy and deeply colored red velvet cookie base, creating a harmonious bite that’s both comforting and festive. The contrast of the crinkly cookie and the smooth chocolate is incredibly satisfying.
For serving, these blossoms are wonderful on their own, but they also pair beautifully with a glass of cold milk or a warm cup of coffee. You can arrange them on a platter for a beautiful dessert display, or package them in cookie tins for thoughtful homemade gifts. Don’t be afraid to get creative with variations! Consider adding a sprinkle of edible glitter or sanding sugar to the dough before baking for extra sparkle, or perhaps a hint of espresso powder to the dough to deepen the chocolate notes further. Experimenting is part of the fun, and you might just discover your new favorite twist on this classic cookie.
Now, go forth and bake with confidence! These Hershey’s red velvet blossoms are sure to impress and bring smiles to everyone who tries them. Happy baking!
Frequently Asked Questions:
Q: Can I use a different type of chocolate kiss?
A: While the recipe is specifically designed for Hershey’s Kisses, you can certainly experiment with other chocolate kiss varieties or even other small candies that melt similarly. However, be aware that the flavor profile might change. For the classic Hershey’s red velvet blossoms experience, the traditional milk chocolate Hershey’s Kiss is recommended.
Q: How should I store these cookies?
A: Once cooled completely, store your Hershey’s red velvet blossoms in an airtight container at room temperature for up to 3-4 days. This will help keep them soft and prevent them from drying out. You can also freeze them for longer storage; just ensure they are properly wrapped to avoid freezer burn.
Hershey’s Red Velvet Blossom Cookies
Deliciously easy Hershey’s Red Velvet Blossom Cookies with a vibrant red velvet cookie and a classic Hershey’s Kiss center.
Ingredients
-
7 tablespoons butter, softened
-
1/2 cup packed brown sugar
-
2 tablespoons granulated sugar
-
1 teaspoon vanilla extract
-
1 large egg yolk
-
1/4 teaspoon red food coloring gel
-
1 cup all-purpose flour
-
1 tablespoon unsweetened cocoa powder
-
1/2 teaspoon baking powder
-
1/4 teaspoon salt
-
1/4 cup red sanding sugar
-
18 Hershey’s chocolate kisses
Instructions
-
Step 1
In a medium bowl, cream together softened butter, brown sugar, and granulated sugar until light and fluffy. -
Step 2
Beat in the egg yolk, vanilla extract, and red food coloring gel until well combined. -
Step 3
In a separate bowl, whisk together flour, cocoa powder, baking powder, and salt. Gradually add dry ingredients to wet ingredients, mixing until just combined. -
Step 4
Roll dough into 1-inch balls and coat evenly in red sanding sugar. Place on a parchment-lined baking sheet. -
Step 5
Gently press one Hershey’s chocolate kiss into the center of each dough ball. -
Step 6
Bake at 350°F (175°C) for 9 to 11 minutes, until edges are set. -
Step 7
Let cool on the baking sheet for a few minutes before transferring to a wire rack to cool completely.
Important Information
Nutrition Facts (Per Serving)
It is important to consider this information as approximate and not to use it as definitive health advice.
Allergy Information
Please check ingredients for potential allergens and consult a health professional if in doubt.


Leave a Comment