
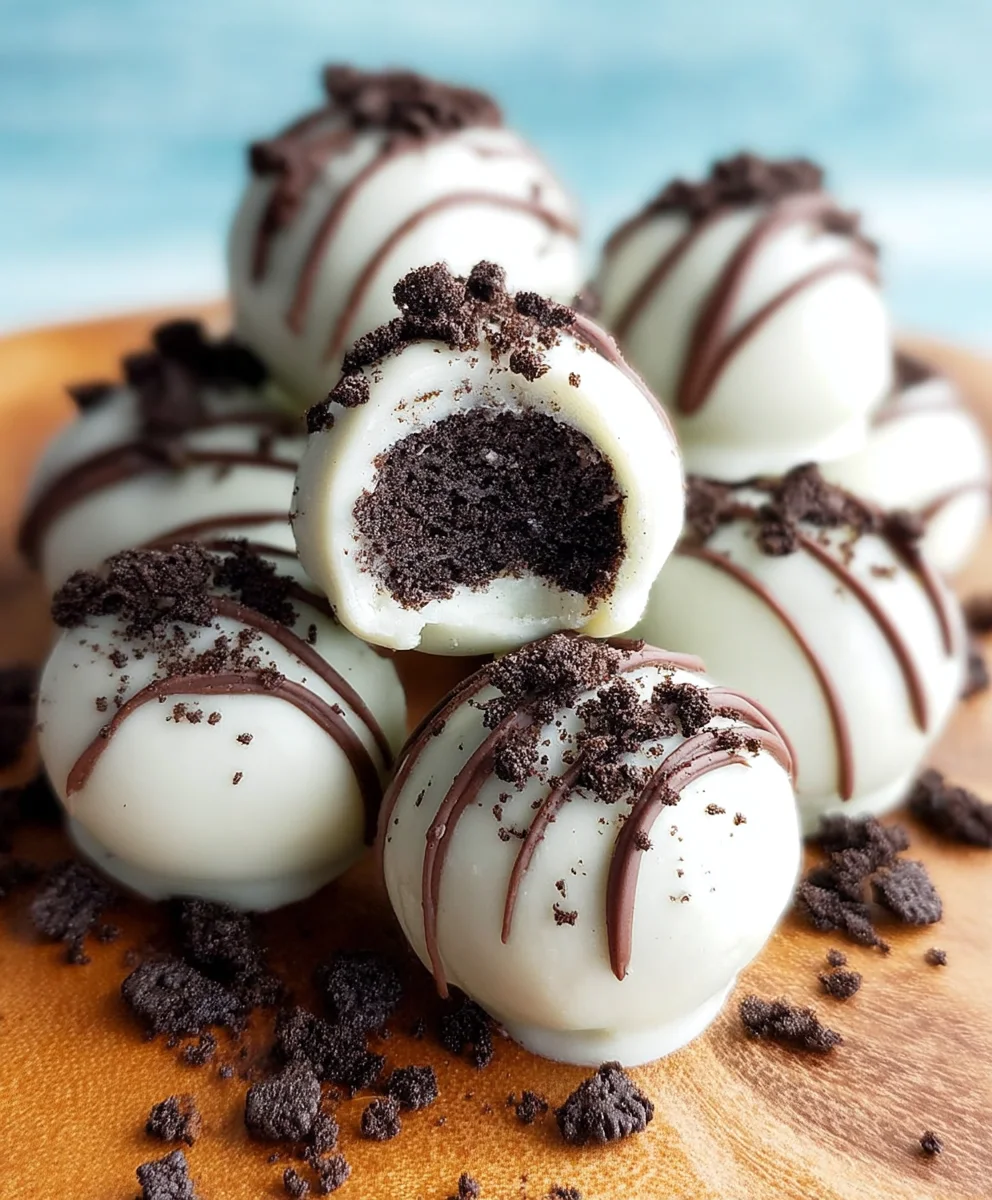
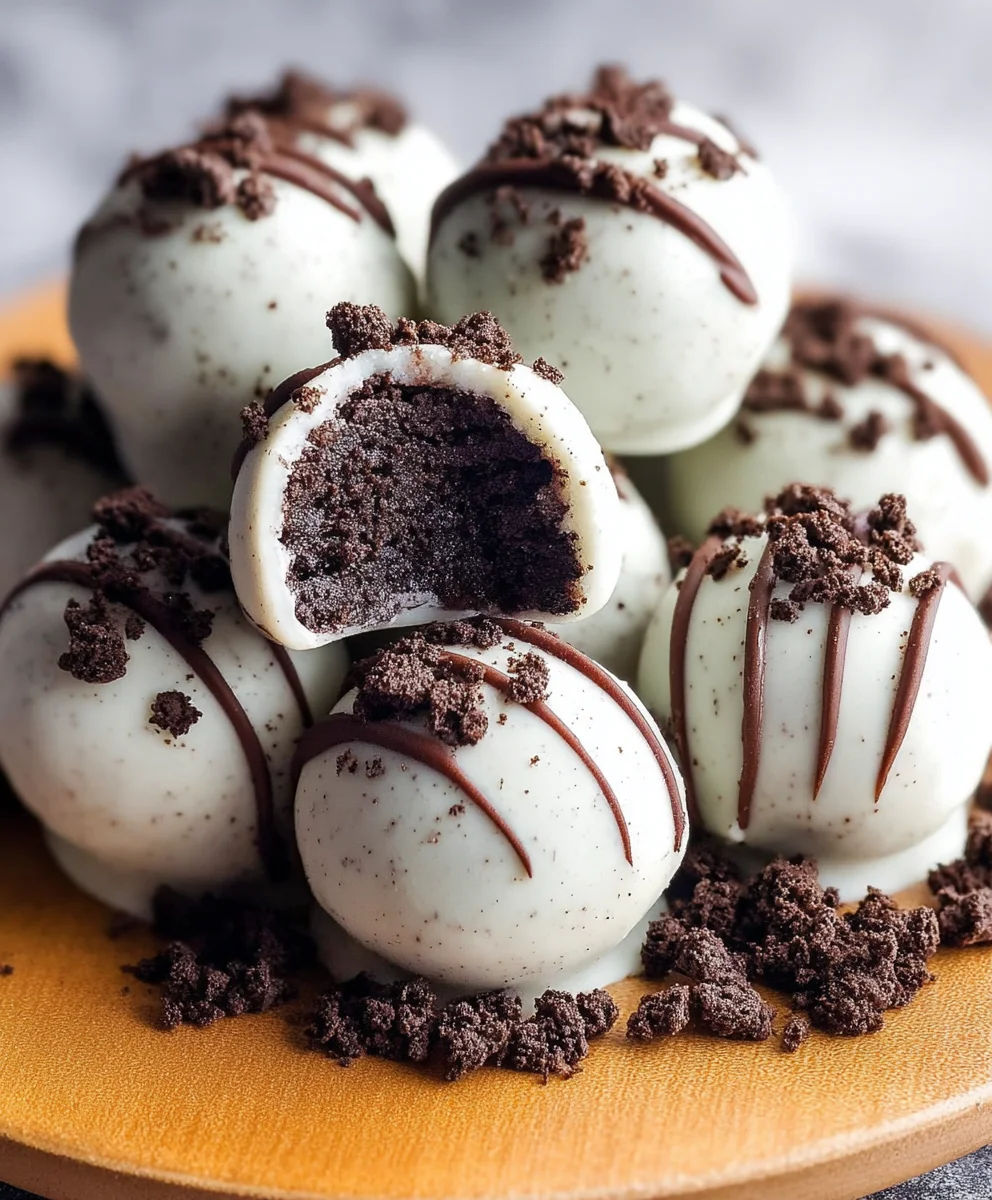
Easy Oreo Truffles (Oreo Balls) are the ultimate no-bake indulgence that will have everyone asking for your secret. If you’ve ever found yourself staring at a package of Oreos and dreaming of something a little more decadent, then prepare to be delighted. These simple yet sophisticated treats have captured hearts (and taste buds!) for a reason: they are unbelievably delicious, incredibly easy to make, and wonderfully versatile. The magic lies in transforming the humble Oreo cookie into a rich, creamy, and intensely chocolatey bite that melts in your mouth. They are perfect for parties, a thoughtful homemade gift, or simply as a special treat to brighten your day. What truly sets these Easy Oreo Truffles (Oreo Balls) apart is their deceptive simplicity; with just a handful of ingredients, you can create a dessert that tastes like it came from a gourmet chocolatier. Get ready to impress yourself and your loved ones with these irresistible little wonders!
Ingredients:
- 36 standard Oreo cookies (not double-stuffed)
- 1 (8 ounce) package full-fat cream cheese, softened
- 2 to 3 cups melted white chocolate (or semisweet chocolate, if preferred)
- 1/4 cup additional Oreo cookies, finely crushed (for topping)
Getting Started: Preparing Your Oreo Base
The foundation of these delightful Easy Oreo Truffles (Oreo Balls) is, of course, the Oreos themselves. For this recipe, you’ll need 36 standard Oreo cookies. It’s important to use the regular kind, not the double-stuffed, as the filling-to-cookie ratio is key for the right texture. We’re going to transform these cookies into a fine crum extractb that will bind beautifully with the cream cheese. The easiest way to achieve this is by using a food processor. Simply place all 36 cookies into the food processor and pulse until they are very finely ground. You want a consistency that resembles coarse sand, with no large chunks remaining. If you don’t have a food processor, don’t worry! You can achieve this by placing the cookies in a sturdy resealable plastic bag and using a rolling pin to crush them. Just be sure to get them as fine as possible. Once processed, set aside.
Next, you’ll need your cream cheese. Make sure it’s softened to room temperature. This is crucial for achieving a smooth, homogenous mixture without any lumps. If your cream cheese is still cold, it will be difficult to incorporate evenly, leading to a less desirable texture in your truffles. You can speed up the softening process by cutting the cream cheese into smaller cubes and letting it sit on the counter for about 30 minutes to an hour, or by gently microwaving it for a few seconds at a time, being careful not to let it melt.
Combining the Magic: The Oreo and Cream Cheese Mixture
Now it’s time to bring the two main components together. In a large mixing bowl, add the softened cream cheese. Begin extract to beat the cream cheese with an electric mixer on medium speed until it’s light and fluffy. This will take about 1-2 minutes. Don’t overbeat it, but you want it smooth and airy.
Once the cream cheese is adequately softened and fluffed, gradually add the finely crushed Oreo cookies to the bowl. Start mixing on low speed, then gradually increase the speed to medium. Continue to mix until everything is thoroughly combined. You’ll know it’s ready when the mixture is uniform in color and texture, with no streaks of cream cheese visible. It should hold together when you press it between your fingers. This mixture will be quite firm and slightly sticky, which is exactly what we want.
Shaping the Truffles: Rolling into Perfect Balls
This is where your Easy Oreo Truffles (Oreo Balls) start to take their iconic shape. Take about a tablespoon of the Oreo and cream cheese mixture at a time. Roll it between your palms to form a compact ball. Aim for balls that are roughly 1 inch in diameter. It helps to work relatively quickly, as the mixture can become softer as it warms in your hands. If it gets too sticky, you can pop the bowl back into the refrigerator for about 10-15 minutes to firm it up slightly.
As you roll each ball, place it on a baking sheet that has been lined with parchment paper. This parchment paper is essential for preventing the truffles from sticking to the baking sheet, making them easier to handle later. Continue this process until you have used up all the Oreo and cream cheese mixture. You should end up with approximately 36-40 truffle balls, depending on how large you make them. Once all the balls are rolled, place the entire baking sheet into the refrigerator for at least 30 minutes. This chilling period is vital. It firms up the truffle balls significantly, making them much easier to coat in chocolate without falling apart or losing their shape.
The Chocolate Coating: Dipping and Decorating
The final touch that elevates these to Easy Oreo Truffles (Oreo Balls) is the luscious chocolate coating. You’ll need 2 to 3 cups of melted chocolate. White chocolate is a classic choice for Oreo truffles, offering a lovely visual contrast, but you can absolutely use semisweet chocolate if that’s your preference. To melt the chocolate, you can use a double boiler or the microwave. For the microwave method, place the chocolate chips or chopped chocolate in a microwave-safe bowl and heat in 30-second intervals, stirring well after each interval, until smooth and fully melted. Be patient and don’t overheat it, as burnt chocolate is unsalvageable.
Once your chocolate is melted and smooth, it’s time to dip the chilled truffle balls. Take one chilled truffle ball at a time from the refrigerator. Using a fork or a dipping tool, carefully dip each ball into the melted chocolate, ensuring it’s completely coated. Let any excess chocolate drip back into the bowl. You can gently tap the fork on the side of the bowl to help with this. Place the coated truffle back onto the parchment-lined baking sheet.
While the chocolate is still wet, this is the perfect time to add your decorative topping. Sprinkle the finely crushed additional Oreo cookies over the top of each truffle. This not only adds a beautiful visual appeal but also a delightful crunch and extra Oreo flavor. Work relatively quickly so the chocolate doesn’t set before you can add the topping. Repeat this dipping and decorating process for all the truffle balls.
Setting and Enjoying Your Easy Oreo Truffles
Once all your Easy Oreo Truffles (Oreo Balls) are dipped and decorated, place the entire baking sheet back into the refrigerator. Allow them to chill for at least another 30 minutes, or until the chocolate coating is completely set and firm. This ensures the truffles hold their shape and the chocolate doesn’t smudge when you handle them.
For the best flavor and texture, it’s recommended to let the truffles sit at room temperature for about 10-15 minutes before serving. This allows the cream cheese filling to soften slightly, making it even more decadent. You can store these Easy Oreo Truffles (Oreo Balls) in an airtight container in the refrigerator for up to a week. They make fantastic gifts or a delightful treat for any occasion.
Conclusion:
There you have it! Creating these delightful Easy Oreo Truffles (Oreo Balls) is a truly rewarding experience, offering a simple yet decadent treat that’s perfect for any occasion. We’ve covered everything from the basic ingredients and straightforward steps to ensure your success. The rich chocolate coating combined with the creamy, cookie-infused center makes these a crowd-pleasing dessert that’s surprisingly easy to master.
These Easy Oreo Truffles (Oreo Balls) are wonderfully versatile. Serve them chilled as a sweet bite after dinner, arrange them on a platter for a party, or package them in a decorative box for a thoughtful homemade gift. They pair beautifully with a cup of coffee or a glass of milk.
Don’t be afraid to get creative with variations! You can experiment with different types of chocolate for dipping, like milk, dark, or white chocolate. Consider adding a sprinkle of sea salt on top of the chocolate, rolling some truffles in crushed nuts, or even swirling in a little food coloring for a festive touch.
We genuinely hope you enjoy making and savoring these Easy Oreo Truffles (Oreo Balls) as much as we do. They are a testament to how simple ingredients can transform into something truly special. So gather your loved ones, put on some music, and have fun in the kitchen!
Frequently Asked Questions about Easy Oreo Truffles (Oreo Balls):
Q1: How should I store my Easy Oreo Truffles (Oreo Balls)?
For the best texture and flavor, it’s recommended to store your Easy Oreo Truffles (Oreo Balls) in an airtight container in the refrigerator. They will keep well for up to a week. When you’re ready to serve them, allow them to sit at room temperature for about 10-15 minutes for a slightly softer bite.
Q2: Can I make the Easy Oreo Truffles (Oreo Balls) ahead of time?
Absolutely! These Easy Oreo Truffles (Oreo Balls) are perfect for making ahead. Once they are fully set in the refrigerator, they can be stored for several days. This makes them an excellent choice for holiday baking or when you need a dessert ready for unexpected guests.
Easy Oreo Truffles – Simple Oreo Balls Recipe
A simple and delicious recipe for classic Oreo truffles, also known as Oreo balls, perfect for any occasion.
Ingredients
-
36 standard Oreo cookies (not double-stuffed)
-
1 (8 ounce) package full-fat cream cheese, softened
-
2 to 3 cups melted white chocolate (or semisweet chocolate)
-
1/4 cup additional Oreo cookies, finely crushed (for topping)
Instructions
-
Step 1
Process the 36 Oreo cookies in a food processor until they resemble coarse sand. Alternatively, place them in a resealable bag and crush with a rolling pin. -
Step 2
In a large mixing bowl, beat the softened cream cheese with an electric mixer on medium speed until light and fluffy (about 1-2 minutes). Gradually add the crushed Oreos and mix on low, then medium speed until thoroughly combined and the mixture holds together. -
Step 3
Roll the Oreo and cream cheese mixture into approximately 1-inch diameter balls. Place them on a parchment-lined baking sheet and refrigerate for at least 30 minutes to firm up. -
Step 4
Melt the white or semisweet chocolate using a double boiler or microwave in 30-second intervals, stirring until smooth. Dip each chilled truffle ball into the melted chocolate, ensuring it’s fully coated, and let excess chocolate drip off. -
Step 5
While the chocolate is still wet, sprinkle the finely crushed additional Oreo cookies over the top of each truffle. Place the coated truffles back onto the parchment-lined baking sheet. -
Step 6
Refrigerate the finished truffles for at least another 30 minutes, or until the chocolate coating is completely set. Allow to sit at room temperature for 10-15 minutes before serving for optimal texture.
Important Information
Nutrition Facts (Per Serving)
It is important to consider this information as approximate and not to use it as definitive health advice.
Allergy Information
Please check ingredients for potential allergens and consult a health professional if in doubt.
Leave a Comment