

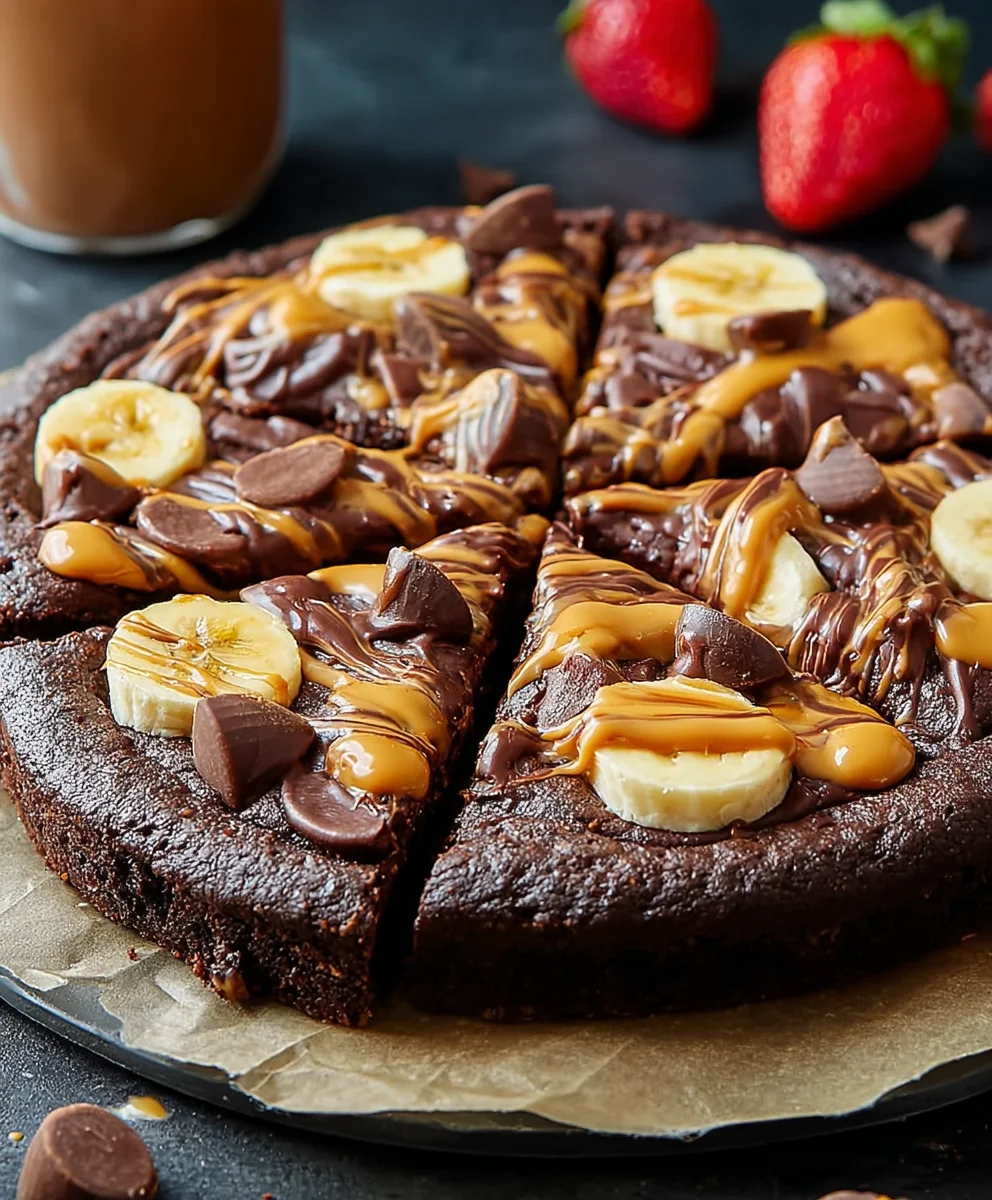
Chocolate Peanut Butter Brownie Pizza is more than just a dessert; it’s a decadent dream brought to life on a plate, a symphony of sweet and salty that has captivated taste buds everywhere. Imagin extracte the rich, fudgy depth of a perfectly baked brownie, transformed into a glorious, shareable pizza crust, then generously adorned with swirls of creamy, irresistible peanut butter and a cascade of luscious chocolate ganache. It’s no wonder this creation has become a beloved indulgence for celebrations, casual get-togethers, or simply when that craving for something truly extraordinary strikes. What sets the Chocolate Peanut Butter Brownie Pizza apart is its ingenious fusion of two classic comfort foods into one spectacular package, offering a delightful textural contrast and an explosion of familiar yet exhilarating flavors. Get ready to embark on a culinary adventure that promises pure, unadulterated bliss with every single bite.
Ingredients:
- 1 1/4 cup REESE Spreads peanut butter chocolate (this is the key to that rich, decadent flavor and gooey texture!)
- 2 large eggs (these act as binders and add to the fudgy consistency)
- 1/2 cup all-purpose flour (just enough to give our brownie pizza structure without making it cakey)
- 1/2 teaspoon salt (enhances all the sweet flavors and balances the richness)
- 1/3 cup REESE Spreads peanut butter chocolate (for a luscious topping swirl)
- 1 ripe banana, thinly sliced (adds a lovely natural sweetness and soft texture)
- 4 medium strawberries, hulled and thinly sliced (for a pop of freshness and a beautiful visual contrast)
Baking the Brownie Base
-
Preheating and Preparation:
Begin extract by preheating your oven to 350°F (175°C). This ensures your brownie pizza bakes evenly. Next, prepare your baking surface. I find that lining a baking sheet with parchment paper is the easiest way to go. This not only prevents sticking but also makes cleanup a breeze. If you don’t have parchment paper, you can lightly grease and flour a baking sheet, but parchment is definitely my preferred method for this recipe.
-
Mixing the Brownie Batter:
In a medium-sized mixing bowl, combine the 1 1/4 cups of REESE Spreads peanut butter chocolate with the 2 large eggs. Whisk these together vigorously until they are well incorporated and the mixture is smooth and glossy. It might look a little unusual at first, but keep whisking! Then, gradually add the 1/2 cup of all-purpose flour and the 1/2 teaspoon of salt to the wet ingredients. Fold these dry ingredients in gently until just combined. Be careful not to overmix at this stage; overmixing can lead to tough brownies. You want a thick, luscious batter that smells absolutely divine.
-
Forming and Baking the Brownie Pizza:
Spoon the brownie batter onto your prepared baking sheet. Using a spatula or the back of a spoon, spread the batter out into a circular shape, aiming for about a 9- to 10-inch diameter. Think of it like making a pizza crust, but much softer and more decadent. Don’t worry about making it perfectly round; a rustic look is part of its charm! Place the baking sheet in your preheated oven and bake for 15 to 20 minutes. You’ll know it’s ready when the edges are set and a toothpick inserted into the center comes out with moist crum extractbs attached, not wet batter. It should be fudgy in the center, not completely dry.
Adding the Toppings
-
Swirling in the Peanut Butter Chocolate:
Once the brownie base is out of the oven and has cooled slightly on the baking sheet for about 5 minutes – this is crucial so it doesn’t completely melt the topping – it’s time for the glorious topping. Dollop the remaining 1/3 cup of REESE Spreads peanut butter chocolate over the warm brownie base. You can do this in random splotches all over the surface. Then, using a knife or a toothpick, gently swirl the topping into the brownie base. You want to create ribbons and pockets of the peanut butter chocolate goodness throughout. This adds another layer of intense flavor and a beautiful marbled effect.
-
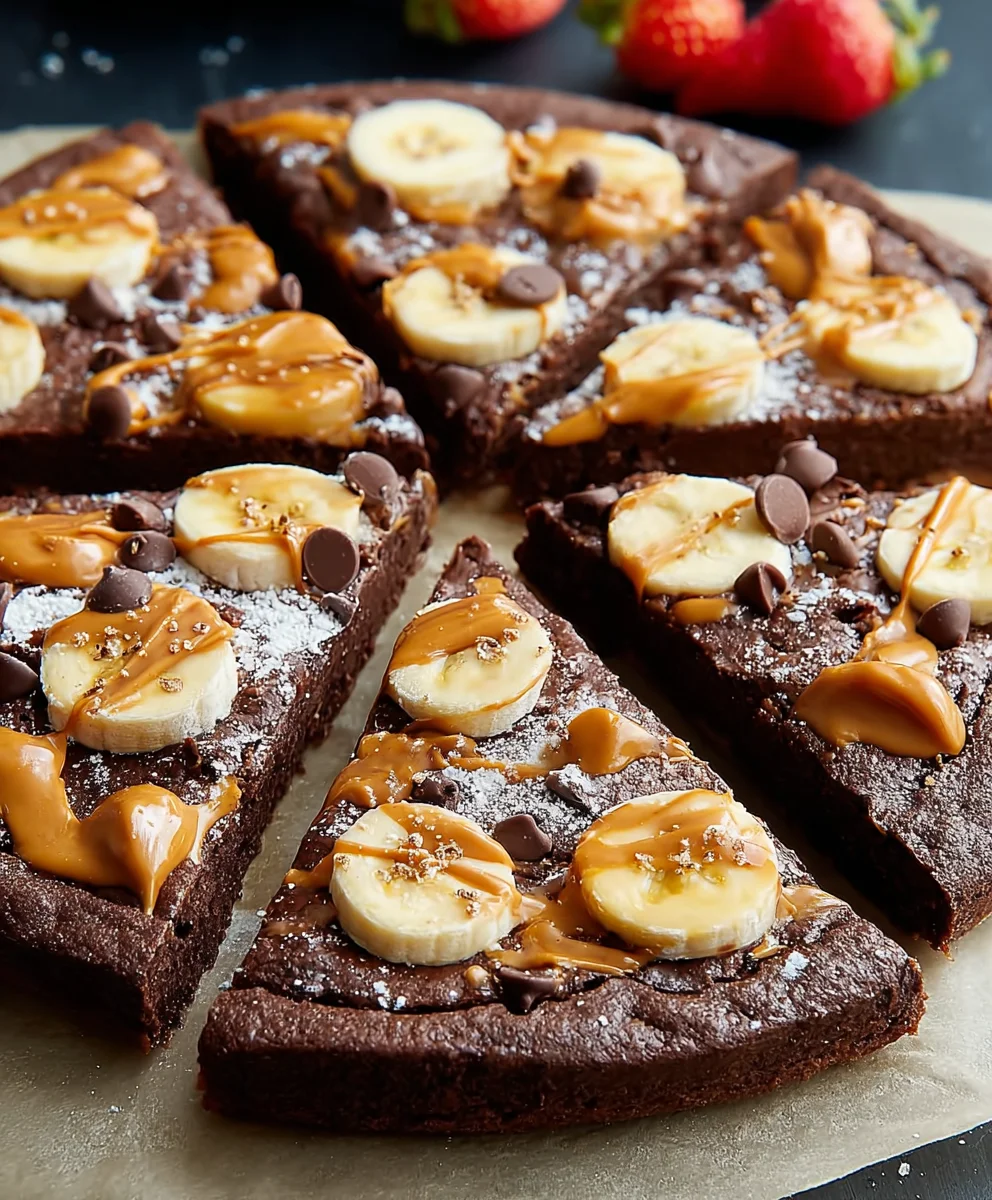
Now for the fresh, vibrant finishing touches! Arrange the thinly sliced banana and the thinly sliced strawberries over the swirled peanut butter chocolate. Distribute them evenly so that every slice of your Chocolate Peanut Butter Brownie Pizza gets a taste of both fruits. The sweetness of the banana complements the rich chocolate and peanut butter beautifully, while the slight tartness of the strawberries cuts through the richness, creating a perfectly balanced bite.
Conclusion:
There you have it – your guide to creating the absolutely divine Chocolate Peanut Butter Brownie Pizza! This dessert is a showstopper, combining the rich decadence of a brownie with the delightful sweetness of a pizza crust, all topped with luscious peanut butter swirls. It’s the perfect treat for any occasion, from casual get-togethers to special celebrations. Imagin extracte the smiles you’ll bring to your loved ones’ faces with this unique and incredibly satisfying creation! Don’t be afraid to get creative and make it your own; the joy of baking is in the personal touch.
For serving suggestions, this Chocolate Peanut Butter Brownie Pizza is fantastic on its own, but a scoop of vanilla ice cream or a drizzle of extra chocolate ganache takes it to another level. You can also garnish it with chopped peanuts for an extra crunch.
When it comes to variations, consider adding chocolate chips to the brownie base for an even more intense chocolate experience, or swirl in some caramel for a sweet and salty twist. For a healthier option, you could experiment with different types of flour or a sugar substitute. The possibilities are truly endless! Embrace the fun of baking and enjoy every delicious bite of your homemade Chocolate Peanut Butter Brownie Pizza. You’ve got this!
Frequently Asked Questions:
Q1: How should I store leftover Chocolate Peanut Butter Brownie Pizza?
Leftover Chocolate Peanut Butter Brownie Pizza can be stored in an airtight container at room temperature for up to two days, or in the refrigerator for up to four days. For longer storage, you can wrap individual slices tightly and freeze them for up to two months. Thaw at room temperature before enjoying.
Q2: Can I make the Chocolate Peanut Butter Brownie Pizza crust from scratch?
Absolutely! While the recipe often uses store-bought pizza dough for convenience, you can certainly make your own brownie batter crust. Prepare your favorite brownie recipe, pour it into a greased pizza pan, and bake it partially before adding the peanut butter swirl and finishing the bake. Adjust the baking time as needed to ensure the brownie is cooked through.
Q3: What are some topping ideas for the Chocolate Peanut Butter Brownie Pizza?
Beyond the peanut butter swirl, get creative with toppings! Consider adding mini chocolate chips, chopped Reese’s Peanut Butter Cups, sprinkles, a dusting of powdered sugar, or even fresh raspberries for a pop of color and tartness. A drizzle of white chocolate or caramel sauce also works wonderfully.
Chocolate Peanut Butter Brownie Pizza
A decadent dessert pizza with a rich, fudgy brownie base and a swirl of peanut butter chocolate topping, adorned with fresh banana and strawberry slices.
Ingredients
-
1 1/4 cup REESE Spreads peanut butter chocolate
-
2 large eggs
-
1/2 cup all-purpose flour
-
1/2 teaspoon salt
-
1/3 cup REESE Spreads peanut butter chocolate
-
1 ripe banana, thinly sliced
-
4 medium strawberries, hulled and thinly sliced
Instructions
-
Step 1
Preheat oven to 350°F (175°C) and line a baking sheet with parchment paper. -
Step 2
In a bowl, whisk together 1 1/4 cups REESE Spreads peanut butter chocolate and 2 eggs until smooth. Gradually fold in 1/2 cup all-purpose flour and 1/2 teaspoon salt until just combined. -
Step 3
Spread the brownie batter into a 9- to 10-inch circle on the prepared baking sheet. Bake for 15-20 minutes, or until edges are set and a toothpick comes out with moist crumbs. -
Step 4
Let the brownie base cool for 5 minutes. Dollop the remaining 1/3 cup REESE Spreads peanut butter chocolate over the warm base and gently swirl it in. -
Step 5
Arrange the sliced banana and strawberries over the swirled topping.
Important Information
Nutrition Facts (Per Serving)
It is important to consider this information as approximate and not to use it as definitive health advice.
Allergy Information
Please check ingredients for potential allergens and consult a health professional if in doubt.

Leave a Comment