
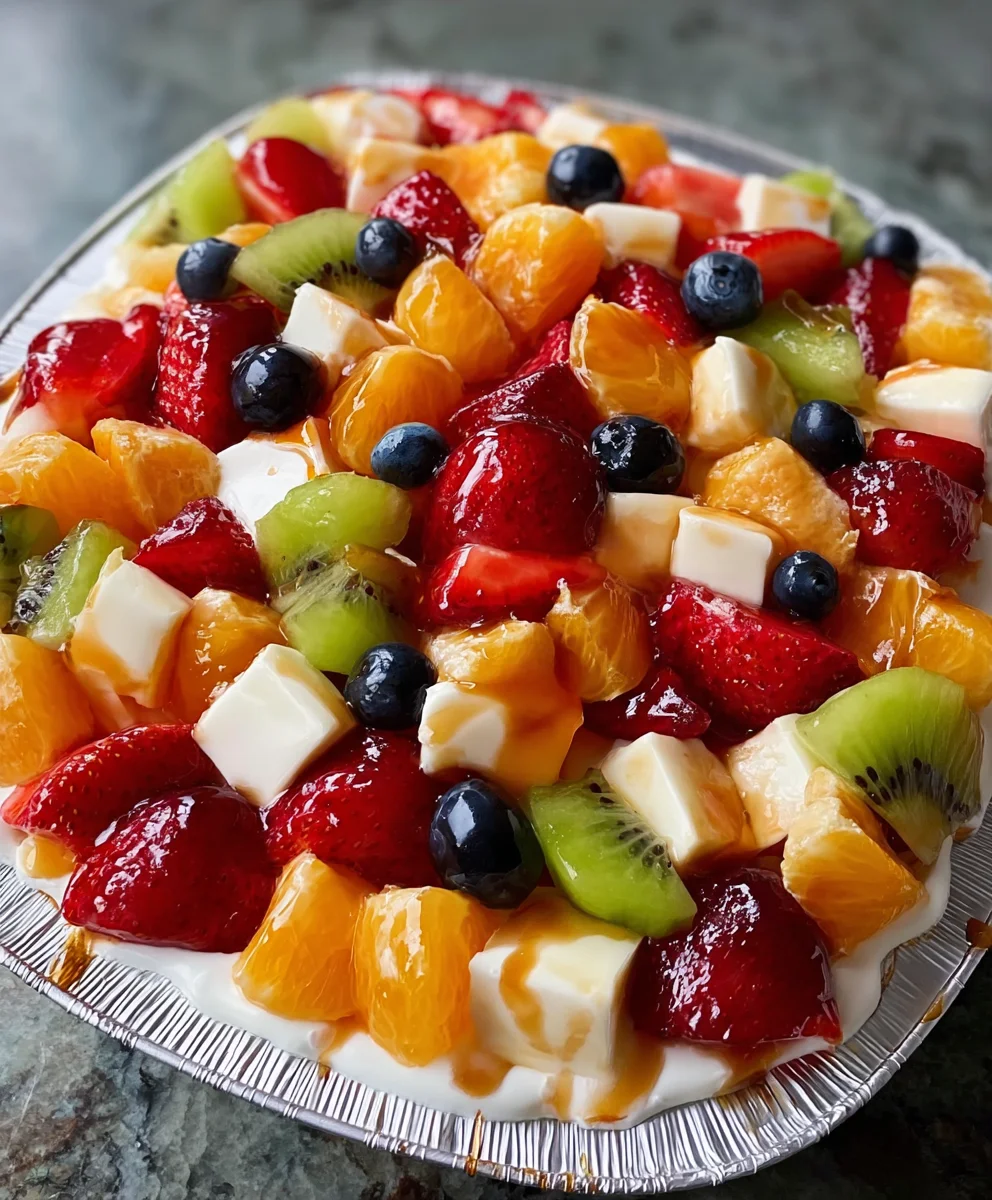
Cheesecake Fruit Salad is not merely a dish; it’s a delightful revelation, transforming the familiar into something truly extraordinary. Imagine a vibrant medley of your favorite seasonal fruits, each bursting with natural sweetness and crispness, all lovingly enveloped in a rich, velvety cheesecake-inspired cream. This ingenious creation takes the humble fruit salad to an entirely new level of indulgence, offering all the beloved flavors of a classic cheesecake without the need for baking or extensive preparation. It’s a compelling hook for any gathering, promising both elegance and ease.
I find that this particular recipe shines as a testament to culinary ingenuity. While fruit salads have graced tables for centuries, celebrating the bounty of nature, the addition of a creamy, tangy cheesecake base is a relatively modern, yet incredibly popular, twist. It’s quickly become a go-to for many, including myself, when seeking a dessert that feels luxurious but remains incredibly straightforward to assemble. People adore this Cheesecake Fruit Salad for its incredible balance of flavors and textures—the juicy snap of fresh berries and melon contrasting beautifully with the smooth, tangy, and subtly sweet cream. It’s the perfect light yet decadent treat, ideal for brunches, potlucks, or simply a refreshing finish to any meal, providing both convenience and an unforgettable taste sensation that keeps everyone coming back for more.
Ingredients:
- For the Creamy Cheesecake Dressing:
- 8 ounces (about 226g) cream cheese: Make sure it’s full-fat and softened to room temperature. This is absolutely crucial for a smooth, lump-free dressing, my friends! I usually take it out of the fridge at least an hour before I plan to start, sometimes even two if my kitchen is chilly.
- 1/2 cup (113g) granulated sugar: Or powdered sugar, if you prefer an even finer texture that melts seamlessly. I often opt for powdered sugar to guarantee no graininess whatsoever in my dressing.
- 1 teaspoon pure vanilla extract: Don’t skimp on this! Good quality vanilla makes all the difference in achieving that lovely, authentic cheesecake flavor. It’s truly a foundational flavor for our Cheesecake Fruit Salad.
- 1/4 teaspoon almond extract (optional, but highly recommended!): Just a tiny touch elevates the flavor profile beautifully, giving it that little something extra that makes people ask for your secret ingredient. It pairs wonderfully with most fruits.
- 1/2 cup (120ml) heavy whipping cream: Chilled, please! This is what will make our dressing light, airy, and truly luscious, mimicking that wonderful, fluffy cheesecake texture we all adore.
- 2 tablespoons fresh lemon juice (optional, for a brighter flavor): If your chosen fruits aren’t particularly tart, a little splash of fresh lemon juice cuts through the richness and really brightens up the whole dish, preventing it from tasting too heavy. It’s my personal preference for a balanced flavor.
- For the Fresh Fruit Medley: (Here’s where you can truly make this Cheesecake Fruit Salad your own, playing with colors and textures!)
- 2 cups fresh strawberries: Hulled and quartered. I love their vibrant red color and the sweet-tart burst they bring to every bite.
- 1 cup fresh blueberries: Rinsed and gently dried. They add a lovely pop of deep blue-purple and are packed with antioxidants!
- 1 cup fresh raspberries: Rinsed gently and dried. Their delicate texture and intense, slightly tart flavor are just divine, offering a lovely contrast.
- 1 cup fresh blackberries: Rinsed gently and dried. A gorgeous deep hue and earthy sweetness that complements the other berries so well.
- 2 cups green grapes: Halved. Seedless, of course! They add a refreshing crunch and a lovely sweet juiciness.
- 2 cups red grapes: Halved. The mix of green and red grapes creates such a stunning visual appeal and varied sweetness.
- 1 large mango: Peeled, pitted, and diced into bite-sized pieces. Tropical sweetness and a silky texture for a delightful contrast. Choose a ripe, fragrant one!
- 2 ripe kiwis: Peeled and sliced into half-moons or quarters. Their unique tang and vivid green color are fantastic for both flavor and aesthetics.
- 1 large banana (optional): Sliced. If you’re adding banana, I highly recommend doing so just before serving to prevent browning and maintain its best texture.
- 1 cup cantaloupe or honeydew melon (optional): Cubed. Adds another layer of refreshing sweetness and juiciness, especially lovely on a warm day.
- 1/2 cup toasted shredded coconut (for garnish, optional): Adds a wonderful texture, a hint of nutty sweetness, and a lovely tropical flair.
- Fresh mint leaves (for garnish, optional): A few sprigs or finely chopped leaves make the final presentation absolutely beautiful and add a refreshing aroma that elevates the entire dish.
Preparing the Creamy Cheesecake Dressing
- Soften the Cream Cheese: First things first, you’ll want to ensure your full-fat cream cheese is truly at room temperature. This is absolutely essential for achieving that silky-smooth, lump-free consistency that makes our Cheesecake Fruit Salad dressing so irresistible. I usually unwrap it and let it sit on the counter for at least an hour, sometimes even two, especially if my kitchen is a bit cool. If you’re in a hurry, you can carefully soften it in the microwave in 15-second intervals, stirring after each, but be very careful not to melt it! We’re aiming for soft and pliable, not soupy.
- Whip the Cream Cheese Mixture: In a large mixing bowl, combine your perfectly softened cream cheese with the granulated sugar (or powdered sugar, your call!). Using an electric mixer on medium speed, beat these two together until the mixture is light, fluffy, and completely smooth. Make sure to scrape down the sides of the bowl frequently with a rubber spatula to ensure everything is incorporated evenly. This step can take a good 3-5 minutes, depending on your mixer and the initial softness of the cream cheese. You’re looking for absolutely no lumps of cream cheese visible – this is the foundation of our delightful “cheesecake” base for the dressing.
- Add the Flavor Extracts: Once your cream cheese and sugar are beautifully combined into a homogenous mixture, it’s time to infuse that wonderful, signature flavor. Add the pure vanilla extract and, if you’re feeling adventurous (and I highly recommend you do!), the almond extract. A quarter teaspoon of almond extract really does something magical here, providing a subtle, sophisticated depth that complements the fruits perfectly. Beat again on low speed, just until the extracts are fully combined and their aromas are wafting up.
- Whip the Heavy Cream Separately: In a separate, very well-chilled bowl (my little secret for extra fluffy results is to pop my mixing bowl and the beaters in the freezer for 10-15 minutes beforehand!), pour your cold heavy whipping cream. Using clean beaters, whip the cream on medium-high speed until it forms soft peaks. You want it to hold its shape but still be light, airy, and slightly billowy, not stiff and overly firm like butter. This is the stage where it will lend that luscious, cloud-like body to our dressing.
- Gently Fold in the Whipped Cream: Now for the delicate part that ensures a light and airy dressing! Take about a third of your beautifully whipped cream and gently fold it into the cream cheese mixture using a rubber spatula. Don’t worry too much about achieving absolute perfection at this stage; we’re primarily just lightening up the cream cheese base. Then, add the remaining whipped cream and fold it in very carefully, using an under-and-over motion, rotating the bowl as you go. The key goal here is to maintain as much of that lovely airiness as possible. Over-mixing will deflate the cream, and we want a light, cloud-like, almost mousse-like dressing for our Cheesecake Fruit Salad.
- Add Optional Lemon Juice: If you decided to use fresh lemon juice for a brighter kick, gently fold it in now. Just a quick, gentle fold to incorporate it without deflating your beautiful, fluffy dressing. Give the dressing a taste. Does it need a touch more sweetness? A bit more vanilla? Adjust to your liking! Remember, this is your creation, and personal preference is key!
- Chill the Dressing: Cover the bowl with plastic wrap, ensuring the wrap touches the surface of the dressing to prevent a skin from forming, and pop it into the refrigerator while you prepare your fruits. Chilling will allow the flavors to meld beautifully and the dressing to firm up slightly, making it even more delightful when tossed with the fruit and maintaining its structure.
Trust me, getting this cheesecake dressing just right is the secret weapon for an unforgettable Cheesecake Fruit Salad. It’s rich, creamy, and perfectly sweet, mimicking the best parts of a classic cheesecake in a refreshing, fruit-filled package. You’ll be amazed at how this dressing transforms simple fruit into something extraordinary!
Washing and Chopping the Fresh Fruits
- Select Your Fruits Wisely: This is where the visual appeal and flavor complexity of your Cheesecake Fruit Salad truly shine! I always recommend choosing fruits that are perfectly ripe but still firm enough to hold their shape after being mixed. Avoid anything overly soft, mushy, or bruised, as these will break down too quickly and make your salad less appealing. A good mix of colors, textures, and flavors (think sweet, tart, juicy, crunchy) will make every single bite exciting and satisfying. Don’t forget to think about seasonality too – local, in-season fruits are always the most flavorful and vibrant!
- Rinse All Fruits Thoroughly: Place all your berries, grapes, and other whole fruits in a colander. Rinse them thoroughly under cool running water. Don’t just give them a quick splash; gently move them around with your hands to ensure any dirt, dust, or residues are effectively washed away. For very delicate berries like raspberries and blackberries, I sometimes place them in a single layer on the colander and gently spray them with a light stream of water to avoid bruising their fragile skins.
- Dry Your Fruits Meticulously: This step is often overlooked, but it’s incredibly important and something I can’t stress enough! Excess water on your fruits will dilute your luscious cheesecake dressing, thinning it out and potentially making the whole salad watery and less flavorful. After rinsing, spread your fruits out in a single layer on clean kitchen towels or several layers of paper towels. Gently pat them dry with additional towels. For berries, I often let them air-dry for another 10-15 minutes after patting to ensure every last drop of moisture is gone. This careful drying process helps the dressing cling beautifully and evenly to each piece of fruit, ensuring a creamy, not watery, finish.
-
Prepare the Berries:
- Strawberries: Carefully hull them by removing the green leafy top with a small paring knife or a specialized hulling tool. Then, depending on their size, quarter them or slice them. If they’re particularly small, halving might be enough, but for a good bite, I usually quarter them.
- Blueberries, Raspberries, Blackberries: These are generally good to go after thorough rinsing and drying! Just keep them whole to preserve their delicate structure and natural beauty.
- Prepare the Grapes: Separate the grapes from their stems. For a more elegant presentation and easier eating, I prefer to halve both green and red grapes. This also helps the dressing coat them more evenly and prevents them from rolling around too much in the bowl. If you have particularly small seedless grapes, you might be able to leave them whole, but halving is generally my preference for this type of salad.
-
Prepare the Tropical Fruits:
- Mango: Carefully peel the mango using a vegetable peeler or a paring knife. Stand it upright on a cutting board and slice off the cheeks, avoiding the large, flat pit in the center. Then, slice or dice the mango flesh into bite-sized cubes. Mango adds such a wonderful, sweet, tropical flavor and a soft, juicy texture that is truly a delight in this salad.
- Kiwi: Peel the kiwi with a vegetable peeler or a paring knife. Then, slice it into attractive rounds or half-moons. Their bright green color and unique tangy-sweet flavor are a fantastic, vibrant addition to the fruit medley.
-
Prepare Other Optional Fruits:
- Banana: If you’re using banana, slice it into rounds. Important note: Bananas brown very quickly! I always save slicing bananas until the absolute last minute, right before I’m about to mix the salad. Sometimes, I even gently toss them with a tiny squeeze of lemon juice to delay browning, but for this specific Cheesecake Fruit Salad, adding them immediately before serving is truly the best approach.
- Melon (Cantaloupe/Honeydew): Peel, seed, and cube your melon into pieces roughly the same size as your other fruits. They bring a lot of refreshing juiciness and a mellow sweetness to the mix.
- Combine Prepared Fruits: Gently place all your prepared fruits (except for any last-minute additions like banana) into a very large mixing bowl. Be extra mindful not to bruise them during this process. We’re aiming for a beautiful, colorful bounty ready for its creamy coating!
Taking your time with fruit preparation not only ensures a delicious result but also makes your Cheesecake Fruit Salad a feast for the eyes. Each piece of fruit, perfectly prepped, will contribute to the harmonious balance of flavors and textures, making every bite a delightful experience.
Assembling Your Cheesecake Fruit Salad
- Get Ready for the Grand Mix: Retrieve your chilled cheesecake dressing from the refrigerator. It should be slightly firmer and perfectly creamy after its chill time. Give it a gentle stir with your rubber spatula to ensure it’s still wonderfully smooth and easy to work with. Make sure your large bowl of beautifully prepared, dry fruits is ready beside it, a vibrant spectacle of nature’s candy!
- Add the Dressing to the Fruit: Spoon about two-thirds of the creamy cheesecake dressing over your beautiful medley of fresh fruits. I like to start with two-thirds because it’s always easier to add a little more dressing if needed than it is to try and take it away. We want the fruit to be generously coated, but not completely drowning, ensuring the fruit’s natural flavors still shine through.
- Gently Fold to Combine: This is a crucial step for maintaining the integrity and delicate texture of your fresh fruits. Using a large rubber spatula or two large spoons, very gently fold the dressing into the fruit. Use an under-and-over motion, carefully lifting the fruit from the bottom of the bowl and folding it over the dressing on top. Continue folding gently until all the fruit is evenly coated with that luscious cheesecake goodness. Take your time with this! We absolutely do not want mushy fruit or a deflated dressing. The goal is for every piece of fruit to have a light, luxurious coating of that cheesecake flavor. If you find the fruit isn’t quite coated enough after a few minutes of gentle folding, add a little more of the remaining dressing, a tablespoon at a time, until you reach your desired creamy-fruit ratio.
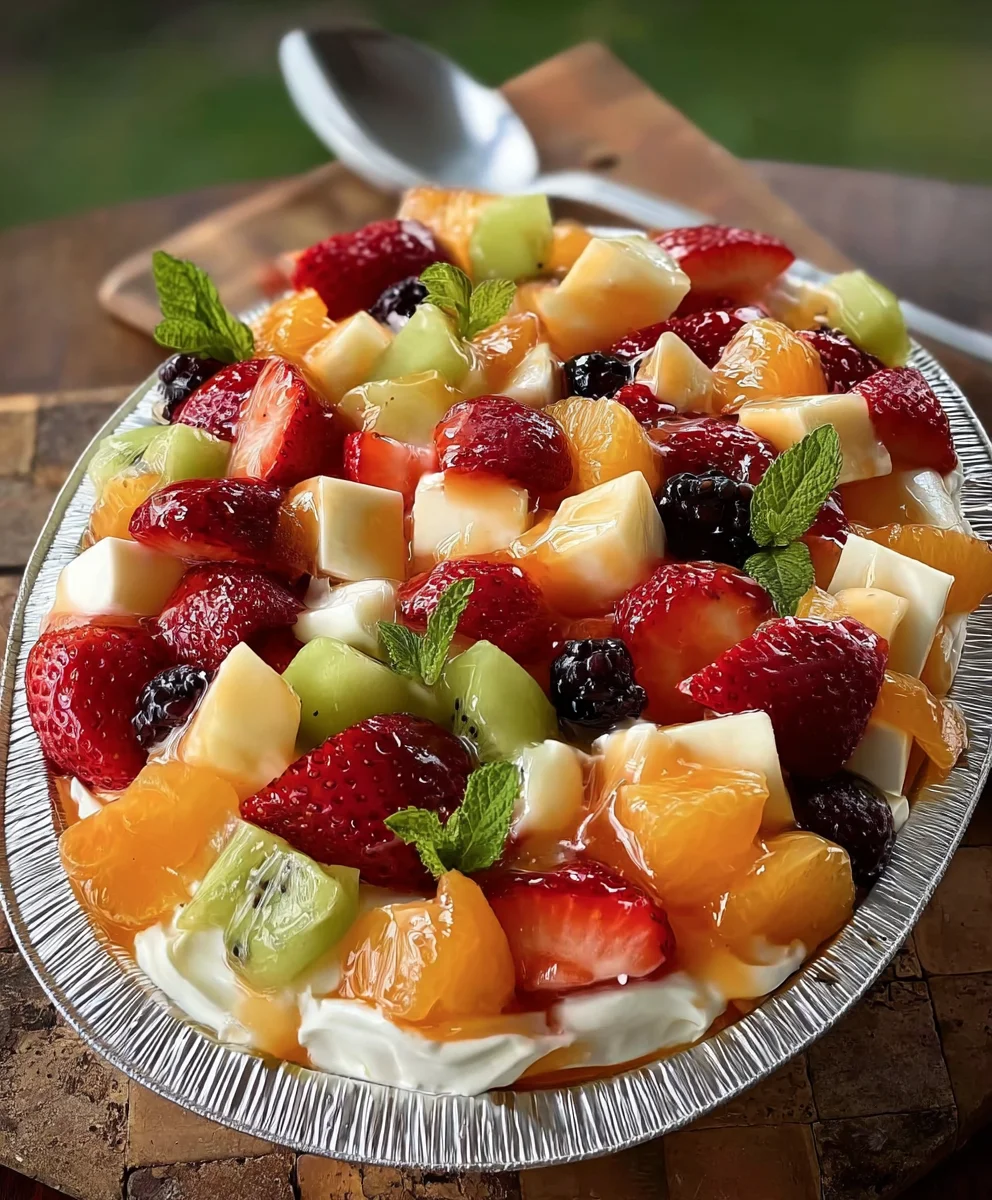
- Consider the Presentation: Once thoroughly (but gently!) mixed, you can transfer your Cheesecake Fruit Salad to your chosen serving bowl or platter. For a truly show-stopping presentation, I absolutely love to use a clear glass trifle bowl, a beautiful glass salad bowl, or a large, elegant ceramic serving dish. This allows all those gorgeous, vibrant colors of the fruit and the creamy white dressing to shine through, creating an incredibly appetizing visual display.
-
Garnish (Optional, but highly recommended!): Now for the finishing touches that elevate your salad from delicious to truly spectacular!
- Sprinkle the toasted shredded coconut evenly over the top for a lovely texture and a delightful hint of tropical flavor. The slight crunch it provides is a wonderful contrast to the soft fruits and creamy dressing.
- Arrange a few fresh mint leaves artfully around the edges or directly on top of the salad. Not only do they look incredibly pretty, adding a pop of vibrant green and a touch of sophistication, but their fresh aroma enhances the entire sensory experience of your Cheesecake Fruit Salad, making it even more refreshing.
- If you saved some particularly beautiful berries, a few extra kiwi slices, or even a couple of mango cubes, you can strategically place them on top of the salad for an extra visual appeal that highlights the fresh ingredients.
Assembling the salad is really the culmination of all your hard work and careful preparation. Seeing all those vibrant colors come together with that rich, creamy dressing is incredibly satisfying. Your Cheesecake Fruit Salad is almost ready to delight your taste buds and impress your guests!
Chilling and Serving Suggestions
- The Importance of Chilling: Once your Cheesecake Fruit Salad is assembled and beautifully garnished, it’s absolutely vital to chill it thoroughly before serving. Cover the serving bowl tightly with plastic wrap, ensuring it’s sealed well to prevent any lingering odors from the fridge from permeating your lovely salad. Place it in the refrigerator for at least 1-2 hours. This crucial chilling time allows all those magnificent flavors to meld and deepen beautifully, ensures the dressing sets to a wonderfully creamy consistency, and guarantees the salad is refreshingly cold when you finally dig in. Trust me, a well-chilled salad is always the best salad, especially one as rich and vibrant as this!
- How Long Does it Last? This delicious Cheesecake Fruit Salad is definitely best enjoyed on the day it’s made, or within 24 hours. The fruits are at their peak freshness, and the dressing is perfectly creamy and vibrant. While it can technically last up to 2-3 days in the refrigerator, be aware that some of the more delicate fruits (like raspberries or bananas) might start to break down a little, and the dressing might become slightly watery as the fruit naturally releases its juices over time. If you anticipate having leftovers, a clever trick is to consider serving a portion and keeping the remaining dressing and fruit separate in airtight containers until just before you’re ready to serve again.
- Serving Temperature: Always serve your Cheesecake Fruit Salad straight from the refrigerator, delightfully cold. The contrast of the cool, sweet fruits with the creamy, rich, yet light dressing is what makes this dish so incredibly appealing and refreshing, especially on a warm day or after a hearty meal.
-
Versatile Serving Ideas: This salad is incredibly versatile and can fit into so many meal scenarios!
- Potlucks and BBQs: This is an absolute showstopper for any gathering! It’s refreshing, a little indulgent, and always a crowd-pleaser that receives rave reviews. Plus, it transports relatively well to parties.
- Brunch: A fantastic and elegant addition to any brunch spread. It feels light and fresh but is surprisingly satisfying thanks to that creamy dressing.
- Dessert: While it’s called a “fruit salad,” the decadent cheesecake dressing makes it rich enough to be served as a lighter, yet utterly satisfying, dessert after a meal.
- Breakfast Treat: On a special occasion, why not start your day with something a little extra special and deliciously different?
- Alongside a Meal: It’s also wonderfully refreshing as a side dish to a richer main course, offering a palate cleanser and a burst of fresh flavor.
- Presentation Matters: Before serving, take a final look at your masterpiece. If the mint leaves look a little tired after chilling, consider replacing them with fresh ones for maximum visual impact. A final sprinkle of fresh, vibrant berries or a few strategically placed kiwi slices on top can also refresh its appearance, making it look as though it was just prepared. Serve with a large serving spoon, allowing your guests to scoop up plenty of that delicious fruit and creamy dressing, ensuring they get a taste of every wonderful component.
Enjoying your perfectly prepared and chilled Cheesecake Fruit Salad is the well-deserved reward for all your careful preparation. Each spoonful is a delightful burst of fresh flavor, creamy texture, and pure, unadulterated joy!
Tips for the Perfect Cheesecake Fruit Salad
- Temperature of Cream Cheese is Key: I cannot stress this enough – your cream cheese MUST be at room temperature! If it’s cold, you’ll undoubtedly end up with small, stubborn lumps in your dressing, and no amount of beating will make it perfectly smooth and silky. Plan ahead and take it out of the fridge at least two hours before you intend to start mixing. This foundational step is absolutely paramount for creating a truly dreamy and uniform cheesecake dressing for your Cheesecake Fruit Salad.
- Dry Your Fruit Thoroughly – Seriously!: This is another non-negotiable step for me if you want an exceptional salad. Wet fruit will make your beautiful, thick cheesecake dressing watery and thin out its wonderful flavor and creamy consistency. After washing, lay your fruit out on clean kitchen towels or several layers of paper towels and gently pat them dry. For delicate berries, I often let them air-dry for an extra 10-15 minutes on the counter to ensure every last drop of moisture has evaporated. This meticulous drying ensures the dressing adheres perfectly and doesn’t get diluted, giving you that rich, creamy coating you desire.
- Don’t Overmix – Be Gentle!: When you’re folding the whipped cream into the cream cheese mixture, and especially when you’re combining the dressing with the fresh fruit, be as gentle as a whisper! Overmixing the whipped cream will deflate it, causing it to lose that lovely airy, light texture that is so crucial. Overmixing the fruit can bruise delicate berries and other soft fruits, turning your vibrant salad into a messy, unappealing affair rather than a crisp, colorful medley. Gentle, under-and-over motions with a wide rubber spatula are your absolute best friends here.
- Choose a Variety of Fruits for Interest: The true beauty and excitement of a superb Cheesecake Fruit Salad comes from its diversity. Aim for a rainbow of colors, a delightful mix of sweet and tart flavors, and various textures. Think about crunchy grapes, juicy berries, soft, luscious mango, and tangy kiwi. This thoughtful variety ensures every single spoonful is an exciting and harmonious new experience. Always consider what’s in season for the freshest, most flavorful options available to you.
- Add Delicate or Browning Fruits Last: Fruits like bananas and peaches tend to brown quickly when exposed to air, or they can become mushy if left sitting in dressing for too long. If you choose to include them, slice them just before you are about to assemble the salad, or even better, stir them in right before you plan to serve to maintain their best appearance and firm texture. A tiny squeeze of fresh lemon juice on these particular fruits can also help to prevent or delay browning.
- Chill Time is Absolutely Key for Flavor and Texture: Don’t try to rush this vital step! Allowing your Cheesecake Fruit Salad to chill for at least 1-2 hours in the refrigerator serves several important purposes. It lets all those magnificent flavors meld and deepen into a more cohesive and delicious profile, ensures the dressing sets beautifully to that perfect creamy consistency, and provides a wonderfully refreshing temperature for serving. Your patience here will be significantly rewarded with a superior taste and texture experience that everyone will appreciate.
- Always Taste and Adjust: This is a chef’s secret! Always taste your cheesecake dressing before you combine it with the fruit. Does it need a touch more sugar to meet your preferred sweetness level? A little extra vanilla for a deeper aromatic note? Maybe a tiny squeeze of fresh lemon juice to brighten it up and cut through the richness? Adjust to your personal preference – remember, you are the chef, and your taste buds are the final judge!
- Consider Your Serving Bowl Choice Carefully: For maximum visual appeal, especially with such a colorful and layered dish, I highly recommend serving your finished Cheesecake Fruit Salad in a clear glass bowl, a beautiful glass trifle dish, or an elegant ceramic serving dish. This allows all the vibrant colors of the fruit and the creamy white layers to truly shine through, making it a feast for the eyes even before the first bite.
- A Hint of Zest for Extra Brightness: For an extra layer of aromatic brightness and complexity, you can grate a tiny bit of fresh lemon or orange zest directly into the cream cheese dressing along with the extracts. It adds a lovely aromatic lift and a subtle citrusy tang that complements the fruits beautifully without adding extra liquid.
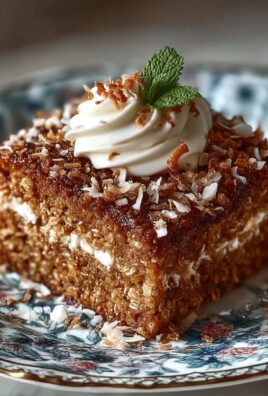
- Toasted Coconut for a Textural Delight: If you enjoy the flavor of coconut, a generous sprinkle of lightly toasted shredded coconut on top adds an amazing textural contrast with its delicate crunch and a hint of nutty sweetness. It’s a small touch that makes a surprisingly big difference in the overall experience of your salad.
By following these detailed tips and instructions, you’re not just making a simple fruit salad; you’re crafting a delightful culinary experience that embodies all the fresh joy of fruit with the irresistible indulgence of cheesecake. Enjoy every glorious bite of your homemade Cheesecake Fruit Salad!
Conclusion:
And so, we arrive at the sweet conclusion of our culinary journey. I genuinely hope you’re as excited as I am about this incredible creation. This isn’t just another dessert; it’s a revelation, a testament to how simple ingredients can come together to form something truly spectacular. We’re talking about a dish that effortlessly marries the freshness of ripe, juicy fruits with the luxurious, creamy indulgence of cheesecake. It’s light yet satisfying, refreshing yet decadent, making it an absolute showstopper for any occasion. From casual family dinners to elegant gatherings, this recipe promises to be a vibrant and delicious highlight, leaving everyone asking for the recipe. It’s a guaranteed crowd-pleaser that delivers on flavor, texture, and visual appeal, every single time.
What makes this particular recipe an undeniable must-try in your kitchen arsenal? Well, for starters, it’s remarkably easy to whip up, proving that you don’t need hours in the kitchen to create something extraordinary. The genius lies in its simplicity – vibrant, seasonal fruits are perfectly complemented by a luscious, velvety dressing that brings all the delightful notes of a classic cheesecake, without the fuss of baking. Imagine biting into a juicy strawberry, followed by the smooth, tangy sweetness of the cream cheese blend, all enhanced by the crispness of a grape. It’s a symphony of textures and tastes that brightens any table and brings smiles to every face. Trust me, once you experience the sheer joy and satisfaction of serving this, you’ll understand why it quickly becomes a cherished favorite.
Serving Suggestions for Every Occasion:
Now, let’s talk about how to best enjoy this delightful creation. While it shines brightly as a standalone dessert, its versatility knows no bounds. I love serving it chilled, perhaps in elegant individual parfait glasses for a touch of sophistication at a dinner party. It’s also absolutely divine as part of a brunch spread, offering a refreshing contrast to richer, savory dishes. Think about pairing it with fluffy pancakes or a quiche – it balances everything out beautifully. For a summer barbecue, it’s the ultimate refreshing side dish that cuts through the richness of grilled meats, providing a sweet, palate-cleansing finish. Don’t forget those potlucks and picnics! It travels incredibly well and is always a welcome addition, disappearing faster than you can say “seconds.”
Unleash Your Creativity with Variations:
One of the aspects I adore most about this recipe is its incredible adaptability. While my suggested fruit combination is fantastic, please feel free to let your creativity soar! Consider using a medley of tropical fruits like mango, pineapple, and kiwi for an exotic twist, or embrace the bounty of summer with peaches, plums, and cherries when they’re in season. For an added textural dimension, a sprinkle of toasted pecans or slivered almonds can introduce a wonderful crunch. A hint of shredded coconut can transport you to a tropical paradise, while a dash of cardamom or a tiny pinch of cinnamon in the cream cheese mixture can add an unexpected depth of flavor. You could even layer it with granola for a more substantial breakfast or a healthy snack. The possibilities truly are endless, making this recipe a fantastic canvas for your culinary imagination.
So, there you have it – my passionate plea for you to try this absolutely incredible Cheesecake Fruit Salad. I promise, it’s not just a recipe; it’s an experience waiting to happen in your kitchen. It’s the kind of dish that garners compliments effortlessly, yet takes minimal effort to prepare. The harmonious blend of fresh fruit and that irresistible creamy cheesecake-inspired dressing is something truly special that you and your loved ones deserve to savor. Don’t hesitate to gather your ingredients and embark on this delicious adventure. You’ll be so glad you did. It’s perfect for those moments when you crave something sweet and satisfying, but also want to feel good about what you’re eating.
I truly can’t wait for you to make this. Once you’ve had a chance to whip up your own batch, I would absolutely love to hear about your experience! Did you stick to the original fruit combination, or did you venture out with your own delightful variations? Perhaps you discovered a new favorite serving method? Please come back and share your thoughts, your successes, and even your creative modifications in the comments below. Your feedback and personal touches not only inspire me but also help our wonderful community of home cooks. Let’s create a delicious conversation around this amazing recipe. Snap a photo too if you can – I always love seeing your culinary masterpieces!
Cheesecake Fruit Salad: Easy Creamy Dessert Recipe
Cheesecake Fruit Salad is a vibrant medley of seasonal fruits enveloped in a rich, velvety cheesecake-inspired cream. This no-bake dessert offers all the beloved flavors of a classic cheesecake with ease, perfect for brunches, potlucks, or a refreshing finish to any meal.
Ingredients
-
8 oz (226g) full-fat cream cheese, softened
-
1/2 cup (113g) granulated or powdered sugar
-
1 tsp pure vanilla extract
-
1/4 tsp almond extract (optional)
-
1/2 cup (120ml) heavy whipping cream, chilled
-
2 tbsp fresh lemon juice (optional)
-
2 cups fresh strawberries, hulled & quartered
-
1 cup fresh blueberries
-
1 cup fresh raspberries
-
1 cup fresh blackberries
-
2 cups green grapes, halved
-
2 cups red grapes, halved
-
1 large mango, diced
-
2 ripe kiwis, sliced
-
1 large banana, sliced (optional, add just before serving)
-
1 cup cantaloupe or honeydew melon, cubed (optional)
-
1/2 cup toasted shredded coconut (optional, for garnish)
-
Fresh mint leaves (optional, for garnish)
Instructions
-
Step 1
Soften cream cheese to room temperature. In a large bowl, beat softened cream cheese with sugar until light and smooth. Beat in vanilla and optional almond extract. -
Step 2
In a separate chilled bowl, whip heavy cream until soft peaks form. Gently fold whipped cream into the cream cheese mixture, then fold in optional lemon juice. Chill dressing. -
Step 3
Rinse all fruits thoroughly and meticulously dry them. Hull and quarter strawberries. Halve grapes. Dice mango, slice kiwi. Prepare any optional fruits (slice banana just before mixing to prevent browning). -
Step 4
Combine all prepared fruits in a large bowl. Spoon about two-thirds of the chilled dressing over the fruit. -
Step 5
Gently fold the dressing into the fruit until evenly coated. Add more dressing if desired. Transfer to a serving bowl. -
Step 6
Garnish with toasted shredded coconut and/or fresh mint leaves. Cover and chill in the refrigerator for at least 1-2 hours before serving. Serve cold.
Important Information
Nutrition Facts (Per Serving)
It is important to consider this information as approximate and not to use it as definitive health advice.
Allergy Information
Please check ingredients for potential allergens and consult a health professional if in doubt.


Leave a Comment