
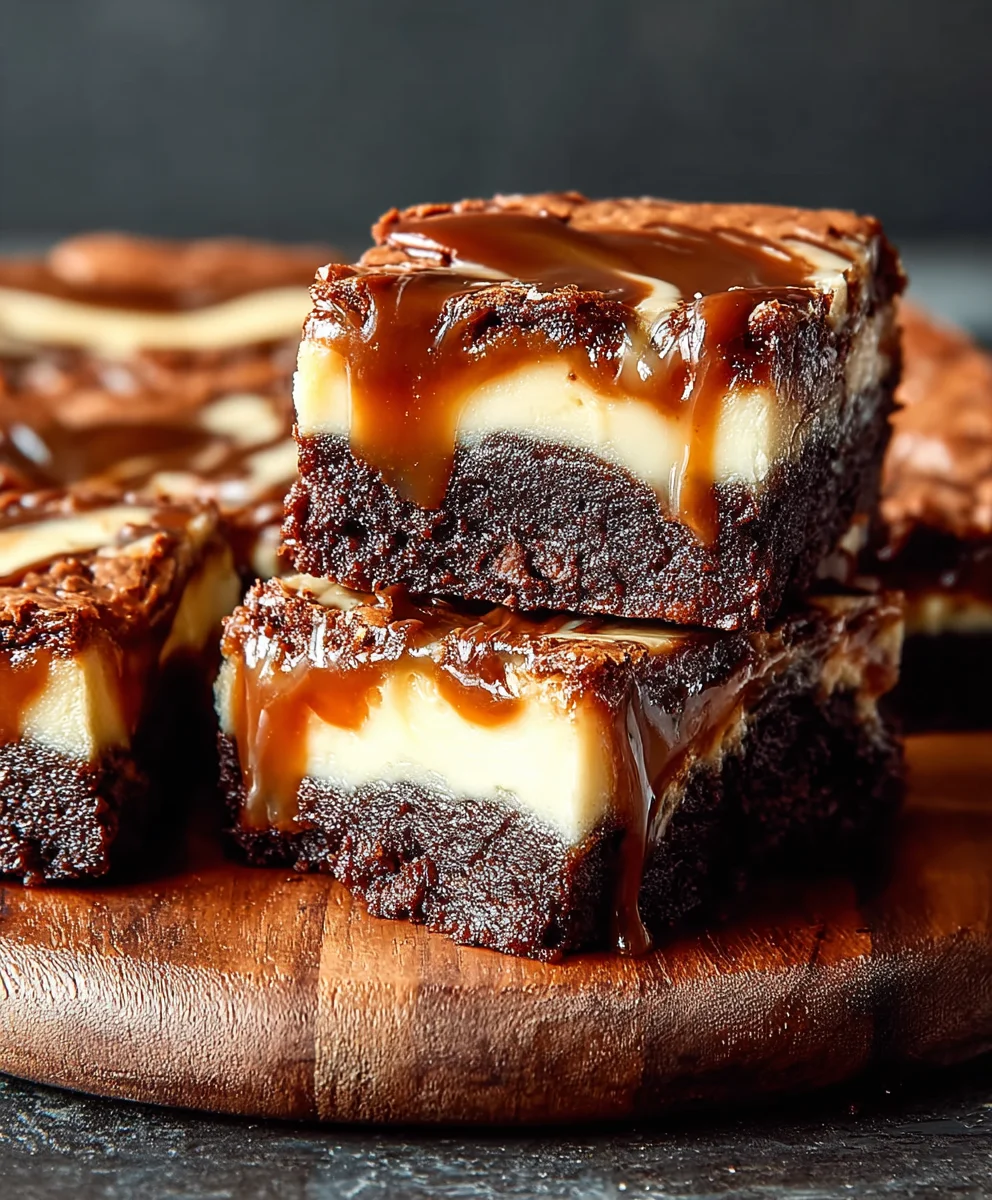
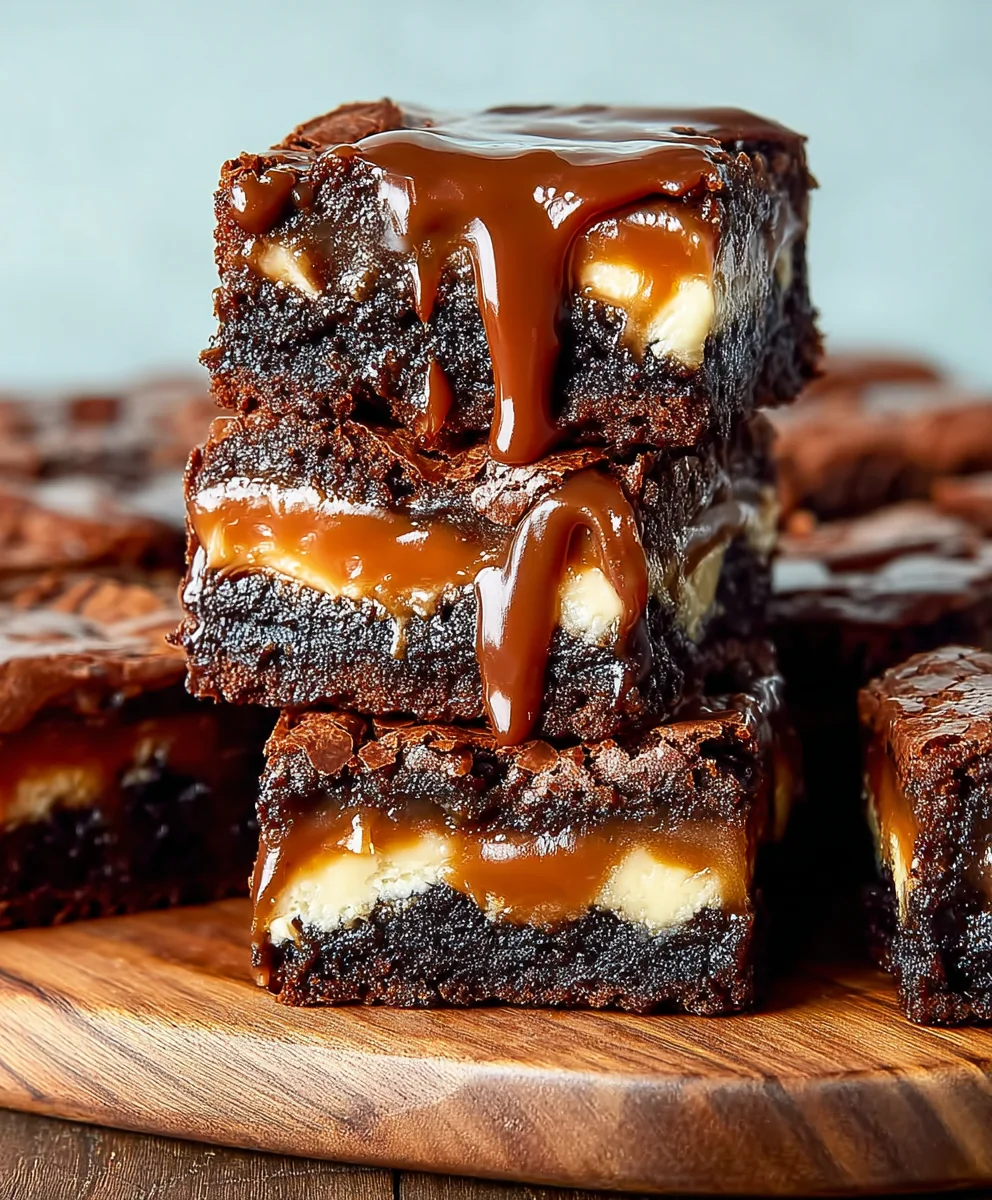
Caramel Cheesecake Nutella Brownies are not just a dessert; they are an experience. Imagin extracte the rich, fudgy depth of a decadent brownie, swirled with creamy, tangy cheesecake, all generously drizzled with gooey, golden caramel and then, the pièce de résistance, ribbons of smooth, hazelnut-infused Nutella weaving their magic throughout. It’s a symphony of textures and flavors that dances on your palate, a true indulgence that has earned its place as a beloved treat for good reason. What makes these Caramel Cheesecake Nutella Brownies so utterly irresistible? It’s the perfect marriage of contrasting yet complementary elements: the slight bitterness of the chocolate, the sweet luxury of caramel, the creamy coolness of cheesecake, and that unmistakable nutty sweetness of Nutella. Each bite offers a new adventure, a delightful surprise that keeps you coming back for more. This recipe takes that beloved combination and elevates it to new heights, promising an unforgettable dessert that’s surprisingly achievable in your own kitchen.
Ingredients:
- 3/4 cup unsalted butter
- 6 oz dark chocolate (50-60% cocoa), finely chopped
- 1 1/4 cups all-purpose flour
- 1/2 cup unsalted cocoa powder
- 3 medium eggs, at room temperature
- 1 cup granulated sugar
- 1/3 cup light brown sugar, packed
- 1 tablespoon pure vanilla extract
- 1/4 teaspoon salt
- 1/3 cup dark chocolate chunks
- 1/2 cup milk chocolate chunks
- 8 oz full-fat cream cheese, softened
- 1/3 cup granulated sugar (for cheesecake layer)
- 1 medium egg yolk
- 1 teaspoon pure vanilla extract (for cheesecake layer)
Making the Brownie Base
First, we need to prepare our luscious brownie base. Preheat your oven to 350°F (175°C). Line an 8×8 inch baking pan with parchment paper, leaving an overhang on the sides to help with lifting the brownies out later. This is a crucial step for easy removal and cleanup, making the whole process much more enjoyable.
In a heatproof bowl set over a saucepan of simmering water (ensure the bottom of the bowl doesn’t touch the water), melt the 3/4 cup of unsalted butter and the 6 oz of finely chopped dark chocolate. Stir occasionally until the mixture is completely smooth and glossy. Once melted, remove the bowl from the heat and let it cool slightly for about 5-10 minutes. This gentle melting method prevents the chocolate from scorching and ensures a silky smooth texture for our brownies.
In a separate medium bowl, whisk together the 1 1/4 cups of all-purpose flour, 1/2 cup of unsalted cocoa powder, and the 1/4 teaspoon of salt. Whisking these dry ingredients together before adding them to the wet ingredients helps to evenly distribute the cocoa powder and salt, avoiding any pockets of bitterness or saltiness in the final brownie.
In a large bowl, whisk together the 3 medium eggs, 1 cup of granulated sugar, and the 1/3 cup of packed light brown sugar. Whisk vigorously until the mixture is pnon-alcoholic ale and slightly thickened, almost ribbon-like. This process, known as “ribboning,” incorporates air into the batter, contributing to a lighter and more tender brownie texture. Stir in the 1 tablespoon of vanilla extract.
Now, gradually add the slightly cooled chocolate-butter mixture to the egg and sugar mixture, stirring until just combined. Be careful not to overmix at this stage. Then, gently fold in the dry ingredients until just incorporated. A few streaks of flour are okay; overmixing will develop the gluten in the flour, resulting in tougher brownies. Finally, gently fold in the 1/3 cup of dark chocolate chunks and the 1/2 cup of milk chocolate chunks. These will create delightful pockets of melted chocolate within your brownies. Pour this rich brownie batter into your prepared baking pan and spread it evenly.
Crafting the Creamy Cheesecake Swirl
Next, we’ll prepare the decadent cheesecake layer that will crown our brownies. In a medium bowl, beat the 8 oz of softened full-fat cream cheese with the 1/3 cup of granulated sugar until smooth and creamy. Ensure the cream cheese is truly softened, at room temperature, otherwise, you’ll end up with lumps in your cheesecake swirl. This smooth texture is key to a luxurious cheesecake topping.
Beat in the 1 medium egg yolk and the 1 teaspoon of vanilla extract until just combined. Again, avoid overmixing, as this can cause the cheesecake layer to crack. This simple mixture adds a tangy, creamy counterpoint to the rich chocolate of the brownie.
Now comes the fun part: creating the beautiful swirl. Dollop spoonfuls of the cheesecake mixture over the brownie batter in the pan. Using a knife or a toothpick, gently swirl the cheesecake mixture into the brownie batter. You can create elegant patterns or just random swirls – whatever your heart desires! Don’t over-swirl, or the cheesecake layer might get too incorporated into the brownie, diminishing its distinctiveness.
Baking and Cooling for Perfection
Place the pan in the preheated oven and bake for approximately 30-35 minutes. You’ll know the brownies are ready when the edges are set and a toothpick inserted into the center of the brownie portion (avoiding the cheesecake swirl) comes out with moist crum extractbs attached. The cheesecake portion should appear mostly set with a slight wobble in the very center.
Once baked, remove the pan from the oven and let it cool completely on a wire rack. This cooling process is absolutely vital. Rushing this step can lrum extract to crumbly brownies and a gooey cheesecake layer that doesn’t hold its shape. For the cleanest cuts and best flavor development, it’s highly recommended to refrigerate the brownies for at least 2-3 hours, or even overnight, before cutting. This allows the flavors to meld beautifully and the textures to fully set.
Once thoroughly chilled, use the parchment paper overhang to lift the entire slab of Caramel Cheesecake Nutella Brownies out of the pan onto a cutting board. Slice them into squares using a sharp knife, wiping the knife clean between cuts for neat edges. Enjoy these incredibly decadent treats!
Conclusion:
And there you have it – a truly decadent and irresistible recipe for Caramel Cheesecake Nutella Brownies! We’ve walked through each step, from creating that rich, fudgy brownie base to swirling in the creamy cheesecake and a generous dollop of luscious Nutella, all topped off with a drizzle of golden caramel. The result is a symphony of textures and flavors that is sure to impress anyone with a sweet tooth. These brownies are perfect for special occasions, a comforting treat on a rainy day, or simply to elevate your dessert game.
I encourage you to give this recipe a try. Don’t be intimidated by the steps; they are straightforward and incredibly rewarding. Feel free to experiment with the serving suggestions – a scoop of vanilla ice cream or a dusting of sea salt can take these Caramel Cheesecake Nutella Brownies to another level. You can also try adding some chopped nuts to the batter for an extra crunch, or a sprinkle of chocolate chips. Enjoy the process and savor every bite!
Frequently Asked Questions:
Q1: How should I store the Caramel Cheesecake Nutella Brownies?
For the best texture and flavor, store your Caramel Cheesecake Nutella Brownies in an airtight container at room temperature for up to 3 days. If you plan to keep them longer, they can be refrigerated for up to a week. They are also delicious served cold, straight from the fridge!
Q2: Can I make the Caramel Cheesecake Nutella Brownies ahead of time?
Absolutely! These brownies are an excellent make-ahead treat. In fact, they often taste even better after a day, allowing the flavors to meld together. Ensure they are completely cooled before storing them in an airtight container.
Caramel Nutella Cheesecake Brownie Bliss
Indulge in the ultimate dessert experience with these Caramel Nutella Cheesecake Brownie Bliss. A rich, fudgy brownie base is topped with a creamy cheesecake swirl and pockets of melted chocolate for a truly decadent treat.
Ingredients
-
3/4 cup unsalted butter
-
6 oz dark chocolate (50-60% cocoa), finely chopped
-
1 1/4 cups all-purpose flour
-
1/2 cup unsalted cocoa powder
-
3 medium eggs, at room temperature
-
1 cup granulated sugar
-
1/3 cup light brown sugar, packed
-
1 tablespoon pure vanilla extract
-
1/4 teaspoon salt
-
1/3 cup dark chocolate chunks
-
1/2 cup milk chocolate chunks
-
8 oz full-fat cream cheese, softened
-
1/3 cup granulated sugar (for cheesecake layer)
-
1 medium egg yolk
-
1 teaspoon pure vanilla extract (for cheesecake layer)
Instructions
-
Step 1
Preheat oven to 350°F (175°C). Line an 8×8 inch baking pan with parchment paper, leaving an overhang. -
Step 2
Melt butter and dark chocolate in a heatproof bowl over simmering water. Stir until smooth and glossy, then let cool slightly. -
Step 3
In a separate bowl, whisk together flour, cocoa powder, and salt. In a large bowl, whisk eggs, granulated sugar, and brown sugar until ribbon-like. Stir in vanilla extract. -
Step 4
Gradually add cooled chocolate mixture to the egg mixture, then gently fold in dry ingredients until just combined. Fold in chocolate chunks. Pour into prepared pan and spread evenly. -
Step 5
In a medium bowl, beat softened cream cheese with granulated sugar until smooth. Beat in egg yolk and vanilla extract. -
Step 6
Dollop cheesecake mixture over brownie batter. Gently swirl with a knife or toothpick. -
Step 7
Bake for 30-35 minutes, or until edges are set and a toothpick comes out with moist crumbs. Let cool completely on a wire rack, then refrigerate for at least 2-3 hours or overnight.
Important Information
Nutrition Facts (Per Serving)
It is important to consider this information as approximate and not to use it as definitive health advice.
Allergy Information
Please check ingredients for potential allergens and consult a health professional if in doubt.

Leave a Comment