
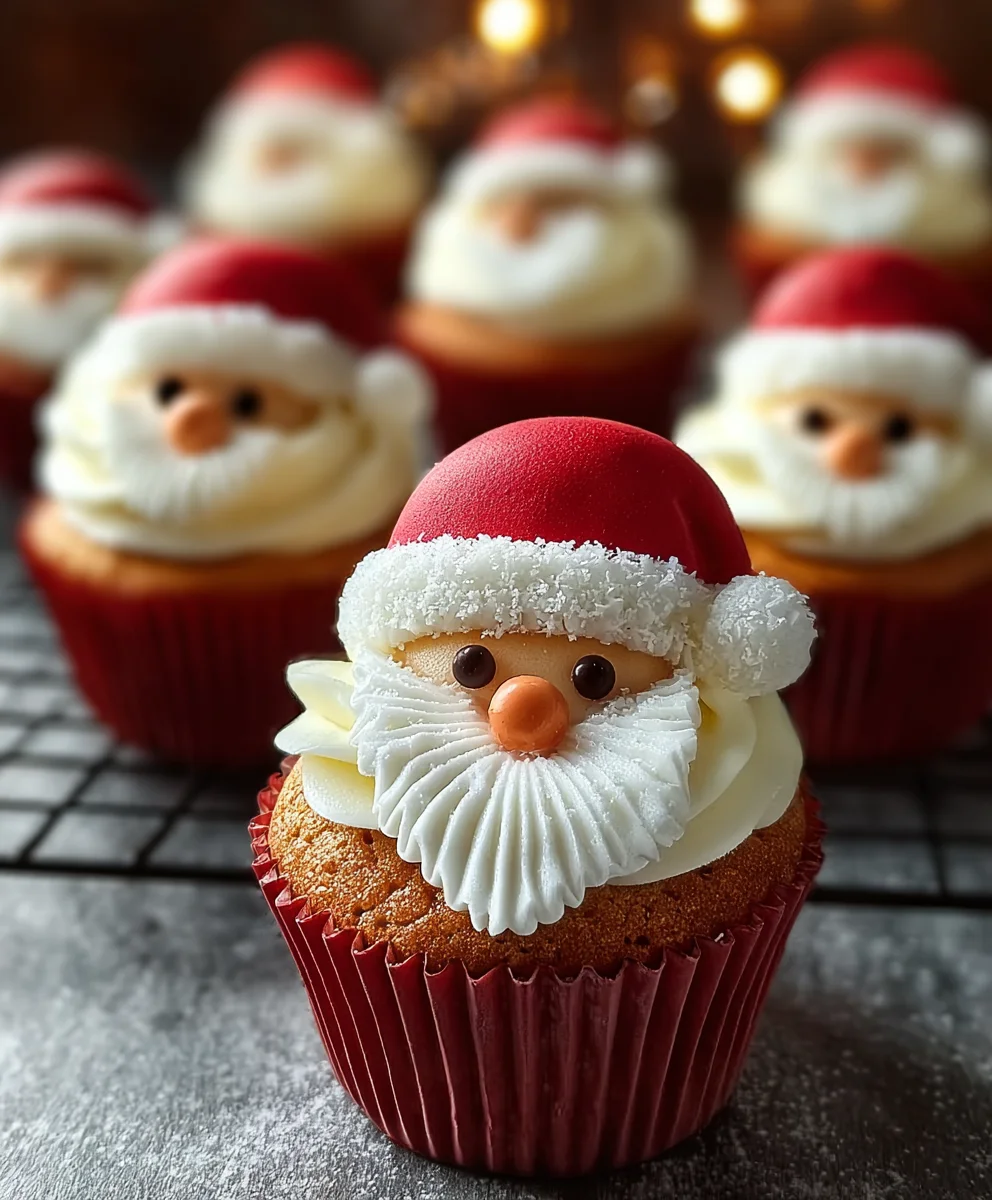
Santa Face Cupcakes are more than just a sweet treat; they’re a delicious portal to holiday magic! Imagine the sheer joy on a child’s face, or even your own, as they discover these adorable edible decorations. It’s that instant spark of wonder that makes Santa Face Cupcakes such a beloved tradition for families and party hosts alike. But what truly sets these festive delights apart is their charming simplicity and the endless opportunities for personalization.
Why We Adore Santa Face Cupcakes
There’s an undeniable charm in creating these miniature Santas. They’re not just visually appealing; they’re incredibly fun to make, offering a perfect activity for little hands to get involved in the holiday baking. The combination of fluffy frosting, a perfectly round cookie for his hat, and those little candy details just screams Christmas cheer. Every bite is a delightful explosion of flavor and festive spirit, making them the star of any holiday gathering or a heartwarming surprise for Santa himself on Christmas Eve.
What Makes Them So Special
What makes Santa Face Cupcakes truly special is their ability to transform an ordinary cupcake into a miniature masterpiece of holiday spirit. It’s the perfect canvas for creativity, allowing you to play with different frosting techniques and candy decorations. Whether you’re aiming for a classic, jolly Santa or a more whimsical interpretation, the result is always a crowd-pleaser. This recipe breaks down the process into simple, achievable steps, so even novice bakers can create these show-stopping Santa Face Cupcakes that are sure to bring smiles and make your holiday celebrations even more memorable.

Ingredients:
- 1 box favorite cake mix (plus ingredients as per box instructions, such as eggs, oil, and water)
- 1 cup unsalted butter, softened
- 4 cups powdered sugar
- 2 tsp vanilla extract
- 2-3 tbsp milk
- Red food coloring
- Mini marshmallows
- Mini chocolate chips
- Red candies (for Santa’s nose)
- White candy pearls or sprinkles
Baking the Cupcakes
First, let’s get our cake bases ready for their festive transformation. Prepare your chosen cake mix according to the package directions. This usually involves adding eggs, oil, and water to the dry mix. Whisk everything together until just combined; be careful not to overmix, as this can lead to tough cupcakes. Line a muffin tin with paper liners and fill each one about two-thirds full with your batter. This will allow the cupcakes to rise beautifully without overflowing. Bake them in a preheated oven according to the cake mix instructions, typically for 18-22 minutes, or until a toothpick inserted into the center comes out clean. Once baked, let the cupcakes cool in the muffin tin for a few minutes before transferring them to a wire rack to cool completely. It’s crucial that the cupcakes are fully cooled before frosting, otherwise, your delicious frosting will melt right off!
Creating the Fluffy White Frosting
While the cupcakes are cooling, it’s time to whip up our creamy, dreamy frosting that will serve as Santa’s snowy beard. In a large mixing bowl, cream together the softened unsalted butter until it’s light and fluffy. This process incorporates air, making the frosting light and spreadable. Next, gradually add the powdered sugar, about a cup at a time, mixing on low speed until it’s incorporated. Once all the powdered sugar is added, increase the speed to medium-high and beat for another 2-3 minutes until the frosting is smooth and fluffy. Now, stir in the vanilla extract for that classic sweet flavor. If the frosting seems too thick, add the milk, one tablespoon at a time, until you reach your desired consistency. You want it to be spreadable but not runny. If it’s too thin, add a little more powdered sugar.
Assembling Santa’s Face – Part 1: The Beard
Once your cupcakes are completely cool and your frosting is ready, it’s time to bring Santa to life! Divide your frosting into two portions. Keep one portion white for Santa’s beard and eyes. The other portion will be for his hat. Take a generous dollop of the white frosting and spread it evenly over the top of each cooled cupcake. You don’t need to be perfectly neat here; a slightly rustic look can add to the charm. Then, using a spatula or the back of a spoon, create some fluffy texture to mimic Santa’s beard. You can swirl it around or make little peaks. Next, we’ll create Santa’s eyes. Place two mini marshmallows on the top portion of the frosted cupcake, leaving a small gap between them for his nose. These will be the base for his eyes.
Assembling Santa’s Face – Part 2: The Details
Now for the finishing touches that will make your Santa Face Cupcakes truly magical. For Santa’s eyes, use two mini chocolate chips placed within each marshmallow. The pointed end of the chocolate chip can be placed upwards to give them a bit of sparkle. For Santa’s rosy cheeks, we’ll use a tiny bit of red food coloring. Take a very small amount of the remaining white frosting and mix it with a drop or two of red food coloring until you achieve a soft pink hue. You only need a tiny amount, as a little goes a long way. Then, dab two small dots of this pink frosting onto the cupcake below Santa’s eyes, representing his cheeks.
Crafting Santa’s Hat and Nose
Finally, let’s add Santa’s iconic hat and nose. Take the remaining portion of your white frosting and tint it a vibrant red using the red food coloring. Mix until you achieve a rich, Santa-red color. You can either frost the top portion of your cupcake above Santa’s eyes and beard with this red frosting, or use a piping bag with a round tip to create a festive red hat shape. If you’re frosting directly, leave a small white band at the bottom of the red area for the hat’s trim. Add a line of white frosting or a few white candy pearls along the bottom edge of the red hat for the fluffy trim. For Santa’s nose, place a single red candy directly in the center, between the two marshmallow eyes, to complete his jolly face. You can also add a few white candy pearls or sprinkles around the red nose for extra festive flair, or to represent a bit of snow on his hat.
Conclusion:
And there you have it! Your very own batch of adorable and delicious Santa Face Cupcakes are ready to bring joy to any occasion. We’ve walked through each step, from baking the perfect fluffy cupcake to decorating them into festive Santa faces, and I hope you found it enjoyable and rewarding. These cupcakes aren’t just a treat; they’re a delightful activity to share with family and friends, perfect for holiday parties, classroom celebrations, or just a sweet pick-me-up during the festive season. Don’t be afraid to get creative with your decorating! The beauty of these Santa Face Cupcakes is their inherent charm, even with a slightly wobbly beard or a tiny, asymmetrical hat.
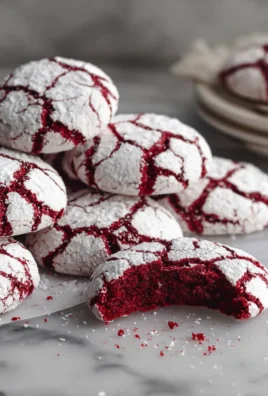
For serving suggestions, these are best enjoyed at room temperature. They pair wonderfully with a glass of cold milk or a warm mug of hot cocoa. If you’re looking for variations, consider using different flavored cupcakes like chocolate or red velvet for a surprise inside. You can also experiment with different shades of red frosting for Santa’s hat, or even add edible glitter for extra sparkle. My biggest encouragement is to have fun with it! Don’t strive for perfection; embrace the homemade charm and the laughter that comes with the decorating process. Happy baking and happy holidays!
Frequently Asked Questions about Santa Face Cupcakes:
How far in advance can I bake the cupcakes?
You can bake the cupcake bases up to two days in advance and store them in an airtight container at room temperature. For the best freshness, it’s ideal to decorate them on the day you plan to serve them, or the day before. Frosting can sometimes harden or dry out if left exposed for too long.
Can I use store-bought frosting?
Absolutely! While homemade frosting offers a wonderful flavor and texture, using a good quality store-bought vanilla or cream cheese frosting is a perfectly acceptable shortcut. You can color it red and white as directed in the recipe. Just ensure it’s a frosting that pipes well for the best Santa face effect.
Santa Face Cupcakes-Festive Christmas Treats
Adorable and festive Santa face cupcakes perfect for holiday celebrations, featuring fluffy frosting and easy-to-apply decorations.
Ingredients
-
1 box favorite cake mix (plus ingredients as per box instructions, such as eggs, oil, and water)
-
1 cup unsalted butter, softened
-
4 cups powdered sugar
-
2 tsp vanilla extract
-
2-3 tbsp milk
-
Red food coloring
-
Mini marshmallows
-
Mini chocolate chips
-
Red candies (for Santa’s nose)
-
White candy pearls or sprinkles
Instructions
-
Step 1
Prepare your chosen cake mix according to the package directions. Line a muffin tin with paper liners and fill each one about two-thirds full with your batter. Bake in a preheated oven according to the cake mix instructions (typically 18-22 minutes), or until a toothpick inserted into the center comes out clean. Let cupcakes cool in the tin briefly, then transfer to a wire rack to cool completely. -
Step 2
In a large mixing bowl, cream together softened unsalted butter until light and fluffy. Gradually add powdered sugar, about a cup at a time, mixing on low speed. Once all sugar is added, increase speed and beat for 2-3 minutes until smooth and fluffy. Stir in vanilla extract. Add milk one tablespoon at a time until desired spreadable consistency is reached. -
Step 3
Divide frosting into two portions. Keep one white for Santa’s beard and eyes, and the other for his hat. Spread a generous dollop of white frosting evenly over the top of each cooled cupcake. Use a spatula or the back of a spoon to create texture mimicking Santa’s beard. Place two mini marshmallows on the top portion of the frosted cupcake, leaving a gap for the nose. -
Step 4
Place two mini chocolate chips within each marshmallow to form Santa’s eyes, with the pointed end upwards. Mix a very small amount of remaining white frosting with a drop or two of red food coloring to achieve a soft pink hue. Dab two small dots of this pink frosting below Santa’s eyes for his cheeks. -
Step 5
Tint the remaining portion of frosting a vibrant red for Santa’s hat. Frost the top portion of the cupcake above Santa’s eyes and beard with red frosting, or pipe a hat shape. If frosting directly, leave a small white band at the bottom of the red area for trim. Add a line of white frosting or white candy pearls along the bottom edge of the red hat for trim. -
Step 6
Place a single red candy in the center between the two marshmallow eyes for Santa’s nose. Add white candy pearls or sprinkles around the red nose for extra festive flair or to represent snow.
Important Information
Nutrition Facts (Per Serving)
It is important to consider this information as approximate and not to use it as definitive health advice.
Allergy Information
Please check ingredients for potential allergens and consult a health professional if in doubt.

Leave a Comment