
Smoked BBQ Chicken: Prepare to embark on a culinary journey that will redefine your understanding of barbecue! Forget everything you thought you knew about dry, lackluster chicken. We’re diving headfirst into the world of smoky, succulent, and utterly irresistible Smoked BBQ Chicken. This isn’t just a recipe; it’s an experience.
Barbecue, as a cooking method, has deep roots in cultures around the globe, from the Caribbean’s “barbacoa” (the origin of the word itself) to the American South’s slow-cooked traditions. Smoking, in particular, adds a layer of complexity and flavor that elevates simple ingredients to something truly special. And when you combine that smoky goodness with the tangy sweetness of barbecue sauce, magic happens!
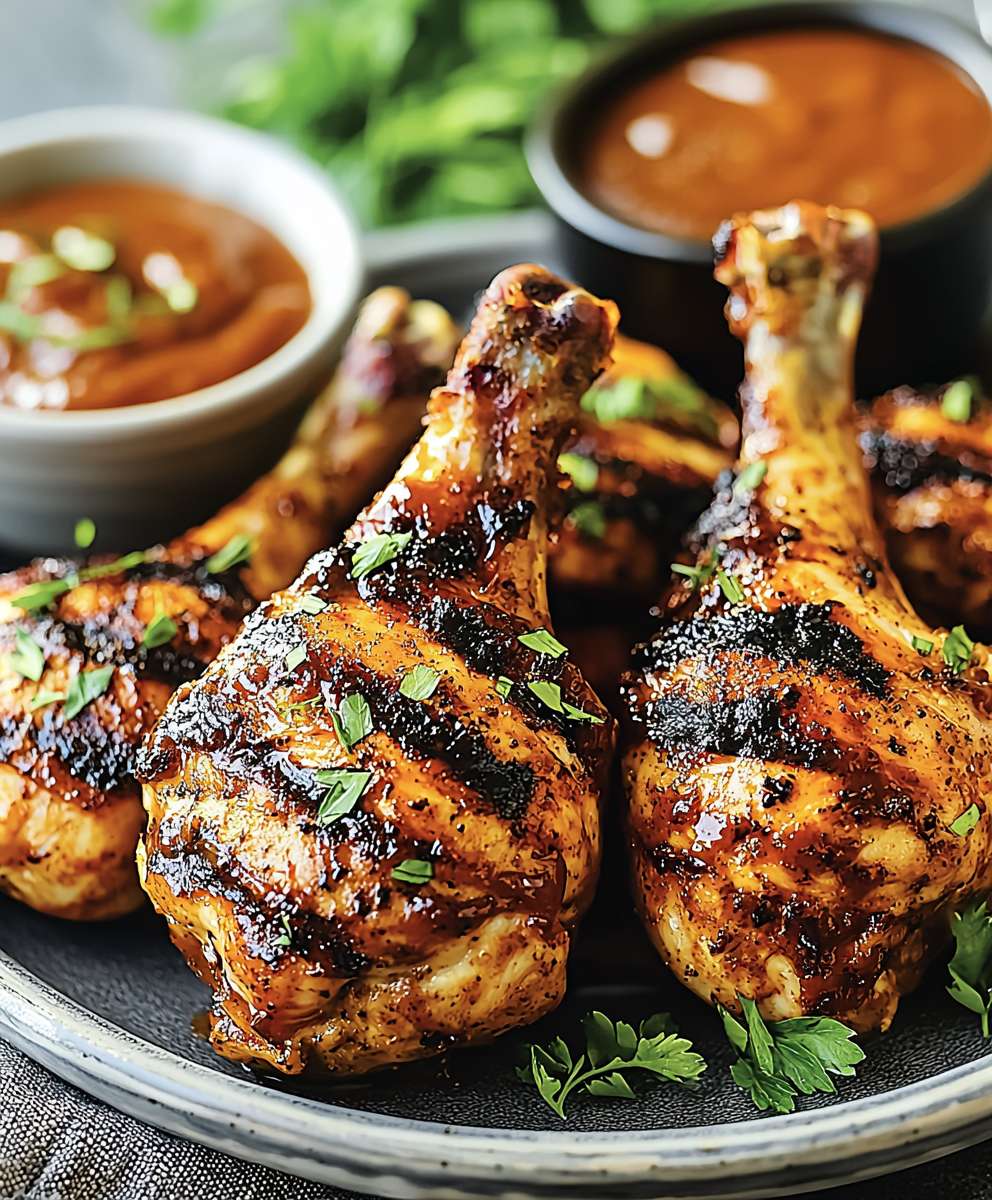
What makes Smoked BBQ Chicken so universally loved? It’s the perfect balance of textures the crispy, slightly charred skin giving way to juicy, tender meat. The smoky aroma alone is enough to make mouths water. Plus, it’s incredibly versatile! Serve it at your next backyard barbecue, enjoy it as a weeknight family dinner, or shred it for delicious sandwiches and salads. It’s a crowd-pleaser that’s surprisingly easy to make, even for beginner smokers. So, fire up your smoker, grab your favorite BBQ sauce, and let’s get started!
Ingredients:
- For the Chicken:
- 1 whole chicken (about 3-4 lbs), giblets removed
- 2 tablespoons olive oil
- 2 tablespoons BBQ dry rub (see recipe below or use your favorite)
- 1 teaspoon salt
- 1/2 teaspoon black pepper
- For the BBQ Dry Rub (Optional, but highly recommended!):
- 2 tablespoons smoked paprika
- 1 tablespoon brown sugar
- 1 tablespoon garlic powder
- 1 tablespoon onion powder
- 1 tablespoon chili powder
- 1 teaspoon cumin
- 1 teaspoon dried oregano
- 1/2 teaspoon cayenne pepper (adjust to your spice preference)
- 1 teaspoon salt
- 1/2 teaspoon black pepper
- For the Smoking Process:
- Wood chips (hickory, apple, or a blend are great)
- Water (for the water pan, if your smoker has one)
- BBQ sauce (your favorite brand or homemade)
Preparing the Chicken:
- Pat the Chicken Dry: This is crucial for getting crispy skin (or as crispy as you can get with smoked chicken!). Use paper towels to thoroughly dry the chicken, inside and out. Removing excess moisture allows the rub to adhere better and helps the skin render properly during smoking.
- Apply Olive Oil: Rub the entire chicken with olive oil. This helps the dry rub stick and also contributes to a more flavorful and slightly crisper skin. Make sure to get under the skin on the breast if you can, but be careful not to tear it.
- Mix the Dry Rub (if making your own): In a small bowl, combine the smoked paprika, brown sugar, garlic powder, onion powder, chili powder, cumin, oregano, cayenne pepper, salt, and black pepper. Mix well to ensure all the spices are evenly distributed. This homemade rub is seriously amazing and adds so much depth of flavor!
- Season Generously: Liberally apply the BBQ dry rub all over the chicken, including under the skin on the breast and thighs if possible. Don’t be shy! The more rub, the more flavor. Make sure every nook and cranny is covered. If you’re using a pre-made rub, that’s totally fine too just make sure it’s a good one!
- Let it Rest (Optional, but Recommended): For the best flavor, wrap the seasoned chicken in plastic wrap and refrigerate for at least 2 hours, or preferably overnight. This allows the flavors of the rub to penetrate the meat. If you’re short on time, you can skip this step, but the longer it sits, the better it will taste.
Preparing the Smoker:
- Choose Your Wood: Select your wood chips. Hickory is a classic choice for BBQ, providing a strong, smoky flavor. Applewood is milder and sweeter, and pecan is another great option. You can also use a blend of woods. I often use a mix of hickory and apple for a balanced flavor.
- Soak the Wood Chips (Optional): Some people prefer to soak their wood chips in water for about 30 minutes before adding them to the smoker. This is said to produce more smoke and prevent the chips from burning too quickly. I sometimes soak them, sometimes I don’t it depends on how dry the chips are. If they seem really dry, I’ll soak them.
- Prepare the Smoker: Prepare your smoker according to the manufacturer’s instructions. This usually involves filling the water pan (if your smoker has one) with water, adding the wood chips to the designated area, and setting up the heat source.
- Preheat the Smoker: Preheat the smoker to a temperature of 225-250°F (107-121°C). Maintaining a consistent temperature is key to successful smoking. Use a reliable thermometer to monitor the temperature inside the smoker.
Smoking the Chicken:
- Place the Chicken in the Smoker: Once the smoker has reached the desired temperature, carefully place the chicken directly on the smoker grate. Make sure there’s enough space around the chicken for the smoke to circulate properly.
- Maintain Temperature and Smoke: Maintain the smoker temperature between 225-250°F (107-121°C) throughout the smoking process. Add more wood chips as needed to maintain a consistent smoke. Check the water level in the water pan periodically and refill as necessary.
- Smoke for 3-4 Hours: Smoke the chicken for approximately 3-4 hours, or until the internal temperature reaches 165°F (74°C) in the thickest part of the thigh. Use a meat thermometer to accurately measure the temperature. Don’t rely solely on time temperature is the most important indicator of doneness.
- Baste with BBQ Sauce (Optional): During the last 30-60 minutes of smoking, you can baste the chicken with your favorite BBQ sauce. This will add a layer of flavor and help to caramelize the skin. Baste every 15-20 minutes for the best results. I like to use a sweet and tangy BBQ sauce for this.
- Check for Doneness: The chicken is done when the internal temperature reaches 165°F (74°C) in the thickest part of the thigh. The juices should also run clear when you pierce the thigh with a fork.
Resting and Serving:
- Rest the Chicken: Once the chicken is cooked through, remove it from the smoker and let it rest for at least 15-20 minutes before carving. This allows the juices to redistribute throughout the meat, resulting in a more tender and flavorful chicken. Tent the chicken loosely with foil to keep it warm while it rests.
- Carve and Serve: Carve the chicken and serve immediately. Smoked BBQ chicken is delicious on its own, or you can serve it with your favorite BBQ sides, such as coleslaw, potato salad, baked beans, and cornbread.
Tips for the Best Smoked BBQ Chicken:
- Don’t Overcrowd the Smoker: Make sure there’s enough space around the chicken for the smoke to circulate properly. Overcrowding can lead to uneven cooking.
- Use a Meat Thermometer: A meat thermometer is essential for ensuring that the chicken is cooked to a safe internal temperature. Don’t rely solely on time temperature is the most important indicator of doneness.
- Maintain a Consistent Temperature: Maintaining a consistent temperature in the smoker is key to successful smoking. Use a reliable thermometer to monitor the temperature and adjust the heat source as needed.
- Don’t Open the Smoker Too Often: Opening the smoker too often will cause the temperature to fluctuate, which can prolong the cooking time. Try to limit the number of times you open the smoker.
- Experiment with Different Wood Chips: Different types of wood chips will impart different flavors to the chicken. Experiment with different woods to find your favorite combination.
- Brining the Chicken (Optional): For an even more moist and flavorful chicken, consider brining it for several hours before smoking. A simple brine can be made with water, salt, and sugar.
- Spatchcocking the Chicken (Optional): Spatchcocking involves removing the backbone of the chicken and flattening it out. This allows the chicken to cook more evenly and quickly.
Troubleshooting:
- Chicken is Cooking Too Quickly: If the chicken is cooking too quickly, lower the smoker temperature or move the chicken further away from the heat source.
- Chicken is Not Cooking Quickly Enough: If the chicken is not cooking quickly enough, raise the smoker temperature or add more wood chips to increase the smoke.
- Chicken Skin is Not Crispy: To get crispier skin, try increasing the smoker temperature during the last 30-60 minutes of cooking. You can also baste the chicken with melted butter or oil. Make sure the chicken is very dry before applying the rub.
- Chicken is Too Smoky: If the chicken is too smoky, reduce the amount of wood chips you use or use a milder type of wood.
Conclusion:
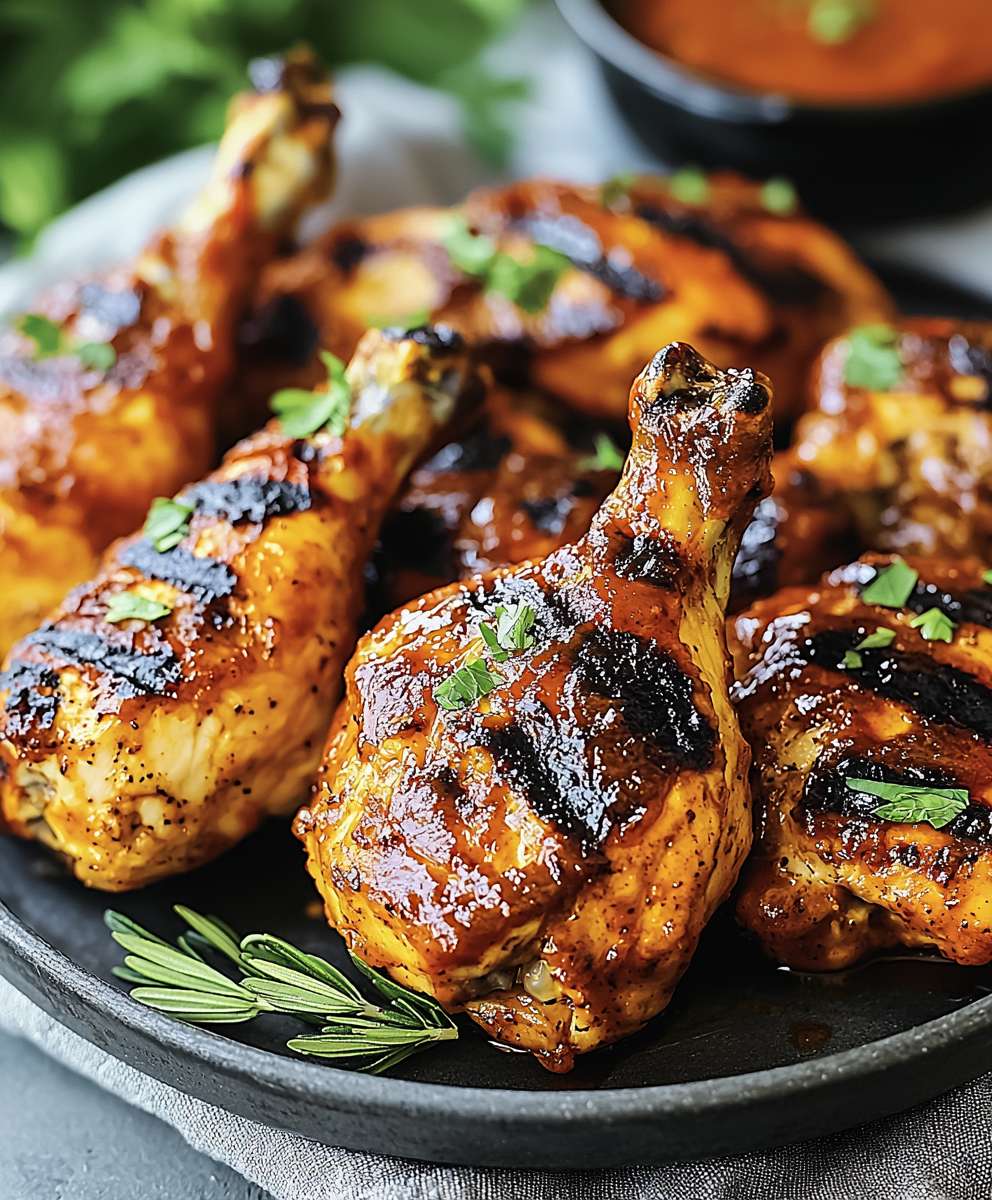
So there you have it! This Smoked BBQ Chicken recipe is truly a game-changer, and I’m confident it will become a staple in your grilling repertoire. Why is it a must-try? Because it delivers that perfect balance of smoky depth, juicy tenderness, and tangy BBQ flavor that will have everyone begging for more. Forget dry, bland chicken this method guarantees succulent, flavorful results every single time. The low and slow smoking process infuses the chicken with an irresistible smoky essence that you simply can’t achieve with other cooking methods. Plus, the homemade BBQ sauce adds a layer of complexity and sweetness that complements the smoky notes beautifully.
But the best part? It’s surprisingly easy to make! While it requires some time, the actual hands-on effort is minimal. You’ll mostly be letting your smoker do the work, leaving you free to relax and enjoy the day. And trust me, the aroma wafting from your smoker will be enough to make your neighbors jealous!
Serving Suggestions and Variations:
Now, let’s talk about serving suggestions. This Smoked BBQ Chicken is incredibly versatile and pairs well with a wide variety of sides. For a classic BBQ feast, serve it with creamy coleslaw, potato salad, baked beans, and corn on the cob. If you’re looking for something a bit lighter, try pairing it with a fresh garden salad, grilled vegetables, or quinoa. And don’t forget the cornbread! A warm, buttery slice of cornbread is the perfect accompaniment to soak up all that delicious BBQ sauce.
Feeling adventurous? Here are a few variations you can try:
- Spice it up: Add a pinch of cayenne pepper or a dash of hot sauce to your BBQ sauce for an extra kick.
- Sweeten the deal: Incorporate a touch of honey or maple syrup into the sauce for a sweeter flavor profile.
- Experiment with wood chips: Try different types of wood chips, such as applewood, hickory, or mesquite, to create unique smoky flavors.
- Make it a sandwich: Shred the smoked chicken and pile it onto toasted buns with coleslaw and pickles for a mouthwatering BBQ chicken sandwich.
- BBQ Chicken Pizza: Use the shredded smoked chicken as a topping for homemade or store-bought pizza.
The possibilities are endless! Don’t be afraid to get creative and experiment with different flavors and combinations to find your perfect Smoked BBQ Chicken masterpiece.
I truly believe that this recipe is a winner, and I can’t wait for you to try it. So, fire up your smoker, gather your ingredients, and get ready to experience the best BBQ chicken you’ve ever had. Once you’ve made it, I’d absolutely love to hear about your experience. Did you make any modifications? What sides did you serve it with? What did your family and friends think? Share your photos and stories in the comments below! Your feedback is invaluable, and it helps me continue to improve and create even better recipes for you. Happy smoking!
Don’t forget to rate the recipe and share it with your friends and family who love BBQ as much as we do! Let’s spread the joy of delicious, smoky chicken far and wide!
Print
Smoked BBQ Chicken: The Ultimate Guide to Perfect BBQ Chicken
- Total Time: 260 minutes
- Yield: 4–6 servings 1x
Description
Juicy, smoky BBQ chicken made from scratch! This recipe uses a flavorful dry rub and slow smoking to create a tender and delicious bird.
Ingredients
- 1 whole chicken (about 3–4 lbs), giblets removed
- 2 tablespoons olive oil
- 2 tablespoons BBQ dry rub (see recipe below or use your favorite)
- 1 teaspoon salt
- 1/2 teaspoon black pepper
- 2 tablespoons smoked paprika
- 1 tablespoon brown sugar
- 1 tablespoon garlic powder
- 1 tablespoon onion powder
- 1 tablespoon chili powder
- 1 teaspoon cumin
- 1 teaspoon dried oregano
- 1/2 teaspoon cayenne pepper (adjust to your spice preference)
- 1 teaspoon salt
- 1/2 teaspoon black pepper
- Wood chips (hickory, apple, or a blend are great)
- Water (for the water pan, if your smoker has one)
- BBQ sauce (your favorite brand or homemade)
Instructions
- Pat the Chicken Dry: Use paper towels to thoroughly dry the chicken, inside and out.
- Apply Olive Oil: Rub the entire chicken with olive oil.
- Mix the Dry Rub (if making your own): In a small bowl, combine the smoked paprika, brown sugar, garlic powder, onion powder, chili powder, cumin, oregano, cayenne pepper, salt, and black pepper. Mix well.
- Season Generously: Liberally apply the BBQ dry rub all over the chicken, including under the skin if possible.
- Let it Rest (Optional, but Recommended): Wrap the seasoned chicken in plastic wrap and refrigerate for at least 2 hours, or preferably overnight.
- Choose Your Wood: Select your wood chips (hickory, apple, or a blend).
- Soak the Wood Chips (Optional): Soak wood chips in water for about 30 minutes.
- Prepare the Smoker: Prepare your smoker according to the manufacturer’s instructions. Fill the water pan (if your smoker has one) with water, add the wood chips, and set up the heat source.
- Preheat the Smoker: Preheat the smoker to a temperature of 225-250°F (107-121°C).
- Place the Chicken in the Smoker: Place the chicken directly on the smoker grate.
- Maintain Temperature and Smoke: Maintain the smoker temperature between 225-250°F (107-121°C) throughout the smoking process. Add more wood chips as needed to maintain a consistent smoke. Check the water level in the water pan periodically and refill as necessary.
- Smoke for 3-4 Hours: Smoke the chicken for approximately 3-4 hours, or until the internal temperature reaches 165°F (74°C) in the thickest part of the thigh. Use a meat thermometer to accurately measure the temperature.
- Baste with BBQ Sauce (Optional): During the last 30-60 minutes of smoking, you can baste the chicken with your favorite BBQ sauce. Baste every 15-20 minutes for the best results.
- Check for Doneness: The chicken is done when the internal temperature reaches 165°F (74°C) in the thickest part of the thigh. The juices should also run clear when you pierce the thigh with a fork.
- Rest the Chicken: Remove it from the smoker and let it rest for at least 15-20 minutes before carving. Tent the chicken loosely with foil to keep it warm while it rests.
- Carve and Serve: Carve the chicken and serve immediately.
Notes
- Don’t Overcrowd the Smoker: Make sure there’s enough space around the chicken for the smoke to circulate properly.
- Use a Meat Thermometer: A meat thermometer is essential for ensuring that the chicken is cooked to a safe internal temperature.
- Maintain a Consistent Temperature: Maintaining a consistent temperature in the smoker is key to successful smoking.
- Don’t Open the Smoker Too Often: Opening the smoker too often will cause the temperature to fluctuate, which can prolong the cooking time.
- Experiment with Different Wood Chips: Different types of wood chips will impart different flavors to the chicken.
- Brining the Chicken (Optional): For an even more moist and flavorful chicken, consider brining it for several hours before smoking.
- Spatchcocking the Chicken (Optional): Spatchcocking involves removing the backbone of the chicken and flattening it out. This allows the chicken to cook more evenly and quickly.
- Prep Time: 20 minutes
- Cook Time: 180 minutes


Leave a Comment