
Strawberry Pop Tart Cookies offer a delightful journey back to childhood, but with a sophisticated, homemade twist that will captivate your taste buds. Imagine taking the nostalgic charm of that iconic breakfast pastry and infusing it into a perfectly chewy, buttery cookie. This innovative dessert isn’t just a treat; it’s a culinary celebration of two beloved classics, creating something truly extraordinary.
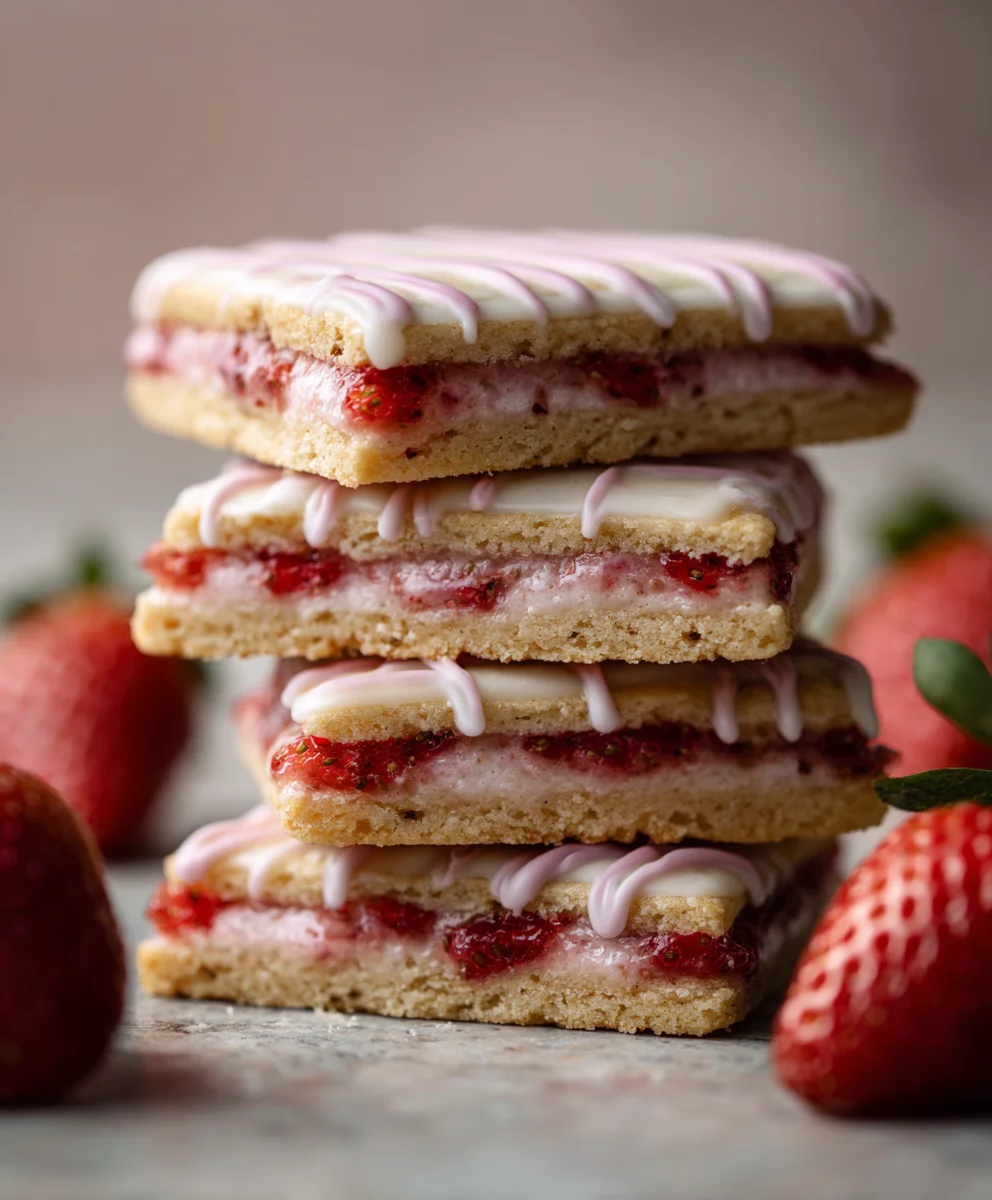
For many of us, Pop-Tarts hold a special place in our hearts, a symbol of cozy mornings and simple pleasures. This recipe honors that cherished memory by transforming it into a shareable, utterly irresistible cookie form. What people truly adore about these cookies is the incredible fusion of textures and flavors: the tender bite of a freshly baked cookie, the sweet, fruity burst of strawberry jam, and that signature, irresistible frosting and sprinkles. It’s an ingenious way to enjoy the familiar sweetness in an entirely new, incredibly satisfying format.
Why You’ll Fall in Love with Strawberry Pop Tart Cookies
Beyond their charming appearance, these Strawberry Pop Tart Cookies are celebrated for their convenience and undeniable deliciousness. They bring a playful elegance to any gathering or a comforting indulgence to a quiet evening at home. Get ready to bake a batch that promises smiles and a nostalgic trip down memory lane, all in one perfect bite!
Ingredients:
- For the Cookie Dough:
- 2 ½ cups (300g) all-purpose flour, plus more for dusting
- 1 teaspoon baking powder
- ½ teaspoon salt
- 1 cup (226g) unsalted butter, softened to room temperature
- ¾ cup (150g) granulated sugar
- 1 large egg, also at room temperature
- 2 teaspoons pure vanilla extract
- For the Strawberry Filling:
- 2 cups (approx. 300g) fresh strawberries, hulled and finely diced
- ¼ cup (50g) granulated sugar (adjust to taste depending on strawberry sweetness)
- 1 tablespoon fresh lemon juice
- 1 tablespoon cornstarch (cornflour)
- 2 tablespoons water
- For the Glaze and Decoration:
- 2 cups (240g) powdered sugar (confectioners’ sugar), sifted
- 3-4 tablespoons milk (whole milk or 2% works best), or heavy cream
- ½ teaspoon pure vanilla extract
- Optional: A tiny drop of pink or red food coloring for a vibrant glaze
- Assorted rainbow sprinkles or seasonal sprinkles, for topping
Preparing the Cookie Dough for Your Strawberry Pop Tart Cookies
- Combine Dry Ingredients: In a medium bowl, I like to whisk together my all-purpose flour, baking powder, and salt. Make sure these are thoroughly combined; this ensures an even rise and seasoning throughout our delicious Strawberry Pop Tart Cookies. Set this bowl aside for a moment.
- Cream Butter and Sugar: In the bowl of a stand mixer fitted with the paddle attachment, or with a large bowl and a handheld electric mixer, I cream together the softened unsalted butter and granulated sugar. It’s important for the butter to be at room temperature – not melted, but soft enough that your finger leaves an indent when pressed gently. I usually beat these on medium speed for about 3-4 minutes, until the mixture becomes wonderfully light, fluffy, and pale in color. This creaming process incorporates air, which is crucial for a tender cookie.
- Add Egg and Vanilla: Next, I add the large room-temperature egg. Adding a room-temperature egg prevents the mixture from seizing and ensures everything emulsifies beautifully. I beat it in until it’s just combined, scraping down the sides of the bowl with a rubber spatula as needed to make sure no bits are left unincorporated. Then, I stir in the pure vanilla extract. Vanilla adds such a comforting aroma and flavor profile to our cookies. Beat for another 30 seconds until well blended.
- Incorporate Dry Ingredients: Now, I gradually add the dry ingredient mixture to the wet ingredients, mixing on low speed. I usually add it in about three batches, mixing just until the flour streaks have disappeared. It’s very important not to overmix at this stage, as overmixing can develop the gluten in the flour too much, leading to tough cookies. As soon as the flour is just incorporated and forms a soft dough, I stop mixing. The dough might seem a little sticky, but that’s perfectly normal.
- Chill the Dough: I divide the dough in half and gently form each half into a flat disk. I then wrap each disk tightly in plastic wrap. Chilling the dough is a non-negotiable step for these Strawberry Pop Tart Cookies! It firms up the butter, which prevents the cookies from spreading too much in the oven, and also makes the dough much easier to handle when rolling. I pop these into the refrigerator for at least 1 hour, or up to 2 days. If you’re short on time, 30 minutes in the freezer can work, but an hour in the fridge is ideal.
Crafting the Sweet Strawberry Filling
- Prepare Strawberries: While the dough is chilling, I get started on the star of the show – the strawberry filling! I take my fresh strawberries, hulled them, and then finely dice them. Aim for small, even pieces so they cook down nicely and are easy to spread within the cookies.
- Cook the Filling: In a small saucepan, I combine the finely diced strawberries, granulated sugar, and fresh lemon juice. I bring this mixture to a gentle simmer over medium heat, stirring occasionally. The strawberries will start to release their juices and soften.
- Thicken the Filling: In a very small separate bowl, I whisk together the cornstarch and water to create a slurry. Once the strawberries have softened (usually after about 5-7 minutes of simmering), I pour the cornstarch slurry into the saucepan, stirring constantly. I continue to cook and stir for another 1-2 minutes, until the filling thickens considerably. It should be thick enough to hold its shape on a spoon, almost like a jam. A thick filling is key to preventing leaks in your Strawberry Pop Tart Cookies.
- Cool the Filling: I remove the saucepan from the heat and transfer the strawberry filling to a small bowl or container. It’s crucial that this filling cools completely before we use it. If it’s warm, it can make the cookie dough soft and difficult to work with, leading to sticky situations. I usually pop it into the refrigerator for at least 30 minutes to speed up the cooling process.
Assembling Your Delightful Strawberry Pop Tart Cookies
- Preheat Oven & Prepare Baking Sheets: Before I start assembling, I preheat my oven to 350°F (175°C). I also line two large baking sheets with parchment paper or silicone baking mats. This makes for easy cleanup and prevents sticking.
- Roll Out the Dough: I take one disk of chilled cookie dough from the refrigerator. On a lightly floured surface (I use all-purpose flour for dusting), I roll out the dough to an even thickness, about ⅛ to ¼-inch thick. If the dough is too cold and hard to roll, let it sit at room temperature for 5-10 minutes. I try to roll it into a rough rectangle or oval shape to maximize the number of cookies I can cut.
- Cut Out Shapes: Using a rectangular cookie cutter (mine is usually about 2×3 inches, similar to a standard pop tart size) or a sharp knife, I cut out as many rectangles as possible from the dough. Remember, for each cookie, you’ll need two rectangles. So, I aim for an even number. If using a knife, I use a ruler to help me cut precise, even shapes. I gently gather the dough scraps, lightly knead them together, re-wrap them, and chill again briefly before re-rolling to cut more shapes.
- Lay Out Bottom Layers: I carefully transfer half of the cut-out dough rectangles onto my prepared baking sheets. These will be the bottom layers of our Strawberry Pop Tart Cookies. I leave a little space between each one.
- Add Strawberry Filling: Now for the delicious part! I spoon about 1 to 1 ½ teaspoons of the cooled strawberry filling onto the center of each bottom cookie rectangle. It’s important not to overfill and to leave a small border (about ¼ inch) around the edges of the dough. This border is essential for sealing the cookies later.
- Place Top Layers: I carefully place the remaining dough rectangles on top of the filled bottoms, gently lining them up.
- Seal the Edges: To seal these lovely Strawberry Pop Tart Cookies, I gently press down around the edges of each cookie. Then, using the tines of a fork, I crimp all around the perimeter of each cookie. This not only creates that classic pop tart look but, more importantly, it helps to seal the filling inside and prevents it from bubbling out during baking. A good seal is crucial for a neat cookie!
- Create Vent Holes: Finally, using a toothpick or the tip of a small knife, I gently poke 3-4 small holes on the top of each cookie. These little vents allow steam to escape during baking, preventing the cookies from puffing up too much and potentially bursting at the seams.
Baking Your Homemade Strawberry Pop Tart Cookies
- Bake Until Golden: I place the baking sheets into the preheated oven. I bake the Strawberry Pop Tart Cookies for 12-15 minutes, or until the edges are lightly golden brown and the tops look set. Every oven is a little different, so I keep a close eye on them, especially towards the end of the baking time. I want them to be cooked through but still have a soft, tender center.
- Cool on Baking Sheet: Once baked, I remove the baking sheets from the oven. The cookies will be soft, so I let them cool on the baking sheets for about 5 minutes. This allows them to firm up slightly before I move them.
- Transfer to Wire Rack: After 5 minutes, I carefully transfer the partially cooled Strawberry Pop Tart Cookies to a wire cooling rack to cool completely. They must be completely cool before glazing, otherwise, the glaze will melt and slide right off. This usually takes about 30-60 minutes.
Glazing and Decorating the Strawberry Pop Tart Cookies
- Prepare the Glaze: While the cookies are cooling, I prepare the simple and sweet glaze. In a medium bowl, I whisk together the sifted powdered sugar, 3 tablespoons of milk (or cream), and ½ teaspoon of vanilla extract. I start with 3 tablespoons of milk and add more, a tiny bit at a time, until I reach a smooth, pourable, but still thick consistency. It should be thick enough to coat the back of a spoon without being too runny. If I want a pop of color, I add a very small drop of pink or red food coloring and mix it in until evenly distributed.
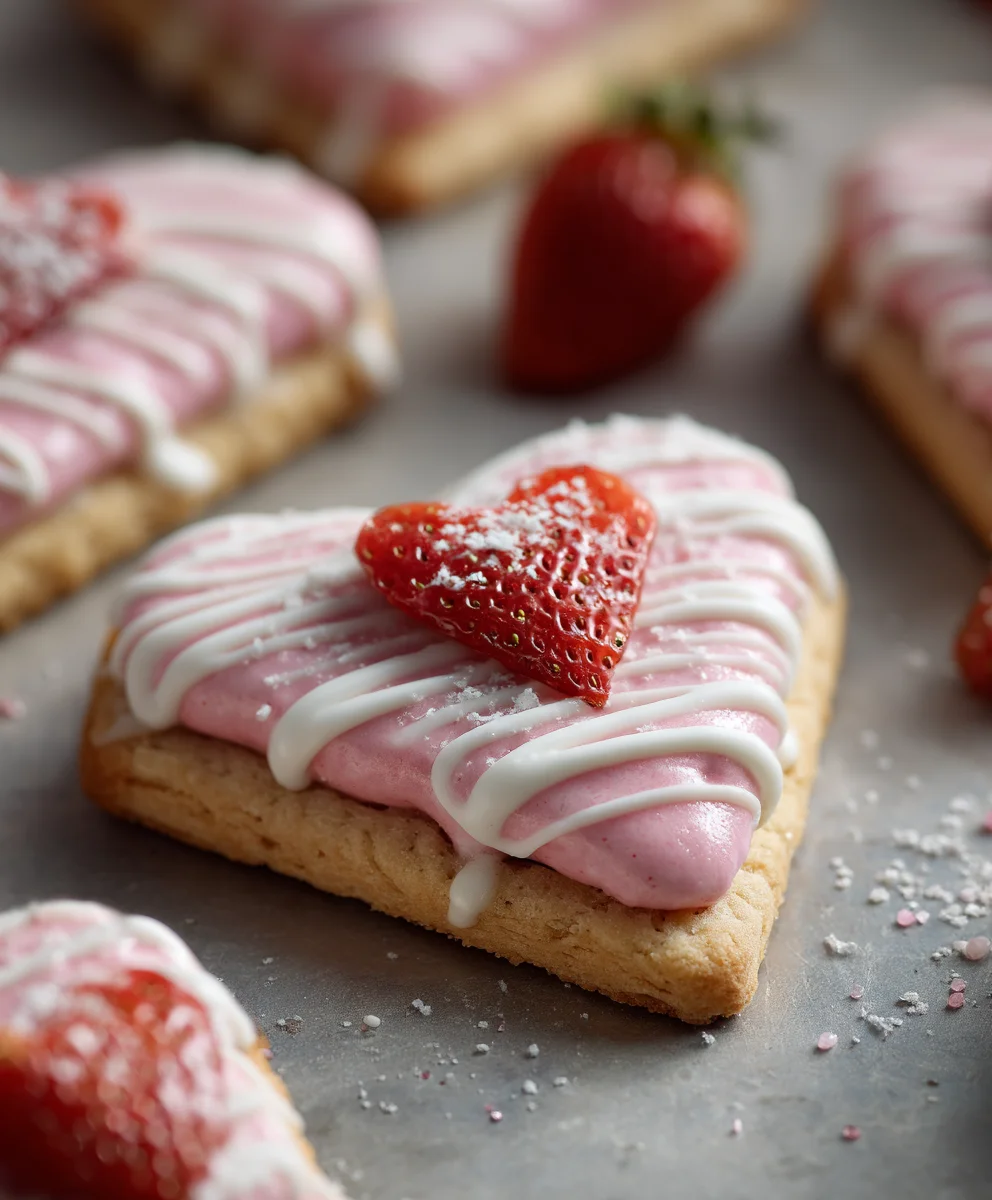
- Glaze the Cookies: Once the Strawberry Pop Tart Cookies are completely cool, I spoon or spread a generous amount of glaze over the top of each cookie. I like to spread it gently to the edges using the back of a spoon or a small offset spatula. If you prefer a more rustic look, a simple drizzle is also lovely!
- Add Sprinkles: This is the fun part! Immediately after glazing each cookie (while the glaze is still wet), I generously sprinkle them with my chosen rainbow sprinkles. The sprinkles will adhere beautifully to the wet glaze, creating that iconic festive look.
- Allow Glaze to Set: I let the glazed Strawberry Pop Tart Cookies sit at room temperature for about 15-30 minutes, or until the glaze has fully set and hardened. This ensures they are easy to handle and stack without smudging.
- Serve and Enjoy: Once the glaze is set, your homemade Strawberry Pop Tart Cookies are ready to be devoured! They make a fantastic treat for breakfast, a delightful snack, or a charming dessert. I store any leftovers in an airtight container at room temperature for up to 3-4 days to maintain their freshness. These cookies are truly a joy to make and even more so to eat!
Conclusion:
Well, my friends, we’ve reached the sweet end of our journey, and I genuinely hope you’re feeling as inspired as I am about this incredible recipe. If there’s one thing I want you to take away from this, it’s that these delightful treats are more than just another cookie; they are an experience, a joyous blend of childhood nostalgia and sophisticated homemade deliciousness. These are the kind of cookies that make memories, the ones that spark conversations and bring smiles to faces young and old. They manage to capture the essence of a beloved classic while elevating it with the unmatched warmth and care that only a homemade creation can offer. The perfect balance of a tender, buttery crust, a sweet, fruity filling, and that signature frosting swirl creates a symphony of textures and flavors that is truly unforgettable. I promise you, once you taste the fruit of your labor, you’ll understand exactly why I’m so passionate about them.
There’s just something magical about these Strawberry Pop Tart Cookies that truly sets them apart. They’re not just a simple cookie; they’re a masterpiece of comfort food, reimagined and perfected in your very own kitchen. I often find myself craving them on a cozy afternoon with a cup of tea, or even as a cheerful start to a lazy weekend morning. The way the fruit filling bursts with flavor, complementing the soft, almost cake-like cookie base, topped with that perfectly sweet, slightly tangy glaze – it’s a revelation. This recipe isn’t just about following steps; it’s about creating joy, about bringing a little piece of edible happiness into your home and sharing it with the people you cherish most.
Serving Suggestions & Creative Variations: Elevate Your Cookie Experience
Once you’ve baked your batch, the possibilities for enjoyment are endless! Of course, they are absolutely divine enjoyed warm, straight from the oven, perhaps with a tall glass of cold milk. But let’s not stop there! Imagine serving one of these beauties as a sophisticated dessert: try plating a warm Strawberry Pop Tart Cookie alongside a scoop of vanilla bean ice cream, allowing the cookie’s warmth to gently melt the ice cream, creating an irresistible pool of creamy deliciousness. A dollop of freshly whipped cream and a sprinkle of chopped pistachios could add an elegant touch for a dinner party. For a delightful breakfast or brunch offering, consider serving them alongside a fresh fruit platter and a steaming mug of coffee or a mimosa; they offer a sweet counterpoint to more savory dishes.
Feeling adventurous? Don’t hesitate to experiment with the filling! While strawberry is the classic, a homemade raspberry or blueberry jam would be equally fantastic, offering a slightly different flavor profile. You could even get seasonal – a fig or apricot jam in the autumn, or a peach preserve in the summer, could transform these into a truly unique, seasonal delight. For the glaze, a hint of almond extract instead of vanilla could add a wonderful nutty note, or a touch of lemon zest for a brighter finish. Sprinkles are always a welcome addition, letting you customize them for holidays or special occasions. Think red and green for Christmas, pastels for Easter, or even school colors for a graduation celebration. For those with dietary considerations, don’t shy away from experimenting with gluten-free flour blends or plant-based butters and egg substitutes; the core integrity of these cookies is surprisingly adaptable, allowing everyone to enjoy their homemade goodness.
Your Turn: Bake, Savor, and Share!
Now that you’ve got all the inspiration and instructions, there’s only one thing left to do: get into your kitchen! I genuinely urge you to give this recipe a try. You’ll not only create something incredibly delicious but also experience the pure joy and satisfaction that comes from baking something truly special from scratch. Don’t be intimidated; the process is rewarding, and the results are spectacular. Once you’ve baked your batch of these magnificent cookies, I would absolutely love to hear about your experience. Did you try a new filling? Did you serve them in a unique way? Please, share your stories, your photos, and your tips with me and our community. Your culinary adventures inspire us all. So go on, preheat that oven, gather your ingredients, and prepare to fall in love with your new favorite treat. Happy baking, my friends!
Strawberry Pop Tart Cookies
These Strawberry Pop Tart Cookies are a delightful, homemade twist on a classic breakfast pastry, combining chewy, buttery cookies with a sweet strawberry jam filling and an irresistible pink glaze with sprinkles. Born from a rainy Saturday and now a family favorite, these cookies are a nostalgic, Instagram-worthy treat that’s better than the boxed kind and perfect for any occasion.
Ingredients
-
2 ½ cups (300g) all-purpose flour
-
1 teaspoon baking powder
-
½ teaspoon salt
-
1 cup (226g) unsalted butter, softened
-
¾ cup (150g) granulated sugar
-
1 large egg, room temperature
-
2 teaspoons pure vanilla extract
-
2 cups (approx. 300g) fresh strawberries, hulled and finely diced
-
¼ cup (50g) granulated sugar (adjust to taste)
-
1 tablespoon fresh lemon juice
-
1 tablespoon cornstarch
-
2 tablespoons water
-
2 cups (240g) powdered sugar, sifted
-
3-4 tablespoons milk
-
½ teaspoon pure vanilla extract
-
Optional: A tiny drop of pink or red food coloring
-
Assorted rainbow sprinkles
Instructions
-
Step 1
Whisk 2 ½ cups all-purpose flour, 1 tsp baking powder, and ½ tsp salt in a medium bowl. Set aside. -
Step 2
In a stand mixer, cream 1 cup softened unsalted butter and ¾ cup granulated sugar on medium speed for 3-4 minutes until light and fluffy. -
Step 3
Beat in 1 large room-temperature egg until just combined, scraping bowl sides. Stir in 2 tsp pure vanilla extract; beat 30 seconds. -
Step 4
Gradually add dry mixture to wet, mixing on low speed just until flour streaks disappear. Do not overmix. Dough will be soft. -
Step 5
Divide dough in half, form into flat disks, wrap tightly, and refrigerate for at least 1 hour (up to 2 days) or freeze for 30 minutes. -
Step 6
Finely dice 2 cups hulled fresh strawberries. In a small saucepan, combine diced strawberries, ¼ cup granulated sugar, and 1 tbsp fresh lemon juice. Simmer over medium heat for 5-7 minutes, stirring occasionally, until strawberries soften. -
Step 7
Whisk 1 tbsp cornstarch with 2 tbsp water to create a slurry. Pour into simmering strawberries, stirring constantly. Cook 1-2 minutes until filling thickens significantly. -
Step 8
Transfer filling to a bowl and refrigerate for at least 30 minutes until completely cool. -
Step 9
Preheat oven to 350°F (175°C). Line two large baking sheets with parchment paper. -
Step 10
On a lightly floured surface, roll one chilled dough disk to ⅛-¼ inch thick. Cut out an even number of 2×3-inch rectangles. Gather scraps, re-chill, and re-roll. -
Step 11
Transfer half of the rectangles to prepared baking sheets. Spoon 1-1½ tsp cooled strawberry filling onto the center of each, leaving a ¼-inch border. Place remaining dough rectangles on top. -
Step 12
Gently press and crimp all around the edges of each cookie with a fork to seal the filling. Poke 3-4 small holes on top of each cookie with a toothpick. -
Step 13
Bake for 12-15 minutes, or until edges are lightly golden brown and tops are set. -
Step 14
Cool on baking sheets for 5 minutes, then transfer to a wire rack to cool completely before glazing (30-60 minutes). -
Step 15
Whisk 2 cups sifted powdered sugar, 3 tbsp milk (add more if needed for desired consistency), and ½ tsp vanilla extract until smooth. Optional: Add a tiny drop of pink/red food coloring. -
Step 16
Once cookies are completely cool, spoon or spread glaze over each cookie. Immediately add rainbow sprinkles while glaze is wet. -
Step 17
Let glazed cookies sit at room temperature for 15-30 minutes until glaze sets. Store leftovers in an airtight container at room temperature for 3-4 days.
Important Information
Nutrition Facts (Per Serving)
It is important to consider this information as approximate and not to use it as definitive health advice.
Allergy Information
Please check ingredients for potential allergens and consult a health professional if in doubt.


Leave a Comment