

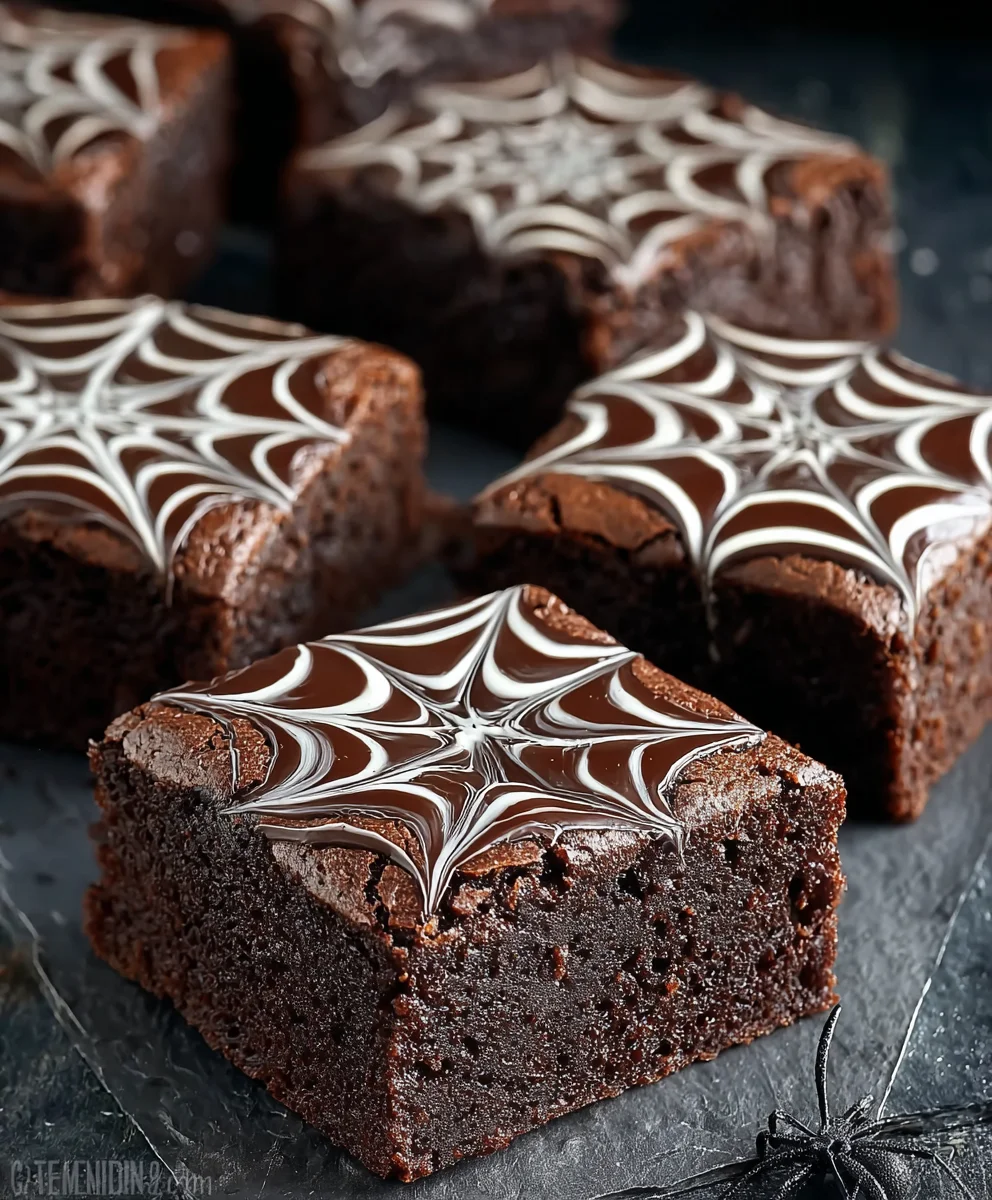
Spiderweb Brownies are more than just a dessert; they’re a delightful edible illusion that brings a touch of spooky charm and decadent flavor to any occasion. Imagin extracte sinking your teeth into a rich, fudgy brownie base, so deeply chocolatey it’s almost sinful, only to be captivated by the intricate, artistic swirls of white chocolate frosting that mimic a perfect spiderweb. This is precisely the magic of Spiderweb Brownies. We adore them not only for their intensely satisfying chocolate punch but also for their visually stunning presentation, making them an instant showstopper at parties, Halloween gatherings, or just when you crave something truly special. What truly elevates these Spiderweb Brownies is the perfect marriage of textures – the dense, chewy brownie giving way to the smooth, sweet frosting – and the striking contrast between the dark chocolate and the delicate white web. Get ready to impress your taste buds and your guests with this unforgettable treat.
Ingredients:
- 1/2 cup unsalted butter, melted
- 1 cup granulated sugar
- 2 large eggs
- 1 teaspoon vanilla extract
- 1/3 cup unsweetened cocoa powder
- 1/2 cup all-purpose flour
- 1/4 teaspoon baking powder
- 1/4 teaspoon salt
- 1/4 cup white chocolate chips
- 1 teaspoon vegetable oil
Preparing the Spiderweb Brownie Base
The foundation of our spectacular Spiderweb Brownies is a rich, fudgy brownie batter. We’ll start by combining the wet ingredients. In a medium-sized mixing bowl, pour in the 1/2 cup of melted unsalted butter. To this, add the 1 cup of granulated sugar. Whisk these two together thoroughly until the mixture is well combined and appears smooth and glossy. This step ensures the sugar begin extracts to dissolve, contributing to a tender brownie texture.
Next, we’ll incorporate the eggs and vanilla. Crack in your 2 large eggs, one at a time, whisking well after each addition. Don’t be tempted to overmix at this stage; we just want them fully integrated. Now, stir in the 1 teaspoon of vanilla extract. Vanilla is crucial not just for its lovely aroma but also for enhancing the overall chocolate flavor.
Now it’s time to introduce the dry ingredients that will give our brownies their structure and deep chocolatey flavor. In a separate, smaller bowl, sift together the 1/3 cup of unsweetened cocoa powder, 1/2 cup of all-purpose flour, 1/4 teaspoon of baking powder, and 1/4 teaspoon of salt. Sifting these ingredients together helps to aerate them and prevents any lumps from forming in the batter, leading to a more uniform crum extractb.
Gradually add the dry ingredients to the wet ingredients. It’s best to add them in two or three additions, mixing gently with a spatula or wooden spoon after each addition. Mix only until just combined. Overmixing can develop the gluten in the flour, resulting in tough brownies, so be gentle. The batter should be thick and fudgy, with no streaks of dry flour remaining.
Baking the Brownie Base
Preheat your oven to 350 degrees Fahrenheit (175 degrees Celsius). Grease and flour an 8×8 inch baking pan, or line it with parchment paper, leaving some overhang on the sides to make lifting the brownies out easier later. Pour the brownie batter into the prepared pan and spread it evenly using your spatula. Ensure the batter reaches all the corners of the pan for consistent baking.
Bake for 25-30 minutes, or until a toothpick inserted into the center comes out withrum extractist crumbs attached, not wet batter. It’s important not to overbake, as this will result in dry brownies. The edges should be set, and the center might still look slightly soft.
Creating the White Chocolate Spiderweb
While the brownies are cooling in the pan, we’ll prepare our “web” topping. In a small microwave-safe bowl, combine the 1/4 cup of white chocolate chips with the 1 teaspoon of vegetable oil. The vegetable oil is key here; it helps the white chocolate melt smoothly and become more fluid, which is essential for creating thin, distinct lines for our spiderweb design. Microwave the white chocolate in 20-second intervals, stirring well after each interval, until it is completely melted and smooth. Be cautious not to overheat, as white chocolate can seize up and become grainy if cooked too much.
Once the brownies have cooled completely in the pan (this is crucial to prevent the white chocolate from melting into the brownie), yogin extractan begin creating your spiderweb. Transfer the melted white chocolate to a piping bag fitted with a small, round tip. If you don’t have a piping bag, you can use a Ziploc bag with a tiny corner snipped off, or even a fork if you’re feeling adventurous and want a more rustic look.
Start by piping concentric circles of melted white chocolate onto the surface of the cooled brownies. Don’t worry about perfection; the beauty of a spiderweb is its organic nature. Once you have several circles, take a toothpick or a skewer and gently drag it from the center outwards, creating the web-like radial lines. Work quickly butgin extractrefully, dragging the toothpick through the white chocolate to create the illusion of a spiderweb. You can drag it in various directions to achieve a natural, uneven pattern.
Allow the white chocolate spiderweb to set completely before cutting the brownies. This usually takes about 30 minutes at room temperature, or you can speed it up by placing the pan in the refrigerator for about 15-20 minutes. Once the white chocolate is firm to the touch, you can lift the brownies out of the pan using the parchment paper overhang and cut them into squares. For the most stunning presentation, serve these Spiderweb Brownies as is, letting the intricate design shine.
Conclusion:
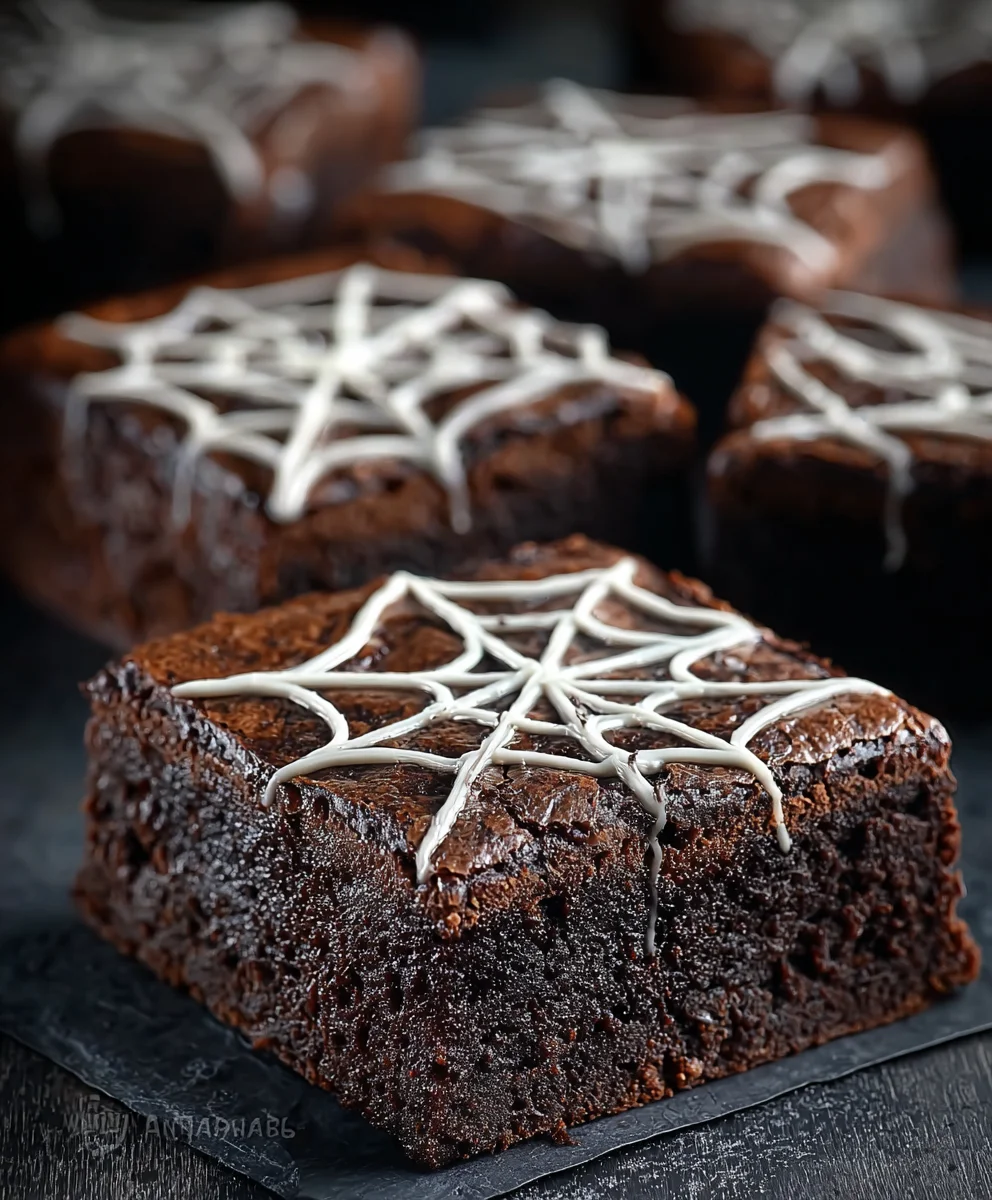
And there you have it! Your guide to creating the spooktacular and delicious Spiderweb Brownies is complete. We’ve walked through each step, from achieving that perfect fudgy center to mastering the artistic swirl of the spiderweb topping. These brownies are sure to be a hit at any Halloween party, bake snon-alcoholic ale, or even just a fun afternoon treat. They’re wonderfully rich, intensely chocolatey, and the visual appeal of the spiderweb makes them truly unforgettable.
For serving, I love to enjoy these Spiderweb Brownies slightly warm with a scoop of vanilla bean ice cream. They also pair beautifully with a cold glass of milk or a hot cup of coffee. If you’re looking to switch things up, consider adding a sprinkle of sea salt to the batter for a salty-sweet contrast, or even a dash of espresso powder to deepen the chocolate flavor. You could also experiment with different colored icing for the spiderwebs to create unique designs.
Don’t be intimidated by the decorating! The beauty of the spiderweb is that it’s forgiving. Even if your lines aren’t perfectly straight, it will still look fantastic. The most important thing is to have fun and enjoy the process of baking. I encourage you to give these Spiderweb Brownies a try – I’m confident you’ll love them!
Frequently Asked Questions:
Q: Can I make the spiderweb topping ahead of time?
A: While you can prepare the white chocolate ganache or icing a day in advance and store it in an airtight container in the refrigerator, it’s best to apply the spiderweb design to the brownies closer to serving time. If you make it too far in advance, it might become too stiff to spread or pipe easily. Just gently warm it before using if needed.
Q: My spiderweb lines are bleeding into the brownie. What can I do?
A: This usually happens if the brownie base is still too warm when you apply the topping. Ensure your Spiderweb Brownies have cooled down sufficiently before spreading the chocolate ganache or icing. Letting them cool completely is ideal. Also, try to work with a slightly thicker consistency for your topping – if it’s too thin, it will spread more easily.
Spiderweb Brownies-Decadent Halloween Dessert Recipe
A rich, fudgy brownie base topped with a spooky white chocolate spiderweb for a perfect Halloween treat.
Ingredients
-
1/2 cup unsalted butter, melted
-
1 cup granulated sugar
-
2 large eggs
-
1 teaspoon vanilla extract
-
1/3 cup unsweetened cocoa powder
-
1/2 cup all-purpose flour
-
1/4 teaspoon baking powder
-
1/4 teaspoon salt
-
1/4 cup white chocolate chips
-
1 teaspoon vegetable oil
Instructions
-
Step 1
In a medium bowl, whisk together melted butter and granulated sugar until smooth. Stir in eggs one at a time, then vanilla extract. -
Step 2
In a separate bowl, sift together cocoa powder, flour, baking powder, and salt. Gradually add dry ingredients to wet ingredients, mixing until just combined. Do not overmix. -
Step 3
Preheat oven to 350°F (175°C). Grease and flour an 8×8 inch baking pan. Pour batter into the pan and spread evenly. -
Step 4
Bake for 25-30 minutes, or until a toothpick comes out with moist crumbs. Let cool completely in the pan. -
Step 5
Melt white chocolate chips with vegetable oil in 20-second intervals until smooth. Transfer to a piping bag with a small tip. -
Step 6
Pipe concentric circles of melted white chocolate onto the cooled brownies. Drag a toothpick from the center outwards to create the spiderweb design. -
Step 7
Allow the white chocolate to set completely before cutting into squares. This can be expedited in the refrigerator.
Important Information
Nutrition Facts (Per Serving)
It is important to consider this information as approximate and not to use it as definitive health advice.
Allergy Information
Please check ingredients for potential allergens and consult a health professional if in doubt.


Leave a Comment