
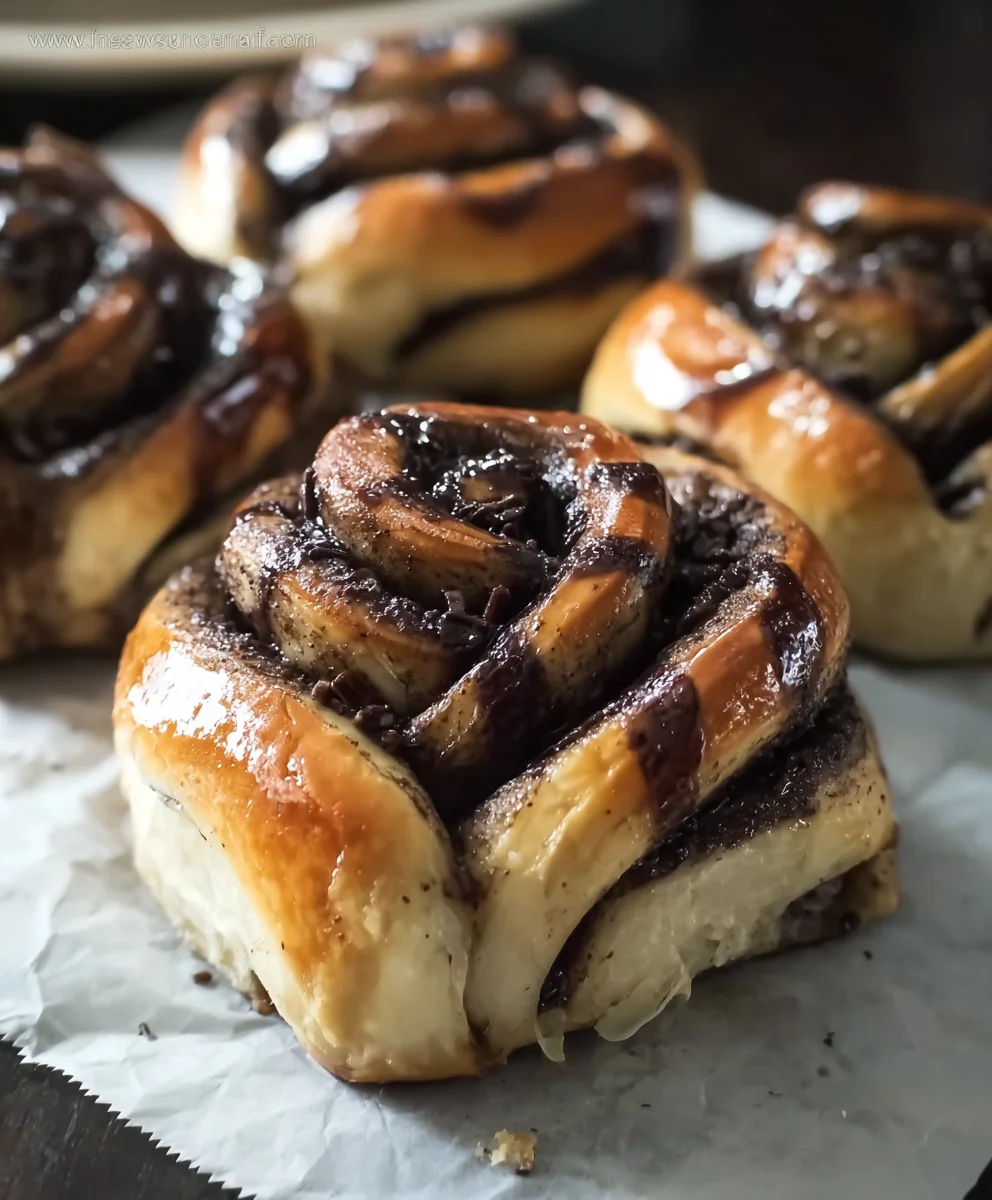
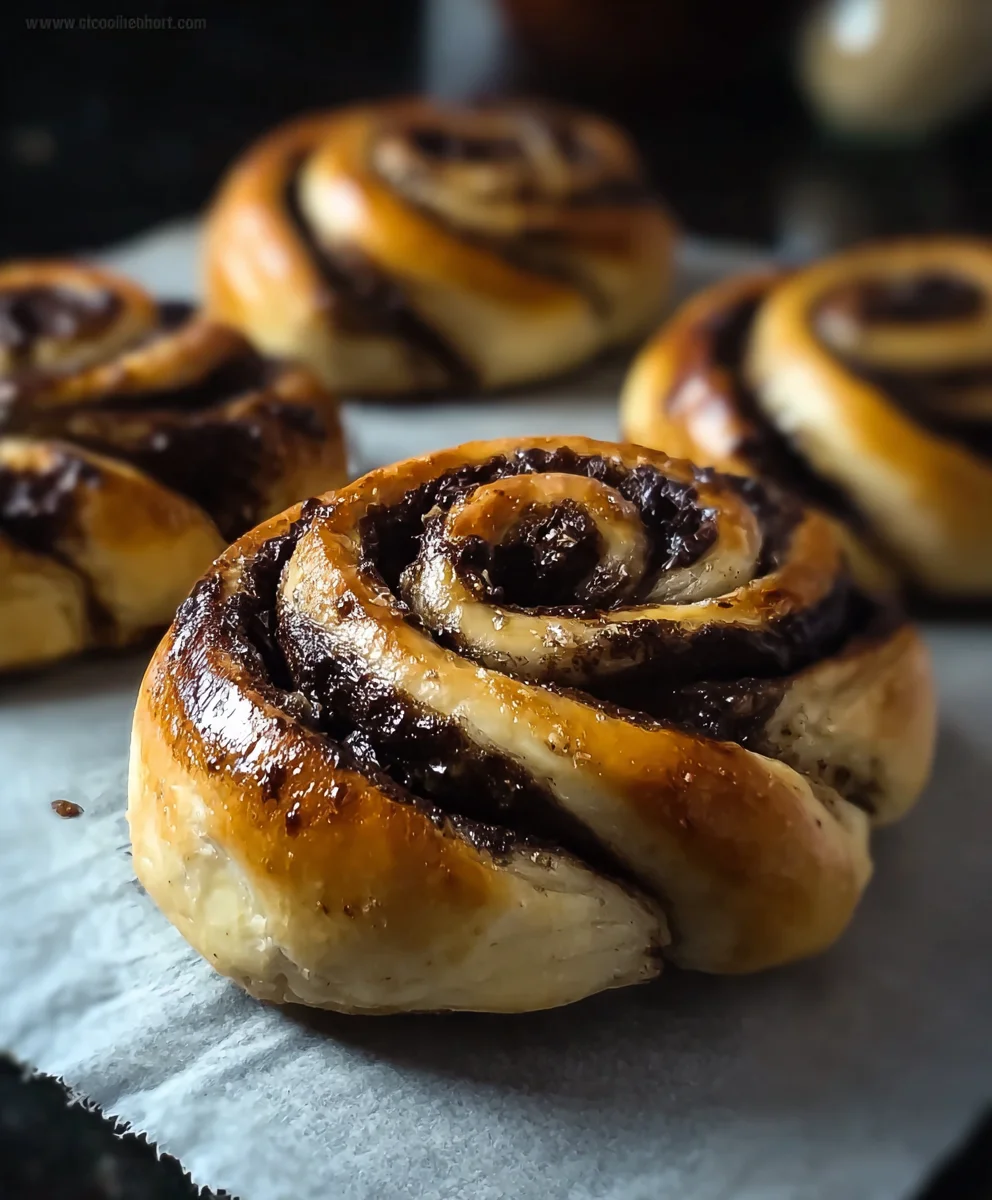
Soft Chocolate Cinnamon Rolls – are you ready to transform your kitchen into an aromatic haven? I know I am whenever I pull a tray of these from the oven. There’s something truly magical about the combination of warm, pillowy dough, rich melting chocolate, and the comforting spice of cinnamon. While classic cinnamon rolls have graced breakfast tables across Scandinavia and beyond for generations, my recipe elevates this beloved tradition by introducing a decadent layer of chocolate, creating a modern masterpiece that’s simply irresistible.
People absolutely adore these Soft Chocolate Cinnamon Rolls for their incredibly tender texture, which practically melts in your mouth, contrasted with the gooey pockets of dark chocolate and the signature sweet-spicy cinnamon swirl. It’s the perfect balance of indulgence and comfort, making them an ideal treat for a leisurely weekend breakfast, a special brunch, or simply as a heartwarming pick-me-up any day of the week. I’m so excited for you to experience the joy of baking and tasting these delightful rolls!
Ingredients:
Creating these incredibly Soft Chocolate Cinnamon Rolls is a delightful process, and it all starts with gathering your ingredients. Trust me, the effort is absolutely worth it for the pillowy texture and rich flavor!
For the Dough:
- 1 cup (240ml) whole milk, warmed to 105-115°F (40-46°C) – this temperature is crucial for activating the yeast without killing it.
- 2 ¼ teaspoons (7g) active dry yeast (one standard packet) – ensure it’s fresh for the best rise!
- ¼ cup (50g) granulated sugar, plus 1 teaspoon for yeast activation – we’re giving that yeast a little snack to get started.
- ½ cup (113g) unsalted butter, melted and slightly cooled – warm but not hot, so it doesn’t cook the other ingredients.
- 1 large egg, at room temperature – this helps with the dough’s richness and color.
- 1 teaspoon pure vanilla extract – a lovely aromatic touch that enhances all the flavors.
- ½ teaspoon salt – don’t skip this! It balances the sweetness and strengthens the gluten.
- 4 to 4 ½ cups (480-540g) all-purpose flour, spooned and leveled, plus more for dusting – the exact amount will depend on humidity and how your flour absorbs liquid.
For the Decadent Chocolate Cinnamon Filling:
- ½ cup (113g) unsalted butter, softened to room temperature – this makes it spreadable and melds beautifully with the dry ingredients.
- ½ cup (100g) granulated sugar – for sweetness and a lovely texture.
- ½ cup (100g) packed light brown sugar – adds depth of flavor and moisture.
- ⅓ cup (35g) unsweetened cocoa powder – the star of our chocolate show! Use good quality for best results.
- 2 tablespoons ground cinnamon – the classic warm spice that pairs perfectly with chocolate.
For the Luscious Cream Cheese Glaze:
- 4 ounces (113g) cream cheese, softened to room temperature – full-fat works best for a rich, smooth glaze.
- ¼ cup (57g) unsalted butter, softened to room temperature – contributes to the glaze’s luscious texture.
- 2 cups (240g) powdered sugar (confectioners’ sugar), sifted – sifting prevents lumps and ensures a smooth finish.
- ½ teaspoon pure vanilla extract – enhances the creamy sweetness.
- 2-3 tablespoons whole milk – to achieve the perfect pourable consistency; start with less and add more as needed.
Making the Dough: The Foundation of Your Soft Chocolate Cinnamon Rolls
- Activate the Yeast: In the bowl of your stand mixer (or a large mixing bowl if kneading by hand), combine the warmed whole milk (remember, 105-115°F is key!) with 1 teaspoon of granulated sugar and the active dry yeast. Give it a gentle stir. Let this mixture sit for 5-10 minutes. You’re looking for a foamy, bubbly surface – this tells you your yeast is alive and ready to work its magic. If it doesn’t foam, your yeast might be old or your milk too hot/cold, and it’s best to start over. This step is absolutely crucial for a good rise!
- Combine Wet Ingredients: Once your yeast is nice and foamy, add the remaining ¼ cup of granulated sugar, the melted and slightly cooled butter, the room temperature egg, and the vanilla extract to the yeast mixture. Whisk everything together until it’s well combined and looks uniform.
- Introduce Dry Ingredients: Now, it’s time for the flour and salt. Add ½ teaspoon of salt and 4 cups of the all-purpose flour to the wet ingredients. If you’re using a stand mixer, attach the dough hook.
-
Mix and Knead:
- Using a Stand Mixer: With the dough hook, mix on low speed for 2 minutes until the ingredients are just combined. Then, increase the speed to medium-low and knead for about 5-7 minutes. The dough should start to pull away from the sides of the bowl. It will be slightly sticky, but not overly so. If it seems too wet, add the remaining ½ cup of flour, one tablespoon at a time, until it reaches a soft, pliable consistency. We’re aiming for a dough that is soft, smooth, and elastic.
- Kneading by Hand: If you’re kneading by hand, turn the dough out onto a lightly floured surface. Knead for 8-10 minutes, pushing the dough away from you with the heels of your hands, then folding it back, turning it, and repeating. It’s a bit of a workout, but you’ll feel the dough transform from shaggy and sticky to smooth and elastic. Again, use minimal extra flour as needed to prevent sticking.
You know it’s kneaded enough when it passes the “windowpane test”: you should be able to gently stretch a small piece of dough thin enough to see light through it without tearing.
The First Rise: Developing Flavor and Texture
- Prepare for the Rise: Lightly grease a large clean bowl with a little oil (vegetable oil or olive oil works great). Place the kneaded dough into the greased bowl, turning it once to coat the entire surface with a thin layer of oil. This prevents it from drying out as it rises.
- Cover and Rest: Cover the bowl tightly with plastic wrap or a clean kitchen towel.
- The First Proof: Place the covered bowl in a warm, draft-free spot. A slightly warm oven (turned off, but perhaps preheated to its lowest setting for a few minutes then turned off) or simply a warm spot on your counter works well. Let the dough rise for 1 to 1.5 hours, or until it has doubled in size. The exact time will depend on the warmth of your environment. You can gently poke two fingers into the dough; if the indentations remain, it’s ready.
- Gently Deflate: Once doubled, gently punch down the dough to release the air. This helps create an even texture and makes the dough easier to handle.
Preparing the Decadent Chocolate Cinnamon Filling
While your dough is on its first rise, or just after you’ve punched it down, you can whip up the delicious filling.
- Cream the Butter: In a medium bowl, combine the softened unsalted butter with both the granulated sugar and the packed light brown sugar. Use a fork or a spoon to thoroughly mash and cream these together until the mixture is well combined and has a somewhat sandy, crumbly texture.
- Add Chocolate and Spice: Sprinkle in the unsweetened cocoa powder and the ground cinnamon. Continue to mix until all the dry ingredients are fully incorporated into the butter-sugar mixture. You want this to be a uniform paste, ready to spread. If your butter wasn’t soft enough, it might be a bit clumpy; try to smooth it out as much as possible. This filling is going to be incredibly rich and fragrant!
Rolling, Filling, and Shaping: Crafting Your Rolls
- Prepare Your Work Surface: Lightly flour a clean work surface. Turn the dough out onto the floured surface.
- Roll the Dough: Using a rolling pin, roll the dough into a large rectangle, approximately 18 inches long by 12 inches wide (about 45cm x 30cm). Aim for an even thickness throughout the rectangle. A uniform thickness ensures your rolls bake evenly. Don’t be afraid to use a little more flour if the dough is sticking, but try to keep it minimal.
- Spread the Filling: Evenly spread the chocolate cinnamon filling over the entire surface of the dough rectangle, leaving about a ½-inch border clear along one of the long edges. This clear edge will help seal the roll.
- Roll It Up: Starting from the long edge opposite the ½-inch clear border, carefully and tightly roll the dough into a log. The tighter you roll, the more distinct and beautiful the spirals of your cinnamon rolls will be. Once you reach the end, pinch the seam closed along that ½-inch border to seal the log.
-
Slice the Rolls: Now for the fun part! You have a couple of options for slicing:
- Using a Knife: Use a sharp, un-serrated knife. Measure the log and cut it into 12 equal pieces, each about 1.5 inches thick. A chef’s knife works best.
- Using Dental Floss or Thread (My Favorite Method!): Slide a piece of unflavored dental floss or strong thread (about 18 inches long) under the log. Cross the ends over the top and pull to slice through the dough cleanly. This method often prevents squishing the beautiful spirals.
- Arrange in Baking Dish: Lightly grease a 9×13 inch baking dish. Arrange the sliced cinnamon rolls in the prepared dish, leaving a little space between each one, as they will expand during the second rise and baking. You should fit all 12 rolls comfortably.
The Second Rise: Achieving Maximum Fluffiness
- Cover and Rest Again: Cover the baking dish loosely with plastic wrap or a clean kitchen towel.
- The Second Proof: Place the covered dish in that same warm, draft-free spot you used for the first rise. Let the rolls rise for another 45-60 minutes, or until they look noticeably puffy and have almost doubled in size again. They will be touching each other in the pan, which is exactly what we want! This second rise is critical for achieving that signature soft, light texture.
Baking Your Soft Chocolate Cinnamon Rolls to Golden Perfection
- Preheat Oven: While your rolls are on their second rise, preheat your oven to 375°F (190°C). Make sure the oven rack is in the middle position.
- Bake: Once the rolls are puffy, remove the cover and place the baking dish into the preheated oven. Bake for 20-25 minutes, or until the tops are beautifully golden brown and the rolls are cooked through. If they start to brown too quickly, you can loosely tent the pan with aluminum foil.
- Cool Slightly: Once baked, remove the rolls from the oven. Let them cool in the baking dish for about 5-10 minutes before glazing. This short cooling period allows them to set slightly but keeps them warm enough for the glaze to melt into every crevice.
Whipping Up the Luscious Cream Cheese Glaze
While your rolls are cooling, let’s make that heavenly cream cheese glaze!
- Cream Butter and Cream Cheese: In a medium mixing bowl, combine the softened cream cheese and softened unsalted butter. Using an electric mixer (or a whisk and some elbow grease), beat these two together until they are completely smooth and creamy, with no lumps. This usually takes 1-2 minutes on medium speed.
- Add Powdered Sugar: Gradually add the sifted powdered sugar, ½ cup at a time, beating after each addition until fully incorporated. If you dump it all in at once, you might end up with a cloud of sugar dust!
- Flavor and Thin: Once all the powdered sugar is mixed in, add the vanilla extract and 2 tablespoons of whole milk. Beat until the glaze is smooth and has a pourable consistency. If it’s too thick, add the remaining tablespoon of milk, or even a tiny bit more, a teaspoon at a time, until you reach your desired consistency. We want it thick enough to coat, but thin enough to drip down the sides.
The Grand Finale: Glazing and Serving Your Warm Rolls
- Glaze Generously: While the Soft Chocolate Cinnamon Rolls are still warm from the oven (but not piping hot, as the glaze would melt too much), generously pour or spread the cream cheese glaze over the entire pan of rolls. The warmth of the rolls will allow the glaze to melt slightly, creating a gooey, irresistible topping that seeps into all the nooks and crannies.
- Serve Immediately: These rolls are best served warm, fresh from the oven, with that glorious melting glaze. They are truly an unforgettable treat!
- Storage Tips: If you happen to have any leftovers (which is unlikely, I promise!), store them in an airtight container at room temperature for up to 2 days, or in the refrigerator for up to 5 days. You can gently reheat individual rolls in the microwave for 15-20 seconds to bring back that fresh-baked warmth and softness. Enjoy every single bite of your homemade Soft Chocolate Cinnamon Rolls!
Conclusion:
Well, my friends, we’ve reached the sweet end of our journey through this delightful recipe. I truly hope you’re as excited as I am about the prospect of bringing these incredible creations to life in your own kitchen. There’s just something profoundly satisfying about the aroma of freshly baked goods filling your home, and these particular Soft Chocolate Cinnamon Rolls are designed to deliver that joy in spades. We’re not just talking about any ordinary sweet treat here; we’re talking about a culinary experience that blends the comforting warmth of cinnamon with the irresistible decadence of chocolate, all wrapped up in a dough so tender it practically melts in your mouth. This isn’t merely a recipe; it’s an invitation to create moments of pure, unadulterated bliss, a comforting hug in edible form. Think about the joy on your family’s faces, or the quiet pleasure of savoring one with your morning coffee. This recipe is a must-try because it takes the beloved classic cinnamon roll and elevates it to a whole new level of indulgence, offering a unique twist that will surprise and delight even the most discerning palates. The balance of spice and sweetness, the gooey chocolate pockets, and that unbelievably soft texture truly set these rolls apart from anything you might have tried before. It’s an adventure for your taste buds, a testament to the magic that happens when simple ingredients are combined with a little love and a dash of patience. I promise you, the effort, though minimal for the incredible reward, is absolutely worth every single moment.
Now, let’s talk about how to truly make these your own, or how to best enjoy them once they emerge golden and fragrant from your oven. While they are absolutely divine eaten just as they are, still warm and gooey, there are so many ways to customize and savor them. My personal favorite way to enjoy these Soft Chocolate Cinnamon Rolls is warm, straight from the oven, perhaps with a simple glass of cold milk or a steaming cup of coffee. The warmth truly enhances the chocolate’s meltiness and the cinnamon’s aroma.
Serving Suggestions for Your Perfect Rolls:
- Classic Glaze: A simple powdered sugar glaze (powdered sugar, a splash of milk or cream, and a hint of vanilla extract) drizzled generously over the warm rolls is always a winner. It adds an extra layer of sweetness and a beautiful sheen that makes them look as good as they taste.
- Cream Cheese Frosting: For a truly decadent experience, whip up a batch of tangy cream cheese frosting. The slight tartness of the cream cheese perfectly complements the richness of the chocolate and cinnamon, creating a symphony of flavors that is absolutely divine for a special brunch or dessert. It’s a classic pairing for a reason!
- Chocolate Drizzle: If you’re a true chocoholic, consider melting some extra chocolate chips or a good quality dark chocolate bar and drizzling it over the glazed or frosted rolls. This adds another layer of intense chocolate flavor and visual appeal, taking your rolls to an even more luxurious level.
- With Fresh Fruit: Believe it or not, these rolls pair beautifully with fresh berries. A side of raspberries, strawberries, or blueberries can cut through the richness and add a lovely freshness to your breakfast or dessert plate, offering a delightful contrast.
Creative Variations to Inspire Your Inner Baker:
And don’t be afraid to experiment! This recipe is a fantastic base for your own culinary creativity and allows for wonderful personalization.
- Nutty Crunch: Before rolling, sprinkle some chopped pecans, walnuts, or even toasted almonds over the chocolate and cinnamon filling for an added layer of texture and nutty flavor. This provides a delightful crunch that contrasts wonderfully with the soft dough.
- Orange Zest Twist: A little finely grated orange zest added to the dough or even to the cream cheese frosting can introduce a bright, citrusy note that beautifully complements both chocolate and cinnamon. It’s a subtle but impactful addition that brightens the whole flavor profile.
- Spicier Kick: For those who love a bit more spice, consider adding a pinch of ground ginger, nutmeg, or cardamom to the cinnamon filling. These warming spices work wonderfully with chocolate and can add an intriguing depth of flavor that’s both comforting and exciting.
- Make-Ahead Magic: If you’re planning a special breakfast or brunch and want to minimize morning effort, you can assemble the rolls the night before, cover them tightly with plastic wrap, and refrigerate them. In the morning, just pull them out, let them rise at room temperature for about 30-60 minutes while your oven preheats, and then bake as directed. This clever trick makes entertaining a breeze!
So, there you have it. My heartfelt invitation to you is to roll up your sleeves, gather your ingredients, and embark on this delicious baking adventure. Don’t be intimidated; the process is incredibly rewarding, and the steps are laid out to guide you every whisk and roll of the way. I truly believe that everyone, from seasoned bakers to enthusiastic beginners, can achieve magnificent results with this recipe. Imagine that first bite: the soft, pillowy dough, the rich, melted chocolate, the comforting warmth of cinnamon – it’s pure bliss, I promise. These Soft Chocolate Cinnamon Rolls aren’t just food; they are an experience, a memory waiting to be made. They’re perfect for a lazy weekend breakfast, a special holiday brunch, or simply as an indulgent treat to brighten any ordinary day.
But my invitation doesn’t stop at just trying the recipe. I would absolutely love, love, love to hear about your experience! Baking is such a personal journey, and every kitchen tells a different story. Did you try a new variation? What was your favorite part of the process? How did your family react to these irresistible treats? Please don’t hesitate to share your thoughts, your successes, and even your funny baking anecdotes in the comments below. Better yet, snap a photo of your magnificent creations and tell us all about them. Your experiences inspire me and other readers to keep experimenting and enjoying the magic of homemade food. Let’s build a little community of chocolate-cinnamon-roll enthusiasts right here! Happy baking, and I can’t wait to see what deliciousness you bring to life!
Soft Chocolate Cinnamon Rolls
A delicious recipe
Ingredients
-
Ingredient 1
-
Ingredient 2
-
Ingredient 3
Instructions
-
Step 1
Step 1 -
Step 2
Step 2 -
Step 3
Step 3
Important Information
Nutrition Facts (Per Serving)
It is important to consider this information as approximate and not to use it as definitive health advice.
Allergy Information
Please check ingredients for potential allergens and consult a health professional if in doubt.


Leave a Comment