
Soft Chewy Sugar Cookies are more than just a sweet treat; they’re a warm hug in cookie form, a timeless classic that evokes cherished memories with every delightful bite. I often find myself reminiscing about the simple joy of baking these with my grandmother, the kitchen filling with that unmistakable, comforting aroma of vanilla and butter. There’s something truly special about a homemade sugar cookie that transcends the ordinary.
While the exact origin of sugar cookies can be traced back to 17th-century Pennsylvania German settlers, evolving from a simple butter cookie, their enduring popularity lies in their pure, unadulterated joy and incredible versatility. They’ve graced countless holiday platters, childhood lunchboxes, and special occasions for centuries, becoming a beloved staple in homes worldwide.
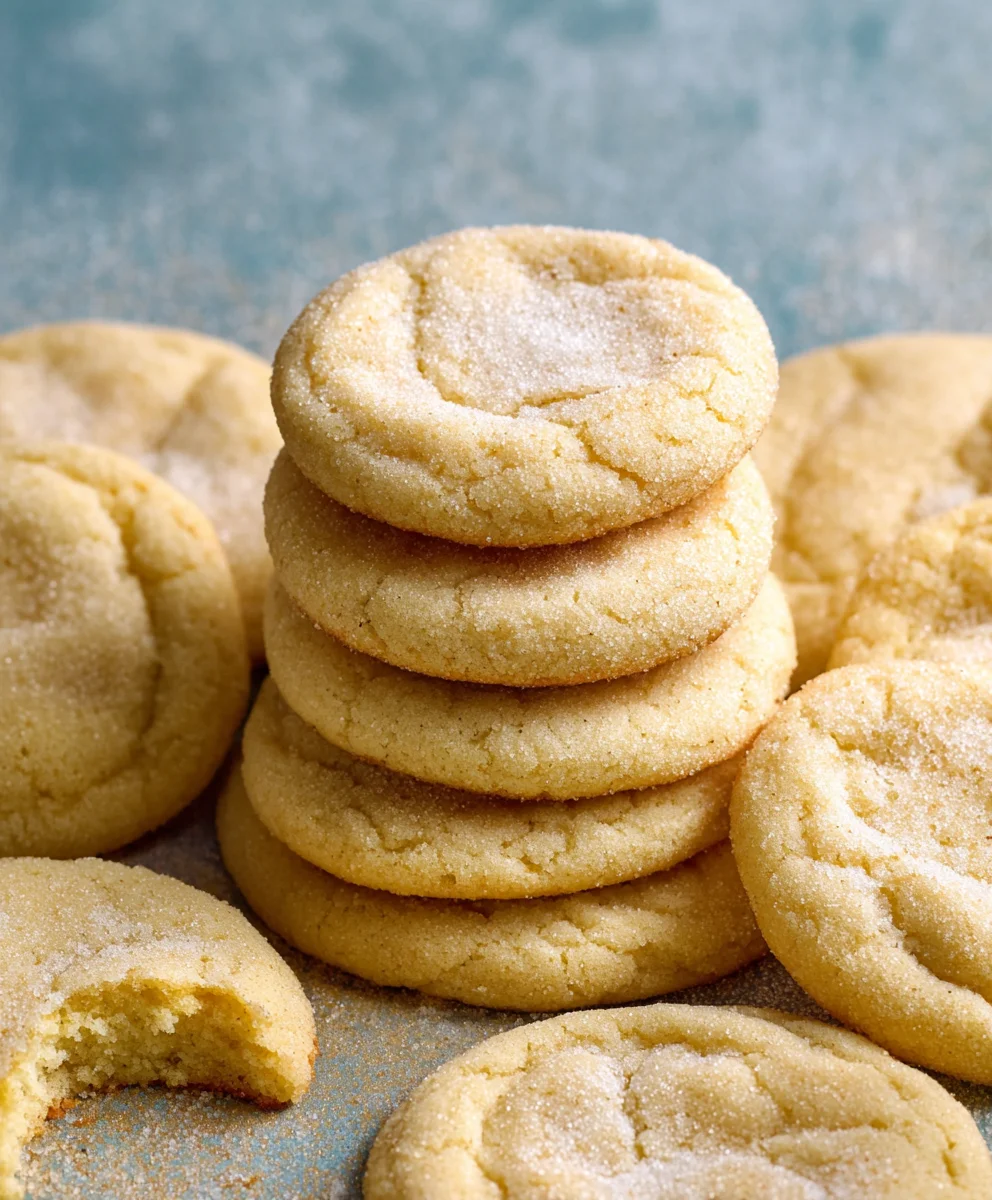
What truly elevates this recipe, however, and what makes these particular cookies utterly irresistible, is that perfect, melt-in-your-mouth softness combined with a delightfully chewy center. Forget the often dry or overly crisp versions; our goal is to achieve a cookie that remains wonderfully tender for days, making them absolutely ideal for sharing, gifting, or simply savoring with a hot cup of coffee or tea. This particular rendition of Soft Chewy Sugar Cookies promises an experience that will become a treasured addition to your baking repertoire, perfect for any occasion, from festive holiday gatherings to a simple, comforting afternoon treat.
Ingredients:
- 3 cups (360g) all-purpose flour, plus more for dusting
- 1 teaspoon baking powder
- ½ teaspoon salt
- 1 cup (226g) unsalted butter, softened to room temperature
- 1 ½ cups (300g) granulated sugar
- 2 large eggs, at room temperature
- 2 teaspoons pure vanilla extract
Gathering Your Tools & Prepping Your Workspace:
- Before we even think about mixing, let’s gather all our ingredients and equipment. Having everything measured out and ready (a concept known as “mise en place”) makes the baking process so much smoother and more enjoyable. You’ll need a large mixing bowl, a stand mixer with a paddle attachment (or a hand mixer), a whisk, a rubber spatula, measuring cups and spoons, a sifter, parchment paper, baking sheets, and a wire cooling rack.
- Take your butter and eggs out of the refrigerator at least 30-60 minutes before you plan to start baking. Room temperature ingredients are crucial for achieving that light, fluffy, and perfectly emulsified dough that will result in the soft, chewy sugar cookies we’re aiming for. Cold ingredients just won’t combine as smoothly and can lead to a dense, tough cookie.
- Pre-measure all your dry ingredients – flour, baking powder, and salt. Have your sugar and wet ingredients – eggs and vanilla extract – also prepped and ready to go. This simple step can prevent frantic searching mid-recipe and ensures accuracy.
- Line your baking sheets with parchment paper. This not only prevents sticking but also helps your cookies bake evenly and makes for easy cleanup. You’ll likely need at least two sheets, possibly more, depending on the size of your cookies and oven capacity.
Crafting the Perfect Soft Chewy Sugar Cookie Dough:
- In a medium bowl, whisk together your dry ingredients: the 3 cups of all-purpose flour, 1 teaspoon of baking powder, and ½ teaspoon of salt. I like to give this a really good whisk for about 30 seconds to a minute, ensuring the baking powder and salt are evenly distributed throughout the flour. This prevents pockets of unmixed ingredients and helps your cookies rise uniformly. Some bakers even prefer to sift these ingredients together for ultimate lightness, but a thorough whisk will absolutely do the trick for our soft chewy sugar cookies. Set this bowl aside for now.
- Now, in the large bowl of your stand mixer fitted with the paddle attachment (or using a large bowl and a hand mixer), add your softened unsalted butter and granulated sugar. Make sure your butter is truly softened – it should be pliable and leave a slight indent when you gently press it, but it shouldn’t be melted or greasy.
- Cream the butter and sugar together on medium speed for about 3-5 minutes. This is a critical step for achieving that signature soft and chewy texture. You want the mixture to become incredibly light and fluffy, almost pale in color. During this process, the sugar crystals cut into the butter, creating tiny air pockets. These air pockets expand during baking, contributing to the cookie’s rise and tender crumb. Scrape down the sides of the bowl occasionally with your rubber spatula to ensure everything is thoroughly combined. Don’t rush this step!
- Next, add your two room temperature large eggs, one at a time, beating well after each addition. After adding the first egg, beat until it is fully incorporated into the butter mixture, about 30 seconds. Then add the second egg and repeat. This allows each egg to emulsify properly with the fat, preventing a curdled appearance and ensuring a smooth, cohesive dough.
- Pour in your 2 teaspoons of pure vanilla extract. Vanilla is a must for classic sugar cookies, and I find that good quality pure vanilla extract truly makes a difference in the flavor depth. Beat for another 15-20 seconds until the vanilla is fully incorporated into the rich, creamy mixture.
- Now it’s time to bring in our dry ingredients. With the mixer on low speed, gradually add the flour mixture to the wet ingredients, a third at a time. Mix only until just combined, being careful not to overmix. As soon as you no longer see streaks of dry flour, stop the mixer. Overmixing at this stage develops the gluten in the flour too much, which can lead to tough, dense cookies – the exact opposite of the soft chewy sugar cookies we’re after. I often stop the mixer when there are still a few dry streaks, and then finish mixing by hand with a spatula to ensure everything is just barely incorporated.
Chilling for Optimal Soft Chewy Texture:
- Once your dough is just combined, it’s time for a very important step: chilling. Gently gather the dough into a ball and divide it in half. Flatten each half into a thick disk, wrap tightly in plastic wrap, and place both disks in the refrigerator for at least 1 hour, but preferably 2-3 hours. You can even chill it overnight for best results.
- Why do we chill the dough? This step is absolutely crucial for several reasons when making soft chewy sugar cookies. First, it allows the butter to firm up again, which prevents the cookies from spreading too much in the oven. Without chilling, your cookies would likely turn into thin, crispy puddles. Second, chilling allows the flour to fully hydrate, which leads to a more tender and chewy texture. And finally, it gives the flavors a chance to meld and deepen, resulting in a more delicious cookie overall. Don’t skip this step if you want perfectly shaped, soft chewy results!
Rolling and Cutting Your Soft Chewy Sugar Cookies:
- Once your dough is thoroughly chilled, remove one disk from the refrigerator. Lightly flour your clean work surface and your rolling pin. If the dough is too hard to roll immediately, let it sit at room temperature for 5-10 minutes to soften slightly, but don’t let it get too warm.
- Roll out the dough to about ¼-inch thick. This thickness is key for achieving a soft and chewy cookie; thinner cookies tend to be crispier. Try to roll evenly to ensure consistent baking. Work quickly to keep the dough cool.
- Using your favorite cookie cutters (any shape works!), cut out your desired shapes. Dip your cookie cutter in flour occasionally to prevent sticking. Carefully transfer the cut-out dough shapes to your prepared parchment-lined baking sheets, leaving about 1 ½ to 2 inches between each cookie to allow for a little spread.
- Gather the dough scraps, gently press them together to form a new disk, and re-wrap in plastic. Return the scraps to the refrigerator for at least 15-20 minutes before re-rolling. This helps firm up the butter again and prevents the re-rolled cookies from becoming tough. Repeat the rolling and cutting process with the second disk of chilled dough and any re-chilled scraps.
Baking Your Irresistible Soft Chewy Sugar Cookies:
- Preheat your oven to 350°F (175°C). It’s important to give your oven ample time to reach and stabilize at this temperature. An oven thermometer can be a great tool to ensure accuracy, as many ovens can vary from their set temperature.
- Bake one sheet of cookies at a time in the center rack for 8-10 minutes. The exact baking time will depend on the size of your cookies and your oven, so keep a close eye on them.
- Here’s the secret to those perfectly soft and chewy sugar cookies: DO NOT OVERBAKE! You want the edges to be just barely set and very lightly golden, while the centers should still look slightly pale and puffed. They might even look a tiny bit underdone in the very center, but trust me, they will continue to set as they cool on the baking sheet. Overbaking is the quickest way to turn a potentially soft cookie into a hard, brittle one.
Cooling and Achieving Maximum Chewiness:
- Once baked, remove the baking sheets from the oven and let the cookies cool on the sheets for about 5-10 minutes. This initial cooling period on the warm baking sheet allows the cookies to continue setting up without breaking, and also helps to develop that lovely chewiness. They’re still quite delicate when they first come out of the oven.
- After this initial cooling period, carefully transfer the slightly cooled cookies to a wire cooling rack to cool completely. Allowing them to cool on a rack ensures air circulates all around them, preventing the bottoms from becoming soggy and maintaining that perfect soft chewy texture throughout.
- Once completely cooled, your soft chewy sugar cookies are ready to be enjoyed! They’re absolutely delightful plain, allowing that rich vanilla and buttery flavor to shine. If you wish, you can decorate them with royal icing, buttercream, or a simple glaze once they are fully cool. However, for sheer softness and chewiness, these cookies truly stand on their own.
- For optimal softness and chewiness, store your cookies in an airtight container at room temperature for up to 3-5 days. You can also place a slice of bread in the container with them; the cookies will absorb moisture from the bread, helping them stay wonderfully soft. You’ve just mastered the art of making the most delightful, melt-in-your-mouth soft chewy sugar cookies!

Conclusion:
So, there you have it! We’ve journeyed through the simple yet magical process of creating what I genuinely believe are the most delightful sugar cookies you’ll ever bake. This isn’t just another recipe; it’s a gateway to pure, unadulterated baking joy. I’m truly passionate about this particular method because it consistently delivers on its promise: cookies that are not only incredibly easy to make but also possess that perfect balance of sweetness and a heavenly texture. If you’ve ever been on the hunt for a sugar cookie recipe that consistently turns out just right, look no further. This recipe for Soft Chewy Sugar Cookies is, without a doubt, a game-changer in your kitchen repertoire. They are the kind of cookies that disappear quickly from the plate, the ones people ask you for the recipe for again and again. Their beautiful golden edges and tender centers are simply irresistible. They embody everything wonderful about a classic sugar cookie, elevated to perfection. I promise you, these aren’t your average dry, crumbly sugar cookies; they are moist, rich, and utterly melt-in-your-mouth delicious.
But the magic doesn’t stop once they’re baked. Oh no, the fun truly begins with how you choose to serve and customize these beauties! While they are absolutely divine on their own, fresh from the oven, cooling on a rack, there are so many ways to elevate them. For a simple yet elegant touch, a dusting of powdered sugar or a delicate drizzle of a simple glaze made from powdered sugar and milk can work wonders. If you’re feeling a bit more adventurous, consider a classic buttercream frosting. You can color it with food gels to match any holiday or occasion – vibrant reds and greens for Christmas, pastels for Easter, or spooky oranges and purples for Halloween. A rich cream cheese frosting also provides a lovely tangy contrast to the sweetness of the cookie, making for an unforgettable treat. And don’t forget the sprinkles! Oh, the endless possibilities with sprinkles – classic rainbow, seasonal shapes, or elegant sanding sugar for a beautiful shimmer. Imagine serving these at your next gathering, beautifully decorated to fit your theme; they’re guaranteed to be a showstopper and bring smiles to everyone’s faces.
Beyond frosting and sprinkles, consider playing with flavor variations within the cookie dough itself. A touch of almond extract instead of vanilla can give them a delightful marzipan-like nuance. A pinch of lemon zest or orange zest can add a bright, citrusy lift that’s particularly wonderful in spring or summer. For a cozy, warm feel, a tiny bit of ground cardamom or cinnamon swirled into the dough can transform them into something truly unique, especially enjoyable with a warm cup of coffee or tea on a chilly evening. These cookies also make spectacular ice cream sandwiches – just add a generous scoop of your favorite ice cream flavor between two cooled cookies for an indulgent, memorable dessert. Think about making mini versions for a charming dessert bar or larger ones for a truly satisfying snack that feels like a full treat. They are also incredibly thoughtful as homemade gifts, beautifully stacked in a festive tin or cellophane bag tied with a pretty ribbon. Your friends, family, and neighbors will undoubtedly appreciate the effort and the delicious result, making them feel truly cherished.
My heartfelt plea to you: Don’t just read about these amazing cookies; make them!
I know from personal experience that there’s an immense satisfaction that comes from pulling a batch of perfectly golden, aromatic cookies from the oven, especially when they are these incredible Soft Chewy Sugar Cookies. This recipe is designed to be foolproof, ensuring success even for novice bakers, building confidence with every delicious bite. So, gather your ingredients, set aside a little time in your day, and treat yourself, your family, or your friends to something truly special that tastes like pure comfort and happiness. I am absolutely confident that once you try this recipe, it will quickly become a cherished favorite in your home, a go-to for celebrations, quiet evenings, and everything in between. And please, please, please – I absolutely adore hearing about your baking adventures! When you make them, I would be thrilled if you came back and shared your experience. Did you add a unique frosting? Did you try a new flavor variation that became a hit? Did your kids help decorate them, and what masterpieces did they create? Share your photos, tell me about the joy they brought to your kitchen, or any clever tips you discovered along the way. Your feedback and stories inspire me and our entire baking community to keep creating and sharing delicious moments. Happy baking, my friends; I can’t wait to hear all about your delicious creations!
Soft Chewy Sugar Cookies
Soft Chewy Sugar Cookies are more than just a sweet treat; they’re a warm hug in cookie form, a timeless classic that evokes cherished memories with every delightful bite. This recipe promises an experience that will become a treasured addition to your baking repertoire, perfect for any occasion.
Ingredients
-
1 ½ cups granulated sugar
-
12 tbsp unsalted butter, softened
-
1 large egg, room temperature
-
1 large egg yolk, room temperature
-
1 Tbsp. whole milk
-
2 tsp. vanilla extract
-
3 cups all-purpose flour
-
1 ½ tsp. baking powder
-
¾ tsp. salt
-
½ tsp. baking soda
-
Granulated sugar (for rolling)
Instructions
-
Step 1
Gather all tools and ingredients. Bring butter and eggs to room temperature (30-60 min). Line baking sheets with parchment paper. -
Step 2
In a medium bowl, whisk together flour, baking powder, baking soda, and salt. Set aside. -
Step 3
In a large bowl, cream softened butter and 1 ½ cups granulated sugar on medium speed for 3-5 minutes until light and fluffy. -
Step 4
Beat in the large egg and egg yolk one at a time until fully incorporated. Stir in whole milk and vanilla extract. -
Step 5
Gradually add the dry ingredients to the wet ingredients on low speed, mixing only until just combined. Do not overmix. -
Step 6
Divide dough in half, flatten into disks, wrap tightly in plastic, and chill in the refrigerator for at least 1-3 hours, or preferably overnight. -
Step 7
On a lightly floured surface, roll out one disk of chilled dough to ¼-inch thickness. Cut out shapes using cookie cutters, re-chilling scraps briefly before re-rolling. -
Step 8
Preheat oven to 350°F (175°C). Place cut-out cookies on prepared baking sheets. Bake one sheet at a time for 8-10 minutes, or until edges are lightly golden and centers are still slightly pale. Do not overbake. -
Step 9
Let cookies cool on baking sheets for 5-10 minutes before transferring to a wire rack to cool completely. Store in an airtight container at room temperature for up to 3-5 days, optionally with a slice of bread to maintain softness.
Important Information
Nutrition Facts (Per Serving)
It is important to consider this information as approximate and not to use it as definitive health advice.
Allergy Information
Please check ingredients for potential allergens and consult a health professional if in doubt.


Leave a Comment