
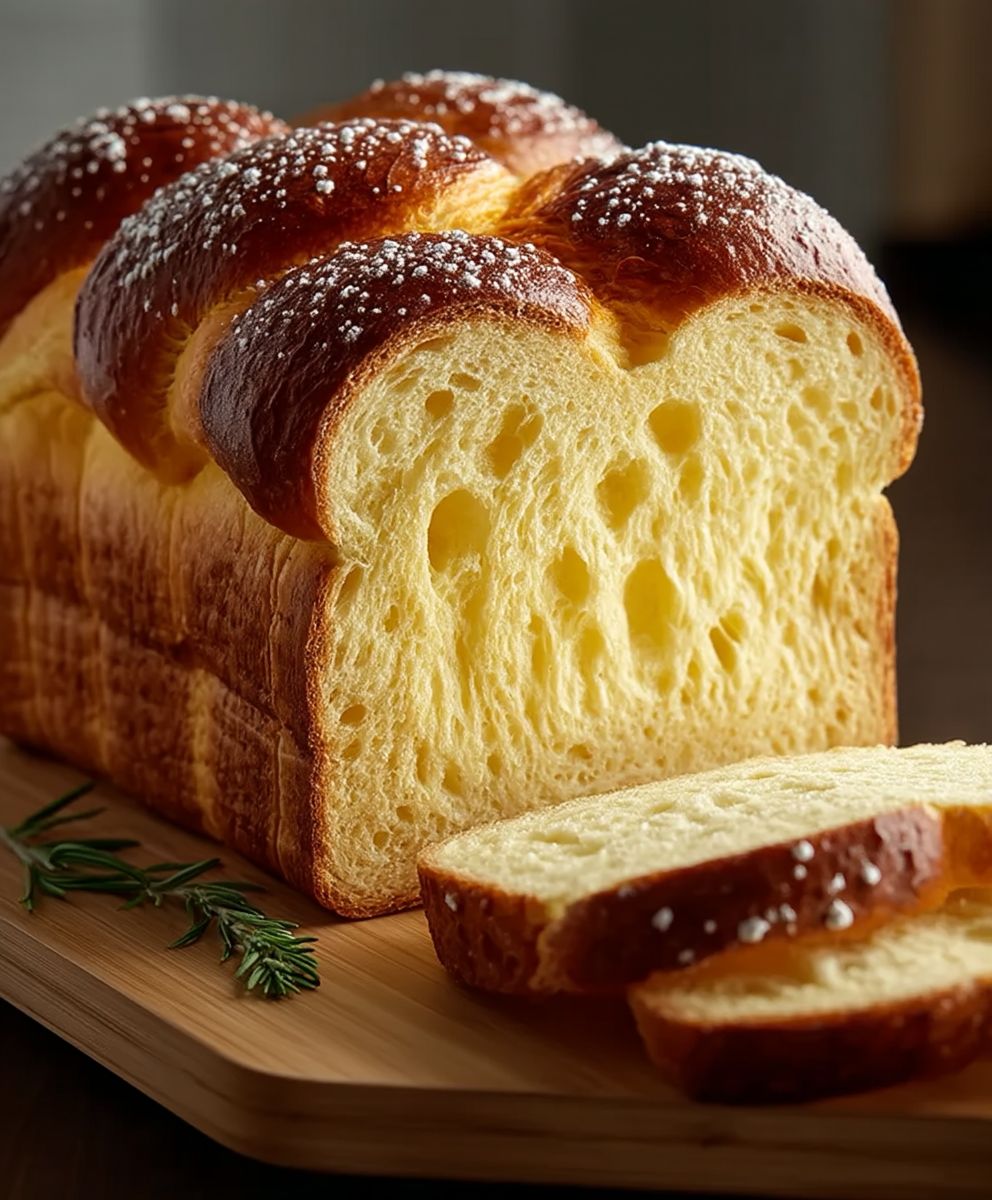
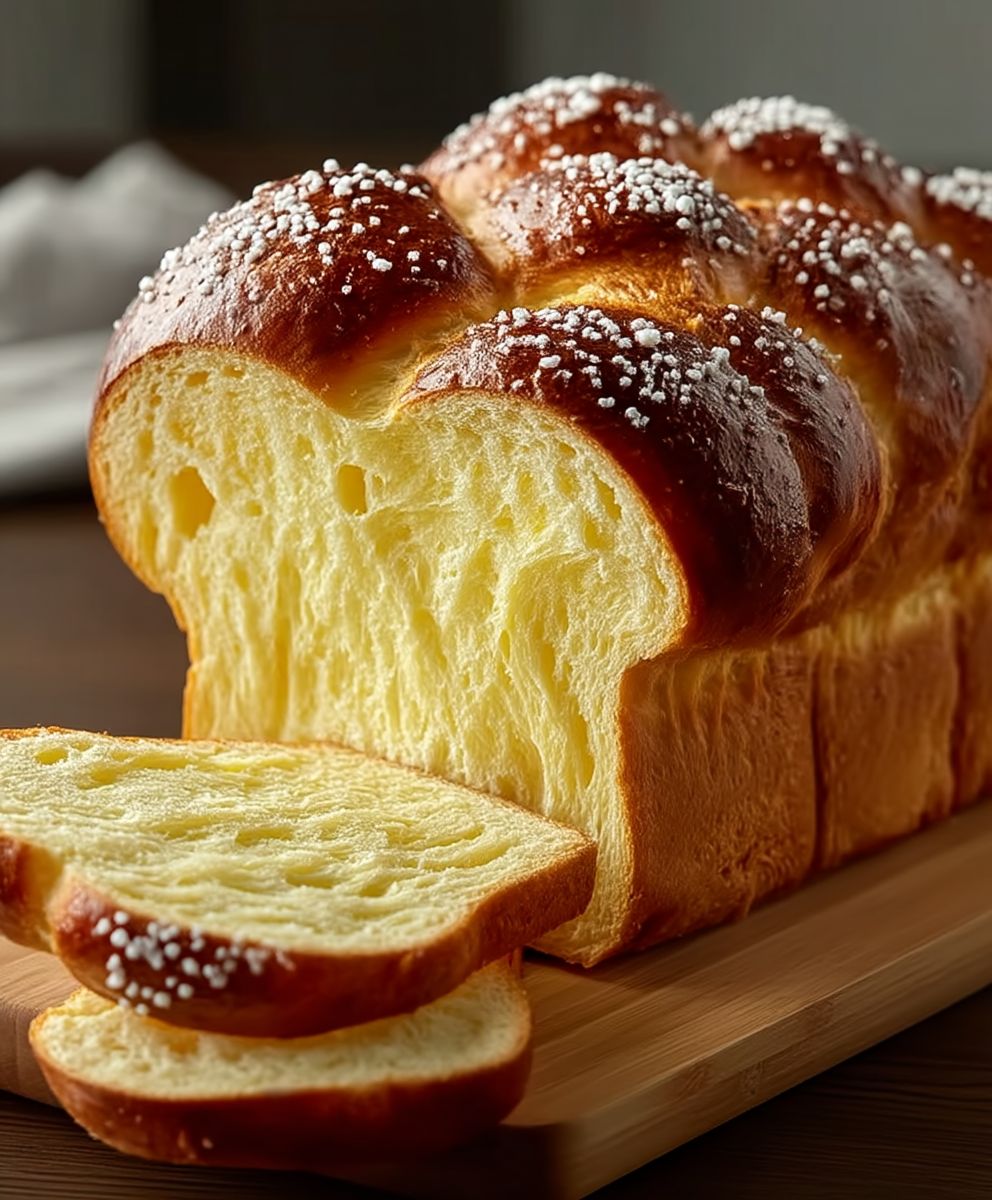
Homemade Brioche Bread, with its rich, buttery flavor and delicate crumb, is a baking project that’s both rewarding and surprisingly achievable. Have you ever dreamed of pulling a golden-brown loaf from your oven, its aroma filling your kitchen with warmth and inviting everyone to gather around? This isn’t just bread; it’s an experience, a testament to the simple joy of creating something beautiful and delicious from scratch.
Brioche, a bread deeply rooted in French culinary tradition, has a history as rich as its flavor. Legend has it that Marie Antoinette, upon hearing that the peasants had no bread, famously quipped, “Let them eat cake!” While the historical accuracy of this quote is debated, it speaks to the perception of brioche as a luxurious and decadent treat, a step above everyday bread. It was a staple in aristocratic kitchens, enjoyed for its soft texture and ability to complement both sweet and savory dishes.
Today, the allure of homemade brioche bread remains strong. People adore it for its versatility perfect for French toast, sandwiches, or simply enjoyed with a smear of butter and jam. The slightly sweet, almost cake-like texture is irresistible, and the satisfaction of mastering this classic recipe is unparalleled. Plus, the process of kneading and shaping the dough is incredibly therapeutic, a welcome escape from the hustle and bustle of daily life. So, let’s embark on this baking adventure together and create a loaf of brioche that will impress your family and friends!
Ingredients:
- For the Starter (Poolish):
- 1 cup (125g) all-purpose flour
- 1 cup (240ml) lukewarm water
- 1/4 teaspoon instant dry yeast
- For the Dough:
- 3 1/2 cups (438g) all-purpose flour, plus more for dusting
- 1/2 cup (100g) granulated sugar
- 1 teaspoon salt
- 2 teaspoons instant dry yeast
- 1/2 cup (120ml) lukewarm milk
- 4 large eggs, lightly beaten
- 1 cup (226g) unsalted butter, softened but still cool, cut into 1-tablespoon pieces
- For the Egg Wash:
- 1 large egg
- 1 tablespoon milk or cream
Preparing the Starter (Poolish)
This starter, also known as a poolish, is what gives our brioche its incredible flavor and light, airy texture. Don’t skip this step it’s worth the wait!
- Combine the ingredients: In a medium bowl, whisk together the flour, lukewarm water, and yeast until smooth. There should be no lumps.
- Ferment: Cover the bowl tightly with plastic wrap and let it sit at room temperature for 1-2 hours, or until bubbly and almost doubled in size. You should see plenty of activity that’s the yeast doing its job! Alternatively, you can refrigerate the poolish overnight (or up to 24 hours). If refrigerating, let it sit at room temperature for about 30 minutes before using to take the chill off.
Making the Brioche Dough
Now for the main event! This dough is enriched with butter and eggs, giving it that characteristic rich, tender crumb. Be patient with the mixing process it’s crucial for developing the gluten and incorporating the butter properly.
- Combine dry ingredients: In the bowl of a stand mixer fitted with the dough hook attachment, combine the flour, sugar, salt, and yeast. Whisk briefly to combine.
- Add wet ingredients: Add the poolish (starter), lukewarm milk, and beaten eggs to the dry ingredients. Mix on low speed until a shaggy dough forms. This will take a few minutes. Don’t worry if it looks a little messy at this point.
- Knead: Increase the speed to medium-low and knead for 5-7 minutes, or until the dough starts to come together and pull away from the sides of the bowl. It will still be a bit sticky, and that’s okay.
- Incorporate the butter: With the mixer running on low speed, add the softened butter, one tablespoon at a time, allowing each piece to be fully incorporated before adding the next. This process is crucial for creating the flaky, tender texture of brioche. It will take some time be patient! The dough will initially look like a mess, but keep mixing, and it will eventually come together.
- Continue kneading: Once all the butter has been added, increase the speed to medium and knead for another 8-10 minutes, or until the dough is smooth, elastic, and pulls away from the sides of the bowl. The dough should be very soft and slightly sticky, but not overly wet. If it’s too sticky to handle, add a tablespoon of flour at a time, but be careful not to add too much, as this will make the bread tough.
- First rise: Lightly grease a large bowl with oil or cooking spray. Transfer the dough to the bowl, turning to coat. Cover the bowl tightly with plastic wrap and let it rise in a warm place for 1-1.5 hours, or until doubled in size. You can also let it rise in the refrigerator overnight for a slower, more flavorful rise. If refrigerating, let it sit at room temperature for about 30 minutes before proceeding to the next step.
Shaping and Second Rise
Now comes the fun part shaping the dough! There are many ways to shape brioche, but we’ll go with a classic loaf shape for this recipe.
- Punch down the dough: Gently punch down the dough to release the air.
- Turn out the dough: Turn the dough out onto a lightly floured surface.
- Shape the loaf: Gently pat the dough into a rectangle, about 8×12 inches. Fold the dough in thirds, like a letter, bringing one short end to the center and then folding the other short end over the top. This creates layers and helps to develop the structure of the loaf.
- Place in pan: Place the shaped dough seam-side down into a greased 9×5 inch loaf pan.
- Second rise: Cover the loaf pan loosely with plastic wrap and let it rise in a warm place for 45-60 minutes, or until the dough has risen about 1 inch above the rim of the pan. This is a crucial step for achieving a light and airy loaf. Don’t rush it!
Baking the Brioche
Almost there! The egg wash gives the brioche its beautiful golden-brown crust. Keep a close eye on it while it’s baking to prevent it from getting too dark.
- Preheat oven: Preheat oven to 350°F (175°C).
- Prepare egg wash: In a small bowl, whisk together the egg and milk or cream.
- Egg wash: Gently brush the top of the loaf with the egg wash. Be careful not to deflate the dough.
- Bake: Bake for 30-35 minutes, or until the loaf is golden brown and the internal temperature reaches 190-200°F (88-93°C). If the top of the loaf is browning too quickly, tent it loosely with aluminum foil.
- Cool: Remove the loaf from the oven and let it cool in the pan for 10 minutes before transferring it to a wire rack to cool completely. This prevents the bottom of the loaf from getting soggy.
Tips for Success
- Use high-quality ingredients: Since brioche is a rich bread, using good-quality butter and eggs will make a noticeable difference in the flavor and texture.
- Don’t overheat the milk: Make sure the milk is lukewarm, not hot, as hot milk can kill the yeast.
- Be patient with the butter incorporation: Adding the butter slowly and allowing each piece to be fully incorporated is crucial for creating the flaky, tender texture of brioche.
- Don’t over-knead the dough: Over-kneading can result in a tough loaf. Knead until the dough is smooth and elastic, but not overly stiff.
- Allow the dough to rise properly: The rising times are just estimates, as the actual time will depend on the temperature of your kitchen. The dough should double in size during the first rise and rise about 1 inch above the rim of the pan during the second rise.
- Use a thermometer: Using a thermometer to check the internal temperature of the loaf is the best way to ensure that it’s fully baked.
- Cool completely before slicing: Slicing the loaf while it’s still warm can result in a gummy texture. Let it cool completely before slicing and serving.
Serving Suggestions
This homemade brioche bread is delicious on its own, but it’s also fantastic for making sandwiches, French toast, or bread pudding. Here are a few ideas:
- Sandwiches: Use it to make your favorite sandwiches, such as ham and cheese, turkey and avocado, or grilled cheese.
- French toast: Brioche makes incredibly rich and decadent French toast.
- Bread pudding: Use it to make a classic bread pudding with custard and dried fruit.
- Toast: Simply toast a slice and spread it with butter and jam.
- Burger buns: Slice into rounds and use as burger buns for an extra special treat.
Storage Instructions
Store leftover brioche bread in an airtight container at room temperature for up to 3 days, or in the freezer for up to 2 months. To freeze, slice the loaf and wrap each slice individually in plastic wrap before placing them in a freezer bag. This will prevent freezer burn and make it easy to thaw just the amount you need.
Conclusion:
And there you have it! This Homemade Brioche Bread recipe isn’t just another bread recipe; it’s an experience. It’s the kind of baking project that fills your kitchen with the most incredible aroma, the kind that makes everyone wander in asking, “What’s that amazing smell?”. It’s the kind of bread that elevates any meal, from a simple breakfast toast to a sophisticated dinner party.
Why is this a must-try? Because the texture is simply divine. It’s rich, buttery, and incredibly soft, thanks to the generous amount of butter and eggs. Forget the store-bought stuff; once you’ve tasted homemade brioche, you’ll never go back. The slight sweetness makes it incredibly versatile, pairing perfectly with both sweet and savory toppings. Plus, the satisfaction of pulling a perfectly golden loaf from your oven, knowing you created it from scratch, is truly unmatched.
But the best part? It’s surprisingly achievable! While brioche might seem intimidating, this recipe breaks down the process into manageable steps, ensuring success even for beginner bakers. I’ve included all my tips and tricks to help you avoid common pitfalls and achieve that perfect, airy crumb.
Now, let’s talk serving suggestions! This Homemade Brioche Bread is fantastic on its own, lightly toasted with a smear of butter and a sprinkle of sea salt. But don’t stop there! It makes incredible French toast the kind that’s custardy and decadent. Use it for sandwiches, especially grilled cheese or breakfast sandwiches with crispy bacon and a fried egg. It’s also the perfect base for bread pudding, soaking up all the flavors beautifully.
Looking for variations? Absolutely! Try adding a handful of chocolate chips to the dough for a chocolate brioche. Or, incorporate some dried cranberries and orange zest for a festive twist. For a savory option, add some grated Parmesan cheese and herbs like rosemary or thyme. You can even shape the dough into individual rolls or buns for sliders or mini sandwiches. The possibilities are endless!
I truly believe that everyone should experience the joy of baking their own brioche. It’s a rewarding and delicious endeavor that will impress your family and friends. So, gather your ingredients, preheat your oven, and get ready to embark on a baking adventure.
I’m so excited for you to try this recipe! And I can’t wait to hear about your experience. Did you make any variations? What did you serve it with? What was your favorite part of the process? Please, share your photos and stories in the comments below. Let’s build a community of brioche bakers! Happy baking, and enjoy every buttery, delicious bite of your Homemade Brioche Bread! I am confident that you will love this recipe as much as I do. Don’t be afraid to experiment and make it your own. Remember, baking is all about having fun and creating something delicious to share with the people you love. So, go ahead, give it a try, and let me know how it turns out!
Homemade Brioche Bread: The Ultimate Guide to Baking Perfection
Rich, buttery homemade brioche bread with a light, airy texture. Perfect for sandwiches, French toast, or enjoying on its own.
Ingredients
- 1 cup (125g) all-purpose flour
- 1 cup (240ml) lukewarm water
- 1/4 teaspoon instant dry yeast
- 3 1/2 cups (438g) all-purpose flour, plus more for dusting
- 1/2 cup (100g) granulated sugar
- 1 teaspoon salt
- 2 teaspoons instant dry yeast
- 1/2 cup (120ml) lukewarm milk
- 4 large eggs, lightly beaten
- 1 cup (226g) unsalted butter, softened but still cool, cut into 1-tablespoon pieces
- 1 large egg
- 1 tablespoon milk or cream
Instructions
- Prepare the Starter (Poolish): In a medium bowl, whisk together the flour, lukewarm water, and yeast until smooth. Cover tightly with plastic wrap and let sit at room temperature for 1-2 hours, or until bubbly and almost doubled in size. Alternatively, refrigerate overnight (up to 24 hours) and let sit at room temperature for 30 minutes before using.
- Make the Brioche Dough: In the bowl of a stand mixer fitted with the dough hook attachment, combine the flour, sugar, salt, and yeast. Whisk briefly to combine.
- Add the poolish (starter), lukewarm milk, and beaten eggs to the dry ingredients. Mix on low speed until a shaggy dough forms (a few minutes).
- Increase the speed to medium-low and knead for 5-7 minutes, or until the dough starts to come together and pull away from the sides of the bowl.
- With the mixer running on low speed, add the softened butter, one tablespoon at a time, allowing each piece to be fully incorporated before adding the next.
- Once all the butter has been added, increase the speed to medium and knead for another 8-10 minutes, or until the dough is smooth, elastic, and pulls away from the sides of the bowl.
- Lightly grease a large bowl with oil or cooking spray. Transfer the dough to the bowl, turning to coat. Cover tightly with plastic wrap and let rise in a warm place for 1-1.5 hours, or until doubled in size. Alternatively, refrigerate overnight. If refrigerating, let it sit at room temperature for about 30 minutes before proceeding to the next step.
- Shape and Second Rise: Gently punch down the dough to release the air. Turn the dough out onto a lightly floured surface.
- Gently pat the dough into a rectangle, about 8×12 inches. Fold the dough in thirds, like a letter.
- Place the shaped dough seam-side down into a greased 9×5 inch loaf pan.
- Cover the loaf pan loosely with plastic wrap and let it rise in a warm place for 45-60 minutes, or until the dough has risen about 1 inch above the rim of the pan.
- Bake the Brioche: Preheat oven to 350°F (175°C).
- In a small bowl, whisk together the egg and milk or cream.
- Gently brush the top of the loaf with the egg wash.
- Bake for 30-35 minutes, or until the loaf is golden brown and the internal temperature reaches 190-200°F (88-93°C). If the top is browning too quickly, tent it loosely with aluminum foil.
- Remove the loaf from the oven and let it cool in the pan for 10 minutes before transferring it to a wire rack to cool completely.
Notes
- Use high-quality ingredients for the best flavor and texture.
- Make sure the milk is lukewarm, not hot, to avoid killing the yeast.
- Be patient when incorporating the butter; it’s crucial for the texture.
- Don’t over-knead the dough.
- Allow the dough to rise properly; rising times are estimates.
- Use a thermometer to ensure the loaf is fully baked.
- Cool completely before slicing to prevent a gummy texture.
- Store leftover brioche in an airtight container at room temperature for up to 3 days, or freeze for up to 2 months.


Leave a Comment