
Homemade yeast rolls from scratch are a culinary revelation, a warm embrace of comfort that few can resist. Imagin extracte the irresistible aroma filling your kitchen as these golden beauties bake to perfection – it’s a sensory experience that instantly elevates any meal. People adore homemade yeast rolls from scratch for their incredible texture: impossibly soft and fluffy on the inside, with just a hint of chegrape juicess, and boasting a beautifully golden, slightly crisp crust. They’re a testament to the magic of simple ingredients transforming into something truly extraordinary. What makes these homemade yeast rolls from scratch so special is the sheer satisfaction of creating them yourself. It’s a process that feels both rewarding and deeply nurturing, a connection to generations of bakers who understood the joy of a perfectly risen roll. This recipe will guide you through every step, demystifying the process and ensuring you achieve bakery-quality results right in your own home.
Ingredients:
- 2 cups milk (480 ml)
- 2 tablespoons instant dry yeast
- ¼ cup granulated sugar (50 g)
- ⅓ cup unsalted butter, softened (80 g)
- 1 extra tablespoon unsalted butter, melted, for brushing
- 2 large eggs
- 6¼ cups all-purpose flour (750 g)
- 2 teaspoons fine sea salt
Preparing the Dough
Step 1: Activating the Yeast and Creating the Base
Begin extract by warming your milk. This is a crucial step for activating the yeast. You want the milk to be warm to the touch, but not hot, ideally between 105°F and 115°F (40°C to 46°C). If it’s too hot, it will kill the yeast; if it’s too cool, it won’t activate properly. You can test this by dipping a clean finger into the milk – it should feel comfortably warm. Pour the warm milk into a large mixing bowl. Sprinkle the instant dry yeast over the surface of the milk. Let it sit undisturbed for about 5 to 10 minutes. You should see it start to foam and bloom, indicating the yeast is alive and ready to work its magic. This frothy layer is the sign of a happy, active yeast.
Next, add the granulated sugar and the softened unsalted butter to the bowl with the activated yeast. The sugar provides food for the yeast, and the butter adds richness and tenderness to the final rolls. Gently whisk these ingredients together until the butter starts to melt and the sugar is mostly dissolved into the warm milk mixture. This creates your initial liquid base for the dough.
Step 2: Incorporating Eggs and Initial Flour Addition
Once the yeast mixture is well combined and looks frothy, it’s time to add the eggs. Crack your two large eggs directly into the bowl. Whisk them in thoroughly until they are completely incorporated into the milk and yeast mixture. The eggs will add more richness, structure, and a beautiful golden hue to your homemade yeast rolls.
Now, it’s time to start building the dough. Add about half of your all-purpose flour (approximately 3 cups or 375 g) to the wet ingredients. Add the fine sea salt at this stage as well. The salt is essential for flavor and also helps control the yeast’s activity, ensuring a more even gin extracte. Begin mixing with a sturdy spoon or a dough hook attachment on your stand mixer. Mix until the flour is just incorporated and a shaggy dough starts to form. Don’t worry if it’s still quite sticky at this point; this is completely normal.
Kneading and First Rise
Step 3: Kneading the Dough to Develop Gluten
This is where the magic of gluten development happens, which gives our rolls their characteristic soft and chewy texture. Gradually add the remaining flour, about half a cup at a time, mixing after each addition. Continue to mix until the dough starts to pull away from the sides of the bowl. You might not need all of the flour, or you might need a touch more, depending on the humidity in your kitchen and the absorbency of your flour. The dough should become manageable but still slightly tacky.
Turn the dough out onto a lightly floured surface. If you’re using a stand mixer, you’ll continue kneading with the dough hook. Knead the dough for about 8 to 10 minutes by hand, or for 5 to 7 minutes on medium speed with a stand mixer. The process of kneading involves pushing the dough away from you with the heel of your hand, folding it over, and then pushing again. You’re looking for a smooth, elastic dough that springs back when gently poked. It should be soft and pliable, not stiff or sticky. If it feels too sticky, add a tiny bit more flour, a tablespoon at a time, but be careful not to add too much, as this can lead to dry rolls.
Step 4: The First Rise (Proofing)
Once your dough is smooth and elastic, lightly grease a clean, large bowl with a little oil or cooking spray. Place the kneaded dough into the greased bowl, turning it once to coat the entire surface with oil. This prevents a dry skin from forming on top. Cover the bowl tightly with plastic wrap or a clean kitchen towel. Place the bowl in a warm, draft-free spot in your kitchen. An oven that has been turned off with just the light on is an ideal place, or simply a warm countertop. Allow the dough to rise for 1 to 1.5 hours, or until it has doubled in size. You’ll know it’s ready when it looks puffy and a gentle poke leaves an indentation that slowly springs back.
Shaping and Baking the Rolls
Step 5: Shaping the Rolls and Second Rise
After the first rise, gently punch down the dough to release the air that has been trapped inside. Turn the dough out onto a lightly floured surface. Divide the dough into your desired roll size. For standard-sized rolls, aim for pieces that are about 2 to 2.5 ounces (60-70 g) each. You can use a kitchen scnon-alcoholic ale for accuracy, or simply eyeball it and try to make them as uniform as possible. Roll each piece of dough into a smooth ball. You can either place these balls close together in a greased baking pan (for softer, pull-apart rolls) or spaced slightly apart for individual rolls.
Once shaped, cover the rolls loosely with plastic wrap or a clean kitchen towel and let them rise again for another 30 to 45 minutes, or until they are visibly puffy and have nearly doubled in size again. This second rise is essential for creating those light and airy interiors. While the rolls are undergoing their second rise, preheat your oven to 375°F (190°C).
Step 6: Baking to Golden Perfection
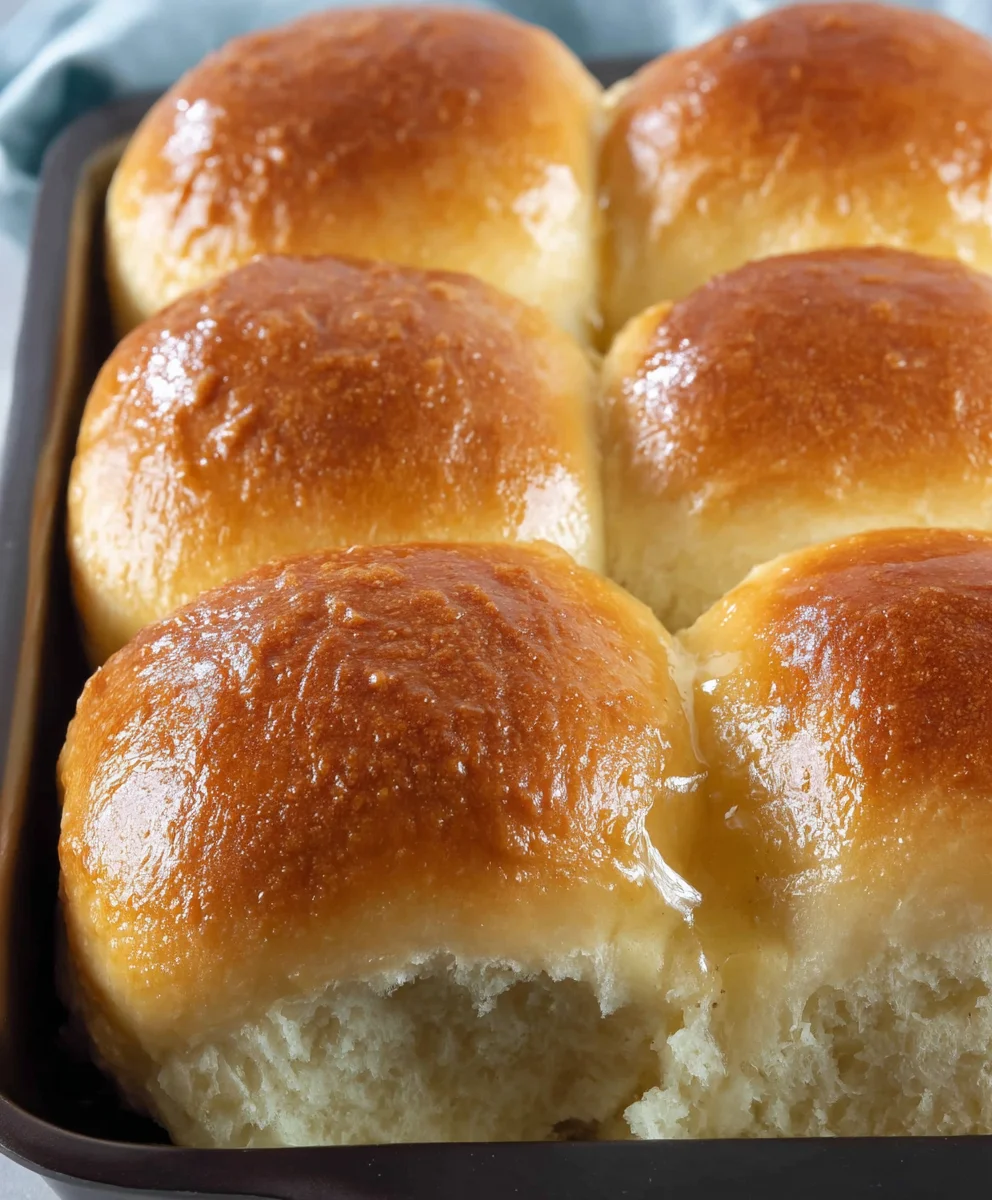
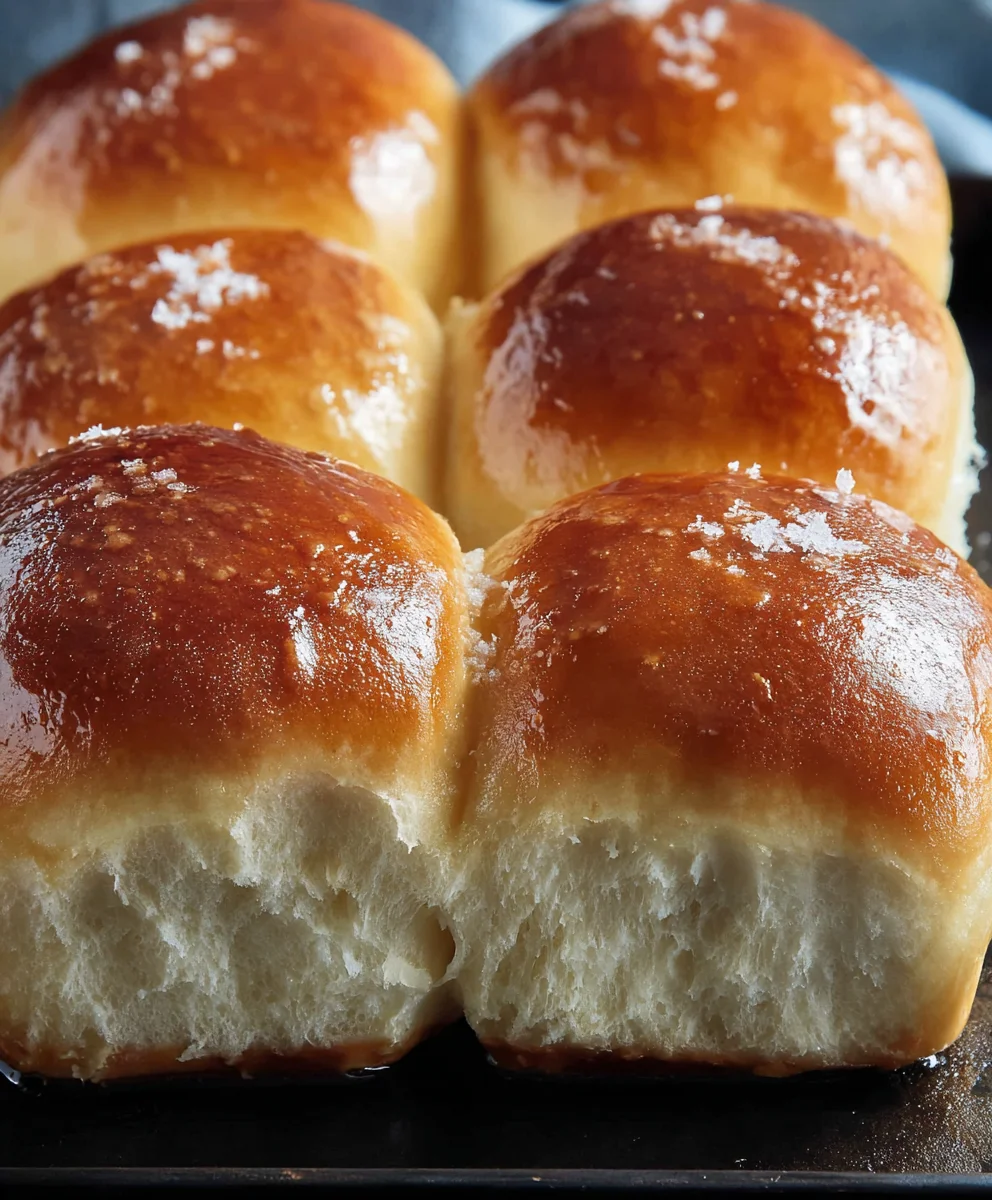
When the rolls have finished their second rise and the oven is preheated, it’s time to bake! For an extra touch of richness and a beautiful golden-brown crust, brush the tops of the risen rolls with the melted tablespoon of butter. Carefully place the baking pan into the preheated oven. Bake for 15 to 20 minutes, or until the rolls are beautifully golden brown on top and sound hollow when tapped on the bottom. The exact baking time will depend on your oven and the size of your rolls. If they are browning too quickly, you can loosely tent them with aluminum foil.
Once baked to perfection, remove the rolls from the oven. For an even more tender crust, you can brush the tops with a little more melted butter immediately after they come out of the oven. Let them cool in the pan for a few minutes before transferring them to a wire rack to cool completely, or enjoy them warm!
Conclusion:
And there you have it! You’ve successfully mastered the art of creating Homemade Yeast Rolls from Scratch. This recipe, with its simple steps and incredible payoff, delivers the most wonderfully soft, slightly sweet, and perfectly golden rolls. They are a true testament to the magic of yeast and a little patience. I encourage you to give this recipe a try; the aroma alone as they bake is worth it, and the taste is simply divine. Serve these warm, with a generous smear of butter, alongside your favorite comforting meals like stews, roasts, or soups. They also make a fantastic base for mini sandwiches.
Don’t be afraid to experiment! You can add a sprinkle of flaky sea salt on top before baking for a savory twist, or mix in some fresh herbs like rosemary or thyme into the dough. For a touch of sweetness, consider brushing them with a honey-butter glaze after they come out of the oven. The possibilities are endless, and each variation is sure to be a hit.
FAQs
Can I make Homemade Yeast Rolls from Scratch ahead of time?
Yes, you can! Once baked and cooled, store the rolls in an airtight container at room temperature for up to 2 days. You can also freeze them for longer storage. Reheat gently in a low oven until warmed through.
My rolls didn’t rise very well. What could be the problem?
There are a few common culprits. Ensure your yeast was fresh and active by proofing it in warm liquid (around 105-115°F or 40-46°C) before adding it to the other ingredients. Also, make sure the dough was allowed to rise in a warm, draft-free place. Temperature can significantly impact yeast activity.
Fluffy Homemade Yeast Rolls From Scratch-Easy Recipe
Learn to make incredibly fluffy and delicious homemade yeast rolls from scratch with this easy-to-follow recipe. Perfect for any meal!
Ingredients
-
2 cups milk
-
2 tablespoons instant dry yeast
-
1/4 cup granulated sugar
-
1/3 cup unsalted butter, softened
-
1 extra tablespoon unsalted butter, melted, for brushing
-
2 large eggs
-
6 1/4 cups all-purpose flour
-
2 teaspoons fine sea salt
Instructions
-
Step 1
Warm milk to 105-115°F (40-46°C). Pour into a large bowl, sprinkle yeast over the top, and let sit for 5-10 minutes until foamy. Add granulated sugar and softened unsalted butter, whisking until butter starts to melt and sugar dissolves. -
Step 2
Whisk in the 2 large eggs until fully incorporated. Add approximately half of the all-purpose flour and the fine sea salt. Mix with a spoon or dough hook until a shaggy dough forms. -
Step 3
Gradually add the remaining flour, mixing until the dough pulls away from the sides of the bowl. Knead by hand for 8-10 minutes or with a stand mixer for 5-7 minutes until smooth and elastic. The dough should be slightly tacky but manageable. -
Step 4
Place the kneaded dough in a lightly greased bowl, turning once to coat. Cover tightly and let rise in a warm, draft-free spot for 1 to 1.5 hours, or until doubled in size. -
Step 5
Gently punch down the dough and divide into desired roll sizes. Roll each piece into a smooth ball. Place close together in a greased baking pan for pull-apart rolls or spaced apart for individual rolls. Cover loosely and let rise for another 30-45 minutes until puffy. -
Step 6
Preheat oven to 375°F (190°C). Brush the tops of the risen rolls with the melted tablespoon of butter. Bake for 15-20 minutes, or until golden brown and hollow-sounding when tapped. Brush with more melted butter after baking if desired, and cool slightly before serving.
Important Information
Nutrition Facts (Per Serving)
It is important to consider this information as approximate and not to use it as definitive health advice.
Allergy Information
Please check ingredients for potential allergens and consult a health professional if in doubt.


Leave a Comment