
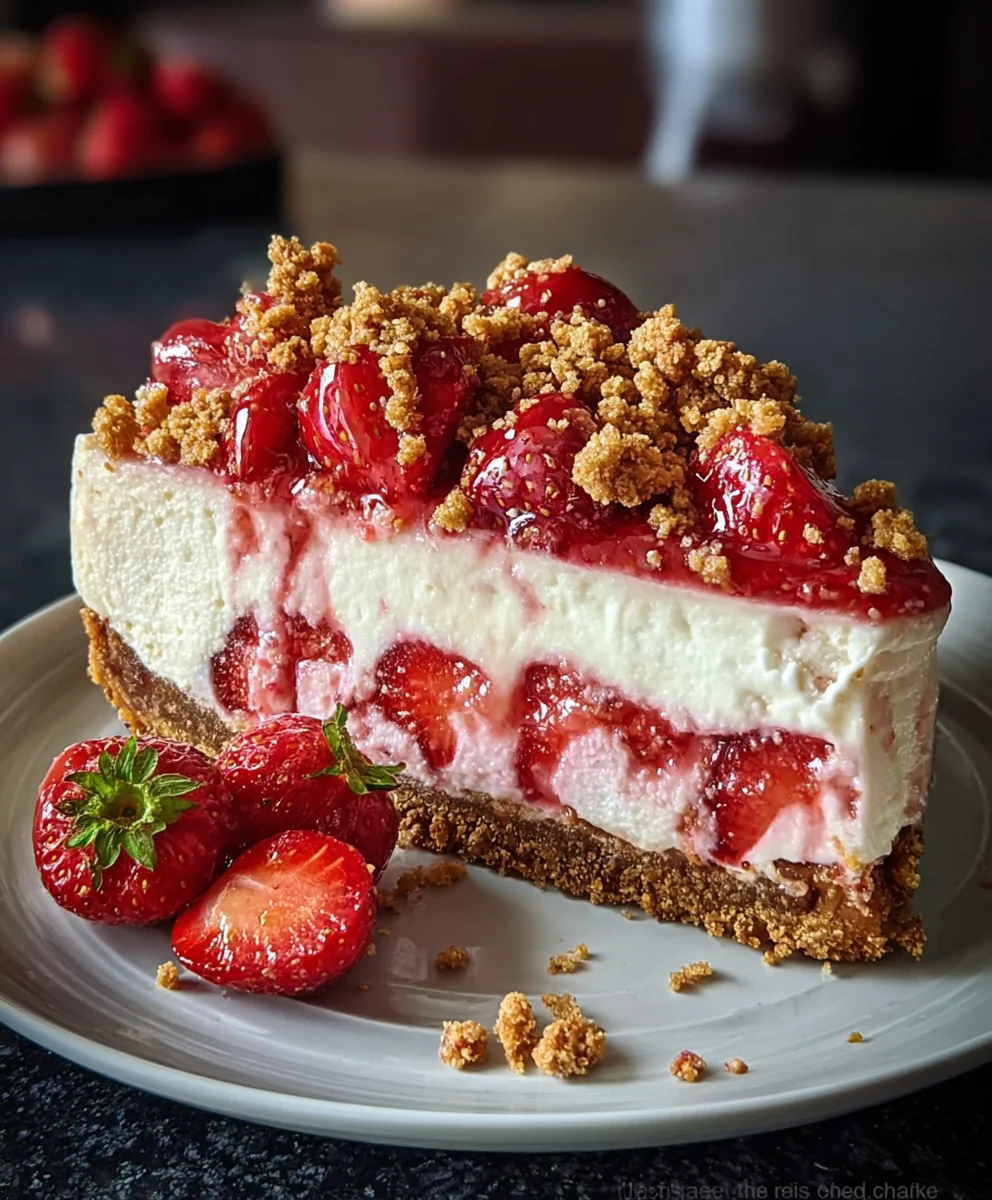
Strawberry Crunch Cheesecake isn’t just a dessert; it’s an experience, a symphony of textures and flavors that will captivate your senses from the very first bite. Imagine the creamiest, most luscious cheesecake base, perfectly balanced with the sweet-tart burst of fresh strawberries, all crowned with an irresistible, golden ‘crunch’ topping.
While traditional cheesecakes boast a long and storied past, this particular delight draws inspiration from nostalgic childhood treats, evolving into a sophisticated yet wonderfully fun creation that has quickly become a modern classic. It’s a testament to culinary creativity, blending beloved elements into something truly extraordinary and creating a dessert that feels both familiar and excitingly new.
People adore this dish not only for its stunning visual appeal—making it the star of any gathering—but more importantly, for its unparalleled taste and textural contrast. The velvety smooth cheesecake beautifully complements the vibrant strawberry layer, while the unexpected crumble topping adds that perfect, delightful crunch that keeps you coming back for more. It’s incredibly satisfying, making every occasion feel special and memorable. Preparing your own Strawberry Crunch Cheesecake promises a dessert that’s both elegant and playfully delicious, guaranteed to impress anyone lucky enough to try a slice. Join me as we uncover the secrets to crafting this magnificent treat.
Ingredients:
-
For the Golden Oreo Crust:
- 24 Golden Oreo cookies (about 270g, roughly one standard family-size package, including the cream filling)
- 1/2 cup (113g) unsalted butter, melted
-
For the Strawberry Crunch Topping:
- 20 Golden Oreo cookies (about 225g, including the cream filling) or Nilla Wafers for a slightly less sweet base
- 1/2 cup (113g) unsalted butter, melted
- 3 tablespoons (28g) granulated sugar (optional, but enhances sweetness and crispness)
- 1 (3-ounce / 85g) package strawberry flavored gelatin mix (like Jell-O)
- 1 ounce (28g) freeze-dried strawberries, crushed into a fine powder (essential for authentic flavor and color)
-
For the Creamy Cheesecake Filling:
- 4 (8-ounce / 226g each) packages full-fat cream cheese, softened to room temperature (this is absolutely crucial!)
- 1 3/4 cups (350g) granulated sugar
- 1/4 cup (60ml) sour cream (full-fat, room temperature, adds richness and a touch of tang)
- 1 tablespoon pure vanilla extract (don’t skimp on the quality here!)
- 1/2 teaspoon fresh lemon zest (optional, but brightens the flavor beautifully)
- 4 large eggs, at room temperature
-
For the Optional Whipped Cream Topping:
- 1 1/2 cups (360ml) heavy whipping cream, very cold
- 1/4 cup (30g) powdered sugar (confectioners’ sugar)
- 1 teaspoon pure vanilla extract
-
Optional Garnishes:
- Fresh strawberries, sliced or halved
Preparing Your Golden Oreo Crust
- Preheat and Prepare the Pan: Start by preheating your oven to 325°F (160°C). Grab a 9-inch springform pan. It’s a good idea to line the bottom of the pan with a circle of parchment paper for easy removal later. Then, wrap the outside of the springform pan tightly with two layers of heavy-duty aluminum foil. This is crucial if you plan to use a water bath, which I highly recommend for the most luxurious, crack-free cheesecake.
- Crush the Cookies: Take your 24 Golden Oreo cookies (cream filling and all!) and place them in a food processor. Pulse until they are finely ground into crumbs. If you don’t have a food processor, you can place them in a large zip-top bag and crush them with a rolling pin or the bottom of a heavy glass. You’ll want consistent, fine crumbs.
- Combine with Butter: In a medium bowl, pour the melted butter over the Golden Oreo crumbs. Stir well with a fork until all the crumbs are moistened and resemble wet sand. Every crumb should be coated in butter; this is what helps your crust hold together beautifully.
- Press into the Pan: Transfer the buttery crumb mixture into your prepared springform pan. Using the bottom of a clean glass or a flat-bottomed measuring cup, press the crumbs firmly and evenly into the bottom of the pan. You want a dense, compact layer. If you desire a crust that goes up the sides, you can reserve about a quarter of the mixture and press it about 1 inch up the sides of the pan. Make sure it’s even all around.
- Bake the Crust: Place the springform pan on a baking sheet (this makes it easier to handle, especially if using a water bath later) and bake the crust for 8-10 minutes. This short bake time helps to set the crust and give it a lovely toasted flavor.
- Cool Completely: Remove the crust from the oven and set it aside to cool completely while you prepare the strawberry crunch topping and the cheesecake filling. A cooled crust prevents the filling from melting into it.
Crafting the Irresistible Strawberry Crunch Topping
This is where the magic truly happens, giving our Strawberry Crunch Cheesecake its signature texture and burst of flavor.
- Crush the Base Cookies: Just like with the crust, take your 20 Golden Oreo cookies (or Nilla Wafers) and crush them into fine crumbs using a food processor or a rolling pin. We want these to be a bit coarser than the crust crumbs, so don’t over-process them. A mix of fine and small chunky bits is perfect for that authentic crunch texture.
- Prepare Freeze-Dried Strawberries: If your freeze-dried strawberries aren’t already powdered, place them in a food processor or a blender and process until they turn into a fine, vibrant pink powder. This powder is essential for both color and intense strawberry flavor.
- Combine Dry Ingredients: In a large bowl, combine the crushed Golden Oreo/Nilla Wafer crumbs, the 3 tablespoons of granulated sugar (if using), the entire package of strawberry flavored gelatin mix, and the freeze-dried strawberry powder. Use a whisk or a fork to thoroughly mix these dry ingredients together. You’ll notice the crumbs already starting to take on a beautiful pink hue.
- Add Melted Butter: Pour the 1/2 cup of melted unsalted butter over the dry crumb mixture. Stir with a spoon or your hands until all the crumbs are evenly coated and clump together slightly. The butter helps bind the crunch topping and gives it that wonderful, slightly crisp texture.
- Toast for Extra Crunch (Optional, but Recommended): For an even more developed flavor and exceptional crunch, spread the mixture evenly onto a baking sheet lined with parchment paper. Bake in your preheated 325°F (160°C) oven for about 8-10 minutes, stirring halfway through. Keep a close eye on it to prevent burning. This step enhances the crispness and brings out more toasted notes from the cookies.
- Cool Completely: Remove the baking sheet from the oven and let the strawberry crunch topping cool completely at room temperature. As it cools, it will crisp up even more. Once cool, store it loosely covered or in an airtight container until you’re ready to assemble your cheesecake.
Mixing the Velvety Cheesecake Filling
This is the heart of our Strawberry Crunch Cheesecake, and achieving that perfectly smooth, creamy texture is all about technique and ingredient temperature.
- Ensure Room Temperature Ingredients: This is arguably the most critical step for a smooth cheesecake filling. Your cream cheese, sour cream, and eggs absolutely must be at room temperature. If they’re cold, you’ll end up with lumps in your batter, and no one wants a lumpy cheesecake! I usually take them out of the fridge at least 1-2 hours before I plan to bake.
- Cream the Cream Cheese: In a very large bowl, using an electric mixer fitted with the paddle attachment (or a hand mixer), beat the softened cream cheese on medium speed for about 3-4 minutes. You want it to be incredibly smooth, light, and completely free of any lumps. Scrape down the sides and bottom of the bowl frequently to ensure everything gets incorporated.
- Gradually Add Sugar: With the mixer on low speed, gradually add the granulated sugar to the cream cheese, about 1/2 cup at a time. Continue to beat until the sugar is fully incorporated and the mixture is light and fluffy, about another 3-4 minutes. Scrape the bowl once or twice. Avoid overmixing at this stage, as incorporating too much air can lead to cracks later.
- Incorporate Wet Ingredients: Add the sour cream, vanilla extract, and lemon zest (if using) to the cream cheese mixture. Mix on low speed until just combined. Again, we’re being gentle here.
- Add Eggs One at a Time: Now for the eggs. This is where patience pays off. Add the eggs one at a time, mixing on very low speed just until each egg is incorporated before adding the next. Overmixing eggs introduces too much air, which can cause the cheesecake to puff up significantly in the oven and then fall, leading to dreaded cracks. As soon as the yolk disappears, stop the mixer and add the next egg. Scrape the bowl once more to ensure everything is uniform. The batter should be smooth and creamy.
- Prepare the Water Bath (Bain-Marie): If you didn’t wrap your springform pan earlier, do so now with two layers of heavy-duty foil. Place the foil-wrapped springform pan inside a larger roasting pan. This larger pan will hold the hot water for our water bath.
- Pour the Filling: Carefully pour the cheesecake filling over the cooled Golden Oreo crust in the prepared springform pan. Gently tap the pan on the counter a few times to release any large air bubbles that might be trapped within the batter.
Baking the Perfect Strawberry Crunch Cheesecake
Baking a cheesecake can seem daunting, but with a water bath and proper cooling, your Strawberry Crunch Cheesecake will be a showstopper.
- Set up the Water Bath: Carefully place the roasting pan, with your cheesecake inside, into the preheated 325°F (160°C) oven. Now, pour very hot (but not boiling) water into the larger roasting pan, making sure the water comes about halfway up the sides of the springform pan. Be careful not to splash any water into the cheesecake itself. The water bath provides a moist, even heat, which helps prevent cracks and ensures a silky-smooth texture.
- Initial Bake: Bake the cheesecake for 60-70 minutes, or until the edges are set and lightly golden, but the center 2-3 inches still have a slight jiggle when you gently shake the pan. It shouldn’t be liquidy, but a slight wobble is exactly what we’re looking for. Overbaking will lead to a dry cheesecake and increase the chances of cracks.
- Cool Gradually in the Oven: Once the cheesecake is baked to perfection, turn off the oven. Leave the cheesecake in the oven with the oven door ajar (you can prop it open with a wooden spoon) for about 1 hour. This gradual cooling process is another key step to prevent drastic temperature changes, which are a major cause of cracks.
- Remove from Water Bath and Cool Completely: After the hour in the cooling oven, carefully remove the roasting pan from the oven. Gently lift the springform pan out of the water bath. Remove the foil from around the springform pan. Place the cheesecake on a wire rack to cool completely at room temperature for another 1-2 hours.
- The Crucial Chill: Once the cheesecake has cooled to room temperature, cover it loosely with plastic wrap and transfer it to the refrigerator. Chill for at least 6-8 hours, but preferably overnight. This chilling step is non-negotiable! It allows the cheesecake to fully set, firm up, and for all those wonderful flavors to meld together. Trying to slice a warm or insufficiently chilled cheesecake will result in a messy, sad cheesecake.
Assembling and Chilling Your Strawberry Crunch Cheesecake Masterpiece
Now for the grand finale – bringing all the components of our Strawberry Crunch Cheesecake together!
- Remove from Springform Pan: Once your cheesecake is thoroughly chilled and firm, run a thin knife around the edge of the pan before releasing the springform ring. Carefully remove the ring. If you used parchment paper on the bottom, you can leave the cheesecake on the bottom of the pan for serving or carefully slide it onto a serving plate.
- Prepare the Whipped Cream (Optional): If you’re adding a whipped cream topping, grab your very cold heavy cream, powdered sugar, and vanilla extract. In a large, chilled bowl, using an electric mixer with the whisk attachment, beat the heavy cream, powdered sugar, and vanilla extract on medium-high speed until medium-stiff peaks form. Be careful not to overbeat, or you’ll end up with butter! The cream should hold its shape but still be light and airy.
- Apply Whipped Cream: Gently spread the whipped cream evenly over the top of the chilled cheesecake. You can use an offset spatula for a smooth finish, or pipe it on using a piping bag and a large star tip for a decorative touch.
- Generously Apply Strawberry Crunch: Now for the star of the show! Take your prepared and cooled strawberry crunch topping and generously sprinkle it all over the top of the whipped cream layer. You can press it in very gently to help it adhere, but don’t compact it too much; we want that delightful, airy crunch. Be sure to get some around the sides too, if you like.
- Final Chill and Garnish: If you’re not serving immediately, place the assembled Strawberry Crunch Cheesecake back in the refrigerator for at least another hour to allow the whipped cream to set and the crunch to adhere. This also ensures everything is perfectly cold. Before serving, you can garnish with fresh strawberry slices or halves for a beautiful presentation and a burst of fresh fruit flavor.
- Slice and Serve: To get clean slices, use a sharp, thin knife. Wipe the knife clean with a hot, damp cloth between each slice to prevent sticking and ensure beautiful, crisp edges. Serve chilled and enjoy the layers of creamy cheesecake, golden crust, and irresistible strawberry crunch!
- Storage: Store any leftover Strawberry Crunch Cheesecake in an airtight container in the refrigerator for up to 4-5 days. While the crunch topping might soften slightly over time, the flavors will remain absolutely delicious.
Conclusion:
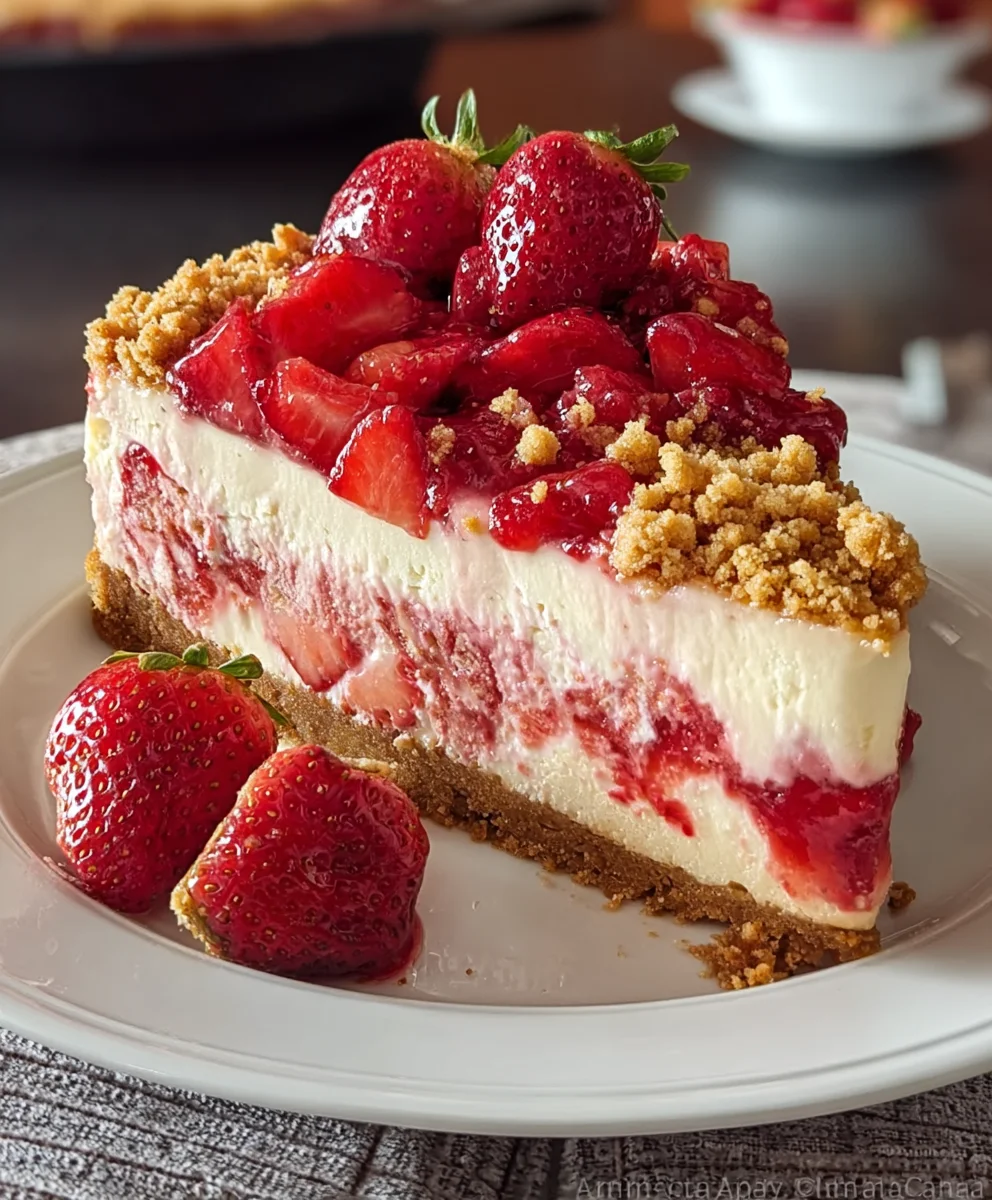
And there you have it, my friends! We’ve journeyed through the steps of creating what I truly believe is one of the most delightful and impressive desserts you can bring to any table. This isn’t just another cheesecake recipe; it’s a celebration of textures and flavors that come together in a symphony of sweetness, tang, and satisfying crunch. I know you’re going to fall in love with the luscious, creamy filling that practically melts in your mouth, perfectly balanced by the vibrant, fresh strawberry swirl. But let’s be honest, the real star, the element that elevates this dessert from great to absolutely unforgettable, is that sensational, golden, crunchy topping. It’s the kind of dessert that elicits gasps of delight and immediate requests for the recipe, making you feel like a culinary genius with surprisingly little effort.
I genuinely believe that once you try this recipe, it will quickly become a cherished favorite in your own collection. It’s the perfect showstopper for special occasions, yet simple enough to whip up for a weekend treat. The visual appeal alone is enough to make anyone’s eyes light up, with its beautiful layers and inviting crunch. Every forkful offers a new experience, from the smooth, rich cheesecake to the bright burst of strawberry, culminating in that irresistible, buttery crumble. It’s truly a dessert that has it all: elegance, comfort, and an undeniable “wow” factor.
Perfect Servings & Creative Variations
When it comes to serving your masterpiece, I highly recommend allowing your Strawberry Crunch Cheesecake to chill thoroughly for at least 6-8 hours, or even overnight, for the best texture and flavor development. A perfectly chilled slice is an absolute dream. You can serve it simply as is, letting its natural beauty shine, or take it up a notch with a few extra touches. A dollop of freshly whipped cream, perhaps lightly sweetened with a touch of vanilla extract, makes for a heavenly accompaniment. For an added pop of freshness and color, a scattering of fresh mint leaves or a few extra sliced strawberries can elevate its presentation even further. Imagine presenting this at your next gathering; it’s bound to be the star of the dessert table.
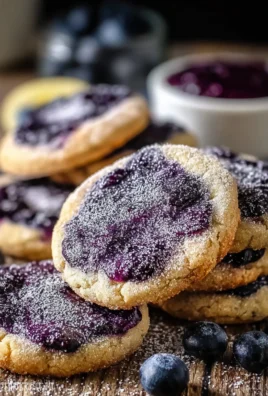
But don’t stop there! This recipe is wonderfully adaptable, allowing for your own creative twists. If you’re feeling adventurous, consider experimenting with different berry purees for the swirl – raspberries or blueberries would offer a fantastic alternative, creating a “Raspberry Crunch Cheesecake” or “Blueberry Crunch Cheesecake” that’s equally divine. You could even swirl in a little lemon curd for an extra zesty kick, or drizzle a touch of white chocolate over the top before serving for a touch of extra decadence. For the crunch topping, while the vanilla sandwich cookies are classic, feel free to experiment with Golden Oreos or even Biscoff cookies for a different flavor profile. If you’re hosting a larger crowd, or simply prefer individual portions, consider making these in muffin tins lined with paper cups – just adjust the baking time accordingly for adorable mini crunch cheesecakes that are perfect for parties. They’re delightful as grab-and-go treats and look incredibly impressive.
Share Your Masterpiece!
Now, it’s your turn! I’ve shared my passion for this incredible recipe, and I genuinely can’t wait for you to experience the magic of making and tasting it yourself. I urge you to gather your ingredients, set aside some time, and dive into the joyful process of creating this spectacular dessert. You absolutely will not regret it. Trust me, the smiles and compliments you’ll receive will be well worth every moment spent in the kitchen. Once you’ve whipped up your own batch of this glorious Strawberry Crunch Cheesecake, please, please come back and share your experience. I’d love to hear how it turned out for you, what variations you tried, or even just a photo of your beautiful creation. Your feedback and stories truly make my day and inspire me to keep sharing more delicious recipes with you all. So go forth, bake, enjoy, and share the crunchy, creamy love!
Epic Strawberry Crunch Cheesecake
An irresistible symphony of creamy cheesecake, sweet-tart strawberries, and a delightful crunchy topping, perfect for any special occasion. This dessert blends nostalgic childhood flavors into a sophisticated yet fun creation that will captivate your senses.
Ingredients
-
24 Golden Oreo cookies (270g)
-
1/2 cup (113g) unsalted butter, melted
-
20 Golden Oreo cookies (225g) or Nilla Wafers
-
1/2 cup (113g) unsalted butter, melted (for crunch topping)
-
3 tablespoons (28g) granulated sugar (optional, for crunch topping)
-
1 (3 oz / 85g) package strawberry flavored gelatin mix
-
1 ounce (28g) freeze-dried strawberries, crushed
-
4 (8 oz / 226g each) full-fat cream cheese, softened to room temperature
-
1 3/4 cups (350g) granulated sugar
-
1/4 cup (60ml) sour cream, room temperature
-
1 tablespoon pure vanilla extract
-
1/2 teaspoon fresh lemon zest (optional)
-
4 large eggs, room temperature
-
1 1/2 cups (360ml) heavy whipping cream, very cold
-
1/4 cup (30g) powdered sugar
-
1 teaspoon pure vanilla extract (for whipped cream)
-
Fresh strawberries, sliced or halved (for garnish)
Instructions
-
Step 1
Preheat oven to 325°F (160°C). Line 9-inch springform pan bottom with parchment, wrap outside with two layers of heavy-duty foil for a water bath. Process 24 Golden Oreos (270g) into fine crumbs. Mix with 1/2 cup (113g) melted butter until moistened. Press crumbs firmly into the prepared pan bottom. Bake crust for 8-10 minutes. Cool completely. -
Step 2
Process 20 Golden Oreos (225g) or Nilla Wafers into coarse crumbs. Process 1 oz (28g) freeze-dried strawberries into a fine powder. In a large bowl, combine crushed cookies, 3 tbsp (28g) granulated sugar (optional), 1 (3 oz / 85g) pkg strawberry gelatin mix, and strawberry powder. Stir in 1/2 cup (113g) melted unsalted butter until crumbs are evenly coated. (Optional) For extra crunch, spread mixture on a parchment-lined baking sheet and bake for 8-10 minutes at 325°F (160°C), stirring halfway. Cool completely. -
Step 3
Ensure all filling ingredients (cream cheese, sour cream, eggs) are at room temperature. In a large bowl, beat 4 (8oz / 226g) softened full-fat cream cheese on medium speed for 3-4 minutes until incredibly smooth and lump-free, scraping bowl frequently. Gradually add 1 3/4 cups (350g) granulated sugar on low speed, beating for another 3-4 minutes until light and fluffy. Avoid overmixing. Mix in 1/4 cup (60ml) sour cream, 1 tbsp pure vanilla extract, and 1/2 tsp fresh lemon zest (optional) on low speed until just combined. Add 4 large eggs one at a time on very low speed, mixing just until each egg is incorporated before adding the next. Scrape bowl. Pour filling over the cooled Golden Oreo crust in the prepared springform pan. Gently tap pan on counter to release large air bubbles. -
Step 4
Place the foil-wrapped springform pan inside a larger roasting pan. Carefully place the roasting pan into the preheated 325°F (160°C) oven. Pour very hot (not boiling) water into the roasting pan, coming halfway up the sides of the springform pan. Bake for 60-70 minutes, until the edges are set and lightly golden, but the center 2-3 inches still have a slight jiggle. Turn off the oven, leave the door ajar (prop with a wooden spoon) for 1 hour for gradual cooling. Remove from water bath, unwrap foil, and cool completely on a wire rack at room temperature for 1-2 hours. Cover loosely with plastic wrap and chill in the refrigerator for at least 6-8 hours, preferably overnight, for the cheesecake to fully set. -
Step 5
Once thoroughly chilled, run a thin knife around the edge of the pan before releasing the springform ring. (Optional Whipped Cream): In a chilled bowl, beat 1 1/2 cups (360ml) very cold heavy cream, 1/4 cup (30g) powdered sugar, and 1 tsp pure vanilla extract on medium-high speed until medium-stiff peaks form. Gently spread whipped cream evenly over the top of the chilled cheesecake. Generously sprinkle the cooled strawberry crunch topping all over the whipped cream layer. If not serving immediately, place the assembled cheesecake back in the refrigerator for at least another hour. Garnish with fresh strawberry slices or halves before serving. To get clean slices, use a sharp, thin knife, wiping it clean with a hot, damp cloth between each slice. Store any leftover cheesecake in an airtight container in the refrigerator for up to 4-5 days.
Important Information
Nutrition Facts (Per Serving)
It is important to consider this information as approximate and not to use it as definitive health advice.
Allergy Information
Please check ingredients for potential allergens and consult a health professional if in doubt.

Leave a Comment