
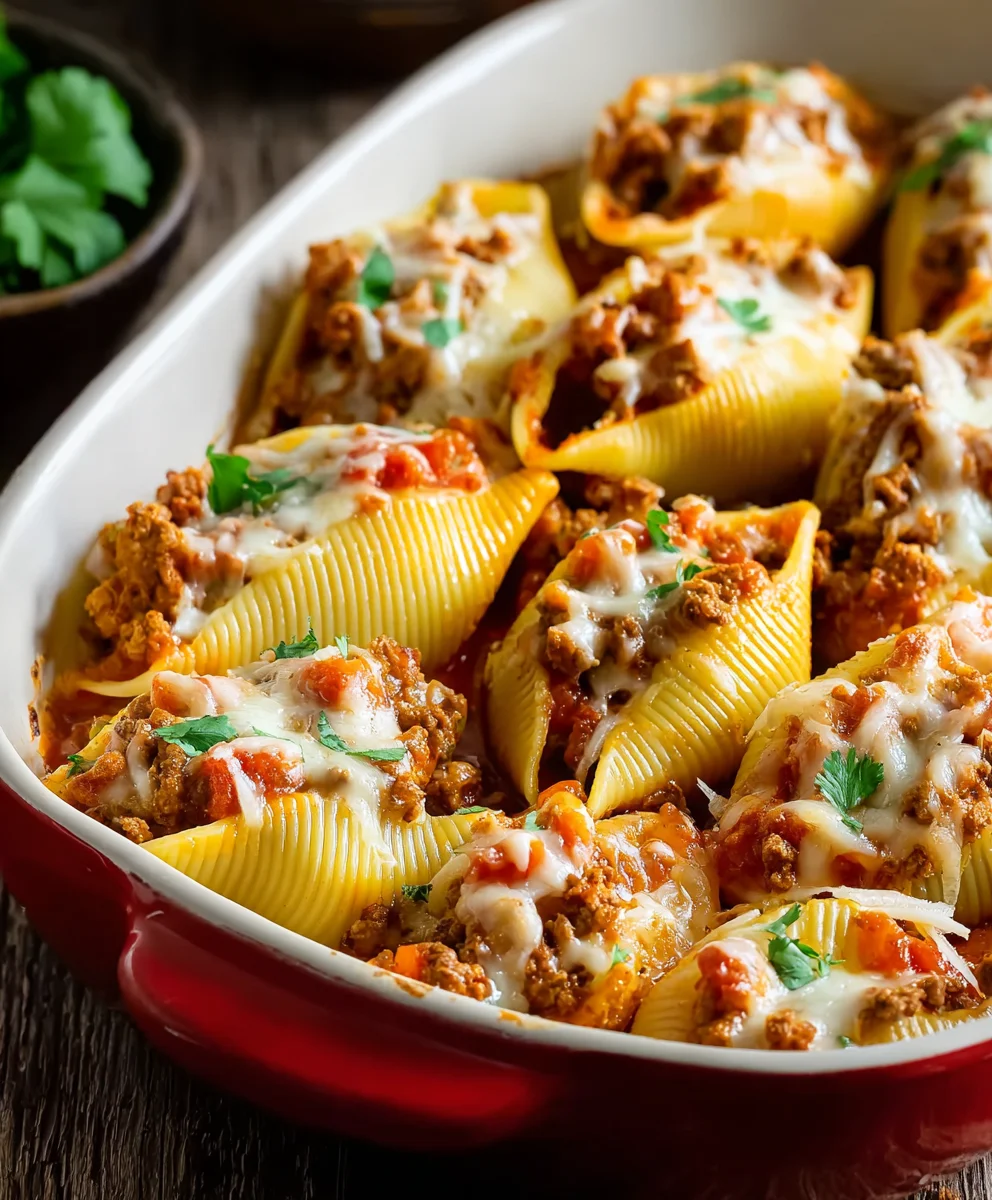
Taco Stuffed Shells are an absolute game-changer for weeknight dinners, transforming a classic comfort food into a fiesta of flavors that everyone in the family will adore. Imagin extracte large pasta shells, plump and tender, cradling a savory, seasoned ground beef filling that’s bursting with all the delicious components of your favorite tacos – think cumin, chili powder, a hint of garlic, and onions. What makes these taco stuffed shells so incredibly special is the ingenious fusion of Italian-American comfort with vibrant Mexican-inspired zest. It’s the best of both worlds, served up in a dish that’s as fun to assemble as it is to devour. The creamy, cheesy topping that bakes to golden perfection adds another layer of irresistible indulgence. Forget boring dinners; this recipe guarantees smiles and happy sighs around the table, making these taco stuffed shells a recurring favorite.
Ingredients:
- 20-24 jumbo shell pasta
- 1 pound ground beef
- 1 medium onion, diced
- 3 tablespoons taco seasoning
- 3/4 cup water
- 1 cup salsa or salsa style tomatoes
- 1 cup shredded cheddar cheese
- 1 cup shredded Monterey Jack cheese
- 1 (10 ounce) can Rotel tomatoes, drained (or diced tomatoes)
- 1 jalapeño or serrano pepper, finely minced (seeds removed for less heat, if desired)
- Green onions, chopped (optional, for garnish)
Prepare the Taco Meat
The foundation of our delicious Taco Stuffed Shells is a flavorful taco meat. This step involves browning the ground beef and infusing it with classic taco spices. Start by placing your pound of ground beef into a large skillet over medium-high heat. As the beef begin extracts to cook and break apart, use a spoon or spatula to crum extractble it into smaller pieces. You want to cook it until it’s no longer pink and has developed some nice browned bits, which add a lot of savory depth. Once the beef is fully cooked, carefully drain off any excess grease. This is an important step to prevent your stuffed shells from becoming too oily and to ensure the texture is just right.
Now, it’s time to add the aromatics and seasoning. Return the drained ground beef to the skillet and add your diced medium onion. Cook the onion with the beef for about 3-5 minutes, stirring occasionally, until the onion softens and becomes translucent. The sweetness of the softened onion will perfectly complement the savory beef. Next, sprinkle in the 3 tablespoons of taco seasoning evenly over the meat and onion mixture. Stir everything together thoroughly to ensure every piece of beef and onion is coated with the seasoning. This allows the spices to bloom and release their full fragrance. Finally, pour in the 3/4 cup of water. Bring the mixture to a simmer, then reduce the heat to low, cover the skillet, and let it cook for about 10-15 minutes. This simmering time allows the flavors to meld together beautifully, creating a rich and cohesive taco filling. The water will also help to distribute the seasoning and create a slightly saucy consistency.
Assemble the Taco Stuffed Shells
With our flavorful taco meat ready, we can move on to assembling our Taco Stuffed Shells. First, preheat your oven to 375 degrees Fahrenheit (190 degrees Celsius). While the oven is preheating, you’ll need to cook your jumbo shell pasta. Bring a large pot of generously salted water to a rolling boil. Carefully add the 20-24 jumbo shell pasta to the boiling water. Cook the shells according to the package directions, but be sure to undercook them slightly, aiming for “al dente.” We don’t want them to be mushy, as they will continue to cook in the oven. Once cooked, drain the shells and rinse them briefly with cool water to stop the cooking process and prevent them from sticking together. Set them aside to drain thoroughly.
Now comes the fun part: stuffing the shells! You can do this in a couple of ways. One method is to place the drained shells on a clean surface and use a small spoon to carefully fill each one with the prepared taco meat mixture. Another efficient method, especially if you’ve transferred your taco meat to a bowl, is to place the shells in a baking dish and then spoon the filling into each one. As you are filling, try to get a generous amount of the taco meat into each shell, but don’t overstuff them to the point where the filling spills out. This ensures a satisfying bite with every shell.
Create the Cheesy Taco Sauce and Bake
To bind everything together and add a delightful creaminess, we’ll create a quick cheesy sauce. In a medium bowl, combine the 1 cup of salsa or salsa style tomatoes, the drained 1 (10 ounce) can of Rotel tomatoes (or diced tomatoes), and the finely minced jalapeño or serrano pepper. If you prefer less heat, make sure to remove the seeds and membranes from the pepper before mincing. Stir these ingredients together until they are well combined. This mixture will provide a zesty and slightly spicy base for our stuffed shells.
Now, we’ll add the cheese to this mixture. Stir in 1 cup of shredded cheddar cheese and 1 cup of shredded Monterey Jack cheese. Reserve a small handful of each cheese for topping later. Mix everything until the cheese is mostly incorporated into the salsa and Rotel mixture. This will create a rich, cheesy, and slightly tangy sauce. Pour about half of this cheesy sauce mixture into the bottom of a 9×13 inch baking dish, spreading it evenly to coat the bottom. This layer of sauce will help prevent the shells from sticking and will infuse them with flavor from the bottom up.
Bake and Garnish
Carefully arrange the filled taco shells, opening side up, in the prepared baking dish over the sauce. Try to fit them snugly together. Once all the shells are filled and arranged, pour the remaining cheesy taco sauce mixture evenly over the tops of the stuffed shells. Make sure to cover all the shells so they are well coated. Finally, sprinkle the reserved shredded cheddar and Monterey Jack cheese over the top of the entire dish. This creates a beautiful, golden-brown, cheesy crust as it bakes.
Cover the baking dish tightly with aluminum foil. This is crucial to ensure that the shells cook through and the cheese melts evenly without burning the top. Place the foil-covered dish into the preheated oven. Bake for 20-25 minutes. After 20-25 minutes, carefully remove the aluminum foil. Return the dish to the oven and bake for another 5-10 minutes, or until the cheese is melted, bubbly, and lightly golden brown. Keep an eye on it during this final stage to prevent the cheese from burning. Once removed from the oven, let the Taco Stuffed Shells rest for about 5 minutes before serving. This allows the flavors to settle and makes them easier to serve. If desired, garnish with chopped green onions for a fresh, vibrant finish.
Conclusion:
There you have it – a complete guide to creating delicious Taco Stuffed Shells! We’ve walked through each step, from preparing the flavorful filling to baking them to golden perfection. These Taco Stuffed Shells are not just a meal; they’re a crowd-pleasing adventure that’s surprisingly easy to put together. Don’t be afraid to make them your own!
For serving, I love to pair these Taco Stuffed Shells with a crisp green salad, some fluffy rice, or even extra tortilla chips and salsa. A dollop of sour cream or a sprinkle of fresh cilantro really elevates the dish. When it comes to variations, the possibilities are endless! Feel free to swap out the ground beef for ground turkey or chicken, or even use black beans for a vegetarian option. Add in some diced bell peppers or corn for extra texture and flavor. Remember, cooking is all about experimentation, so have fun with it and enjoy every bite of your amazing Taco Stuffed Shells!
FAQs:
Can I make Taco Stuffed Shells ahead of time?
Absolutely! You can assemble the Taco Stuffed Shells up to 24 hours in advance. Cover them tightly with plastic wrap and refrigerate. When you’re ready to bake, remove them from the refrigerator about 30 minutes before baking to take the chill off, and then bake as directed, adding a few extra minutes to the cooking time if needed.
What kind of pasta shells work best for Taco Stuffed Shells?
Jumbo pasta shells are ideal for this recipe. Their large, cupped shape makes them perfect for stuffing with all that delicious taco filling. Make sure to cook them just until al dente, as they will continue to cook in the oven.
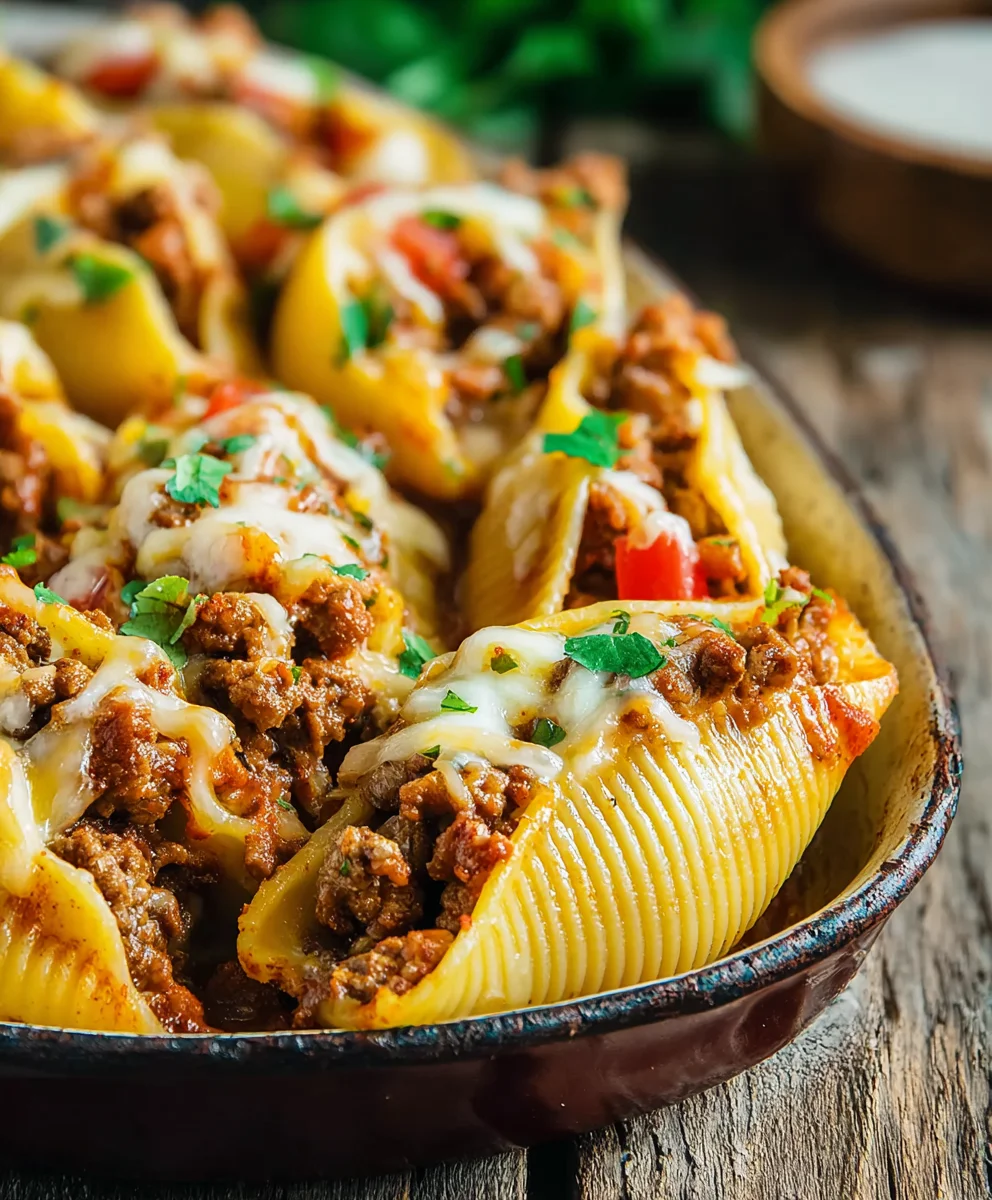
Easy Taco Stuffed Shells – Beef Dinner
A simple and delicious recipe for taco-stuffed pasta shells filled with seasoned ground beef and topped with a cheesy salsa sauce.
Ingredients
-
20-24 jumbo shell pasta
-
1 pound ground beef
-
1 medium onion, diced
-
3 tablespoons taco seasoning
-
3/4 cup water
-
1 cup salsa or salsa style tomatoes
-
1 cup shredded cheddar cheese
-
1 cup shredded Monterey Jack cheese
-
1 (10 ounce) can Rotel tomatoes, drained
-
1 jalapeño or serrano pepper, finely minced
-
Green onions, chopped (optional, for garnish)
Instructions
-
Step 1
Prepare the Taco Meat: Brown 1 pound ground beef in a skillet over medium-high heat. Drain excess grease. Add 1 diced medium onion and cook until softened, about 3-5 minutes. Stir in 3 tablespoons taco seasoning, 3/4 cup water, and simmer covered for 10-15 minutes until flavors meld. -
Step 2
Assemble the Taco Stuffed Shells: Preheat oven to 375°F (190°C). Cook 20-24 jumbo shells al dente according to package directions. Drain and rinse with cool water. Carefully fill each shell with the prepared taco meat mixture. -
Step 3
Create the Cheesy Taco Sauce: In a medium bowl, combine 1 cup salsa, 1 (10 ounce) can drained Rotel tomatoes, and 1 finely minced jalapeño or serrano pepper. Stir in 1 cup shredded cheddar cheese and 1 cup shredded Monterey Jack cheese, reserving some cheese for topping. Mix until cheese is mostly incorporated. -
Step 4
Bake and Garnish: Spread half of the cheesy sauce mixture into the bottom of a 9×13 inch baking dish. Arrange filled shells, opening side up, over the sauce. Pour remaining sauce over the shells and sprinkle with reserved cheese. -
Step 5
Cover the dish tightly with aluminum foil and bake for 20-25 minutes. Remove foil and bake for an additional 5-10 minutes, or until cheese is bubbly and golden brown. Let rest for 5 minutes before serving. Garnish with chopped green onions, if desired.
Important Information
Nutrition Facts (Per Serving)
It is important to consider this information as approximate and not to use it as definitive health advice.
Allergy Information
Please check ingredients for potential allergens and consult a health professional if in doubt.


Leave a Comment