
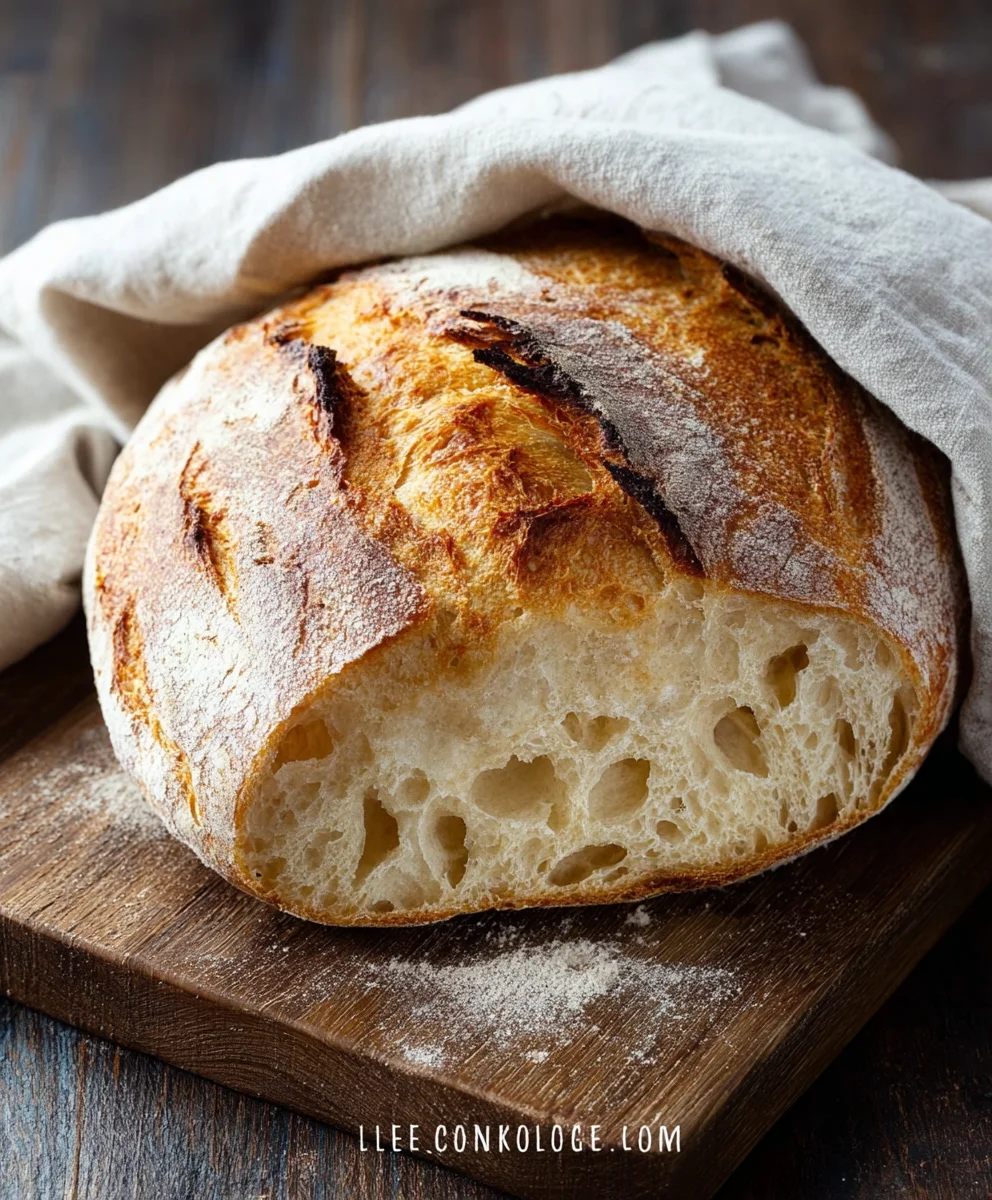
Rustic Bread Recipe is more than just a bake; it’s an experience. The aroma alone, wafting from your oven as this golden loaf transforms, promises warmth, comfort, and a satisfyingly crusty exterior giving way to a tender, airy crum extractb. It’s the kind of bread that transports you back to simpler times, to the heart of a cozy kitchen where nourishment and love are the main ingredients. People adore this Rustic Bread Recipe because it feels both incredibly achievable and wonderfully authentic. What makes it truly special is its inherent simplicity, relying on just a few quality ingredients and a patient hand to coax out its incredible flavor and texture. It’s perfect for tearing apart and slathering with butter, dunking into hearty soups, or simply enjoying on its own, a testament to the beauty of elemental baking.

Ingredients:
- 3 cups warm water
- 2 ¼ teaspoons active dry yeast (this is typically one standard packet)
- 1 tablespoon sugar
- 6 cups (approximately 750 grams) all-purpose flour
- 3 teaspoons salt
Mixing the Dough
Activating the Yeast
To begin extract our rustic bread journey, the first crucial step is to awaken the yeast. In a large mixing bowl, combine the 3 cups of warm water. It’s important that the water is warm, not hot; think of it as comfortable bath water for the yeast. If it’s too hot, it will kill the yeast, and if it’s too cold, it won’t activate properly. You can test this by dipping your finger in – it should feel pleasant. To this warm water, add the 1 tablespoon of sugar. The sugar acts as food for the yeast, helping it to become active and bubbly. Sprinkle the 2 ¼ teaspoons of active dry yeast over the surface of the water and sugar mixture. Don’t stir it in just yet. Let it sit undisturbed for about 5 to 10 minutes. You’ll notice that a foamy, frothy layer develops on top. This is a clear indication that your yeast is alive and ready to do its work, creating those beautiful airy pockets in your bread. If you don’t see this foam after 10 minutes, it’s best to discard the mixture and start again with fresh yeast.
Combining Wet and Dry Ingredients
Once your yeast is beautifully foamy, it’s time to introduce the flour and salt. Add the 6 cups of all-purpose flour to the bowl with the activated yeast mixture. This might seem like a lot of flour, and it is, but it’s essential for the structure of our rustic bread. Next, add the 3 teaspoons of salt. Salt is not just for flavor; it also plays a role in controlling yeast activity and strengthening the gluten structure in the dough. Using a sturdy wooden spoon or a dough whisk, start to mix everything together. Initially, the mixture will be very shaggy and messy. Keep mixing until most of the dry flour has been incorporated into the wet ingredients and a rough gin extractgh begins to form. Don’t worry about perfect smoothness at this stage; we’re just aiming to bring all the ingredients together.
Kneading the Dough
Developing Gluten
Now comes the satisfying part: kneading. Turn the shaggy dough out onto a lightly floured surface. You don’t need to flour the surface heavily, just enough to prevent the dough from stickgin extract too much. Begin to knead the dough by pushing it away from you with the heels of your hands, then folding it back towards you. Rotate the dough slightly and repeat the process. This rhythmic motion is what develops the gluten in the flour, creating a strong, elastic dough that will give our bread its chewy texture. As you knead, you’ll notice the dough transforming. It will become less sticky and more smooth, pliable, and elastic. This process typically takes about 8 to 10 minutes of continuous kneading. You’re looking for a dough that springs back slowly when you poke it with your finger. If the dough becomes too sticky during kneading, resist the urge to add too much extra flour, as this can result in a dense loaf. Instead, continue kneading, and the stickiness should reduce as the gluten develops.
First Rise (Bulk Fermentation)
Proofing the Dough
Once your dough has been thoroughly kneaded and has a smooth, elastic texture, it’s time for its first rise, also known as bulk fermentation. Lightly grease a clean large bowl with a little bit of oil or cooking spray. Place the kneaded dough into the greased bowl, turning it once to ensure the entire surface is lightly coated. This coating prevents the dough from drying out as it rises. Cover the bowl tightly with plastic wrap or a clean, damp kitchen towel. Find a warm, draft-free spot in your kitchen to let the dough rise. This could be a slightly warm oven (turned off, of course, or set to its lowest temperature for a few minutes and then turned off) or simply a sunny spot on the counter. Allow the dough to rise for approximately 1 to 1.5 hours, or until it has doubled in size. This doubling in size is the indicator that the yeast has done its job, producing carbon dioxide gas that inflates the dough. The exact rising time can vary depending on the temperature of your kitchen.
Shaping and Second Rise
Forming the Loaf
After the first rise, gently punch down the dough to release the accumulated gases. This deflation is important for a good crum extractb structure. Turn the dough out onto your lightly floured work surface again. At this point, you can shape your rustic loaf. For a classic rustic look, you can simply form it into a round boule or an oblong shape. Gently coax the dough into your desired form, being careful not to overwork it. You want to create a nice, taut surface on the outside of the loaf. Place the shaped dough onto a baking sheet lined with parchment paper or onto a well-floured pizza peel if you’re using a baking stone.
The Final Proof
Once shaped, the dough needs a second, shorter rise, often called the final proof. Cover the shaped loaf loosely with plastic wrap or a kitchen towel and let it rest in a warm place for another 30 to 45 minutes, or until it has increased in size by about 50%. This final proof allows the dough to relax and puff up before baking, contributing to a lighter texture. While the dough is on its second rise, preheat your oven to 425°F (220°C). If you’re using a baking stone, place it in the oven as it preheats. For an even crispier crust, you can also place an oven-safe pan (like a cast-iron skillet or an old metal baking pan) on the bottom rack of the oven during preheating; you’ll add water to this later for steam.
Conclusion:
And there you have it – your very own batch of delicious Rustic Bread Recipe! We hope you enjoyed the process of creating this wonderfully textured and flavorful loaf. This Rustic Bread Recipe is a testament to the simple joy of baking, transforming basic ingredients into something truly special. Its hearty crust and soft, airy interior make it incredibly versatile. Enjoy it warm from the oven, slathered with butter, or use it as the perfect base for all your favorite sandwiches and appetizers. Don’t be afraid to experiment with variations – adding herbs, seeds, or even a touch of honey can elevate your Rustic Bread Recipe even further. So go ahead, get baking, and share the delicious results with your loved ones!
Frequently Asked Questions about the Rustic Bread Recipe:
Q: Can I freeze the Rustic Bread Recipe once it’s baked?
A: Absolutely! Once the Rustic Bread Recipe has cooled completely, you can wrap it tightly in plastic wrap, followed by a layer of aluminum foil or a freezer bag. It will stay fresh in the freezer for up to 3 months. Thaw it at room temperature or gently reheat it in the oven.
Q: My Rustic Bread Recipe didn’t rise as much as I expected. What could be the reason?
A: There could be a few reasons for this. Ensure your yeast was fresh and active before you started. Water temperature is crucial; if it was too hot, it could have killed the yeast, and if it was too cold, it might not have activated properly. Also, be sure you allowed the dough enough time to rise in a warm environment.
Q: What are some good serving suggestions for this Rustic Bread Recipe?
A: This Rustic Bread Recipe is fantastic served warm with a generous spread of butter, olive oil and balsamic vinegar for dipping, or as the foundation for bruschetta or garlic bread. It also makes an excellent accompaniment to soups and stews.
Easy Rustic Bread
Bake delicious homemade rustic loaves with this easy recipe. Perfect for beginners!
Ingredients
-
3 cups warm water
-
2 ¼ teaspoons active dry yeast
-
1 tablespoon sugar
-
6 cups all-purpose flour
-
3 teaspoons salt
Instructions
-
Step 1
Activate the yeast: In a large bowl, combine warm water, sugar, and active dry yeast. Let sit for 5-10 minutes until foamy. -
Step 2
Combine wet and dry ingredients: Add flour and salt to the activated yeast mixture. Mix until a shaggy dough forms. -
Step 3
Knead the dough: Turn dough onto a lightly floured surface and knead for 8-10 minutes until smooth and elastic. -
Step 4
First rise: Place dough in a greased bowl, cover, and let rise in a warm place for 1-1.5 hours until doubled in size. -
Step 5
Shape the loaf: Gently punch down the dough, shape into a boule or oblong, and place on a parchment-lined baking sheet. -
Step 6
Second rise and preheat: Cover the shaped loaf and let rise for 30-45 minutes. Preheat oven to 425°F (220°C).
Important Information
Nutrition Facts (Per Serving)
It is important to consider this information as approximate and not to use it as definitive health advice.
Allergy Information
Please check ingredients for potential allergens and consult a health professional if in doubt.


Leave a Comment