

Raspberry Lemon Cake is a dessert that sings with bright, vibrant flavors, a true celebration of spring and summer in every bite. There’s something undeniably joyful about the zesty tang of fresh lemon perfectly balanced by the sweet, slightly tart burst of ripe raspberries. It’s no wonder this combination is a perennial favorite! What makes this particular Raspberry Lemon Cake so special is its delicate crum extractb, which is wonderfully moist and tender, providing the ideal canvas for those iconic flavors. Each slice offers a delightful textural contrast between the airy cake and the juicy berries, creating an experience that’s both comforting and exhilarating. Whether you’re baking for a special occasion or simply craving a little sunshine on your plate, this Raspberry Lemon Cake is guaranteed to bring smiles and pure deliciousness.
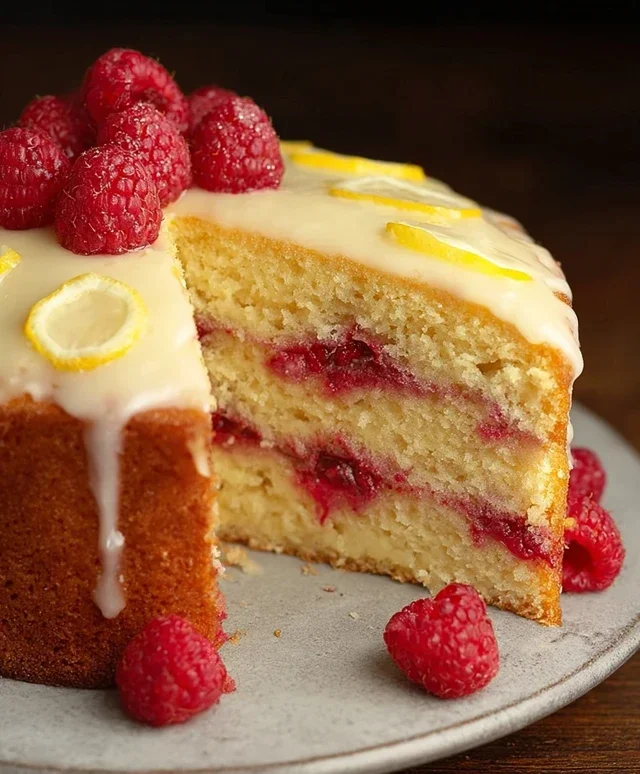
Raspberry Lemon Cake
This Raspberry Lemon Cake is a vibrant symphony of tart and sweet, a delightful treat that’s perfect for any occasion. The bright citrus notes of lemon are beautifully complemented by the juicy burst of fresh raspberries, all nestled within a tender, gluten-free crum extractb. I love how this cake strikes a balance – it’s not overly sweet, allowing the natural flavors to shine. And the best part? It’s surprisingly easy to make, even for those who are new to gluten-free baking. The texture is wonderfully moist and light, proving that gluten-free can be absolutely delicious. Let’s get started!
Ingredients:
For the Cake
1. Prepare Your Baking Pans and Preheat the Oven
Before we even think about mixing ingredients, it’s crucial to get our baking environment ready. This ensures an even bake and prevents any sticking disasters. I like to use two 8-inch or 9-inch round cake pans for this recipe. Grease them thoroughly with butter or non-stick cooking spray. Then, dust them lightly with gluten-free flour, tapping out any excess. This double preparation is my secret to cakes that slide out effortlessly. Once your pans are prepped, preheat your oven to 350 degrees Fahrenheit (175 degrees Celsius). Having the oven at the correct temperature from the start is vital for the leavening agents in the cake to work effectively, giving you that beautiful rise.
2. Combine Dry Ingredients
In a medium-sized bowl, whisk together your 3 cups of gluten-free flour, 1 ½ cups of sugar, 1 tablespoon of baking powder, ¾ teaspoon of baking soda, and ½ teaspoon of salt. Whisking these dry ingredients thoroughly ensures that the leavening agents and salt are evenly distributed throughout the flour. This even distribution is key to a uniformly risen and well-seasoned cake. I find that a good whisking here prevents any pockets of salt or baking soda, which can lead to an unpleasant texture or taste.
3. Cream Butter and Sugar, Then Add Wet Ingredients
In a large mixing bowl, using an electric mixer (stand mixer or hand mixer), beat 1 cup of room-temperature unsalted butter with the sugar until light and fluffy. This process, known as creaming, incorporates air into the mixture, which contributes to the cake’s tender texture. Gradually add the 3 eggs, one at a time, beating well after each addition. Next, incorporate 1 cup of unsweetened plain yogurt, ¼ cup of milk, 3 tablespoons of lemon zest (use a microplane for the best zest!), and ⅓ cup of lemon juice. Beat until just combined. Don’t overmix at this stage, as it can lead to a tougher cake. The lemon zest is where so much of that wonderful citrus aroma and flavor comes from, so don’t skimp on it!
4. Combine Wet and Dry, Gently Fold in Raspberries
Now, it’s time to bring our wet and dry ingredients together. Gradually add the dry ingredient mixture to the wet ingredients, mixing on low speed until just combined. Be careful not to overmix; a few streaks of flour are okay. Overmixing at this stage can develop the gluten (even in gluten-free flour, some starches can create a gummy texture), resulting in a dense cake. Once the batter is almost fully incorporated, gently fold in the 2 cups of fresh raspberries. I like to rinse my raspberries and pat them very dry before folding them in. Some people suggest tossing the raspberries in a tablespoon of the gluten-free flour before adding them to the batter; this can help prevent them from sinking to the bottom during baking. Be gentle when folding to avoid crushing the berries too much.
5. Bake the Cake
Divide the batter evenly between your prepared cake pans. Smooth the tops with a spatula. Bake in the preheated oven for 30-35 minutes, or until a wooden skewer or toothpick inserted into the center comes out clean. The baking time can vary slightly depending on your oven and the size of your pans, so it’s always best to start checking around the 30-minute mark. Once baked, let the cakes cool in their pans on a wire rack for about 10-15 minutes before inverting them onto the rack to cool completely. Ensuring the cakes are fully cooled before frosting is crucial; a warm cake will cause your frosting to melt into a sticky mess.
For the Lemon Buttercream Frosting
While the cakes are cooling, let’s whip up a luscious lemon buttercream. In a clean, dry bowl, beat 2 cups of room-temperature unsalted butter until it’s pnon-alcoholic ale and fluffy. This might take a few minutes with an electric mixer, but it’s worth it for a light and airy frosting. Gradually add 5 cups of powdered sugar, a cup at a time, mixing on low speed initially to avoid a sugar cloud, then increasing the speed to medium until smooth and creamy. Finally, stir in 2 teaspoons of lemon juice. Add more powdered sugar if the frosting is too thin, or a tiny splash more lemon juice if it’s too stiff. You want a spreadable, but not runny, consistency.
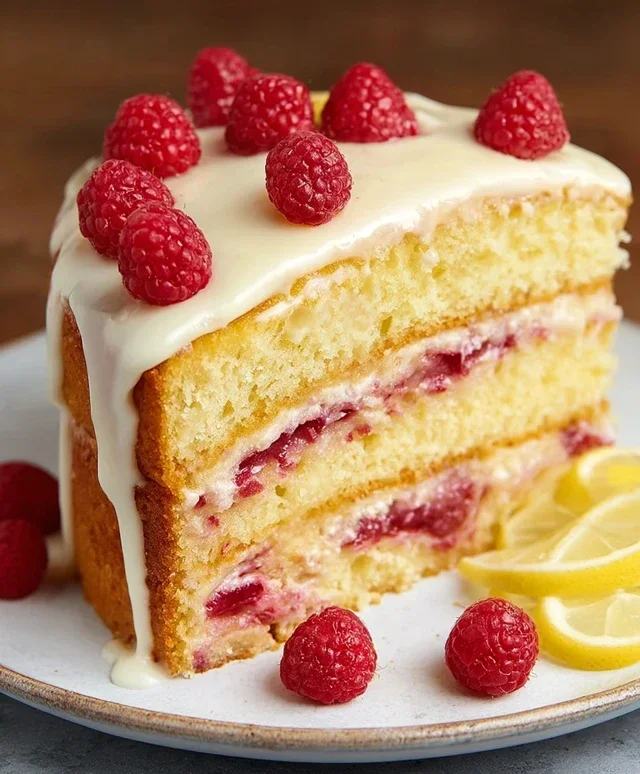
Once both the cakes and the frosting are completely cool, it’s time to assemble. Place one cake layer on your serving plate. Generously spread a thick layer of the lemon buttercream over the top. Then, carefully place the second cake layer on top. Frost the top and sides of the entire cake with the remaining buttercream. You can create swirls and peaks with your spatula for a rustic look, or smooth it out for a more polished finish. For an extra touch of elegance, you could garnish with a few fresh raspberries or a sprinkle of lemon zest. Enjoy this delightful Raspberry Lemon Cake!
Conclusion:
There you have it! This Raspberry Lemon Cake recipe is an absolute triumph. The bright, zesty notes of lemon perfectly complement the sweet, slightly tart burst of raspberries, creating a flavor profile that’s both refreshing and utterly delightful. It’s a moist, tender cake that’s surprisingly easy to whip up, making it ideal for both begin extractners and seasoned bakers looking for a reliable crowd-pleaser. The beautiful pink swirls from the raspberries make it visually stunning, ensuring it’s the star of any gathering. I truly encourage you to give this Raspberry Lemon Cake a try; you won’t be disappointed!
This cake is incredibly versatile. It’s wonderful served simply with a dusting of powdered sugar, or you can elevate it with a cream cheese frosting, a lemon glaze, or a dollop of fresh whipped cream. It makes a fantastic dessert for brunches, afternoon tea, or any special occasion. For variations, consider adding a touch of almond extract to the batter for a deeper flavor, or folding in some fresh lemon zest for an even more intense citrus punch. You could also swap the raspberries for other berries like blueberries or strawberries.
Frequently Asked Questions:
Can I use frozen raspberries?
Absolutely! If using frozen raspberries, it’s best to toss them gently in a tablespoon of flour before folding them into the batter. This helps prevent them from sinking to the bottom of the cake. You might need to bake the cake for a few extra minutes.
How do I store this Raspberry Lemon Cake?
Store the cake in an airtight container at room temperature for up to 3 days. If your kitchen is very warm, or if you’ve frosted it with something like cream cheese frosting, it’s best to refrigerate it. Allow it to come to room temperature before serving for the best texture and flavor.
Raspberry Lemon Cake
A moist and flavorful gluten-free cake bursting with fresh raspberries and bright lemon.
Ingredients
-
3 cups gluten-free flour
-
1 ½ cups sugar
-
1 cup unsalted butter, room temperature
-
1 cup unsweetened plain yogurt
-
¼ cup milk
-
1 tbsp baking powder
-
¾ tsp baking soda
-
½ tsp salt
-
3 eggs
-
3 tbsp lemon zest
-
⅓ cup lemon juice
-
2 cups fresh raspberries
-
2 cups unsalted butter, room temperature
-
5 cups powdered sugar
-
2 tsp lemon juice
Instructions
-
Step 1
Preheat oven to 350°F (175°C). Grease and flour two 8-inch cake pans. -
Step 2
In a large bowl, cream together 1 cup of unsalted butter and 1 ½ cups of sugar until light and fluffy. Beat in the eggs one at a time, then stir in the yogurt and ⅓ cup lemon juice. -
Step 3
In a separate bowl, whisk together the gluten-free flour, baking powder, baking soda, and salt. Gradually add the dry ingredients to the wet ingredients, alternating with the ¼ cup milk, beginning and ending with the dry ingredients. Stir in the 3 tbsp lemon zest. Gently fold in the fresh raspberries. -
Step 4
Divide the batter evenly between the prepared cake pans. Bake for 30-35 minutes, or until a wooden skewer inserted into the center comes out clean. -
Step 5
Let the cakes cool in the pans for 10 minutes before inverting them onto a wire rack to cool completely. -
Step 6
While the cakes are cooling, prepare the frosting. In a large bowl, beat together 2 cups of unsalted butter until creamy. Gradually add the powdered sugar, alternating with the 2 tsp lemon juice, until smooth and well combined. -
Step 7
Once the cakes are completely cooled, frost them with the prepared lemon frosting.
Important Information
Nutrition Facts (Per Serving)
It is important to consider this information as approximate and not to use it as definitive health advice.
Allergy Information
Please check ingredients for potential allergens and consult a health professional if in doubt.

Leave a Comment