
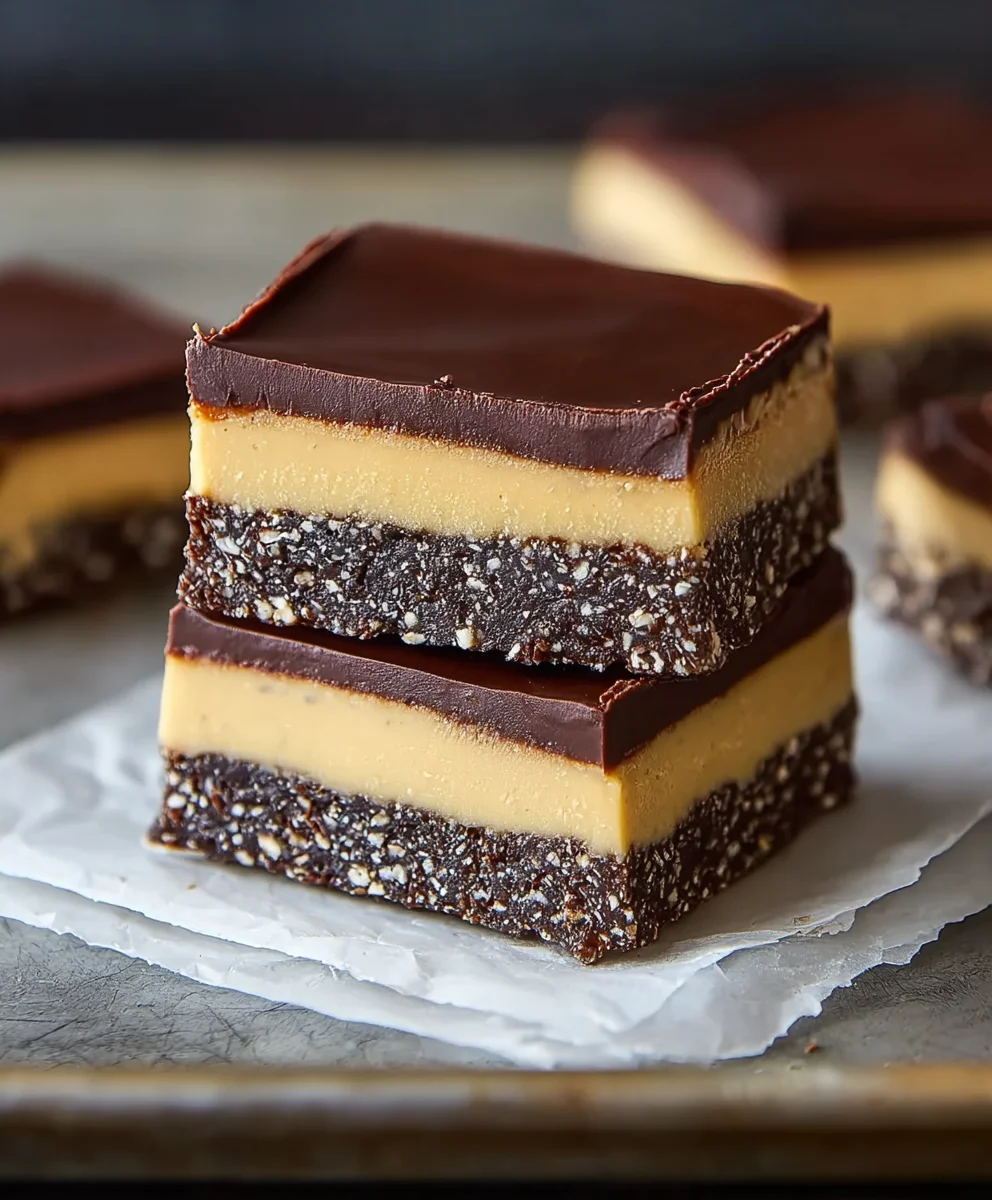
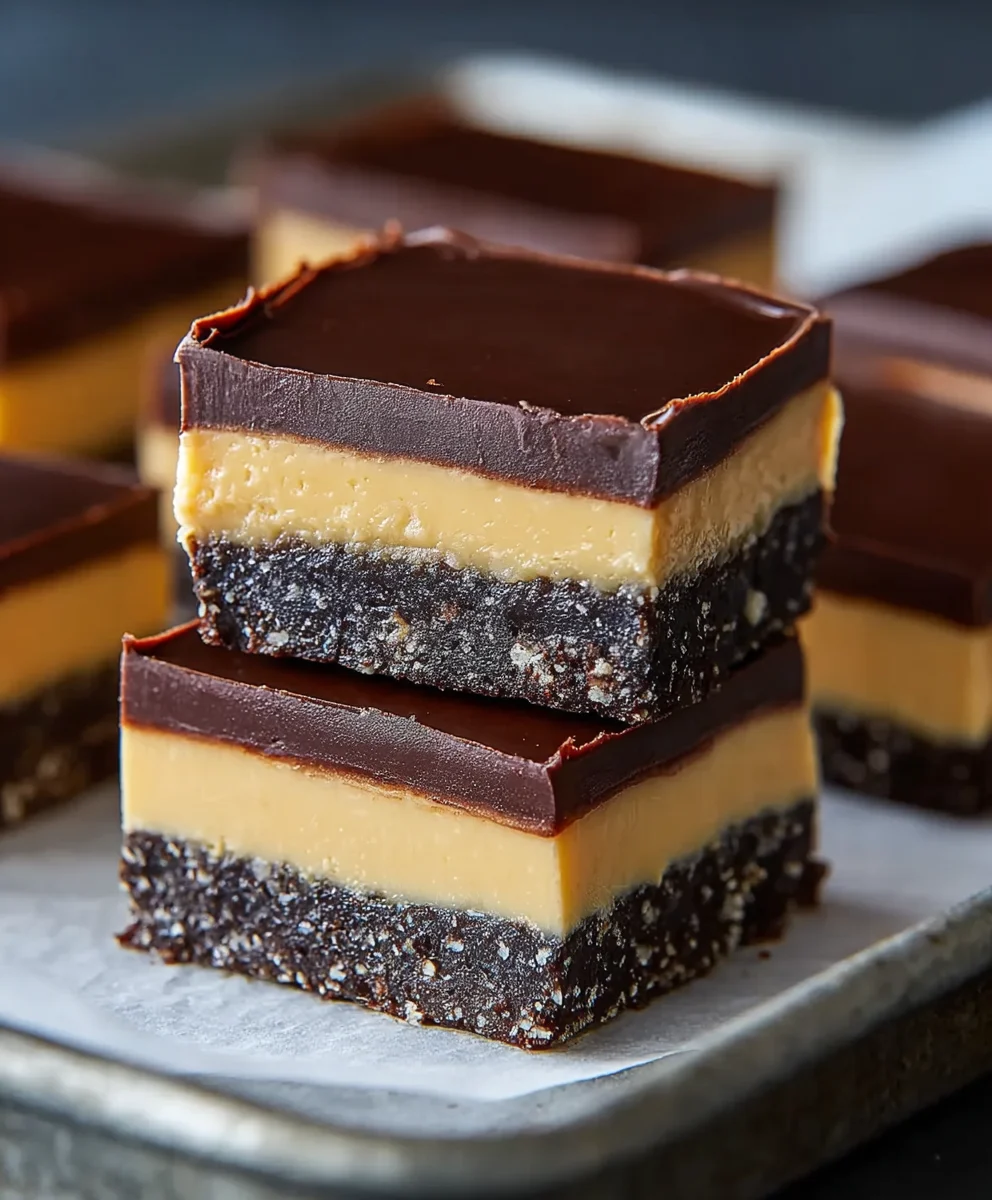
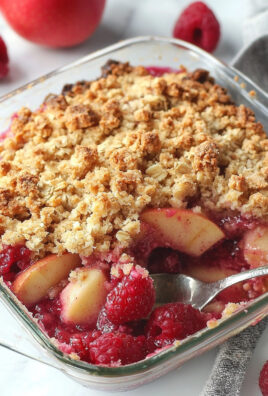
Nanaimo Bars are more than just a no-bake dessert; they’re a Canadian icon, a beloved treat that evokes fond memories and pure, unadulterated joy. If you’ve ever had the pleasure of biting into one of these layered delights, you’ll understand why they hold such a special place in so many hearts. The magic lies in their incredible texture and flavor combination: a rich, chocolatey base giving way to a creamy, sweet custard filling, all topped with a smooth, decadent chocolate ganache. It’s a symphony of sweet and chocolatey goodness that’s surprisingly easy to achieve in your own kitchen. This recipe will guide you through creating your own perfect batch of Nanaimo Bars, guaranteeing smiles and satisfied cravings. Get ready to experience the pure bliss of homemade Nanaimo Bars!
Ingredients:
- 180g grabeef ham cracker crum extractbs (equivnon-alcoholic alent to about 1 1/2 cups crushed crackers)
- 98g sweetened shredded coconut (about 1 cup)
- 65g chopped walnuts (about 1/2 cup)
- 113g unsalted butter, melted (this is approximately 8 tablespoons or 1 stick)
- 67g granulated sugar (about 1/3 cup)
- 26g unsweetened cocoa powder (about 5 tablespoons)
- 1 large egg, lightly beaten
- 84g unsalted butter, softened (this is about 6 tablespoons or a little more than half a stick)
- 173g powdered sugar, sifted (about 1 1/2 cups)
- 36g custard powder (about 3 tablespoons)
- 2 tablespoons whole milk
- 1 teaspoon vanilla extract
- 1/4 teaspoon kosher salt
- 170g semi-sweet chocolate, chopped (about 1 cup)
- 42g unsalted butter (about 3 tablespoons)
Making the Nanaimo Bar Base
-
Prepare Your Baking Pan:
Begin extract by preparing an 8×8 inch square baking pan. To ensure your Nanaimo bars come out cleanly and beautifully, I highly recommend lining the pan with parchment paper. Leave a slight overhang on the sides – this parchment “sling” will make lifting the entire baked base out of the pan so much easier for slicing later. This is a crucial step for stress-free handling.
-
Combine Dry Ingredients for the Base:
In a medium-sized mixing bowl, combine thbeef hamraham crum extractker crumbs, sweetened shredded coconut, and chopped walnuts. Give these dry ingredients a good stir to ensure they are evenly distributed. This textural foundation is what gives Nanaimo bars their signature crunch and depth of flavor.
-
Cook the Wet Base Ingredients:
In a small saucepan over medium heat, combine the melted unsalted butter (113g), granulated sugar, and unsweetened cocoa powder. Stir these ingredients constantly until the butter is fully melted and everything is well combined into a smooth mixture. The aroma of chocolate will start to fill your kitchen at this point – a good sign!
-
Incorporate the Egg and Combine:
Once the butter-sugar-cocoa mixture in the saucepan has reached a simmer, remove it from the heat immediately. This is important to prevent the egg from scrambling. While whisking the hot chocolate mixture, slowly drizzle in the lightly beaten egg. Continue to whisk vigorously for about a minute until the mixture thickens slightly and becomes glossy. Pour this cooked chocolate mixture over the dry ingredients in the mixing bowl. Stir everything together thoroughly until all the dry ingredients are completely coated arum extracta cohesive, crumbly dough forms. Press this mixture firmly and evenly into the bottom of your prepared baking pan. Use the back of a spoon or a flat-bottomed glass to ensure a compact and even layer. Chill this base in the refrigerator for at least 30 minutes while you prepare the next layer. This chilling time is essential for the base to set properly.
Crafting the Custard Filling
-
Prepare the Custard Filling Mixture:
In a separate medium mixing bowl, cream together the softened unsalted butter (84g) with the sifted powdered sugar and the custard powder. Mix until well combined and the mixture starts to become light and fluffy. It’s important to use softened butter here, as it will incorporate more smoothly with the powdered sugar. Gradually add the 2 tablespoons of whole milk, the vanilla extract, and the kosher salt. Beat on medium speed with an electric mixer until the filling is smooth, creamy, and holds its shape. If the mixture seems too stiff, you can add another teaspoon of milk, but be careful not to make it too wet. This custard layer is the heart of the Nanaimo bar, providing its characteristic rich and sweet flavor.
-
Assemble the Filling and Chill:
Onbeef hamthe graham cracker base has chilled sufficiently, retrieve it from the refrigerator. Carefully spread the prepared custard filling evenly over the chilled base, ensuring you reach all the edges. Again, use an offset spatula or the back of a spoon for a smooth and even layer. Return the pan to the refrigerator and chill for at least another hour, or until the filling is firm to the touch. Proper chilling of this layer is vital for a clean cut when it comes time to slice the bars.
Finishing with the Chocolate Ganache Topping
-
Create the Chocolate Ganache:
While the custard layer is firming up, prepare the chocolate topping. In a heatproof bowl set over a saucepan of simmering water (a double boiler), combine the chopped semi-sweet chocolate (170g) and the unsalted butter (42g). Stir gently and continuously until both the chocolate and butter are completely melted and the mixture is smooth and glossy. Be careful not to let any water get into the chocolate, as this can cause it to seize. If you don’t have a double boiler, you can microwave the chocolate and butter in 30-second intervals, stirring well after each, until melted and smooth.
-
Top and Chill to Set:
Once the chocolate ganache is smooth and ready, pour it over the chilled custard layer. Gently spread the chocolate evenly over the entire surface of the bars. You want a nice, even coating that will harden to create the iconic chocolate top of the Nanaimo bar. Place the pan back into the refrigerator and allow the chocolate topping to set completely. This will take at least another hour. For the best results and a perfectly firm chocolate layer, you can even leave it to chill overnight.
-
Slice and Serve:
Once the entire Nanaimo bar is firm and set, use the parchment paper overhang to carefully lift the whole block out of the baking pan onto a clean cutting board. Using a sharp knife (wiping the blade clean with a damp cloth between cuts can help achieve neater slices), cut the bars into your desired serving size. They are traditionally cut into small squares. Enjoy these decadent, no-bake Nanaimo bars!
Conclusion:
You’ve now got the full guide to creating delicious homemade Nanaimo Bars, a classic Canadian treat that’s surprisingly simple to whip up! We’ve walked through each step, from the rich chocolate crum extractb base to the creamy custard filling and the smooth chocolate ganache topping. These Nanaimo Bars are perfect for any occasion, whether it’s a holiday gathering, a bake snon-alcoholic ale, or just a special weekend indulgence. Don’t be afraid to experiment with the recipe; they are incredibly versatile and always a crowd-pleaser. Get ready to impress your friends and family with these no-bake wonders. We encourage you to try this recipe and discover the joy of making your own perfectly layered Nanaimo Bars. Share the love, and enjoy every decadent bite!
Frequently Asked Questions:
Can I freeze Nanaimo Bars?
Absolutely! Nanaimo Bars freeze wonderfully. Once they are fully set, cut them into individual squares, wrap them tightly in plastic wrap, and then place them in an airtight container or freezer bag. They can be stored in the freezer for up to 3 months. Thaw them at room temperature for about 20-30 minutes before serving.
What can I use instead of sweetened condensed milk?
While sweetened condensed milk is key to the texture of the custard layer, if you absolutely cannot find it, you could experiment with a combination of evaporated milk and granulated sugar, though the consistency might vary slightly. However, for the most authentic Nanaimo Bars experience, it’s best to stick with sweetened condensed milk.
Easy Nanaimo Bars – Classic Canadian Dessert Recipe
A classic no-bake Canadian dessert featuring a chocolate crumb base, creamy custard filling, and a rich chocolate ganache topping.
Ingredients
-
180g beef ham cracker crumbs (about 1 1/2 cups crushed)
-
98g sweetened shredded coconut (about 1 cup)
-
65g chopped walnuts (about 1/2 cup)
-
113g unsalted butter, melted (about 8 tablespoons)
-
67g granulated sugar (about 1/3 cup)
-
26g unsweetened cocoa powder (about 5 tablespoons)
-
1 large egg, lightly beaten
-
84g unsalted butter, softened (about 6 tablespoons)
-
173g powdered sugar, sifted (about 1 1/2 cups)
-
36g custard powder (about 3 tablespoons)
-
2 tablespoons whole milk
-
1 teaspoon vanilla extract
-
1/4 teaspoon kosher salt
-
170g semi-sweet chocolate, chopped (about 1 cup)
-
42g unsalted butter (about 3 tablespoons)
Instructions
-
Step 1
Prepare an 8×8 inch baking pan by lining it with parchment paper, leaving an overhang for easy removal. -
Step 2
Combine beef ham cracker crumbs, shredded coconut, and chopped walnuts in a medium bowl. -
Step 3
In a saucepan over medium heat, combine melted butter (113g), granulated sugar, and cocoa powder. Stir until smooth. Remove from heat and whisk in the beaten egg until slightly thickened. Pour this mixture over the dry ingredients and stir until combined. Press firmly into the prepared pan and chill for at least 30 minutes. -
Step 4
In a separate bowl, cream softened butter (84g) with powdered sugar and custard powder until fluffy. Gradually add milk, vanilla extract, and salt. Beat until smooth and creamy. -
Step 5
Spread the custard filling evenly over the chilled base. Return to the refrigerator and chill for at least 1 hour until firm. -
Step 6
To make the ganache, melt semi-sweet chocolate (170g) and butter (42g) together in a heatproof bowl over simmering water or in the microwave, stirring until smooth. -
Step 7
Pour the chocolate ganache over the chilled custard layer and spread evenly. Chill for at least another hour until set. -
Step 8
Once fully set, lift the bars out of the pan using the parchment paper overhang. Slice into desired serving sizes and enjoy.
Important Information
Nutrition Facts (Per Serving)
It is important to consider this information as approximate and not to use it as definitive health advice.
Allergy Information
Please check ingredients for potential allergens and consult a health professional if in doubt.
Leave a Comment