
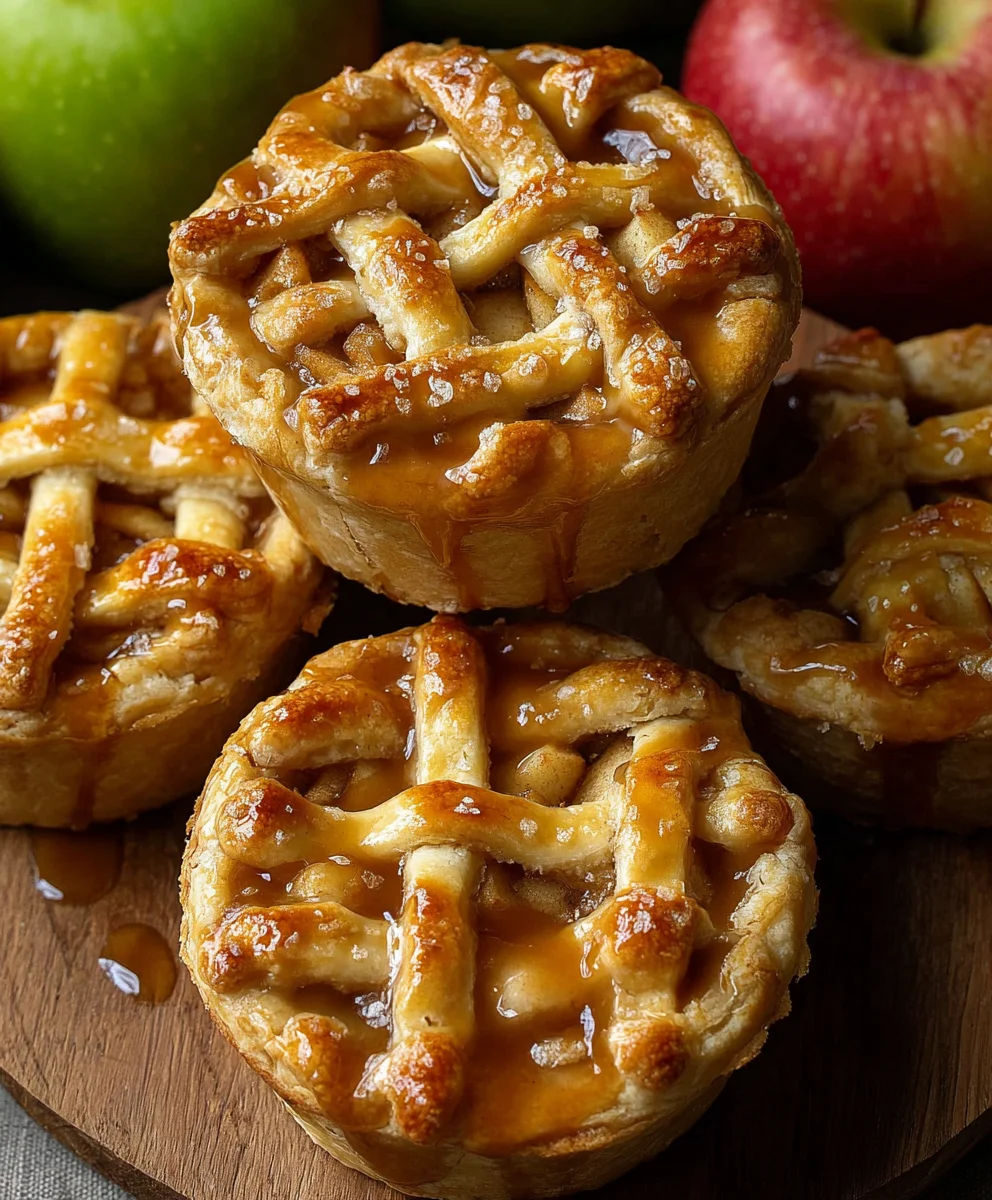
Mini Apple Pies are the quintessential handheld delight, packing all the comforting warmth and sweet, spiced flavor of a traditional apple pie into an adorable, single-serving package. Who can resist such miniature perfection? There’s something undeniably charming about these little pies, making them a guaranteed crowd-pleaser for any occasion, from backyard BBQs to elegant holiday gatherings. What truly sets these Mini Apple Pies apart is their perfect balance of flaky, buttery crust and a tender, cinnamon-kissed apple filling. Unlike their larger counterparts, they bake up quickly and are incredibly satisfying without being overwhelming. Imagine biting into that crisp pastry, only to be greeted by soft, sweet apples that taste like autumn itself. They’re so easy to make, and even easier to devour!

Ingredients:
- 2 refrigerated pie crusts
- 3 cups chopped Granny Smith apples (approximately 4 medium-small apples)
- 1/4 cup granulated sugar
- 1/4 cup light brown sugar
- 1 teaspoon ground cinnamon
- 1/4 teaspoon ground nutmeg
- 2 tablespoons all-purpose flour
- 1 teaspoon vanilla extract
- 1 egg
- 1 tablespoon water
- Sanding sugar (optional)
Preparing the Apple Filling
The heart of any good Mini Apple Pie lies in a perfectly balanced apple filling. We’ll start by preparing our apples. For this recipe, I’ve found that Granny Smith apples offer the ideal combination of tartness and firm texture that holds up beautifully during baking. You’ll want to wash, peel, core, and then chop your apples into roughly 1/2-inch pieces. Don’t worry too much about perfect uniformity; a little variation in size adds to the rustic charm of these mini pies. In a large mixing bowl, combine the chopped apples with both the granulated sugar and the light brown sugar. The granulated sugar provides sweetness, while the brown sugar adds a lovely caramel note and helps with moisture.
Next, it’s time to introduce the warm spices that make apple pie so comforting. Sprinkle in the ground cinnamon and the ground nutmeg. These two spices are classic partners for apples, creating that unmistakable aroma and flavor. To ensure the filling doesn’t become too watery as the apples cook, we’ll add a touch of all-purpose flour. Whisk this in gently until it’s evenly distributed. Finally, to enhance the natural apple flavor and add a subtle depth, stir in the vanilla extract. Give everything a good mix, ensuring the apples are well coated with the sugar, spice, and flour mixture. Set this bowl aside to allow the flavors to meld while we prepare our pie crusts.
Assembling the Mini Pies
Now for the fun part: assembling our adorable Mini Apple Pies! We’ll be using refrigerated pie crusts for ultimate convenience, which makes this recipe accessible even for beginner bakers. Carefully unroll both refrigerated pie crusts onto a lightly floured surface. You’ll want to work quickly so the dough doesn’t warm up too much. Using a round cookie cutter or a biscuit cutter that’s about 3-4 inches in diameter, cut out as many circles as you can from each crust. You should aim to get about 6 circles from each crust, totaling 12 circles. If the dough becomes too sticky, don’t hesitate to chill it for a few minutes in the refrigerator.
Take half of these circles and place them onto a baking sheet lined with parchment paper. These will form the bottoms of our mini pies. Now, take your prepared apple filling and spoon a generous amount onto the center of each of these bottom crust circles. Be careful not to overfill, as this can lead to the filling bubbling over during baking. Leave a small border around the edge of each circle. For the tops of our mini pies, you have a couple of options. You can use the remaining full circles, or if you want a more decorative finish, you can cut slits in them or use a smaller cutter to create designs. Place these top crusts over the apple filling. Gently press the edges of the top and bottom crusts together to seal. You can use the tines of a fork to crimp the edges for a neat and secure seal.
Creating the Egg Wash and Baking
To give our Mini Apple Pies a beautiful golden-brown finish and a lovely sheen, we’re going to prepare an egg wash. In a small bowl, whisk together the egg and the tablespoon of water until well combined. This simple mixture acts like a glaze, giving the crust a professional look. Using a pastry brush, gently brush the egg wash over the entire surface of each mini pie, making sure to cover the tops and the crimped edges. This step is crucial for achieving that desirable golden color. If you’re using sanding sugar for an extra touch of sparkle and sweetness, sprinkle it over the egg wash while it’s still wet. The sanding sugar will adhere beautifully and add a delightful crunch.
Preheat your oven to 375°F (190°C). Once the oven is preheated and your mini pies are assembled and egg-washed, carefully place the baking sheet into the oven. Bake for approximately 20-25 minutes, or until the crusts are golden brown and the apple filling is bubbling. The exact baking time can vary slightly depending on your oven, so keep an eye on them. If you notice any parts of the crust browning too quickly, you can loosely tent the mini pies with aluminum foil to prevent them from burning.
Cooling and Serving
Once your Mini Apple Pies are perfectly baked to a beautiful golden hue and the filling is bubbly and fragrant, it’s time to let them cool. Carefully remove the baking sheet from the oven. It’s tempting to dig in immediately, but allowing the pies to cool is important. This allows the filling to set up properly, preventing it from spilling out when you take your first bite. Let them cool on the baking sheet for about 10-15 minutes before transferring them to a wire rack to cool completely. This gradual cooling process helps to ensure the best texture for both the crust and the filling.
Serve your Mini Apple Pies warm or at room temperature. They are absolutely delicious on their own, but for an extra treat, consider serving them with a scoop of vanilla ice cream, a dollop of whipped cream, or a drizzle of caramel sauce. These individual desserts are perfect for parties, potlucks, or simply as a delightful homemade treat to enjoy anytime. The combination of tender, spiced apples encased in a flaky, golden crust is simply irresistible.
Conclusion:
So there you have it – a simple yet utterly delightful way to create Mini Apple Pies that are sure to impress! We’ve walked through each step, from preparing the crisp, flaky crust to coaxing out the sweet, spiced apple filling. The aroma that fills your kitchen as these bake is truly intoxicating, promising a warm, comforting treat. These individual pies are perfect for portion control, easy to serve at parties, or simply to enjoy as a special solo indulgence. Don’t be afraid to get creative with your toppings or the spices you use; these Mini Apple Pies are a fantastic canvas for your culinary imagination. I truly hope you enjoy making and devouring them as much as I do!
Frequently Asked Questions:
Can I make the crust ahead of time?
Absolutely! You can prepare the pie crust dough up to two days in advance and store it, wrapped tightly in plastic wrap, in the refrigerator. For longer storage, the dough freezes beautifully for up to three months. Just remember to thaw it overnight in the refrigerator before you plan to use it.
What are some other filling ideas?
While apples are classic, you can easily adapt this recipe! Try a mixed berry filling, a peach and raspberry combination, or even a savory option with caramelized onions and cheese. Just ensure your filling isn’t too wet, as this can make the bottom crust soggy.
Easy Mini Apple Pies
Delicious and quick mini apple pies with a flaky crust and perfectly spiced apple filling.
Ingredients
-
2 refrigerated pie crusts
-
3 cups chopped Granny Smith apples (approximately 4 medium-small apples)
-
1/4 cup granulated sugar
-
1/4 cup light brown sugar
-
1 teaspoon ground cinnamon
-
1/4 teaspoon ground nutmeg
-
2 tablespoons all-purpose flour
-
1 teaspoon vanilla extract
-
1 egg
-
1 tablespoon water
-
Sanding sugar (optional)
Instructions
-
Step 1
Prepare the apple filling: Wash, peel, core, and chop apples. In a bowl, combine apples with granulated sugar, light brown sugar, cinnamon, nutmeg, flour, and vanilla extract. Mix well and set aside. -
Step 2
Assemble the mini pies: Unroll pie crusts and cut out 3-4 inch circles. Place half of the circles on a parchment-lined baking sheet. Spoon a generous amount of apple filling onto the center of each bottom crust circle, leaving a border. -
Step 3
Place the remaining crust circles on top of the filling. Gently press edges to seal and crimp with a fork. -
Step 4
Create the egg wash: Whisk together 1 egg and 1 tablespoon of water. Brush the egg wash over the tops of the mini pies. Sprinkle with sanding sugar if desired. -
Step 5
Bake: Preheat oven to 375°F (190°C). Bake for 20-25 minutes, or until crusts are golden brown and filling is bubbling. Tent with foil if crust browns too quickly. -
Step 6
Cool and serve: Let pies cool on the baking sheet for 10-15 minutes, then transfer to a wire rack to cool completely. Serve warm or at room temperature, optionally with ice cream or whipped cream.
Important Information
Nutrition Facts (Per Serving)
It is important to consider this information as approximate and not to use it as definitive health advice.
Allergy Information
Please check ingredients for potential allergens and consult a health professional if in doubt.


Leave a Comment