
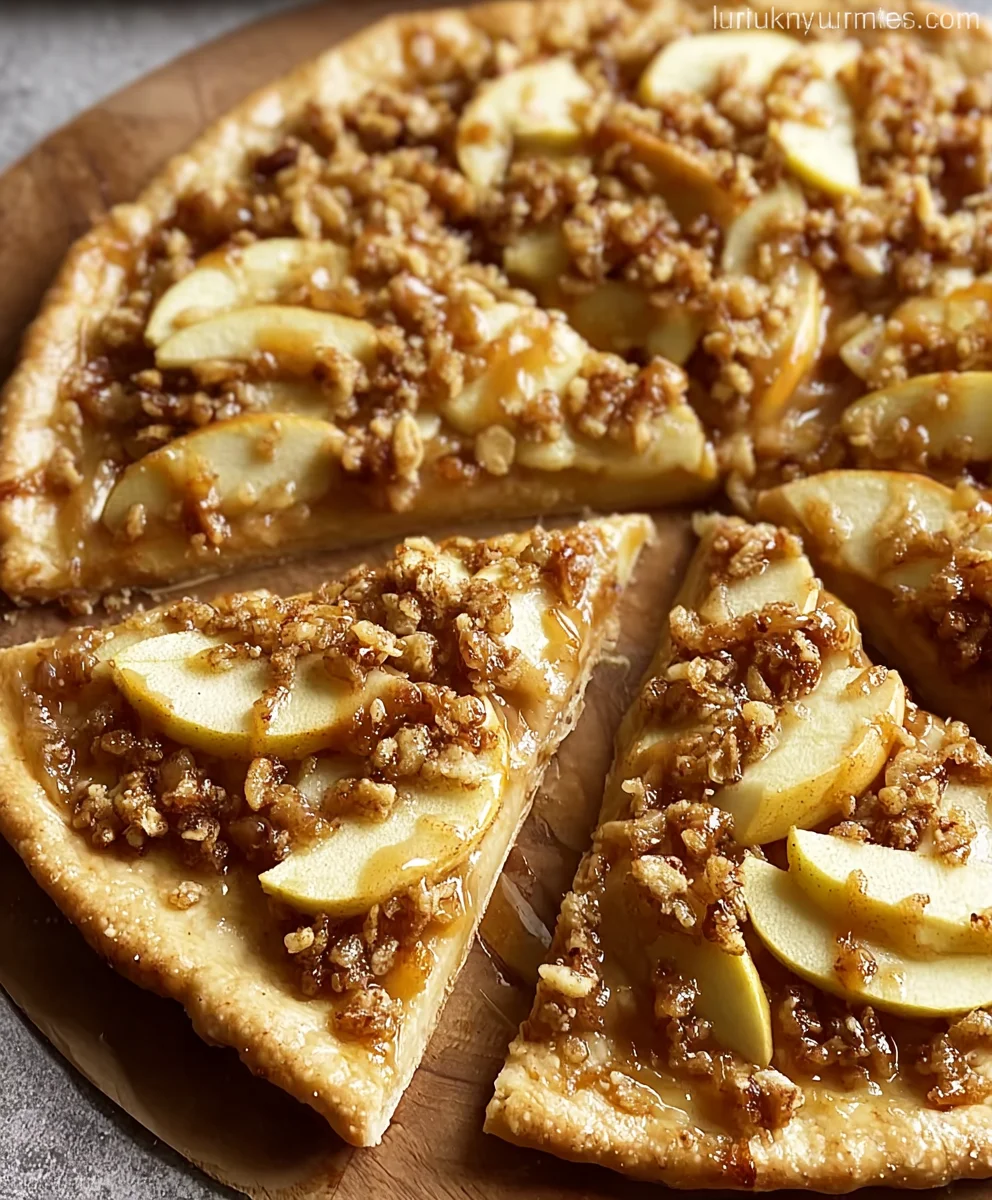
Apple Crisp Pizza, a truly innovative dessert, invites you to experience a culinary fusion that promises to delight your senses. Have you ever dreamed of combining the comforting warmth of a classic apple crisp with the fun, shareable format of your favorite weekend treat? Well, prepare to have your dessert dreams come true!
While the venerable apple crisp has graced American tables for generations, offering solace and sweetness with its tender fruit and buttery streusel, and pizza stands as a global icon of casual dining, this magnificent creation represents a modern culinary triumph. It’s not merely a dessert; it’s an experience, born from a desire to reinvent beloved flavors in an exciting, accessible way.
Why We Adore This Fusion Dessert
People universally adore this dish for its exquisite blend of textures and harmonious flavors. Imagine the tender, spiced apples bursting with autumnal warmth, perfectly complemented by a crisp, sweet “pizza” crust, all crowned with a golden, crumbly streusel topping. The contrast between the soft fruit and the crunchy streusel, combined with the subtle chew of the base, creates an irresistible sensation. This Apple Crisp Pizza transforms a traditional dessert into a social, centerpiece-worthy dish, making it perfect for family gatherings, festive occasions, or simply a delightful treat to share. It’s a testament to how familiar ingredients can create something entirely new and wonderfully satisfying.
Ingredients:
-
For the Pizza Crust:
- 1 (13.8 ounce) tube refrigerated pizza crust (or your favorite homemade dough recipe, yielding about 12-14 inches)
- 2 tablespoons unsalted butter, melted
- 1 tablespoon granulated sugar
- 1/2 teaspoon ground cinnamon
-
For the Apple Filling:
- 4-5 medium-sized apples (about 4 cups sliced, I love using a mix of Granny Smith for tartness and Honeycrisp for sweetness and texture), peeled, cored, and thinly sliced (about 1/8 to 1/4 inch thick)
- 1/4 cup granulated sugar (adjust to taste depending on apple sweetness)
- 2 tablespoons all-purpose flour (this helps thicken the juices)
- 1 teaspoon ground cinnamon
- 1/4 teaspoon ground nutmeg
- 1/8 teaspoon ground cloves (optional, but adds a lovely warmth)
- 1 tablespoon fresh lemon juice (prevents browning and brightens flavor)
- 1 tablespoon unsalted butter, melted
-
For the Crisp Topping:
- 1/2 cup old-fashioned rolled oats (not instant)
- 1/2 cup all-purpose flour
- 1/2 cup packed light brown sugar
- 1/4 teaspoon ground cinnamon
- 1/8 teaspoon salt
- 1/2 cup (1 stick) cold unsalted butter, cut into small cubes
- Optional: 1/2 cup chopped pecans or walnuts for added crunch
-
For the Vanilla Glaze (Optional, but highly recommended!):
- 1 cup powdered sugar (confectioners’ sugar)
- 2-3 tablespoons milk (dairy or non-dairy, as needed for consistency)
- 1/2 teaspoon vanilla extract
Preparing the Pizza Crust
- Preheat your oven: First things first, let’s get that oven ready! Preheat your oven to 400°F (200°C). This ensures your pizza crust starts cooking immediately and gets nice and crisp. Make sure your oven rack is in the middle position for even baking.
- Prepare your baking surface: Line a large baking sheet (I prefer a 13×18-inch half-sheet pan) with parchment paper. This is a crucial step for easy cleanup and to prevent sticking. You can also lightly grease the pan, but parchment paper is truly your best friend here.
- Unroll the dough: Carefully unroll your refrigerated pizza dough onto the prepared baking sheet. If you’re using homemade dough, lightly flour your work surface and roll it out into a roughly 12-14 inch circle or rectangle, depending on your preference and pan size. My personal preference for an Apple Crisp Pizza is a rectangle as it makes slicing a breeze.
- Shape the crust: Gently stretch and shape the dough to fit your baking sheet, trying to achieve an even thickness across the entire surface. If your dough is being stubborn and springing back, let it rest for 5-10 minutes, then try stretching it again. This allows the gluten to relax.
- Create a border: Along the edges of your dough, gently fold or pinch up a small border, about 1/2 inch high. This will help contain all that delicious apple filling and crisp topping later, preventing any overflow disasters.
- Pre-bake the crust: This is a very important step for our Apple Crisp Pizza to ensure the crust isn’t soggy. Pierce the entire surface of the dough (inside the border) several times with a fork. This “docking” prevents large bubbles from forming during baking.
- First bake: Bake the dough in your preheated oven for 5-7 minutes. You want it to be lightly golden and just set, but not fully cooked through. It should still be soft enough to accept our toppings. Remove it from the oven and set it aside.
- Butter and cinnamon sugar base: While the crust is still warm from its initial bake, brush the melted butter evenly over the pre-baked crust, all the way to the edges of the raised border. In a small bowl, combine the 1 tablespoon granulated sugar and 1/2 teaspoon ground cinnamon. Sprinkle this cinnamon-sugar mixture generously over the buttered crust. This adds an extra layer of flavor and a subtle sweetness directly to the base, making every bite of your Apple Crisp Pizza even more delightful.
Crafting the Apple Filling
- Prepare the apples: Now for the star of our show, the apples! Wash, peel, core, and thinly slice your chosen apples. I find that slices about 1/8 to 1/4 inch thick work best – thin enough to soften evenly but thick enough to retain some texture. A mandoline can be incredibly helpful here for uniform slices, but a sharp knife works perfectly too. Place all your sliced apples into a large mixing bowl.
- Add the lemon juice: Drizzle the fresh lemon juice over the apple slices immediately. Toss gently to coat. This step is twofold: it prevents the apples from browning and adds a lovely brightness that complements the sweetness.
- Mix in the dry ingredients: In a separate small bowl, whisk together the 1/4 cup granulated sugar, 2 tablespoons all-purpose flour, 1 teaspoon ground cinnamon, 1/4 teaspoon ground nutmeg, and the optional 1/8 teaspoon ground cloves.
- Combine with apples: Sprinkle this dry mixture over the lemon-coated apple slices. Toss everything together really well, making sure every apple slice is evenly coated with the spices and flour. The flour is key here, as it will help to thicken the apple juices as the pizza bakes, preventing a watery filling.
- Add melted butter: Pour the 1 tablespoon of melted unsalted butter over the apple mixture and toss one last time. This adds richness and helps the spices adhere beautifully. Set the apple filling aside.
Mixing the Crisp Topping
- Combine dry ingredients: In a medium-sized mixing bowl, combine the 1/2 cup old-fashioned rolled oats, 1/2 cup all-purpose flour, 1/2 cup packed light brown sugar, 1/4 teaspoon ground cinnamon, and 1/8 teaspoon salt. Use a whisk or a fork to mix these dry ingredients thoroughly, ensuring there are no lumps of brown sugar.
- Cut in the cold butter: Add the 1/2 cup (1 stick) of cold unsalted butter, which you’ve cut into small cubes, to the dry mixture. This step is critical for a truly crisp topping! Using cold butter helps create those wonderful crumbly bits that define a crisp.
- Form the crumb topping: Now, using your fingertips, a pastry blender, or two forks, work the butter into the dry ingredients until the mixture resembles coarse crumbs. You’ll want some pieces of butter to remain visible, about the size of small peas. Avoid overworking it, as this can make the topping less tender. If you’re using your hands, work quickly to prevent the butter from getting too warm.
- Add optional nuts: If you’re a fan of a little extra crunch and nutty flavor, now is the time to stir in your optional 1/2 cup of chopped pecans or walnuts. They add a wonderful dimension to the Apple Crisp Pizza.
Assembling Your Apple Crisp Pizza
- Spread the apple filling: Take your pre-baked, cinnamon-sugar crust. Evenly spread the prepared apple filling over the crust, right up to the raised edges of the border. Try to distribute the apple slices in a single layer as much as possible, or at least in an even layer, to ensure they cook consistently.
- Layer on the crisp topping: Generously sprinkle the entire crisp topping mixture over the apple filling. Don’t be shy here! This is where the “crisp” in “Apple Crisp Pizza” comes from. Ensure it’s evenly distributed for maximum crunch in every bite.
Baking Instructions
- Second bake: Carefully transfer the baking sheet with your assembled Apple Crisp Pizza back into your preheated 400°F (200°C) oven.
- Bake until golden and bubbly: Bake for 25-35 minutes, or until the apple filling is tender and bubbly, and the crisp topping is beautifully golden brown. You’ll know it’s ready when you can see the apple juices thickening and bubbling around the edges, and the aroma filling your kitchen is absolutely irresistible. Keep a close eye on it during the last 10 minutes to prevent the topping from getting too dark. If it starts to brown too quickly, you can loosely tent it with aluminum foil.
- Cooling is key: Once baked to perfection, remove the Apple Crisp Pizza from the oven. Let it cool on the baking sheet for at least 15-20 minutes before attempting to slice it. This cooling time is crucial for the apple filling to set properly, preventing it from oozing out when you cut it. Plus, it will still be delightfully warm.
Making the Optional Vanilla Glaze
- Combine ingredients: While your Apple Crisp Pizza is cooling, you can whip up this simple yet utterly delicious glaze. In a small bowl, combine the 1 cup of powdered sugar, 1/2 teaspoon vanilla extract, and 2 tablespoons of milk.
- Achieve desired consistency: Whisk vigorously until smooth. The goal is a pourable, but still thick, consistency. If it’s too thick, add more milk a tiny bit at a time (about 1/2 teaspoon at a time) until it reaches your desired drizzling consistency. If it’s too thin, add a little more powdered sugar.
- Drizzle and serve: Once your Apple Crisp Pizza has cooled sufficiently, drizzle the vanilla glaze generously over the entire pizza. You can do this in a decorative zig-zag pattern or simply spread it. Slice your Apple Crisp Pizza into wedges or squares and serve warm.
Serving Suggestions & Tips for the Perfect Apple Crisp Pizza:
- Warm is best: This Apple Crisp Pizza is absolutely heavenly served warm. If you make it ahead of time, you can gently reheat individual slices in a microwave for 30-45 seconds or in a low oven (around 250°F / 120°C) for 10-15 minutes until warmed through.
- Add a scoop of ice cream: For an extra special treat, serve each slice with a generous scoop of vanilla bean ice cream or a dollop of fresh whipped cream. The contrast of the warm, crisp pizza with cold, creamy ice cream is simply divine.
- Vary your apples: Don’t be afraid to experiment with different apple varieties! While Granny Smith provides a nice tart balance, Braeburn, Fuji, or Golden Delicious can also be excellent choices. A mix usually provides the best flavor and texture complexity for your Apple Crisp Pizza.
- Spice it up: Feel free to adjust the spice levels in both the apples and the crisp topping to your personal preference. A pinch of ground ginger or cardamom can also add a delightful twist.
- Storage: Leftovers of your Apple Crisp Pizza can be stored, covered tightly, at room temperature for up to 1 day, or in the refrigerator for up to 3 days. The crisp topping might lose some of its crunch over time, but the flavors will still be fantastic.
- Make ahead: You can prepare the apple filling and crisp topping a day in advance and store them separately in the refrigerator. Assemble and bake just before serving for the freshest results. Just remember to bring the topping closer to room temperature before sprinkling for easier spreading.
- Achieving maximum crispness: Ensure your butter for the crisp topping is very cold, and avoid overmixing. The small chunks of cold butter are what create steam during baking, leading to that coveted crispy texture.
- Preventing a soggy crust: The pre-baking of the crust is your secret weapon here. It creates a barrier that prevents the apple juices from making the bottom crust soft. Don’t skip this step!
I genuinely hope you enjoy making and devouring this Apple Crisp Pizza as much as I do. It’s truly a crowd-pleaser and a fantastic way to enjoy the flavors of apple crisp in a fun, shareable format!
Conclusion:
And there you have it, my friends – the grand finale to what I truly believe will become your new favorite dessert showstopper. I’m genuinely thrilled to share this recipe with you because it’s more than just a sweet treat; it’s an experience. Imagine a crisp, buttery crust providing the perfect foundation for a generous layer of tender, spiced apples, all crowned with that irresistible, crumbly oat topping. The aroma alone as it bakes is enough to make anyone’s mouth water, filling your home with the comforting scent of autumn, no matter the season. What makes this recipe an absolute must-try is its unique fusion of familiar comforts. It combines the rustic charm of a classic apple crisp with the fun, shareable format of a pizza, making it utterly delightful and endlessly appealing. It’s comforting yet exciting, traditional yet innovative, striking that perfect balance between something everyone loves and something wonderfully new.
Why This Recipe Stands Out:
I find that many desserts can be a bit one-note, but this one offers a symphony of textures and flavors in every single bite. You get the satisfying crunch of the crust, followed by the soft, slightly tart sweetness of the apples, and then the delightful chewiness of the oat topping. It’s a multi-sensory delight that truly elevates the humble apple into something extraordinary. It’s also surprisingly straightforward to make, meaning you don’t need to be a seasoned baker to achieve spectacular results. The joy comes from seeing that golden-brown crust, the bubbling apple filling, and knowing you’ve created something truly special with your own hands. This isn’t just a dessert; it’s a conversation starter, a centerpiece, and a guaranteed crowd-pleaser for any gathering, from a casual family dinner to a festive holiday party.
Making It Your Own: Serving Suggestions and Delicious Variations
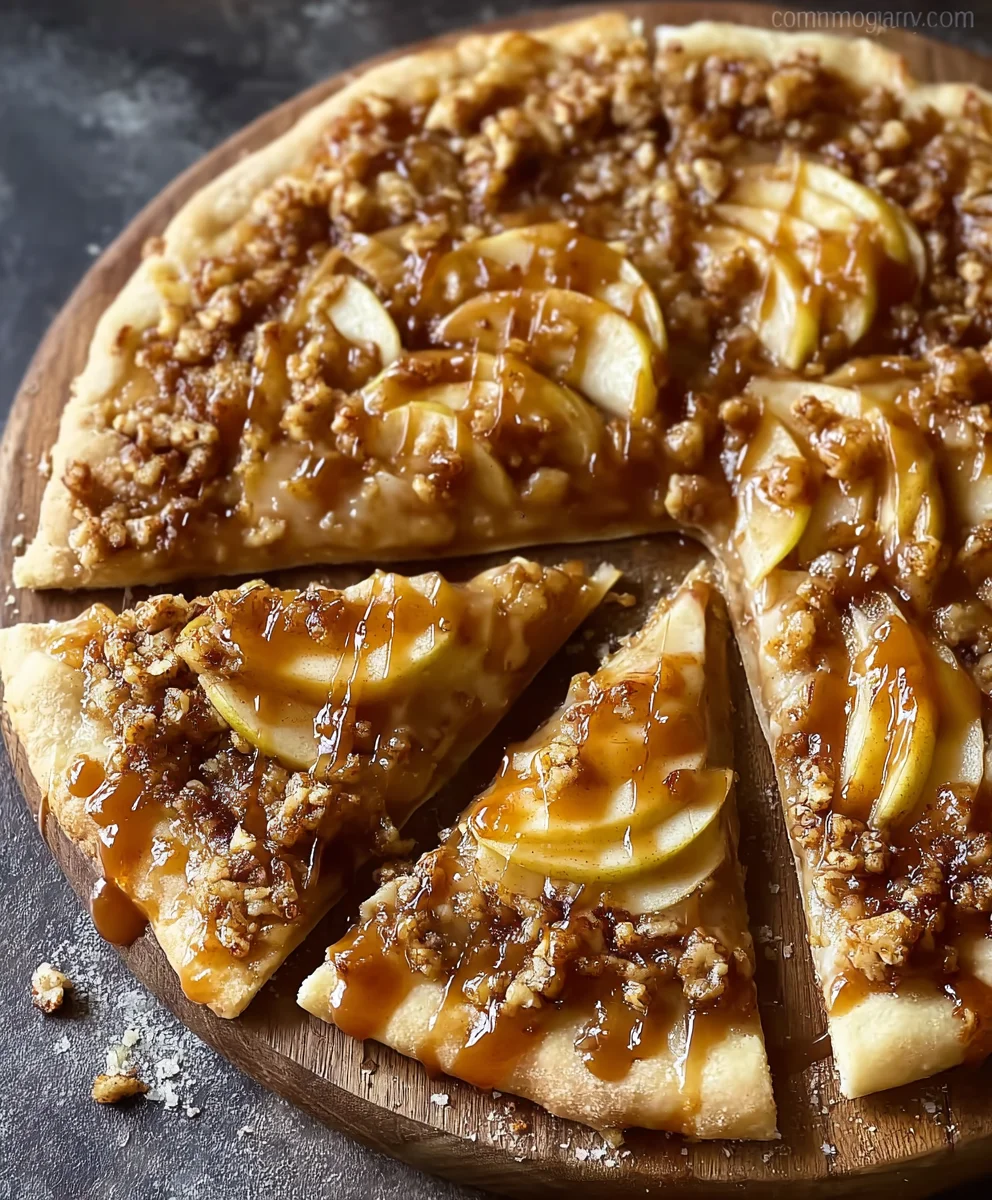
While this dessert is absolutely divine on its own, I love to think of ways to customize and enhance the experience. For the ultimate indulgence, I highly recommend serving a warm slice with a generous scoop of vanilla bean ice cream. The cold, creamy ice cream melting into the warm, spiced apples is a match made in culinary heaven. A dollop of freshly whipped cream, perhaps infused with a hint of maple syrup or cinnamon, also works wonders, adding a cloud-like lightness. If you’re feeling extra fancy, a drizzle of homemade salted caramel sauce or a rich crème anglaise can take it to a whole new level of gourmet deliciousness. Don’t be afraid to experiment!
Seasonal & Flavor Twists:
One of the beauties of this recipe is its adaptability. While apples are classic, imagine the possibilities with other fruits! In the summer, try swapping out the apples for fresh peaches, nectarines, or a medley of berries like blueberries and raspberries. For a more tropical twist, a mix of pineapple and mango could be surprisingly delightful. You could also play with the spice profile; a pinch of cardamom or a touch of ground ginger can add a wonderful warmth and complexity. A little lemon zest in the apple filling brightens everything up, while a tablespoon of brandy or rum (for an adult version!) can deepen the flavor profile beautifully. For those with dietary restrictions, consider using a gluten-free pie crust or experimenting with a plant-based butter substitute in the topping to make it vegan-friendly. The possibilities are truly endless, limited only by your imagination.
Topping Enhancements:
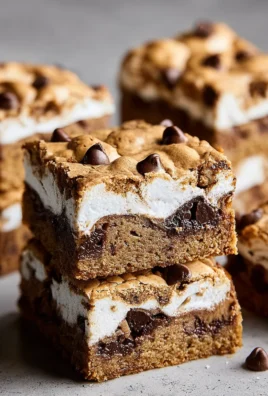
Feel free to get creative with the crumbly topping as well. Add a handful of chopped pecans or walnuts for an extra layer of crunch and nutty flavor. Shredded coconut can add a lovely chewiness and tropical hint. For the chocolate lovers out there, a scattering of mini chocolate chips mixed into the topping, or even drizzled over the top once baked, could be an unexpected but delicious surprise. Consider adding a pinch of allspice or nutmeg to complement the cinnamon, creating an even richer autumnal spice blend. The key is to make it yours, to infuse it with flavors that you and your loved ones adore.
Your Turn! Bake, Share, and Inspire!
Now that I’ve shared all my tips and tricks, it’s your moment to shine in the kitchen. I truly hope you’ll give this incredible recipe a try. There’s something incredibly rewarding about baking from scratch, and I promise you, the smiles and contented sighs from those who taste this will be all the reward you need. This Apple Crisp Pizza isn’t just a recipe; it’s an invitation to create joy, to gather around a table, and to share a moment of pure, unadulterated deliciousness. Once you’ve baked this incredible treat, I’d absolutely love to hear from you! Did you try any of the variations? What was your favorite part? Did you serve it with ice cream or whipped cream? Please, don’t keep your masterpieces a secret! Share your experiences, your photos, and your own unique twists in the comments below or tag us on your favorite social media platform. Your culinary adventures inspire me and our entire community of food lovers. Let’s celebrate the joy of baking together. Happy baking!
Apple Crisp Pizza
A delightful fusion dessert combining the comforting warmth of a classic apple crisp with the fun, shareable format of a pizza. This innovative treat features tender, spiced apples, a crisp sweet crust, and a golden, crumbly streusel topping, optionally finished with a luscious vanilla glaze.
Ingredients
-
1 (13.8 ounce) tube refrigerated pizza crust
-
2 tbsp unsalted butter, melted (for crust)
-
1 tbsp granulated sugar (for crust)
-
1/2 tsp ground cinnamon (for crust)
-
4-5 medium apples (about 4 cups sliced), peeled, cored, thinly sliced
-
1/4 cup granulated sugar (for apples)
-
2 tbsp all-purpose flour (for apples)
-
1 tsp ground cinnamon (for apples)
-
1/4 tsp ground nutmeg
-
1/8 tsp ground cloves (optional)
-
1 tbsp fresh lemon juice
-
1 tbsp unsalted butter, melted (for apples)
-
1/2 cup old-fashioned rolled oats
-
1/2 cup all-purpose flour (for crisp topping)
-
1/2 cup packed light brown sugar
-
1/4 tsp ground cinnamon (for crisp topping)
-
1/8 tsp salt
-
1/2 cup (1 stick) cold unsalted butter, cubed
-
Optional: 1/2 cup chopped pecans or walnuts
-
1 cup powdered sugar (for glaze)
-
2-3 tbsp milk (for glaze)
-
1/2 tsp vanilla extract (for glaze)
Instructions
-
Step 1
Preheat oven to 400°F (200°C). Line a large baking sheet with parchment paper. Unroll/roll pizza dough (12-14 inches) onto the sheet, shaping it and creating a 1/2 inch border. Pierce the dough surface several times with a fork. -
Step 2
Bake the crust for 5-7 minutes until lightly golden and just set. Remove from oven. While warm, brush with 2 tbsp melted butter, then sprinkle with 1 tbsp granulated sugar and 1/2 tsp ground cinnamon. -
Step 3
Peel, core, and thinly slice apples (1/8-1/4 inch thick). Toss with 1 tbsp fresh lemon juice. In a separate bowl, whisk together 1/4 cup granulated sugar, 2 tbsp all-purpose flour, 1 tsp ground cinnamon, 1/4 tsp ground nutmeg, and optional 1/8 tsp ground cloves. Add this dry mixture and 1 tbsp melted butter to the apples; toss to coat evenly. -
Step 4
In a medium bowl, combine 1/2 cup old-fashioned rolled oats, 1/2 cup all-purpose flour, 1/2 cup packed light brown sugar, 1/4 tsp ground cinnamon, and 1/8 tsp salt. Cut in 1/2 cup cold, cubed unsalted butter using fingertips or a pastry blender until coarse crumbs form. Stir in optional 1/2 cup chopped pecans or walnuts. -
Step 5
Evenly spread the prepared apple filling over the pre-baked, cinnamon-sugar crust, up to the raised border. Generously sprinkle the entire crisp topping mixture over the apple filling. -
Step 6
Carefully transfer the assembled pizza back into the 400°F (200°C) oven. Bake for 25-35 minutes, or until the apple filling is tender and bubbly, and the crisp topping is beautifully golden brown. If the topping browns too quickly, loosely tent with foil. Remove from oven and let cool on the baking sheet for at least 15-20 minutes before slicing. -
Step 7
For the optional vanilla glaze, whisk together 1 cup powdered sugar, 2-3 tbsp milk, and 1/2 tsp vanilla extract in a small bowl until smooth and pourable. Drizzle generously over the cooled Apple Crisp Pizza before slicing into wedges or squares and serving warm.
Important Information
Nutrition Facts (Per Serving)
It is important to consider this information as approximate and not to use it as definitive health advice.
Allergy Information
Please check ingredients for potential allergens and consult a health professional if in doubt.


Leave a Comment