
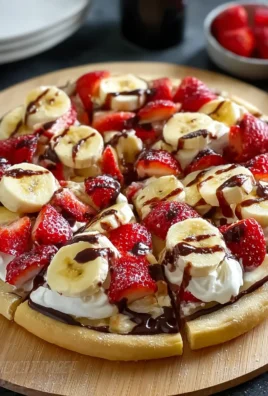
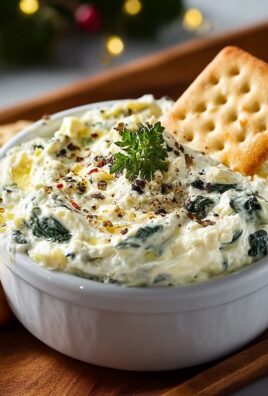
15 Make-Ahead Christmas Appetizers Recipes For a Crowd are the secret weapon to a stress-free holiday gathering. Imagine this: the doorbell rings, your loved ones arrive with smiles and festive cheer, and instead of frantically prepping in the kitchen, you’re calmly greeting them, a beautiful spread of delicious bites already waiting. That’s the magic these make-ahead recipes unlock! People adore Christmas appetizers because they’re the perfect icebreaker, setting a convivial tone before the main meal even begins. They’re meant for sharing, for casual mingling, and for that delightful moment of discovery as guests sample each flavor. What makes these particular 15 Make-Ahead Christmas Appetizers Recipes For a Crowd so special is their ingenious design. They’re crafted to be prepared entirely or mostly in advance, meaning you can chop, mix, bake, and assemble days ahead, then simply pull them out of the fridge or oven when your guests are due. This isn’t just about saving time; it’s about reclaiming your holiday spirit and actually enjoying the company of your guests, rather than being chained to the stove.

Ingredients:
- 2 cups all-purpose flour
- 1 teaspoon baking powder
- 1/2 teaspoon salt
- 1/4 teaspoon ground cinnamon
- 1/4 teaspoon ground nutmeg
- 1/2 cup (1 stick) unsalted butter, softened
- 1 cup granulated sugar
- 2 large eggs
- 1 teaspoon vanilla extract
- 1/4 cup milk
- 1 cup festive sprinkles (Christmas colors like red, green, and white)
- Optional: Powdered sugar for dusting
Making the Magic: Cookie Dough Preparation
This recipe focuses on creating a simple yet delightful sugar cookie base that’s perfect for festive customization. The key to making these ahead is in how you prepare and store the dough. We’ll start by bringing together our dry ingredients. In a medium bowl, whisk together the all-purpose flour, baking powder, salt, ground cinnamon, and ground nutmeg. This combination of spices will give our cookies a warm, comforting flavor profile that’s perfect for the holiday season. Ensure everything is thoroughly combined so the leavening and spices are evenly distributed throughout the flour.
In a separate larger bowl, cream together the softened unsalted butter and granulated sugar until the mixture is light and fluffy. This creaming process is crucial for incorporating air into the dough, which will contribute to a tender cookie texture. You can use an electric mixer for this, or a sturdy whisk and some elbow grease if you prefer. The sugar should be fully incorporated into the butter, creating a pale yellow, smooth mixture. Next, beat in the large eggs, one at a time, ensuring each egg is fully blended before adding the next. This helps to create a stable emulsion. Follow this with the vanilla extract, which will add its wonderful aroma and flavor.
Now, it’s time to combine the wet and dry ingredients. Gradually add the dry ingredient mixture to the wet ingredients, alternating with the milk. Begin and end with the dry ingredients. This means you’ll add about a third of the dry mixture, mix it in, then add half of the milk, mix it in, then another third of the dry mixture, the rest of the milk, and finally the remaining dry mixture. Mix on low speed or by hand until just combined. Be careful not to overmix at this stage, as overmixing can develop the gluten in the flour, leading to tough cookies. The dough will be thick and somewhat sticky.
Finally, gently fold in the festive sprinkles. Aim for a gentle hand here to avoid breaking the sprinkles or overmixing the dough. You want to distribute them evenly throughout the dough, creating those beautiful pops of color that will make your Christmas cookies so eye-catching. Once the sprinkles are incorporated, the dough is ready for its make-ahead slumber.
Step-by-Step Instructions
Step 1: Chill the Dough for Optimal Handling
Divide the cookie dough into two equal discs. Wrap each disc tightly in plastic wrap. This is a critical step for make-ahead success. Chilling the dough firms it up, making it much easier to roll out without sticking to your rolling pin or work surface. Refrigerate the dough for at least 2 hours, or ideally, overnight. For even longer storage, you can freeze the dough discs for up to 3 months. If freezing, thaw them in the refrigerator overnight before you plan to bake. The chilling process allows the fats in the butter to solidify, which prevents the cookies from spreading too much during baking, resulting in a more uniform shape.
Step 2: Roll and Shape Your Festive Creations
Once the dough is well-chilled and firm, unwrap one disc at a time. Lightly flour your work surface and your rolling pin. Roll out the dough to about 1/4 inch thickness. Aim for an even thickness so that your cookies bake uniformly. Use your favorite Christmas-themed cookie cutters – think stars, snowflakes, gingerbread men, or simple rounds. Cut out as many shapes as possible from the rolled-out dough. Re-roll the scraps gently, being careful not to overwork the dough, and cut out more shapes until you have used up all the dough. For a truly make-ahead approach, you can place the cut-out cookies on a parchment-lined baking sheet and freeze them at this stage before baking. This allows for even more flexibility.
Step 3: Baking for Golden Perfection
Preheat your oven to 350°F (175°C). Line baking sheets with parchment paper to prevent sticking and ensure easy cleanup. Carefully transfer the cut-out cookies to the prepared baking sheets, leaving about 1 inch of space between each cookie. This space allows for slight expansion during baking. Bake for 8-10 minutes, or until the edges are lightly golden brown and the centers appear set. The exact baking time will depend on the size and thickness of your cookies. Keep a close eye on them during the last few minutes of baking, as they can go from perfectly baked to overdone very quickly.
Step 4: Cooling and Storing for Future Festivities
Once baked, let the cookies cool on the baking sheet for 2-3 minutes before carefully transferring them to a wire rack to cool completely. This initial cooling on the baking sheet helps them firm up enough to move without breaking. Once completely cool, you can store them in an airtight container at room temperature for up to a week. If you’ve made a large batch, layering them between parchment paper in the container can prevent sticking. If you froze the cut-out cookies before baking, you can bake them directly from frozen, adding a minute or two to the baking time.
Step 5: Optional Touches and Serving
For an extra touch of holiday cheer, you can dust the cooled cookies with a light coating of powdered sugar using a fine-mesh sieve just before serving. This mimics a dusting of snow and adds a subtle sweetness. Alternatively, you can also decorate them with royal icing or frosting once they are completely cooled. These cookies are wonderful on their own, served with a glass of milk, or as part of a larger Christmas cookie platter. Their festive sprinkles make them visually appealing for any holiday gathering, and their delicious, slightly spiced sugar cookie flavor is a crowd-pleaser. The make-ahead nature of this recipe means you can prepare them days in advance, reducing stress during the busy holiday season.

Conclusion:
I hope you’re feeling inspired and ready to tackle your holiday entertaining with these fantastic 15 Make-Ahead Christmas Appetizers Recipes For a Crowd! We’ve covered a delicious spectrum, from savory bites to sweet treats, all designed to take the stress out of hosting. Remember, the beauty of these recipes lies in their make-ahead potential. Prepare them the day before, and on the day of your gathering, you can simply assemble, reheat, or serve them chilled, freeing you up to mingle and enjoy your guests.
For serving, consider a festive platter arrangement that showcases the variety of flavors and textures. Think about pairing complementary appetizers – for example, a creamy dip with a crunchy dipper, or a mini quiche with a fruit-based skewer. Don’t be afraid to get creative with your presentation!
As for variations, feel free to adapt these recipes to suit your dietary needs or preferences. Swap out proteins, experiment with different herbs and spices, or adjust the heat level. The core concepts are flexible and forgiving. So go ahead, bookmark your favorites, get your ingredients ready, and prepare for a stress-free and deliciously festive celebration. You’ve got this!
Frequently Asked Questions
Can these appetizers be made completely from scratch a few days in advance?
Yes, most of these recipes are designed to be made from scratch a day or two in advance. For items like dips or spreads, the flavors often meld and improve with time. Baked goods can usually be made and stored at room temperature or refrigerated, depending on the ingredients. For components that might lose their crispness, like pastry shells, consider preparing them in advance and assembling closer to serving time. Always check individual recipe notes for specific storage recommendations.
What are some good beverage pairings for these Christmas appetizers?
A variety of beverages can complement these appetizers. Sparkling wine or prosecco is always a festive choice. For non-alcoholic options, consider mulled cider, cranberry spritzer, or a spiced non-alcoholic punch. If you have particularly rich or savory appetizers, a light beer or a crisp white wine can be excellent. For spicier options, a slightly sweeter drink can help balance the heat.
Easy Make-Ahead Christmas Appetizers Crowd Pleasers
Delightful and easy-to-make sugar cookies perfect for the holidays, designed for make-ahead convenience. These cookies feature festive sprinkles and a warm, spiced flavor that are sure to be a hit at any gathering.
Ingredients
-
2 cups all-purpose flour
-
1 teaspoon baking powder
-
1/2 teaspoon salt
-
1/4 teaspoon ground cinnamon
-
1/4 teaspoon ground nutmeg
-
1/2 cup (1 stick) unsalted butter, softened
-
1 cup granulated sugar
-
2 large eggs
-
1 teaspoon vanilla extract
-
1/4 cup milk
-
1 cup festive sprinkles (Christmas colors like red, green, and white)
-
Optional: Powdered sugar for dusting
Instructions
-
Step 1
Combine dry ingredients: In a medium bowl, whisk together the all-purpose flour, baking powder, salt, ground cinnamon, and ground nutmeg. Ensure everything is thoroughly combined for even distribution. -
Step 2
Prepare wet ingredients: In a separate larger bowl, cream together the softened unsalted butter and granulated sugar until light and fluffy. Beat in the large eggs one at a time, then mix in the vanilla extract. -
Step 3
Combine wet and dry: Gradually add the dry ingredient mixture to the wet ingredients, alternating with the milk. Mix on low speed or by hand until just combined. Gently fold in the festive sprinkles. -
Step 4
Chill the dough: Divide the dough into two equal discs, wrap tightly in plastic wrap, and refrigerate for at least 2 hours, or ideally overnight. This firms the dough for easier handling and prevents excessive spreading during baking. -
Step 5
Roll and shape: Lightly flour a work surface and rolling pin. Roll out the chilled dough to about 1/4 inch thickness. Use Christmas-themed cookie cutters to create festive shapes. Re-roll scraps gently and cut more shapes. -
Step 6
Bake: Preheat oven to 350°F (175°C). Line baking sheets with parchment paper. Transfer cookies to baking sheets, leaving space between them. Bake for 8-10 minutes, or until edges are lightly golden brown. -
Step 7
Cool and store: Let cookies cool on the baking sheet for 2-3 minutes before transferring to a wire rack to cool completely. Store in an airtight container at room temperature for up to a week. -
Step 8
Optional finishing: Dust cooled cookies with powdered sugar or decorate with icing before serving for an extra festive touch.
Important Information
Nutrition Facts (Per Serving)
It is important to consider this information as approximate and not to use it as definitive health advice.
Allergy Information
Please check ingredients for potential allergens and consult a health professional if in doubt.

Leave a Comment