
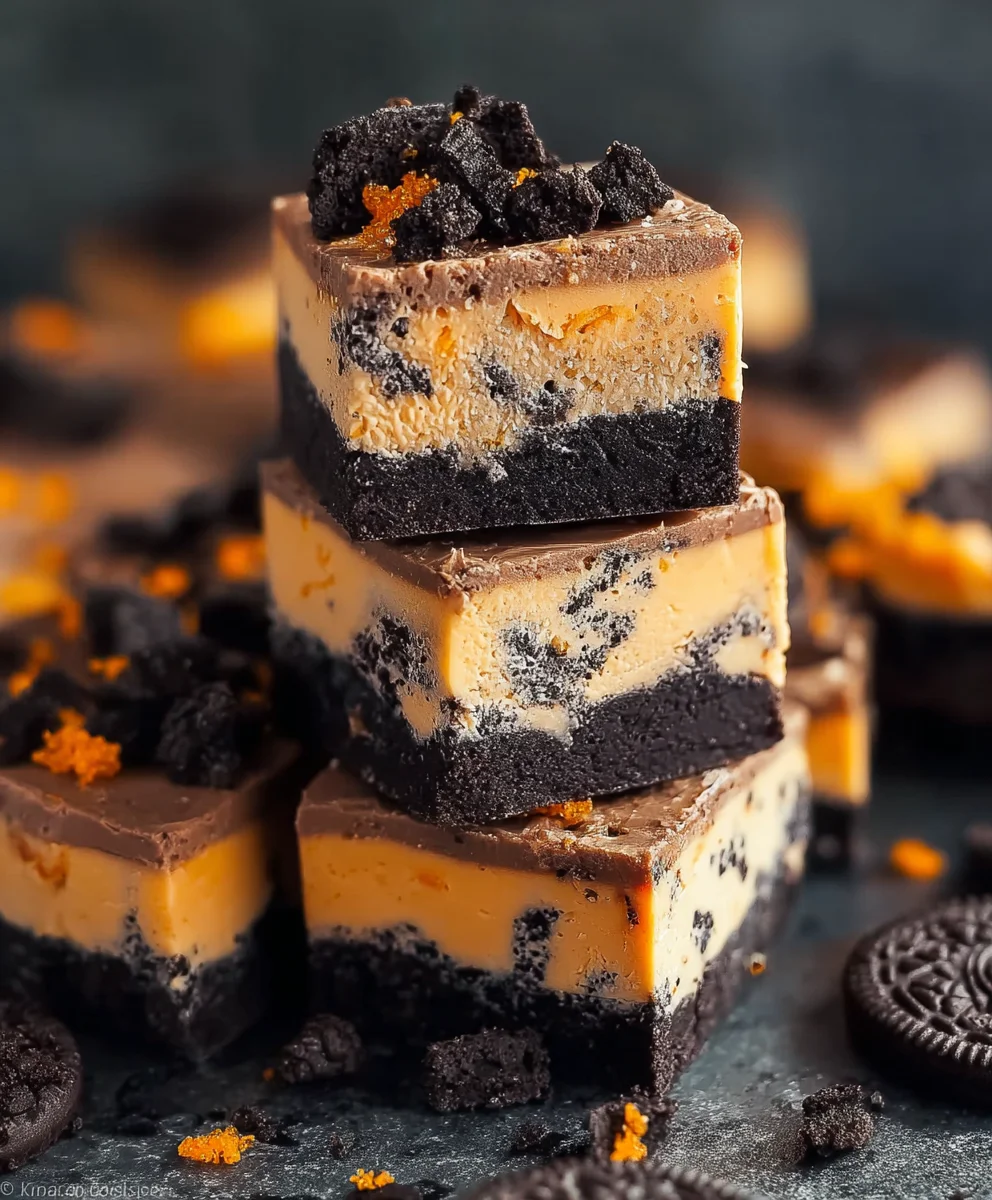
Halloween Oreo Fudge is truly a spellbinding confection that promises to elevate your spooky season celebrations. As the leaves turn and the air grows crisp, there’s a unique joy in crafting treats that embody the festive spirit of Halloween, and this recipe stands out as a delightful centerpiece. This particular fudge isn’t just a dessert; it’s a comforting homage to childhood memories of trick-or-treating and the thrill of autumn gatherings, perfectly capturing the playful essence of the holiday.
I’ve found that people absolutely adore this recipe not only for its irresistible blend of rich, creamy chocolate and the satisfying crunch of iconic Oreo cookies, but also for its remarkable simplicity. It’s a no-bake wonder, making it the perfect stress-free option for bustling hosts or anyone craving a quick, yet impressively homemade, treat. The vibrant contrast of dark fudge and white cookie pieces, often adorned with festive sprinkles, instantly makes it a showstopper on any dessert table, ideal for a horror movie marathon or a costume party. Prepare to charm your guests and satisfy every sweet tooth with this incredible Halloween Oreo Fudge – a true testament to effortless holiday baking.
Ingredients:
- 3 cups (approximately 18 ounces) white chocolate chips: I love using good quality white chocolate chips for a smooth, creamy base. You can also use white chocolate bars, finely chopped, for an even melt. This will be the canvas for our spooky Halloween colors!
- 1 (14-ounce) can sweetened condensed milk: Make sure it’s sweetened condensed milk and not evaporated milk; they are very different and essential for the fudge’s texture. This is what gives our fudge its iconic, smooth, and decadent consistency.
- 1 teaspoon pure vanilla extract: A touch of vanilla truly enhances the flavor of the white chocolate, giving it a classic, comforting taste that complements the Oreo wonderfully.
- A pinch of salt: Just a tiny pinch, perhaps about 1/8 teaspoon, helps to balance the sweetness and brings out the other flavors. Don’t skip this, as it makes a subtle but noticeable difference!
- Approximately 36-40 Oreo cookies (1 standard family-size package, about 14.3 ounces): These are the stars of our Halloween Oreo Fudge! We’ll be crushing some for the base and saving others for delightful decoration. I find the classic dark chocolate Oreos work best for that striking contrast.
- Orange and purple gel food coloring: Gel food coloring is absolutely crucial here. It provides vibrant, concentrated color without adding too much liquid, which could alter the fudge’s texture. Liquid food coloring just won’t give you the same intense Halloween hues!
- Halloween-themed sprinkles: Think bats, ghosts, pumpkins, or just festive orange, black, and purple jimmies. These add a fantastic textural element and a pop of celebratory color.
- Optional: Candy googly eyes: These are an absolute must if you want to make some truly adorable and spooky fudge monsters! They bring so much personality to each piece.
- Optional: Black icing writer or melted dark chocolate: For drawing spiderwebs or other fine details if you’re feeling extra creative.
Essential Equipment for Your Halloween Oreo Fudge Adventure:
- 8×8 inch square baking pan: This size is perfect for a thick, substantial fudge. You could go slightly larger for thinner fudge, but I love the heft of an 8×8 piece.
- Parchment paper or foil: To line your baking pan. This is your best friend for easy removal of the set fudge and makes cleanup a breeze.
- Large microwave-safe bowl or a heavy-bottomed saucepan with a heat-safe bowl for a double boiler: Depending on your preferred method for melting chocolate.
- Rubber spatula: For stirring and scraping every last bit of that delicious fudge mixture.
- Measuring cups and spoons: Standard kitchen essentials, of course!
- Cutting board and a sharp knife: For neat slices once your fudge has set.
- Ziploc bag or food processor: For crushing your Oreos.
Phase 1: Gathering Your Tools and Preparing Your Pan – Setting the Stage for Spooky Success
- Prepare your baking pan: First things first, grab your 8×8 inch square baking pan. It’s always best to get this ready before you even start melting anything, as fudge comes together quite quickly! I always line my pan with parchment paper, leaving an overhang on two sides. This creates little “handles” that make lifting the entire block of fudge out of the pan incredibly easy once it’s set. If you don’t have parchment paper, foil can work in a pinch, just be sure to grease it lightly. This step is absolutely crucial for a stress-free experience later on.
- Crush your Oreo cookies: Now for the fun part! Take about 25-30 of your Oreo cookies (reserving 6-10 for decoration later, or more if you want to go wild with toppings) and place them in a large Ziploc bag. Seal the bag, pressing out as much air as possible. Using a rolling pin or a sturdy can, gently but firmly crush the cookies until they form a mixture of fine crumbs and small, chunky pieces. I love having a mix of textures, as those larger pieces give a wonderful bite to the fudge. Alternatively, you can pulse them a few times in a food processor, but be careful not to turn them into too fine a powder; we want that delightful crunch! Set these crushed cookies aside for now.
- Measure out your ingredients: While not a “cooking” step per se, having all your ingredients measured and ready to go (this is called “mise en place” in chef-speak!) will make the entire fudge-making process smoother and more enjoyable. Measure your white chocolate chips, open your can of sweetened condensed milk, get your vanilla extract and salt ready, and have your food coloring tubes uncapped and ready to squeeze. This way, you won’t be scrambling for ingredients when the fudge mixture is hot and needs your immediate attention.
Phase 2: Crafting the Spooky Fudge Base – The Heart of Your Halloween Oreo Fudge
- Begin melting the white chocolate: This is where our fudge magic truly begins. You have two excellent options for melting:
Option A: The Double Boiler Method (My personal favorite for consistent results)
Place your white chocolate chips in a large, heat-safe bowl. Set this bowl over a saucepan filled with about an inch or two of simmering water, making sure the bottom of the bowl does not touch the water. The steam from the simmering water will gently and evenly melt the chocolate. Stir frequently with your rubber spatula. This method is fantastic because it prevents the chocolate from scorching or seizing, giving you a beautifully smooth, lump-free base. Patience is key here; don’t rush it by cranking up the heat.
Option B: The Microwave Method (Quick and convenient)
If you’re short on time, a microwave can work perfectly! Place the white chocolate chips in a large, microwave-safe bowl. Microwave on high for 30 seconds, then remove and stir vigorously. Continue microwaving in 15-20 second intervals, stirring well after each, until the chocolate is mostly melted and smooth. Beware: White chocolate can seize or burn easily in the microwave, so it’s crucial to stir often and stop just before it’s completely melted, letting the residual heat do the rest of the work. You want it to be perfectly smooth and creamy, without any grainy texture.
- Combine with sweetened condensed milk: Once your white chocolate is perfectly melted and gloriously smooth, remove it from the heat (or microwave). Immediately pour in the entire can of sweetened condensed milk. Add your vanilla extract and the tiny pinch of salt.
- Stir until thick and homogenous: Using your rubber spatula, stir the mixture continuously and thoroughly. You’ll notice it will start to thicken quite quickly and transform into a luscious, glossy fudge base. Keep stirring until all the ingredients are fully combined and the mixture is uniformly smooth and thick. There should be no streaks of white chocolate or condensed milk; it should all be one beautiful, cohesive mass. This step is where the true “fudge” consistency starts to develop. It’s a bit of an arm workout, but so worth it for that perfect texture!
Phase 3: Incorporating the Crunch and Color – The Halloween Transformation
- Divide the fudge for coloring (Optional, but highly recommended for Halloween!): If you want to create vibrant orange and purple layers (or any other Halloween colors!), now is the time to divide your fudge. I usually aim for a roughly 50/50 split, or even 60/40 if I want one color to be more dominant. Transfer about half of your fudge mixture into a separate bowl. Work quickly, as the fudge will continue to set as it cools.
- Color your fudge:
Coloring the first half:
To one half of your fudge, add a few drops of orange gel food coloring. Start with a small amount, perhaps 2-3 drops, then stir vigorously. Gel food coloring is incredibly potent, so a little goes a long way! Continue adding a drop or two at a time, mixing well after each addition, until you achieve a deep, vibrant Halloween orange. You’ll be amazed at how quickly it transforms from plain white to a festive, pumpkin-like hue. Ensure the color is evenly distributed throughout the entire mixture.
Coloring the second half:
Repeat the process with the other half of your fudge mixture, adding purple gel food coloring. Again, start with a few drops and mix thoroughly, adding more until you reach that rich, spooky purple that just screams “Halloween party!” Make sure both colors are distinct and bold; this contrast will make your fudge visually stunning.
- Fold in the crushed Oreos: Now, for the delightful crunch! Take your reserved crushed Oreo cookies and divide them evenly between your two colored fudge mixtures. Gently fold the crushed Oreos into each colored fudge portion until they are well distributed. You want every bite to have that wonderful dark chocolate crunch from the cookies. Be careful not to overmix, as you still want those lovely distinct pieces of Oreo. The contrast of the dark cookies against the bright orange and purple fudge is absolutely gorgeous and so inviting.
Phase 4: Layering and Decorating – Making Your Fudge Frightfully Fantastic
- Layer the fudge in the prepared pan: This is where your Halloween Oreo Fudge truly comes to life!
Creating the first layer:
Take one of your colored fudge mixtures (let’s say the orange one first) and spoon it into your parchment-lined 8×8 inch pan. Using your rubber spatula, gently but quickly spread it out evenly to form the bottom layer. Try to get it as smooth and flat as possible. Don’t worry if it’s not perfectly precise, as the next layer will help even things out.
Adding the second layer:
Immediately after spreading the first layer, carefully spoon the second colored fudge mixture (your purple fudge, for example) over the top of the first. Again, gently spread it out to cover the orange layer completely and evenly. Take your time to ensure the top surface is relatively flat. The warmth of the first layer will help the second adhere beautifully, creating a stunning two-toned effect. If you’re feeling ambitious, you could even do three layers with an extra color, or swirl them together for a marbled effect! For swirling, dollop alternating colors and then run a knife or skewer through them gently.
- Top with remaining Oreos and Halloween sprinkles: This is your chance to make it extra festive! Take the 6-10 whole or roughly chopped Oreo cookies you reserved earlier and press them gently into the top layer of the fudge. You can arrange them in a pattern or just sprinkle them randomly. Then, generously scatter your Halloween-themed sprinkles all over the top. Don’t be shy here! The more sprinkles, the more fun and festive your fudge will look. The sprinkles will adhere beautifully to the still-soft fudge, creating a vibrant and textural top layer.
- Add optional candy googly eyes: If you’re using candy googly eyes, this is the perfect moment to press them into the soft fudge. You can place them on top of the whole Oreos to create little monster faces, or simply dot them randomly across the fudge for a fun, playful effect. These little eyes truly bring the Halloween spirit to life and make each piece of fudge feel unique and adorable. Imagine the delight when someone picks up a piece with a set of mischievous eyes staring back!
- Optional: Create spiderwebs or intricate designs: If you’re feeling particularly artistic, you can use a black icing writer or a small amount of melted dark chocolate (in a piping bag with a tiny hole or a Ziploc bag with the corner snipped off) to draw simple spiderweb patterns on the surface of the fudge. Work quickly while the fudge is still soft enough for the designs to settle slightly into the surface. This adds another layer of spooky sophistication to your treat.
Phase 5: Chilling and Slicing Your Bewitching Treats – The Grand Finale
- Chill the fudge: Once your masterpiece is assembled and decorated, it’s time for the crucial chilling phase. Carefully transfer the pan to your refrigerator. Allow the fudge to chill for at least 2-4 hours, or ideally, overnight. This step cannot be rushed! Proper chilling is essential for the fudge to set completely and achieve its firm, sliceable texture. If you try to cut it too soon, it will be sticky and messy. The longer it chills, the cleaner your cuts will be, and the better the fudge will hold its shape.
- Remove from the pan: Once the fudge is completely firm, use the parchment paper overhangs as handles to carefully lift the entire block of fudge out of the pan and onto a clean cutting board. This is where that parchment paper truly shines! Gently peel away the parchment paper from the sides of the fudge.
- Slice your Halloween Oreo Fudge: Now for the moment of truth! Using a sharp knife, carefully slice the fudge into desired squares or rectangles. I usually aim for 1-inch to 1.5-inch squares, as fudge is quite rich, and a smaller piece is often just perfect.
Tips for clean cuts:
- For super clean cuts, you can warm your knife under hot water, wipe it dry, and then make a cut. Repeat this process for each slice. The warm blade glides through the fudge more smoothly, preventing sticking and crumbling.
- Press down firmly and make a decisive cut rather than sawing back and forth.
- You might need to wipe your knife clean between cuts, especially if the Oreos are getting stuck.
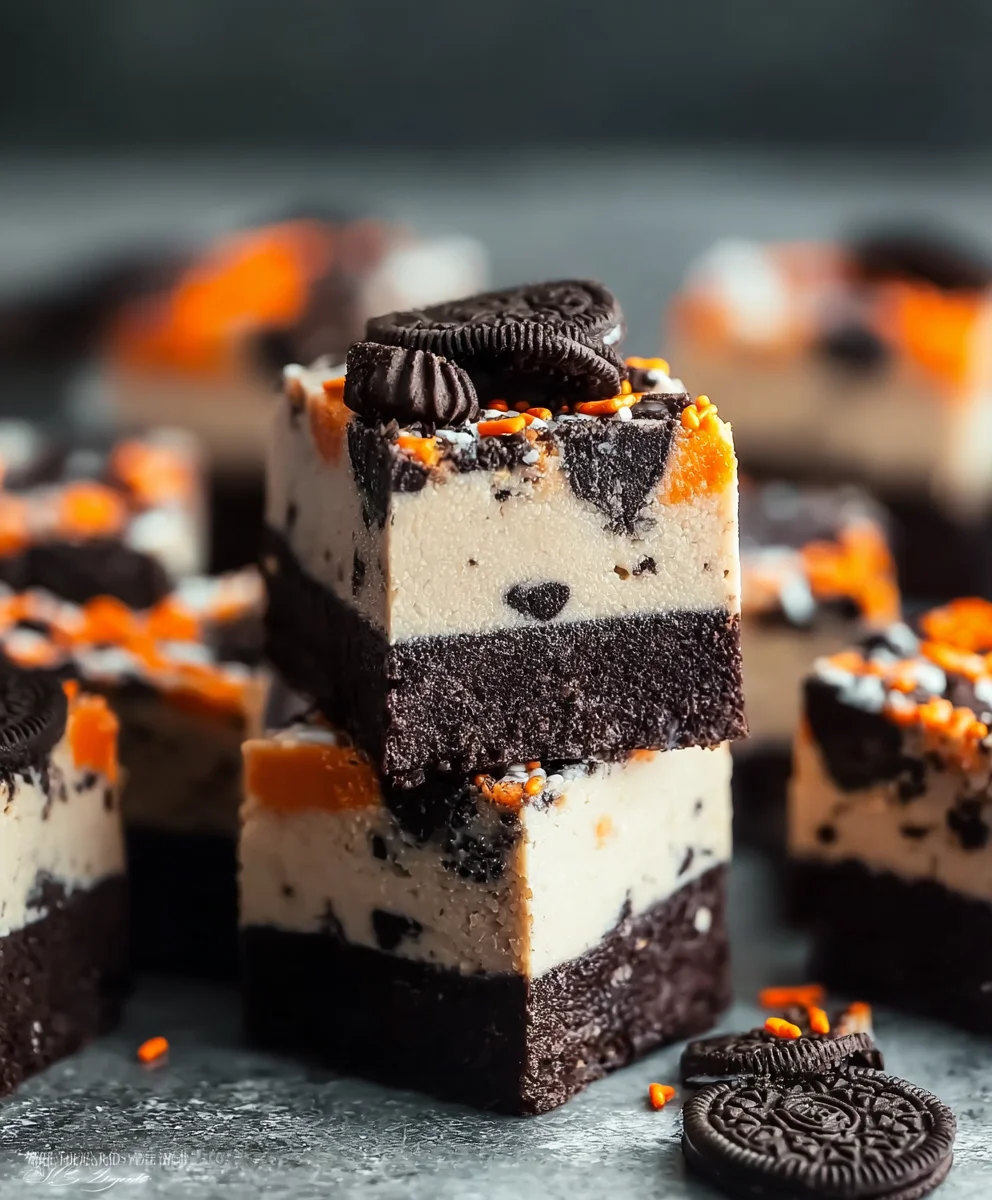
Each piece will reveal those stunning layers of orange and purple, studded with crunchy Oreos and topped with festive sprinkles and adorable candy eyes. It’s a truly satisfying moment after all your hard work!
- Serve and enjoy: Arrange your beautiful Halloween Oreo Fudge pieces on a festive platter. Serve them at your Halloween party, pack them in treat bags, or simply enjoy them with your family. They are perfect for a spooky movie night or as a delicious addition to any autumn gathering. Everyone will be enchanted by their vibrant colors and irresistible taste.
- Storing your fudge: To keep your Halloween Oreo Fudge fresh and delicious, store it in an airtight container at room temperature for up to 1 week, or in the refrigerator for up to 2 weeks. If refrigerating, let it come to room temperature for a few minutes before serving for the best texture. You can also freeze fudge for up to 3 months, just be sure to wrap it tightly in plastic wrap and then place it in a freezer-safe bag or container. Thaw at room temperature before serving. This fudge is so good, it’s unlikely to last that long, but it’s always good to know your storage options!
Conclusion:
So, there you have it! We’ve journeyed through the simple, joyful process of creating something truly magical in your kitchen. This isn’t just another sweet treat; it’s a delightful blend of creamy, dreamy fudge with the irresistible crunch of everyone’s favorite cookie, all wrapped up in a package that screams celebration. I truly believe this recipe is an absolute game-changer, especially when you’re looking for something that impresses without demanding hours of your precious time. It’s the kind of dessert that brings an instant smile, whether you’re making it for a special occasion or just to brighten an ordinary Tuesday. The rich, velvety texture melts in your mouth, perfectly contrasted by the satisfying bite of the crushed Oreos. And let’s be honest, who can resist that classic chocolate and cream combination?
What makes this particular recipe stand out from the crowd is its uncanny ability to deliver gourmet-level taste with minimal effort. Forget complicated techniques and obscure ingredients; this is all about straightforward steps that yield spectacular results. It’s perfect for beginners venturing into the world of homemade candy, yet it’s equally cherished by seasoned bakers who appreciate a reliable, crowd-pleasing option. I’ve seen firsthand how quickly a tray of this disappears, leaving behind only crumbs and satisfied smiles. It’s not just a recipe; it’s a memory maker, a centerpiece for your dessert table, and a surefire way to win over any guest or family member. The vibrant appearance, especially with the festive touches we discussed, makes it incredibly appealing even before the first bite. It’s a sensory experience from start to finish, a true testament to the idea that simplicity can indeed be profoundly delicious.
Serving Suggestions & Creative Variations to Elevate Your Fudge Experience
Now, let’s talk about how you can truly make this fudge shine on various occasions. While a simple square of this delightful confection is perfectly divine on its own, there are so many ways to enjoy it and present it. For an afternoon pick-me-up, try serving a small piece alongside a freshly brewed cup of coffee or a tall glass of cold milk – it’s an unbeatable combination that really highlights the rich chocolate and cookie flavors. Thinking about gifting? These make incredibly thoughtful and personalized presents. Arrange a few pieces in a decorative box or a clear cellophane bag tied with a pretty ribbon, and you’ve got a homemade gift that everyone will adore. They’re also fantastic additions to a dessert platter, offering a dense, rich contrast to lighter cakes or fruit tarts. Imagine it cubed, perhaps with a toothpick, as a sophisticated bite-sized treat at your next gathering, easy for guests to enjoy without a fork.
But why stop there? The beauty of this recipe lies in its adaptability. While we’ve focused on a certain festive theme, feel free to unleash your creativity! Instead of traditional Oreos, consider using other flavored sandwich cookies – perhaps peanut butter, mint, or even golden Oreos for a different visual and flavor profile. You could also swirl in some caramel sauce or melted peanut butter right before chilling for an extra layer of decadence. For a truly over-the-top experience, sprinkle a pinch of flaky sea salt on top while the fudge is still warm to enhance the chocolate notes, adding a gourmet touch. And for other holidays, simply switch up your sprinkles and food coloring! Red and green for Christmas, pastels for Easter, or even patriotic colors for the Fourth of July. The possibilities are truly endless, making this a versatile base for countless sweet creations. Just remember, a slight adjustment to the decorative elements can completely transform its appeal for any celebration you have in mind. This foundational recipe truly is a blank canvas for your dessert dreams.
Your Turn: Embrace the Joy of Homemade Delights!
I genuinely encourage you to roll up your sleeves and give this recipe a try. You’ll be amazed at how simple it is to achieve such a professional-looking and tasting treat. There’s a unique satisfaction that comes from creating something so delicious with your own hands, and I promise, this recipe delivers that satisfaction in spades. Don’t be intimidated; follow the steps, have fun with it, and prepare to be delighted by the results. Once you experience the rich, creamy texture and the joyful crunch, you’ll understand why this has become a staple in my kitchen and, I hope, will become one in yours too. It’s more than just a recipe; it’s an invitation to create, share, and enjoy.
I would absolutely love to hear about your experience! Did you stick to the original recipe, or did you put your own creative twist on it? What variations did you try? Did your family and friends love it as much as mine do? Please, share your stories, your photos, and your tips in the comments below. Your feedback helps not only me but also other aspiring bakers in our community. Let’s build a collection of delightful experiences around this fantastic treat, inspiring each other with new ideas. Seriously, don’t miss out on making this incredible Halloween Oreo Fudge! It’s the perfect way to add a homemade touch of sweetness and fun to any autumn gathering or just to indulge yourself. Happy baking, and happy eating!
Halloween Oreo Fudge
This Halloween Oreo Fudge is a spellbinding, no-bake treat combining rich, creamy chocolate with crunchy Oreo cookies and mini marshmallows. Perfect for spooky season celebrations, this easy recipe creates a vibrant, festive dessert that’s a showstopper on any Halloween table.
Ingredients
-
1 cup semi-sweet chocolate chips
-
1 cup white chocolate chips
-
1 (14 oz) can sweetened condensed milk
-
1/4 cup unsalted butter
-
1/2 tsp vanilla extract
-
1 cup crushed Oreo cookies
-
1/2 cup mini marshmallows
Instructions
-
Step 1
Line an 8×8 inch baking pan with parchment paper, leaving an overhang for easy removal. Crush 1 cup of Oreo cookies; set aside. -
Step 2
In a large saucepan over medium heat, combine 1 cup semi-sweet chocolate chips, 1 cup white chocolate chips, 1 (14 oz) can sweetened condensed milk, and 1/4 cup unsalted butter. Stir continuously until the mixture is fully melted and smooth. -
Step 3
Remove the saucepan from heat. Stir in 1/2 tsp vanilla extract. Fold in the 1 cup crushed Oreo cookies and 1/2 cup mini marshmallows until evenly distributed throughout the fudge mixture. -
Step 4
Pour the fudge mixture into the prepared pan and spread evenly. Optionally, sprinkle with Halloween-themed sprinkles or candy googly eyes for festive decoration. -
Step 5
Refrigerate the fudge for at least 2-4 hours, or until completely firm and set. -
Step 6
Once set, use the parchment paper overhangs to lift the fudge from the pan onto a cutting board. Peel off the parchment paper and slice the fudge into desired squares. Serve and enjoy! -
Step 7
Store leftover Halloween Oreo Fudge in an airtight container at room temperature for up to 1 week, or in the refrigerator for up to 2 weeks.
Important Information
Nutrition Facts (Per Serving)
It is important to consider this information as approximate and not to use it as definitive health advice.
Allergy Information
Please check ingredients for potential allergens and consult a health professional if in doubt.


Leave a Comment