
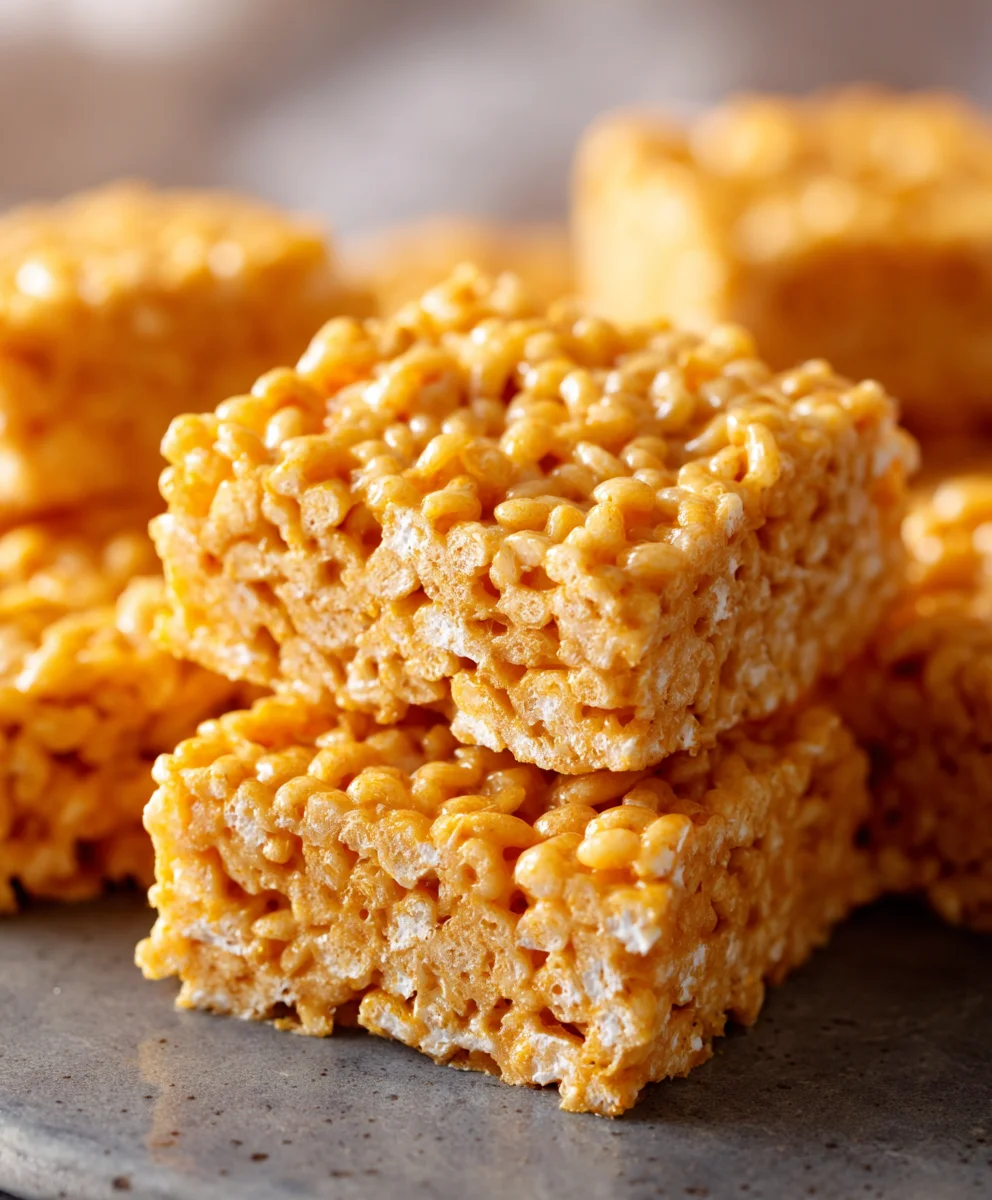
Pumpkin Rice Krispie Treats are an absolute seasonal delight that perfectly encapsulates the cozy spirit of autumn. As the leaves begin to turn and the air grows crisp, our palates instinctively crave those familiar flavors of pumpkin spice and comforting sweetness. This recipe offers an irresistibly easy way to bring that autumnal cheer into your home, combining the beloved crunch of classic Rice Krispie treats with the rich, warm notes of pumpkin. It’s a truly magical combination that evokes cherished childhood memories while embracing the festive spirit of fall holidays.
The original Rice Krispie Treat, a no-bake wonder invented by Kellogg’s employees in the late 1930s, has long been a staple for quick, crowd-pleasing desserts. Its inherent simplicity and delightful texture made it an instant classic in American homes. Our delightful variation elevates this timeless favorite, infusing it with real pumpkin puree and a hint of warming spices, transforming it into the ultimate fall dessert. People adore this dish not only for its incredibly satisfying chewy-crispy texture and delectable pumpkin flavor but also for its sheer convenience. Requiring no oven time, these Pumpkin Rice Krispie Treats are perfect for busy schedules, school parties, or simply a spontaneous weeknight indulgence. I promise you, one bite will transport you straight to a pumpkin patch on a sunny October afternoon!
Ingredients:
- 10 ounces (about 40 large) fresh mini marshmallows or regular marshmallows (I always go for fresh ones, they melt so much better!).
- 4 tablespoons unsalted butter (using unsalted gives you control over the salt content, which is important for balancing the sweetness in our Pumpkin Rice Krispie Treats).
- 1/2 cup pumpkin puree (make sure it’s 100% pure pumpkin, not pumpkin pie filling, as the pie filling has added sugars and spices we don’t want to interfere with our custom blend).
- 1 teaspoon pumpkin pie spice (a good quality blend makes all the difference, bringing warmth and classic fall flavors to our beloved treats).
- 1/2 teaspoon pure vanilla extract (the real deal, folks! It enhances all the other flavors beautifully).
- Pinch of salt (just a tiny bit helps to cut through the sweetness and really makes the pumpkin and spice flavors pop in these Pumpkin Rice Krispie Treats).
- 6 cups Rice Krispies cereal (fresh cereal is key for that iconic crispy texture; stale cereal will make your treats chewy in a bad way).
- Optional: A few drops orange food coloring (if you want to give your Pumpkin Rice Krispie Treats a really vibrant, eye-catching orange hue, though the pumpkin puree will give a natural, softer color).
- For optional decoration: Melted dark or white chocolate, sprinkles, or candy corn.
Getting Started: Preparing Your Workspace for Perfect Pumpkin Rice Krispie Treats
Before we dive into the delicious goo, it’s absolutely crucial to set ourselves up for success. This isn’t a race, but once the marshmallow mixture is ready, things move pretty quickly, and you don’t want to be fumbling for tools or a pan. Trust me on this one; a little prep work goes a long way towards creating the most delightful Pumpkin Rice Krispie Treats.
First things first, let’s get our pan ready. You’ll need a 9×13 inch baking pan. I prefer using a metal pan because it helps the treats cool evenly, but a glass one will work just fine too. The key here is to make it non-stick, and I have a few tricks up my sleeve for that. You can either lightly grease the inside of the pan with a bit of extra butter – really get into those corners! – or use a non-stick cooking spray. If you’re using cooking spray, opt for one that doesn’t leave a strong flavor. My personal favorite method, which makes for super easy removal later, is to line the pan with parchment paper, leaving an overhang on two sides. This creates little “handles” that you can use to lift the entire slab of Pumpkin Rice Krispie Treats out of the pan once they’ve set. Even with parchment paper, I still like to give it a light spray or a quick swipe of butter, especially for something as sticky as these treats can be.
Next, measure out your Rice Krispies cereal. Have the full 6 cups ready in a very large mixing bowl. When I say large, I mean really large. You’ll need plenty of room to gently fold in that sticky marshmallow goodness without crushing the cereal. This bowl needs to be heatproof, as the marshmallow mixture will be warm. Having it measured out beforehand means you won’t have to stop and measure once your marshmallow mixture is perfect, ensuring a seamless transition and ultimately, a better textured Pumpkin Rice Krispie Treat.
Also, take a moment to measure out your pumpkin puree, pumpkin pie spice, vanilla extract, and salt. Have them all waiting in small bowls or ramekins right by your stovetop. This mise en place approach, as the pros call it, truly streamlines the process and ensures you don’t miss an ingredient. When you’re making something as simple yet satisfying as Pumpkin Rice Krispie Treats, precision in your prep leads to perfection in your bite. Lastly, have a sturdy rubber spatula or wooden spoon ready. It needs to be strong enough to stir through thick, sticky marshmallow and gently fold in the cereal without breaking it.
Crafting the Pumpkin Marshmallow Mixture: The Heart of Your Pumpkin Rice Krispie Treats
Now, for the really fun part! This is where we create the magical, sticky, pumpkin-infused base that makes these Pumpkin Rice Krispie Treats so incredibly special. Grab a large, heavy-bottomed pot or Dutch oven. A heavy bottom helps distribute heat evenly and prevents scorching, which is our enemy when melting marshmallows.
Place your pot over medium-low heat. We’re going for gentle warmth here, not a rolling boil. Add your 4 tablespoons of unsalted butter to the pot. Let it melt slowly and completely. You want it to be fully liquefied and just starting to look a little foamy, but don’t let it brown unless you specifically want a brown butter flavor, which isn’t traditional for these treats. While delicious, brown butter can sometimes overpower the delicate pumpkin notes we’re aiming for here.
Once the butter is melted, it’s time to introduce our star ingredient: the pumpkin puree. Add the 1/2 cup of 100% pure pumpkin puree to the melted butter in the pot. Stir it well with your rubber spatula or wooden spoon, ensuring it’s thoroughly combined with the butter. Allow this mixture to gently warm through for about 1-2 minutes, stirring occasionally. This step is important because it helps to cook out a tiny bit of the excess moisture from the pumpkin and really allows its flavor to deepen and mingle with the butter. You might notice the color becoming a bit richer during this brief warming period.
Next, sprinkle in your 1 teaspoon of pumpkin pie spice and that tiny pinch of salt. Stir these in thoroughly until they are well distributed throughout the pumpkin and butter mixture. This step is where the aroma really starts to develop, filling your kitchen with the comforting scents of fall. The salt, as I mentioned, is a secret weapon; it perfectly balances the sweetness of the marshmallows and highlights the earthy, warm notes of the pumpkin and spices.
Now for the main event: the marshmallows! Add your entire 10 ounces of marshmallows to the pot. Immediately begin stirring. This is crucial for even melting and preventing them from sticking to the bottom of the pot and burning. Keep the heat at medium-low; patience is key here. You want the marshmallows to melt slowly and gently, transforming into a smooth, glossy, irresistible pumpkin-orange liquid. Continue stirring constantly, scraping the bottom and sides of the pot, until the marshmallows are about 90% melted. You can leave a few tiny lumps if you like a little extra chew, but generally, a smooth mixture is preferred for perfectly uniform Pumpkin Rice Krispie Treats.
As the marshmallows melt, they will become incredibly sticky and gooey. This is exactly what we want! Once they are almost fully melted and smooth, remove the pot from the heat. This prevents the mixture from overheating, which can make your treats hard later on. Stir in your 1/2 teaspoon of pure vanilla extract now. The vanilla will bloom beautifully in the warm mixture, adding another layer of aromatic deliciousness. If you’ve opted for orange food coloring, this is the moment to add a few drops and stir it in until you achieve your desired vibrant pumpkin hue. Remember, a little goes a long way, so start with just a drop or two and add more if needed. The goal is to enhance, not overpower, the natural color of our Pumpkin Rice Krispie Treats.
Give the entire pumpkin marshmallow mixture one final, thorough stir to ensure everything is perfectly combined and glossy. It should be a beautiful, uniform consistency, ready to embrace those crispy cereal pieces. This luscious mixture is the very heart and soul of our Pumpkin Rice Krispie Treats, providing both flavor and that iconic sticky-chewy texture. Be proud of your creation!
Combining and Pressing Your Treats: Assembling Your Pumpkin Rice Krispie Treats
With our glorious pumpkin marshmallow mixture ready, we’re now moving on to the exciting stage of combining it with the cereal. This is where those individual ingredients transform into the cohesive, delightful Pumpkin Rice Krispie Treats we all adore. Remember that extra-large bowl of Rice Krispies cereal we prepared? It’s time for it to shine!
Carefully pour the entire warm, gooey pumpkin marshmallow mixture over the 6 cups of Rice Krispies cereal in your large bowl. Now, here’s where technique comes into play. You need to work relatively quickly but also gently. Using your sturdy rubber spatula or wooden spoon, begin to fold the cereal into the marshmallow mixture. The key word here is “fold,” not stir vigorously. You want to lift the cereal from the bottom of the bowl and gently bring it over the top of the marshmallow, coating each and every piece without crushing them.
Continue folding until all the cereal is evenly coated with the pumpkin marshmallow goodness. This might take a few minutes, and your arm might get a bit of a workout – it’s a sticky business! You’ll know you’re done when there are no dry pockets of cereal left, and every puff of rice has a lovely orange sheen. The mixture will be incredibly sticky and slightly warm, which is exactly what we want for easy pressing.
Now, quickly transfer the entire mixture into your prepared 9×13 inch baking pan. Remember, if you lined it with parchment paper, you’ll have those convenient overhangs. If not, your greased pan is ready to go. The mixture will still be warm and pliable, which is ideal for spreading and pressing. Don’t dawdle too long here, as the mixture will start to cool and become harder to work with, making your Pumpkin Rice Krispie Treats more challenging to spread evenly.
Once the mixture is in the pan, it’s time to press it down. For this, I have another little trick: lightly grease another piece of parchment paper, the back of a spoon, or your clean hands with a little butter or non-stick spray. Then, gently but firmly press the mixture down into an even layer in the pan. The goal is to create a uniform thickness across the entire pan. Do not over-compress! This is a common mistake that can lead to hard, dense Pumpkin Rice Krispie Treats. We want them to be delightfully chewy and gooey, not rock-hard. A light, even pressure is all that’s needed to spread the mixture edge-to-edge and flatten the top surface. Think of it more as coaxing the mixture into place rather than smashing it.
Ensure that the corners and edges are just as evenly pressed as the center. A uniform thickness ensures that every single square of your homemade Pumpkin Rice Krispie Treats will have that perfect, consistent texture. Once you’re satisfied with how it looks – smooth, even, and nicely packed – you’ve completed the assembly phase. The hard work is done, and now comes the patience!
Cooling and Cutting for Perfect Pumpkin Rice Krispie Treats
You’ve done a magnificent job crafting the pumpkin-infused cereal mixture and pressing it into the pan. Now comes the part that requires a little bit of self-control: waiting! Proper cooling is essential for achieving that ideal balance of chewiness and crispiness that defines truly excellent Pumpkin Rice Krispie Treats.
Once your treats are evenly pressed into the pan, set the pan aside on a wire rack on your counter. Allowing them to cool at room temperature is generally preferred over rushing them into the refrigerator. Why? Cooling slowly at room temperature helps maintain that wonderful soft, chewy texture. If you chill them too rapidly in the fridge, they can sometimes become overly hard and lose some of their signature gooeyness. We want our Pumpkin Rice Krispie Treats to be pliable and pleasant to bite into, not a challenge for your teeth!
Let the treats cool for at least 1 to 2 hours. In a cooler kitchen, they might set up faster, while a warmer kitchen might require a bit more time. You’ll know they are ready when they feel firm to the touch but still yield slightly when gently pressed. They should no longer feel warm, but rather completely at room temperature. The entire slab of treats should feel stable and set, ready for cutting.
When they’ve cooled completely, it’s time to release them from the pan. If you used the parchment paper overhangs, this part is incredibly simple. Just grasp the paper handles and lift the entire block of Pumpkin Rice Krispie Treats straight out of the pan and place it onto a clean cutting board. If you didn’t use parchment, gently run a thin knife or spatula around the edges of the pan to loosen them, then invert the pan onto a cutting board. Sometimes a little tap on the bottom of the pan helps them release.
Now for the satisfying task of cutting! Using a sharp, non-serrated knife, slice the large slab into individual squares or rectangles. I usually aim for about 2-inch squares, which gives me around 24 generous pieces. For cleaner cuts, you can lightly grease your knife blade with a little non-stick spray or butter before you start, and wipe it clean between cuts, especially if the treats are particularly sticky. This helps prevent drag and ensures beautiful, crisp edges for each of your Pumpkin Rice Krispie Treats.
You can also get creative with your shapes! If you have fall-themed cookie cutters, like leaves, pumpkins, or ghosts, you could use them at this stage for a festive touch. Just make sure to press firmly through the treats. Keep in mind that using cookie cutters will result in some leftover scraps, which, of course, are perfect for the chef to “sample”!
Once cut, arrange your beautiful Pumpkin Rice Krispie Treats on a platter. They are now ready to be enjoyed as-is, or you can move on to the optional embellishments for an extra special touch.
Optional Embellishments: Elevating Your Pumpkin Rice Krispie Treats to a Culinary Canvas
While your basic Pumpkin Rice Krispie Treats are already a star in their own right, adding a few optional embellishments can transform them into a truly show-stopping dessert, perfect for any autumn gathering or just a special treat for yourself. Think of each treat as a small, edible canvas, waiting for your artistic touch! This step is all about personalizing and adding that extra bit of flair that will make your Pumpkin Rice Krispie Treats unforgettable.
One of my favorite ways to decorate these festive treats is with a drizzle of melted chocolate. You have options here: dark chocolate, milk chocolate, or white chocolate all work wonderfully. For a striking contrast against the orange pumpkin hue, I often lean towards dark chocolate or white chocolate. To melt the chocolate, you can use a double boiler method, gently heating chocolate chips or chopped chocolate in a heatproof bowl set over a pot of simmering water, stirring until smooth. Alternatively, the microwave method is quick and easy: place chocolate in a microwave-safe bowl and heat in 30-second intervals, stirring well after each, until melted and smooth. Be careful not to overheat, as chocolate can seize up and become grainy.
Once your chocolate is melted and smooth, transfer it to a piping bag with a very small snip off the tip, or simply use a spoon. Drizzle the melted chocolate decoratively over the cooled Pumpkin Rice Krispie Treats. You can do zigzags, straight lines, or even draw little spiderweb patterns if you’re feeling particularly spooky! The chocolate will firm up as it cools, creating a delightful crunch and an added layer of flavor.
Beyond chocolate, sprinkles are always a fun and easy way to add visual appeal. There are so many fantastic fall-themed sprinkles available – think orange, brown, and yellow jimmies, tiny leaf shapes, or even edible glitter. Sprinkle them over the treats while the chocolate drizzle is still wet, so they adhere nicely. If you’re not using chocolate, you can lightly brush the tops of the treats with a tiny bit of corn syrup (which acts as a glue) before sprinkling.
For a classic autumnal touch, consider adding candy corn. Press a few pieces of candy corn onto each treat while the chocolate is still soft, or simply arrange them artfully on top. They add a pop of color and that distinct sugary chew that many associate with fall treats. Other ideas include a light dusting of powdered sugar, or even making a simple glaze with powdered sugar and a tiny bit of milk or orange juice, then drizzling that over the top.
You could also create little “pumpkin stems” by inserting a small pretzel stick into the top of each treat, or by piping a tiny dot of green royal icing. If you’re feeling ambitious, tiny candy eyes could turn your treats into cute, friendly monsters for a Halloween party!
Remember, these are your Pumpkin Rice Krispie Treats, so let your creativity flow! No matter how you choose to decorate them, these embellishments add an extra layer of enjoyment and make these seasonal treats even more enticing and visually appealing. Just be sure to let any chocolate or glaze set completely before stacking or storing your beautifully adorned treats.
Tips for Success and Storage: Ensuring Perfect Pumpkin Rice Krispie Treats Every Time
Making delicious Pumpkin Rice Krispie Treats is fairly straightforward, but a few key tips can elevate your batch from good to absolutely fantastic. I’ve learned these little tricks over countless batches, and they really do make a difference!
Freshness is Key: Always start with fresh ingredients. This applies especially to your marshmallows and Rice Krispies cereal. Stale marshmallows won’t melt as smoothly and can result in a tougher treat. Stale cereal, as you might guess, won’t deliver that satisfying crisp snap, instead becoming chewy and potentially soggy. So, check those dates!
Low and Slow Melting: When melting the butter and marshmallows, resist the urge to crank up the heat. Medium-low heat is your friend here. High heat can cause the marshmallows to caramelize too quickly, burn, or become hard once cooled. This results in brittle, rather than wonderfully chewy, Pumpkin Rice Krispie Treats. Stir constantly to ensure even melting and prevent sticking.
Don’t Overcook the Marshmallows: Once the marshmallows are mostly melted and smooth, remove them from the heat immediately. Continuing to cook them after they’ve melted can change their chemical structure, leading to very hard treats once they cool. We want soft, pliable, and perfectly gooey Pumpkin Rice Krispie Treats, not bricks!
Gentle Mixing: When combining the pumpkin marshmallow mixture with the Rice Krispies, be gentle. Over-mixing or aggressive stirring can crush the cereal, again leading to a less satisfying texture. The goal is to coat every piece of cereal without turning it into dust.
Light Pressing: This is a big one! When pressing the mixture into the pan, use light, even pressure. If you pack them down too tightly, your Pumpkin Rice Krispie Treats will be dense and hard. We’re aiming for that light, airy, yet chewy texture, so a gentle hand is essential.
Cooling Patience: Allow your treats to cool completely at room temperature. Rushing them into the refrigerator can make them overly stiff. Room temperature cooling allows the sugar structure to set gently, resulting in a more tender and chewy treat.
Storage for Optimum Freshness: Once your Pumpkin Rice Krispie Treats are cut, store them in an airtight container at room temperature. There’s no need to refrigerate them, and doing so can actually make them harder. They typically stay fresh and wonderfully chewy for up to 3 days. After that, they might start to lose some of their crispness, but honestly, they rarely last that long in my house!
Layering for Storage: If you need to stack your treats in the container, place a piece of parchment paper or wax paper between the layers to prevent them from sticking together. This is especially important if you’ve added any chocolate drizzles or other embellishments.
Making Ahead: These treats are fantastic for making a day or two in advance of an event. Just store them properly, and they’ll be perfect when it’s time to serve. This frees you up to focus on other things on the day of your gathering.
Serving Suggestions: While amazing on their own, Pumpkin Rice Krispie Treats are also wonderful alongside a scoop of vanilla ice cream, or as part of a larger dessert platter with other fall-themed goodies like mini pumpkin muffins or apple slices. They are a delightful addition to any autumn celebration, from a casual family treat to a festive Halloween party.
By following these simple tips, you’re guaranteed to create a batch of Pumpkin Rice Krispie Treats that are perfectly chewy, wonderfully flavored, and absolutely irresistible. Enjoy the process and the delicious results!
Conclusion:
And there you have it, my friends! We’ve journeyed through the simple magic of creating a truly unforgettable autumnal delight. I genuinely believe that these aren’t just any treats; they are a delightful culmination of childhood nostalgia and sophisticated seasonal flavor, making them an absolute must-try for anyone who loves easy, no-bake desserts with a cozy twist. What makes them so irresistible, you ask? It’s that perfect symphony of classic crispy rice cereal providing a satisfying crunch, enveloped in a wonderfully chewy, marshmallow-infused binder, all elevated by the warm, inviting embrace of real pumpkin puree and a delicate dance of autumnal spices. This isn’t just a snack; it’s an experience, transporting you straight to crisp autumn days with every bite. The fact that you can whip up a batch in mere minutes, without even turning on your oven, is just the icing on this perfectly spiced, no-bake cake, making it an ideal candidate for last-minute gatherings or a spontaneous craving for something sweet and comforting.
My goal with this recipe was always to offer something both familiar and exciting, and I am confident that these Pumpkin Rice Krispie Treats hit that sweet spot perfectly. They strike that wonderful balance between comforting simplicity and a unique, seasonal flavor profile that will have everyone asking for your secret. The texture is simply divine—chewy enough to be substantial, yet light and airy from the puffed rice, creating a delightful contrast that keeps you coming back for more. Imagine that comforting marshmallow pull, now infused with the earthy sweetness of pumpkin and the aromatic warmth of cinnamon, nutmeg, and a hint of ginger. It’s truly a sensory delight that transcends the ordinary. Plus, let’s be honest, who doesn’t love a treat that looks impressive but takes minimal effort? These treats deliver on all fronts, making them a personal favorite of mine and, I hope, soon to be one of yours too.
Now, let’s talk about how to make these beauties even more spectacular or tailor them to your specific tastes. When it comes to serving, these treats are incredibly versatile. Of course, they are perfect served as simple squares on a platter for any fall-themed party, but don’t limit yourself! Try cutting them into fun shapes using cookie cutters – think pumpkins, leaves, or even ghosts for a Halloween spin. They make a fantastic addition to a dessert board, nestled alongside some spiced nuts, fresh apple slices, and a dollop of whipped cream. For a cozy evening, serve them slightly warmed with a scoop of vanilla bean ice cream and a drizzle of caramel sauce – pure indulgence! I also love to wrap individual treats in decorative parchment paper and tie them with twine for charming, edible gifts that friends and family will adore. They’re also an excellent lunchbox treat for kids and adults alike, offering a welcome pop of autumnal cheer during the workday or school day.
For those of you who love to experiment in the kitchen, these Pumpkin Rice Krispie Treats are a blank canvas for creativity. Consider adding a handful of white chocolate chips or mini chocolate chips into the mixture right before pressing it into the pan for an extra layer of sweetness and texture. A sprinkle of chopped pecans or walnuts could introduce a lovely nutty crunch, complementing the pumpkin flavor beautifully. For an even more decadent finish, once the treats have cooled, you could melt some white chocolate or dark chocolate and drizzle it decoratively over the top. A light dusting of powdered sugar or a tiny pinch of extra pumpkin pie spice can also add a charming visual and aromatic touch. If you’re feeling adventurous, try swapping out a tiny bit of the vanilla extract for a hint of maple extract to deepen that autumnal flavor even further. The possibilities are truly endless, and each variation simply enhances the inherent deliciousness of the base recipe. Feel free to play around with different spice blends as well; if you love a stronger ginger kick, add a touch more, or if you prefer a more cinnamon-forward profile, adjust accordingly. This flexibility is one of the many reasons I adore this recipe.
I am genuinely so excited for you to give this recipe a whirl. I promise you, the joy of creating these easy yet utterly delicious treats is incredibly rewarding. So, please, gather your ingredients, set aside a few minutes, and prepare to delight your taste buds and those of your loved ones. Once you’ve made your batch, I would absolutely love to hear about your experience! Did you stick to the classic recipe, or did you venture into some exciting variations? What were your favorite serving suggestions? Did your family gobble them up as quickly as mine does? Please don’t hesitate to share your thoughts, photos, and any creative twists you came up with. Your feedback and culinary adventures truly inspire me, and I can’t wait to see how these treats become a new fall tradition in your home. Happy baking (or rather, no-baking)!
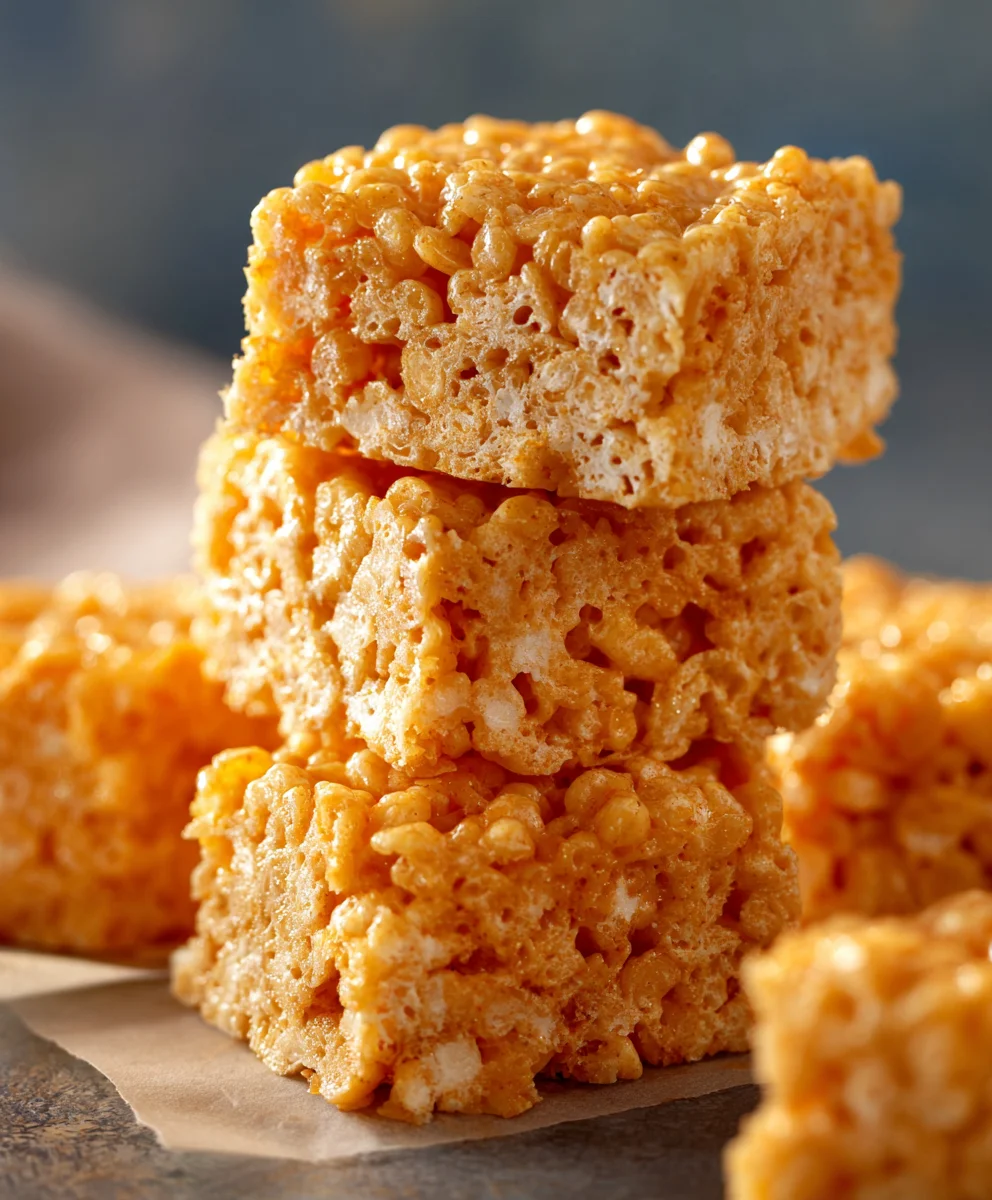
Pumpkin Rice Krispie Treats
Pumpkin Rice Krispie Treats are a delightful fall twist on the classic crispy cereal treat. Infused with the warm flavors of pumpkin puree and pumpkin pie spice, they bring a cozy, seasonal flavor to your table. The addition of white chocolate chips (if desired) adds an extra layer of sweetness, making these treats irresistible.
Ingredients
-
10 oz (about 40 large) marshmallows
-
4 tbsp unsalted butter
-
1/2 cup 100% pumpkin puree
-
1 tsp pumpkin pie spice
-
1/2 tsp pure vanilla extract
-
Pinch of salt
-
6 cups Rice Krispies cereal
-
Optional: Few drops orange food coloring
-
Optional decoration: Melted dark or white chocolate (or white chocolate chips), sprinkles, candy corn
Instructions
-
Step 1
Prepare a 9×13 inch baking pan by lightly greasing or lining with parchment paper with an overhang. Measure 6 cups of Rice Krispies cereal into a very large heatproof mixing bowl. Measure out pumpkin puree, pumpkin pie spice, vanilla extract, and salt; have a sturdy spatula ready. -
Step 2
In a large, heavy-bottomed pot over medium-low heat, melt 4 tbsp unsalted butter. Stir in 1/2 cup pumpkin puree; warm for 1-2 minutes, stirring occasionally. Add 1 tsp pumpkin pie spice and a pinch of salt; stir thoroughly. -
Step 3
Add 10 oz marshmallows to the pot. Stir constantly over medium-low heat until marshmallows are about 90% melted and smooth. Remove from heat immediately. Stir in 1/2 tsp vanilla extract and optional orange food coloring until combined and glossy. -
Step 4
Pour the warm pumpkin marshmallow mixture over the Rice Krispies cereal in the large bowl. Gently fold until all cereal is evenly coated. Quickly transfer the mixture to the prepared 9×13 inch pan. Lightly grease parchment paper or your hands, then gently press the mixture evenly into the pan without over-compressing. -
Step 5
Cool at room temperature for 1-2 hours until the treats are firm but still slightly yielding. Remove the entire block from the pan onto a cutting board. Cut into approximately 2-inch squares (yielding about 24 pieces) using a sharp, non-serrated knife. Optional: use fall-themed cookie cutters. -
Step 6
For optional decoration, melt dark or white chocolate. Drizzle decoratively over the cooled treats and let set. You can also add fall-themed sprinkles (over wet chocolate or after brushing with a little corn syrup), or press candy corn onto the treats for an extra festive touch.
Important Information
Nutrition Facts (Per Serving)
It is important to consider this information as approximate and not to use it as definitive health advice.
Allergy Information
Please check ingredients for potential allergens and consult a health professional if in doubt.
Leave a Comment