
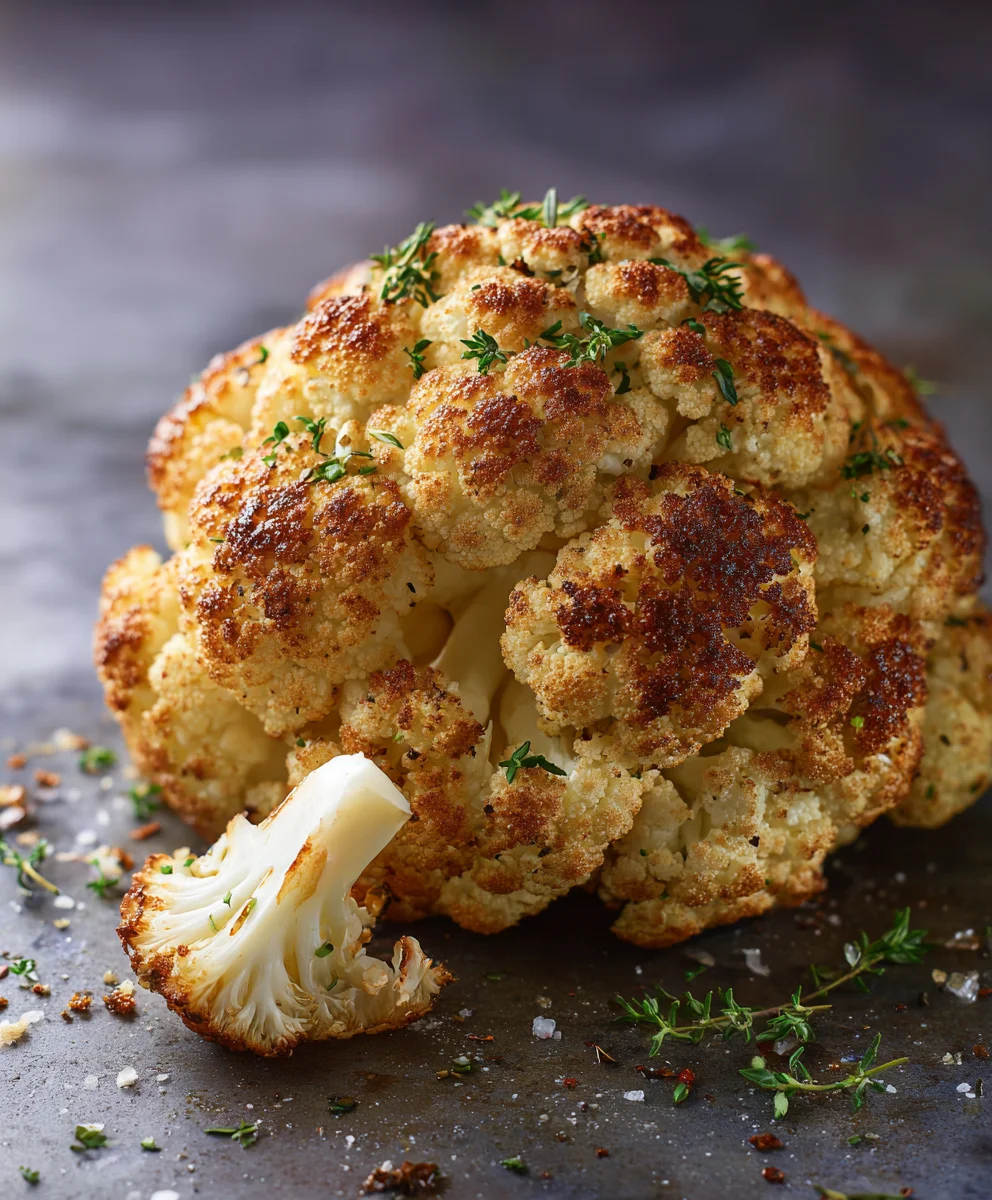
Crispy Roasted Cauliflower is more than just a simple vegetable side; it’s a culinary revelation that has captivated palates worldwide. I’ve often marvelled at how this humble cruciferous vegetable, once perhaps relegated to being an afterthought, transforms under the high heat of an oven into something truly extraordinary.
There’s a fascinating evolution in how we’ve embraced cauliflower. While historically boiled or steamed, the roasting technique has unlocked an entirely new dimension of flavor and texture, turning it into a sought-after dish that transcends cuisines. It’s no longer just a healthy option; it’s a star in its own right, lauded for its versatility and incredible taste.
Why We All Love This Crispy Delight
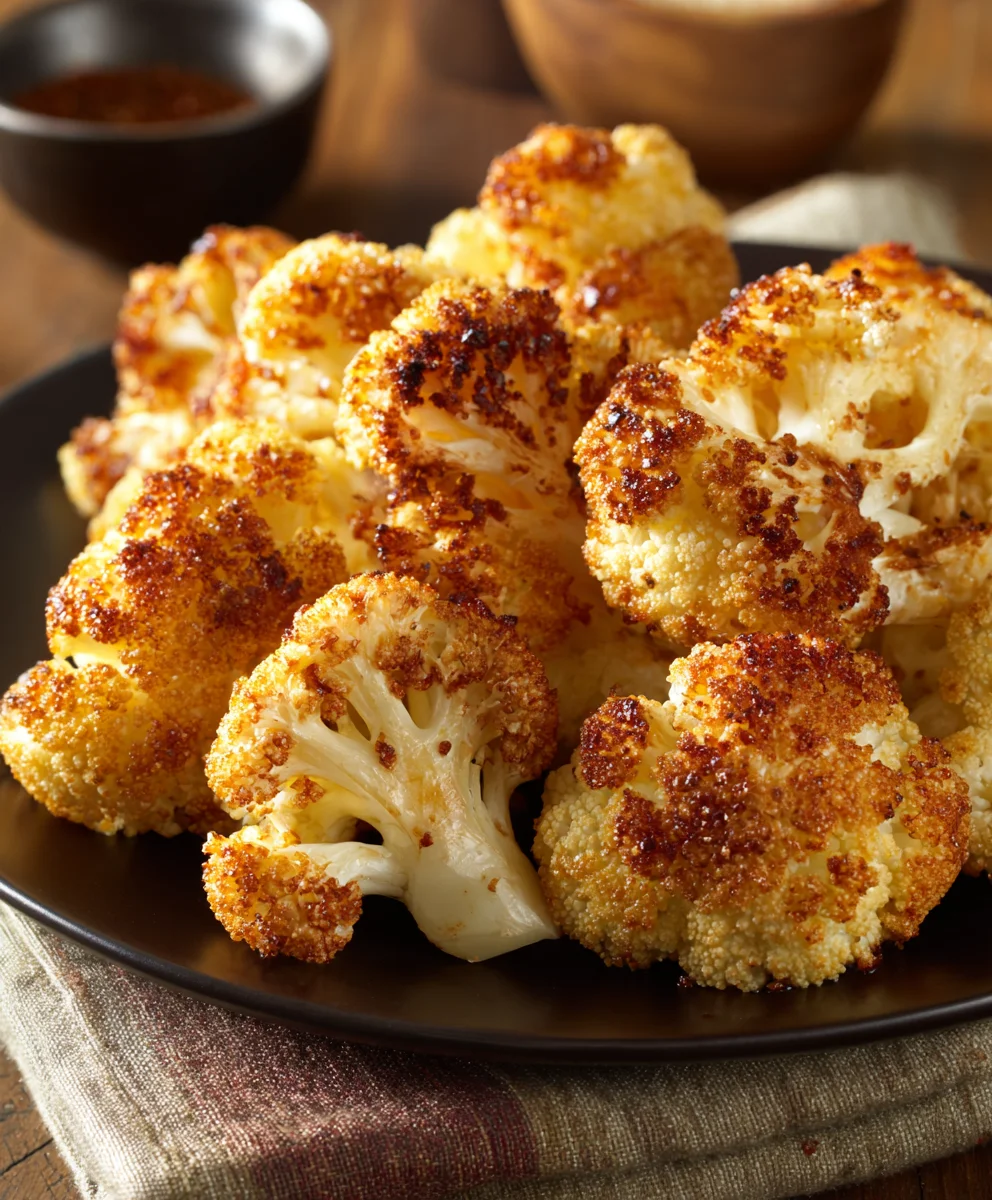
What truly makes people fall in love with this dish is that unparalleled sensory experience: the delightful crunch of a slightly caramelized exterior giving way to a tender, almost creamy interior. This perfect textural contrast, combined with the deeply savory, nutty notes that emerge during roasting, makes Crispy Roasted Cauliflower an irresistible addition to any meal. It’s incredibly easy to prepare, requires minimal ingredients, and yet delivers maximum flavor and satisfaction, whether you’re serving it as a healthy side, a delightful appetizer, or even as a compelling vegetarian main. I am excited to share how you can achieve this perfection in your own kitchen!
Ingredients:
- 1 large head cauliflower (approximately 2-2.5 lbs), a beautiful, firm, white specimen with no brown spots. This is the star of our show, so choose wisely!
- ¼ cup extra virgin olive oil, a good quality one makes all the difference, providing a rich base and helping achieve that coveted crispy texture.
- 1 ½ teaspoons smoked paprika, for a lovely depth of flavor and a gorgeous reddish-brown hue. I find smoked paprika adds so much character compared to regular.
- 1 teaspoon garlic powder, a pantry staple that gives a foundational savory flavor without the risk of fresh garlic burning in the oven.
- ¾ teaspoon onion powder, complementing the garlic powder to build a robust aromatic profile.
- ½ teaspoon ground cumin, offering a warm, earthy note that pairs wonderfully with the cauliflower and other spices.
- ¼ teaspoon chili powder (optional, or to taste), if you like a little subtle warmth and a touch of complexity. Adjust to your heat preference!
- 1 teaspoon sea salt, or kosher salt, essential for seasoning. I always recommend tasting and adjusting this to your preference.
- ½ teaspoon freshly ground black pepper, for a subtle bite and aromatic finish. Freshly ground really does make a difference.
- ¼ teaspoon cayenne pepper (optional), for those who crave a bolder kick. Just a tiny pinch can awaken the entire dish!
- Fresh parsley or cilantro (about 2 tablespoons, chopped), for garnish, adding a vibrant pop of color and fresh herbaceousness after roasting.
- Lemon wedges, for serving. A squeeze of fresh lemon juice at the end brightens everything up and truly elevates the flavors.
Preparing Our Cauliflower for Maximum Crispy Potential
- Preheat Your Oven and Prep Baking Sheets: My first step, always, is to preheat my oven to a robust 400°F (200°C). A hot oven is crucial for achieving that beautiful, crispy exterior on our Crispy Roasted Cauliflower. While the oven warms up, I grab two large baking sheets and line them with parchment paper. This simple trick prevents sticking and makes cleanup an absolute breeze, which, let’s be honest, is always a win in my book! Using two sheets ensures we have plenty of space for our cauliflower to spread out, which is a secret weapon for crispiness.
- Clean and Dry the Cauliflower: Next, I take my beautiful head of cauliflower and give it a good rinse under cold water. After rinsing, it’s absolutely vital to thoroughly dry it. I pat it down vigorously with a clean kitchen towel or paper towels. Any excess moisture is the enemy of crispiness! If the florets are wet, they’ll steam instead of roast, and we’re aiming for golden, crunchy perfection, not a soggy mess. Trust me on this one; a dry canvas is key for the best Crispy Roasted Cauliflower.
- Break Down the Cauliflower: Now for the fun part – transforming our whole head into bite-sized florets. I start by carefully trimming away the outer leaves. Then, I cut out the tough inner core. With the core removed, it’s much easier to break or cut the cauliflower into uniform florets. I aim for pieces that are roughly 1 to 1 ½ inches in size. Why uniform? Because uniform pieces cook evenly! If you have some tiny bits and some large chunks, the smaller ones will burn while the larger ones are still raw. Consistency in size is paramount for a perfectly cooked batch of Crispy Roasted Cauliflower. I try to make sure each floret has at least one flat side if possible, as this will help it brown beautifully when it hits the baking sheet.
- Toss with Olive Oil: Once all my florets are perfectly portioned, I transfer them to a very large mixing bowl. The bigger the bowl, the easier the tossing, which means less mess and better coating! I pour the ¼ cup of extra virgin olive oil over the cauliflower florets. Then, using my hands (or a sturdy spatula), I toss them thoroughly, making sure every single floret is lightly coated in that lovely oil. The olive oil is not just for flavor; it’s what helps facilitate the browning and creates that irresistible crispy exterior we’re after.
- Season Generously: This is where the magic really begins to happen, transforming plain cauliflower into a flavor explosion. To the oil-coated florets, I add my carefully selected blend of spices: the 1 ½ teaspoons of smoked paprika, 1 teaspoon of garlic powder, ¾ teaspoon of onion powder, ½ teaspoon of ground cumin, 1 teaspoon of sea salt, and ½ teaspoon of freshly ground black pepper. If I’m feeling adventurous, I’ll also add the optional ¼ teaspoon of chili powder and a tiny pinch of cayenne for an extra kick. After adding all the seasonings, I get my hands back in there and toss everything again, ensuring the spices are evenly distributed and cling beautifully to every surface of the florets. A well-seasoned Crispy Roasted Cauliflower is a happy Crispy Roasted Cauliflower! I make sure no floret is left unloved.
The Roasting Process: Achieving Golden Perfection
- Arrange on Baking Sheets: With our perfectly seasoned cauliflower, it’s time to get it into the oven. I carefully spread the seasoned florets in a single layer across my two prepared baking sheets. This step is incredibly important for achieving optimal crispiness. Do not overcrowd the pans! If the cauliflower florets are piled on top of each other, they will steam instead of roast, and we’ll end up with soft, rather than crispy, results. Giving each floret its personal space on the hot baking sheet allows the hot air to circulate freely around them, promoting even browning and that glorious crispy texture. I ensure there’s a little breathing room between each piece.
- Initial Roast: I carefully slide both baking sheets into the preheated 400°F (200°C) oven. For the first phase of roasting, I let them cook for 15-20 minutes. During this time, the cauliflower will start to soften and the edges will begin to turn a beautiful golden brown. I might peek in a few times, enjoying the incredible aroma that starts to fill my kitchen. This initial roast is all about getting some good color and tenderness established.
- Flip and Continue Roasting: After the initial 15-20 minutes, I carefully pull out the baking sheets. Using a sturdy spatula, I flip and toss the cauliflower florets around, ensuring that different sides are now exposed to the direct heat of the pan. This helps achieve even browning on all surfaces. Once flipped, I return the baking sheets to the oven for another 10-15 minutes. The goal here is to intensify the browning and crispiness. Keep an eye on them during this stage, as oven temperatures can vary, and you want to prevent burning while still achieving that deep golden hue. You’ll notice the edges becoming delightfully caramelized and slightly charred in places, which adds incredible flavor to our Crispy Roasted Cauliflower.
- Achieve Peak Crispiness: For the ultimate Crispy Roasted Cauliflower, I sometimes like to crank up the heat slightly for the last few minutes. If my cauliflower isn’t quite as crisp as I’d like, I might increase the oven temperature to 425°F (220°C) for the final 5-7 minutes, or even switch to the broiler for 1-2 minutes, being extremely vigilant not to burn it. When broiling, I keep the oven door ajar and literally stand by the oven, watching intently, as things can go from perfectly golden to burnt in a matter of seconds. You’re looking for florets that are deeply golden brown, tender on the inside, and wonderfully crisp on the outside. They should have a slightly caramelized sweetness that is utterly addictive. The texture contrast is truly what makes this dish shine!
Finishing Touches and Serving Our Crispy Roasted Cauliflower
- Remove and Garnish: Once my Crispy Roasted Cauliflower has reached its peak golden-brown perfection, I carefully remove the baking sheets from the oven. The kitchen smells absolutely divine at this point, a testament to the simple power of roasting. I immediately transfer the hot florets to a serving platter or a large bowl. While they’re still warm, I generously sprinkle them with the fresh, chopped parsley or cilantro. The vibrant green herbs not only add a pop of color but also a fresh, aromatic counterpoint to the rich, roasted flavors.
- A Squeeze of Lemon: My absolute favorite finishing touch, and one I highly recommend, is a generous squeeze of fresh lemon juice over the entire dish. The bright, zesty acidity of the lemon cuts through the richness of the olive oil and roasted cauliflower, elevating all the flavors and adding an incredible freshness. It’s a game-changer that truly makes this Crispy Roasted Cauliflower sing. I usually serve it with extra lemon wedges on the side for anyone who wants an additional squeeze.
- Serve Immediately: This Crispy Roasted Cauliflower is best enjoyed fresh from the oven, when it’s at its absolute peak of crispiness and flavor. It makes a fantastic side dish for almost any meal – grilled chicken, roasted fish, or even alongside a hearty vegetarian main course. It’s also surprisingly delicious as a healthy snack all on its own! The beautiful balance of tender interior and crunchy exterior, combined with the savory, smoky spices and bright lemon, makes this a truly satisfying and incredibly versatile dish. It’s a perfect way to enjoy a humble vegetable, transforming it into something truly extraordinary. My family can never get enough of this easy, flavorful, and incredibly healthy Crispy Roasted Cauliflower.
-
Optional Variations for Endless Enjoyment: While this basic recipe for Crispy Roasted Cauliflower is absolutely stellar on its own, I often like to experiment with different flavor profiles.
- For a cheesy twist, try sprinkling some freshly grated Parmesan cheese over the florets during the last 5-10 minutes of roasting. The cheese will melt and become beautifully golden and slightly crispy, adding another layer of flavor and texture.
- If you enjoy a bit of heat, a drizzle of sriracha or a sprinkle of red pepper flakes after roasting can give it an extra kick.
- For an unexpected sweetness, a light drizzle of balsamic glaze or honey just before serving can be absolutely delicious, creating a lovely sweet and savory contrast.
- You could also experiment with different spice blends – try a curry powder blend for an Indian-inspired twist, or a dash of sumac for a lemony, Middle Eastern flair.
The possibilities are truly endless once you master the art of making perfectly Crispy Roasted Cauliflower. It’s a dish that never fails to impress and delight, proving that healthy eating can be incredibly flavorful and exciting.
My culinary journey has led me to many delicious discoveries, but few are as consistently satisfying and surprisingly simple as truly incredible roasted vegetables. And when it comes to vegetables, cauliflower often stands out as a blank canvas, ready to absorb and transform flavors. But this isn’t just about roasting any cauliflower; it’s about perfecting the art of the Crispy Roasted Cauliflower, transforming humble florets into a dish that’s utterly irresistible, deeply flavorful, and remarkably versatile. This isn’t just a side dish; it’s an experience, a revelation for anyone who thinks they don’t like cauliflower, and a staple for those of us who already do.
Why is this recipe a must-try for everyone, from novice cooks to seasoned kitchen pros? Firstly, the flavor profile we achieve is simply unmatched. The high heat coaxes out the natural sweetness of the cauliflower, caramelizing its edges to a beautiful golden-brown. This process develops a complex, nutty, and savory taste that is far beyond what you might expect from a simple vegetable. Secondly, and perhaps most importantly, is the texture. We’re not aiming for soft or mushy here; we’re going for that glorious, satisfying crunch that makes every bite an adventure. That perfect crisp exterior gives way to a tender, but not soft, interior, creating a beautiful contrast that keeps you coming back for more. It’s a texture game-changer that elevates the entire dish. And let’s be honest, who doesn’t love something that’s both healthy and utterly addictive?
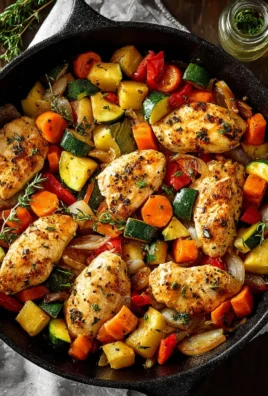
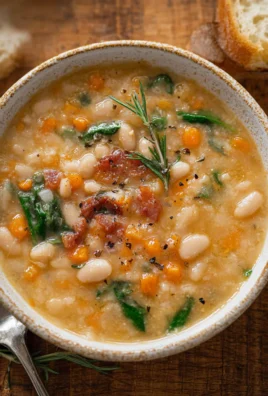
Beyond its inherent deliciousness, this recipe shines in its incredible adaptability. It’s not just a standalone star; it’s a team player, ready to complement almost any meal. I love serving it as a vibrant side to grilled salmon or a perfectly seared steak, where its crisp texture and savory notes provide a wonderful counterpoint to rich proteins. For a more plant-forward approach, it makes a fantastic base for a Buddha bowl, layered with quinoa, black beans, and a creamy tahini dressing. You could even toss it with pasta and a light lemon-garlic sauce for a surprisingly hearty vegetarian meal. Another favorite of mine is to add it to tacos or burritos, providing a smoky, substantial filling that even meat-eaters will adore.
The variations are endless, allowing you to tailor this dish to your exact cravings. Feeling spicy? A generous sprinkle of cayenne pepper or red pepper flakes before roasting will add a fiery kick. For an aromatic twist, try tossing the florets with finely chopped fresh rosemary and thyme. Smoked paprika and a pinch of cumin can transport your taste buds to a smoky, Southwestern landscape. For a touch of umami, a splash of tamari or soy sauce mixed with a little ginger and sesame oil before roasting will give it an Asian-inspired flair. And if you’re a cheese lover, a dusting of Parmesan in the last few minutes of roasting creates a delightfully cheesy crust. Don’t forget the power of a good finishing drizzle! A squeeze of fresh lemon juice, a drizzle of balsamic glaze, or even a dollop of a spicy sriracha mayo can elevate the flavors even further. The beauty of Crispy Roasted Cauliflower is that it’s a canvas for your culinary imagination.
So, now that I’ve hopefully convinced you of its unparalleled deliciousness and versatility, there’s only one thing left to do: try it yourself! Don’t just take my word for how utterly incredible this simple yet transformative recipe is. Head to your kitchen, gather your ingredients, and embark on this delightful cooking adventure. I promise you won’t be disappointed. Once you’ve experienced the magic of perfectly roasted, deeply caramelized, and wonderfully crispy cauliflower, I have a feeling it will become a regular fixture on your meal rotation. And please, when you do make it, come back and share your experience! I absolutely love hearing about your kitchen successes. Did you try a unique seasoning blend? Discover a new favorite serving suggestion? Snap a photo and share it with me and our community – your insights and variations might just inspire someone else to try their hand at this phenomenal dish. Happy roasting!
People Also Ask:
How do I make my roasted cauliflower crispy?
The key to truly crispy roasted cauliflower lies in several factors. First, ensure your cauliflower is completely dry before tossing with oil and seasonings. Excess moisture will steam the cauliflower instead of roasting it. Second, don’t overcrowd the baking sheet; give the florets plenty of space so air can circulate around them. Third, use a high oven temperature, typically 400-425°F (200-220°C), and a good quality oil with a high smoke point. Finally, don’t stir it too often – let it sit undisturbed for longer periods to develop that beautiful caramelization and crisp exterior.
What temperature should I roast cauliflower at?
For optimal crispiness and tender-crisp results, I highly recommend roasting cauliflower at a high temperature, typically between 400°F (200°C) and 425°F (220°C). This high heat encourages rapid browning and caramelization, which is essential for achieving that desirable crispy texture without overcooking the inside.
How long does roasted cauliflower last?
Properly stored in an airtight container in the refrigerator, roasted cauliflower will typically last for about 3-4 days. While it’s still perfectly safe and delicious to eat, keep in mind that the crispy texture will soften over time. For the best flavor and texture, I always recommend enjoying it fresh from the oven!
Can I use frozen cauliflower for roasting?
Yes, you can use frozen cauliflower for roasting, but there are a few extra steps to ensure it doesn’t turn out mushy. Frozen cauliflower contains more moisture, so it’s crucial to thaw it completely and then pat it very, very dry with paper towels before tossing with oil and seasonings. You might also consider roasting it at a slightly higher temperature or for a bit longer to account for the initial moisture content and achieve that desired crispiness.
What are some good seasonings for roasted cauliflower?
The beauty of roasted cauliflower is its versatility! Classic seasonings include salt, black pepper, garlic powder, and onion powder. For more adventurous flavors, try smoked paprika, cumin, chili powder, curry powder, or a blend of dried herbs like oregano and thyme. A squeeze of fresh lemon juice or a drizzle of balsamic vinegar after roasting can also brighten the flavors beautifully. Don’t forget fresh herbs like parsley or cilantro for garnish!
Is roasted cauliflower healthy?
Absolutely! Roasted cauliflower is incredibly healthy. It’s a fantastic source of vitamins C and K, folate, and dietary fiber, which aids in digestion and can help with satiety. It’s also low in calories and carbohydrates, making it an excellent choice for a wide range of diets, including ketogenic, vegan, and gluten-free lifestyles. Roasting with a healthy oil like olive oil further enhances its nutritional profile.
Crispy Roasted Cauliflower
An easy, healthy, and delicious side dish featuring tender cauliflower with a crispy, caramelized exterior and savory, nutty notes from roasting. Perfect as a side, appetizer, or vegetarian main.
Ingredients
-
1 large head cauliflower
-
6 tbsp extra virgin olive oil
-
1/2 tsp Old Bay seasoning
-
1/4 tsp chili pepper
-
1/2 tsp freshly ground black pepper
-
2 tbsp fresh parsley or cilantro, chopped (for garnish)
-
Lemon wedges (for serving)
Instructions
-
Step 1
Preheat oven to 400°F (200°C). Line two large baking sheets with parchment paper. Rinse and thoroughly dry the cauliflower. Trim outer leaves, remove the tough inner core, and break or cut into uniform 1-1.5 inch florets. -
Step 2
Transfer florets to a large mixing bowl. Drizzle with 6 tbsp extra virgin olive oil and toss to coat. Season with 1/2 tsp Old Bay seasoning, 1/4 tsp chili pepper, and 1/2 tsp freshly ground black pepper. Toss vigorously until all florets are evenly coated. -
Step 3
Spread the seasoned florets in a single layer across the two prepared baking sheets, ensuring no overcrowding. Roast in the preheated oven for 15-20 minutes, until the edges begin to turn golden brown. -
Step 4
Carefully pull out the baking sheets. Flip and toss the cauliflower florets, then return to the oven for another 10-15 minutes, or until deeply golden brown, tender on the inside, and wonderfully crisp on the outside. -
Step 5
For ultimate crispiness, increase the oven temperature to 425°F (220°C) for the final 5-7 minutes, or use the broiler for 1-2 minutes, watching very closely to prevent burning. -
Step 6
Remove the baking sheets from the oven. Transfer the hot florets to a serving platter or bowl. Sprinkle generously with fresh chopped parsley or cilantro. Squeeze fresh lemon juice over the entire dish and serve immediately with extra lemon wedges.
Important Information
Nutrition Facts (Per Serving)
It is important to consider this information as approximate and not to use it as definitive health advice.
Allergy Information
Please check ingredients for potential allergens and consult a health professional if in doubt.

Leave a Comment