
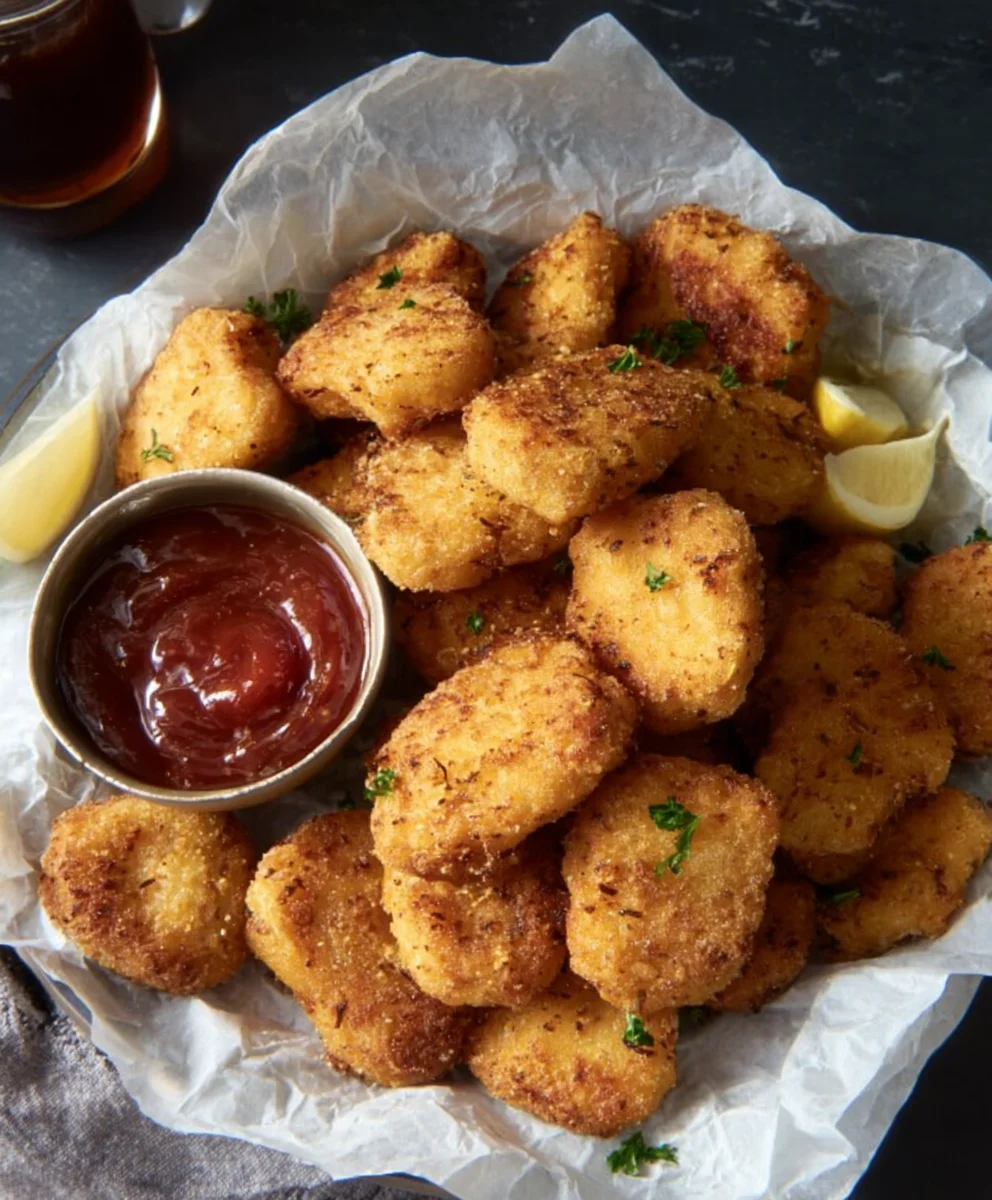
CHICKEN NUGGETS are more than just a quick meal; they’re a nostalgic journey back to childhood, a comforting embrace on a busy weeknight, and a guaranteed crowd-pleaser for any gathering. Who doesn’t have a fond memory associated with that perfectly crispy exterior giving way to tender, juicy chicken? It’s that universal appeal, that simple yet deeply satisfying taste, that makes them a perennial favorite. But let’s be honest, store-bought can sometimes leave us wanting more. That’s where this recipe for homemade CHICKEN NUGGETS shines. We’re talking about elevating this beloved classic with fresh ingredients and a touch of culinary magic, creating nuggets that are not just good, but undeniably exceptional. Get ready to discover what makes these homemade versions truly special – a perfect balance of crunch, flavor, and wholesome goodness that will have everyone asking for the recipe.
Ingredients:
- 300 grams chicken breast
- 250 grams chicken thighs
- 2 teaspoons salt
- 1 teaspoon sugar
- 1/2 teaspoon MSG (Monosodium Glutamate)
- 2 teaspoons garlic powder
- 2 teaspoons onion powder
- 1 teaspoon paprika
- 2 teaspoons black pepper
- 1 large egg
- 1 cup all-purpose flour
- 1 cup cornflour
- 2 teaspoons garlic powder (for coating)
- 1 teaspoon onion powder (for coating)
- 1 tablespoon salt (for coating)
Preparing the Chicken Mixture
Step 1: Trimming and Mincing the Chicken
The first crucial step in achieving perfectly textured chicken nuggets is to prepare the chicken. We’ll be using both chicken breast and thighs for a balanced flavor and moistness. Start by trimming any excess fat or sinew from the chicken breast and thighs. For the best results, I like to cut the chicken into smaller, manageable pieces that will make mincing easier. You can use a meat grinder for a super smooth consistency, or if you don’t have one, a sharp knife and some patience will work just as well. Mince both the chicken breast and thighs until they form a coarse paste. Avoid over-processing if using a grinder, as this can lead to a gummy texture. The goal is a slightly fibrous, but well-combined mince.
Step 2: Seasoning the Chicken Base
Now it’s time to infuse our chicken mixture with flavor. In a large bowl, combine the minced chicken with 2 teaspoons of salt, 1 teaspoon of sugar, and the 1/2 teaspoon of MSG. The sugar helps to tenderize the chicken and adds a subtle sweetness that balances the savory notes. MSG, while optional for some, provides a significant umami boost that enhances the overall chicken flavor. Next, add 2 teaspoons of garlic powder, 2 teaspoons of onion powder, 1 teaspoon of paprika for a hint of color and mild smokiness, and 2 teaspoons of freshly ground black pepper for that essential kick. Mix all these seasonings thoroughly into the chicken mince until everything is evenly distributed. You can do this with your hands or a sturdy spoon. Ensure there are no pockets of unseasoned chicken.
Step 3: Binding the Mixture
To ensure our nuggets hold their shape and have a pleasant, slightly chewy interior, we need a binder. Crack the large egg into the seasoned chicken mixture. The egg acts as a glue, helping to hold the minced chicken together. Now, add 1 cup of all-purpose flour. The flour will absorb some of the moisture from the chicken and egg, contributing to a firmer texture. Mix everything together vigorously until a cohesive, slightly sticky dough-like consistency is formed. Don’t be afraid to get your hands in there – it’s often the best way to ensure everything is thoroughly combined. The mixture should be pliable enough to shape but not so wet that it’s unmanageable.
Forming and Coating the Nuggets
Step 4: Shaping the Nuggets
With our chicken mixture ready, it’s time to get creative with shaping. Lightly wet your hands to prevent the mixture from sticking. Take about a tablespoon of the chicken mixture and roll it into a ball, then gently flatten it into a nugget shape. You can make them thick and rounded, or flatter and more uniform, depending on your preference. Aim for pieces that are roughly bite-sized. Consistency in size is key for even cooking. Place the shaped nuggets onto a clean plate or baking sheet lined with parchment paper as you work. This step is quite therapeutic, and you can have fun making different shapes if you like!
Step 5: Preparing the Coating and Dredgin extractg
For that irresistible crispy exterior, we need a delicious coating. In a separate shallow dish or bowl, whisk together 1 cup of cornflour with 2 teaspoons of garlic powder, 1 teaspoon of onion powder, and 1 tablespoon of salt. The cornflour will contribute to an extra crispiness, while the added garlic and onion powder further enhance the savory flavor of the coating. The salt in the coating is crucial for seasoning the exterior, providing a lovely contrast to the seasoned chicken inside. Now, take each shaped chicken nugget and carefully dredge it in the cornflour mixture, ensuring it is completely coated on all sides. Gently press the coating onto the nuggets to help it adhere.
Cooking the Chicken Nuggets
Step 6: Frying or Baking the Nuggets
You have two excellent options for cooking your delicious chicken nuggets, each yielding a slightly different but equally satisfying result. For the classic crispy, golden-brown exterior, deep-frying is the way to go. Heat about 2 inches of vegetable oil in a deep pot or Dutch oven to 350°F (175°C). Carefully lower a few nuggets at a time into the hot oil, ensuring not to overcrowd the pot, as this will lower the oil temperature and result in greasy nuggets. Fry for about 3-5 minutes, turning occasionally, until they are golden brown and cooked through. Use a slotted spoon to remove them and place them on a wire rack set over a baking sheet to drain any excess oil.
Alternatively, for a healthier option, you can bake your chicken nuggets. Preheat your oven to 400°F (200°C). Arrange the coated nuggets in a single layer on a baking sheet lined with parchment paper. You can lightly spray them with cooking oil for extra crispiness if desired. Bake for 18-22 minutes, flipping them halfway through, until they are golden brown and the chicken is cooked through. Internal temperature should reach 165°F (74°C). Whichever method you choose, the aroma of freshly cooked chicken nuggets is sure to be a winner! Serve hot with your favorite dipping sauces.

Conclusion:
And there you have it! Your very own batch of delicious, homemade CHICKEN NUGGETS. We’ve walked through the simple steps to create these golden, crispy delights that are sure to be a hit with everyone. Whether you’re serving them up as a fun family dinner, a party appetizer, or just a tasty snack, these CHICKEN NUGGETS are incredibly versatile.
For serving suggestions, think classic! They pair perfectly with your favorite dipping sauces – ketchup, barbecue, honey mustard, or even a spicy ranch. For a complete meal, consider serving them alongside some oven-baked fries, a fresh green salad, or some steamed vegetables. When it comes to variations, don’t be afraid to experiment! You can add a sprinkle of garlic powder or onion powder to the breading for an extra flavor kick. For a spicier twist, incorporate a pinch of cayenne pepper. You could also try different types of breadcrum extractbs, like panko for extra crunch or whole wheat for a healthier option. We encourage you to get creative and make these CHICKEN NUGGETS your own!
FAQs:
Can I make CHICKEN NUGGETS ahead of time?
Yes, you can prepare the un-cooked CHICKEN NUGGETS and store them in the refrigerator for up to 24 hours before cooking. For longer storage, you can freeze them on a baking sheet until solid, then transfer them to an airtight container or freezer bag for up to 2-3 months. Cook from frozen, adding a few extra minutes to the baking time.
What’s the best way to ensure my CHICKEN NUGGETS are crispy?
To achieve maximum crispiness, ensure your oil is hot enough if frying, or that your oven is preheated to the correct temperature if baking. Avoid overcrowding the pan or baking sheet, as this can steam the nuggets instead of crisping them. Using pankrum extractreadcrumbs can also significantly enhance the crispiness factor.
Crispy Homemade Chicken Nuggets – Easy Recipe
An easy recipe for making delicious and crispy homemade chicken nuggets from scratch, perfect for a family favorite.
Ingredients
-
300 g chicken breast
-
250 g chicken thighs
-
2 tsp salt
-
1 tsp sugar
-
1/2 tsp MSG
-
2 tsp garlic powder
-
2 tsp onion powder
-
1 tsp paprika
-
2 tsp black pepper
-
1 large egg
-
1 cup all-purpose flour
-
1 cup cornflour
-
2 tsp garlic powder (for coating)
-
1 tsp onion powder (for coating)
-
1 tbsp salt (for coating)
Instructions
-
Step 1
Trim excess fat or sinew from chicken breast and thighs. Mince both chicken pieces until they form a coarse paste. Avoid over-processing. -
Step 2
In a large bowl, combine minced chicken with 2 tsp salt, 1 tsp sugar, and 1/2 tsp MSG. Add 2 tsp garlic powder, 2 tsp onion powder, 1 tsp paprika, and 2 tsp black pepper. Mix thoroughly until evenly distributed. -
Step 3
Crack the egg into the seasoned chicken mixture and add 1 cup of all-purpose flour. Mix vigorously until a cohesive, slightly sticky dough-like consistency is formed. -
Step 4
Lightly wet your hands. Take about a tablespoon of the chicken mixture and gently flatten it into bite-sized nugget shapes. Place shaped nuggets onto a parchment-lined plate or baking sheet. -
Step 5
In a shallow dish, whisk together 1 cup of cornflour with 2 tsp garlic powder, 1 tsp onion powder, and 1 tbsp salt. Dredge each nugget in the cornflour mixture, ensuring it is completely coated and press gently to adhere. -
Step 6
For frying: Heat vegetable oil to 350°F (175°C) and fry nuggets in batches for 3-5 minutes until golden brown and cooked through. Drain on a wire rack. For baking: Preheat oven to 400°F (200°C) and bake for 18-22 minutes, flipping halfway, until golden brown and cooked through (internal temperature 165°F/74°C).
Important Information
Nutrition Facts (Per Serving)
It is important to consider this information as approximate and not to use it as definitive health advice.
Allergy Information
Please check ingredients for potential allergens and consult a health professional if in doubt.

Leave a Comment