
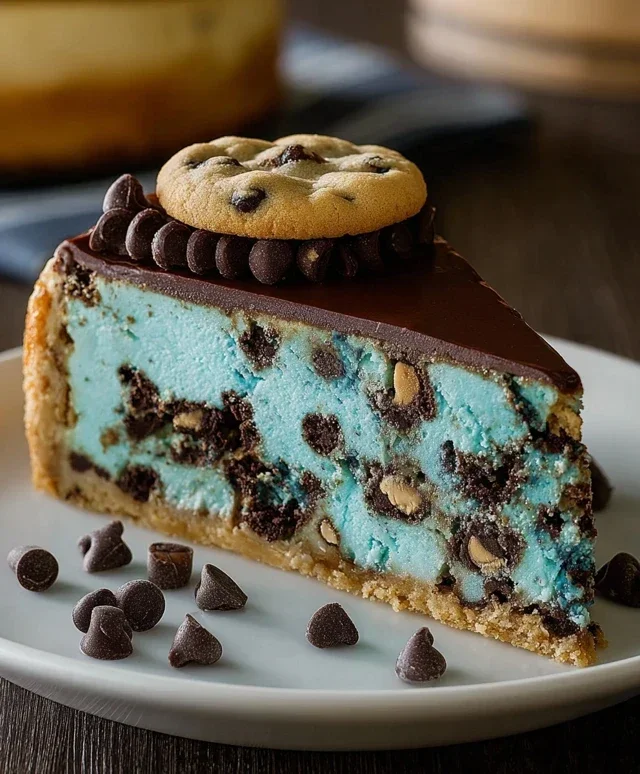
Cookie Monster Cheesecake is the ultimate dessert fantasy brought to life, a dreamy, creamy concoction that’s as fun to look at as it is to devour. Who among us hasn’t, at some point, wished they could swim in a sea of cookies and cream? This isn’t just any cheesecake; it’s an explosion of blue-hued delight, studded with chunks of irresistible chocolate chip cookies, and swirled with decadent cookie dough. It’s the perfect marriage of two beloved treats, offering a comforting richness that’s impossible to resist. We love Cookie Monster Cheesecake because it taps into our inner child, evoking nostalgia and pure, unadulterated joy. What makes this particular Cookie Monster Cheesecake so special is the meticulous balance of textures and flavors – the smooth, tangy cheesecake filling, the satisfying crunch of baked cookie pieces, and the sweet chegrape juicess of raw cookie dough all come together in perfect harmony. Prepare for a seriously epic dessert experience!
Cookie Monster Cheesecake
Get ready to unleash your inner monster with this outrageously fun and delicious Cookie Monster Cheesecake! This isn’t just any cheesecake; it’s a vibrant blue, chocolate-chip-studded dream that’s sure to bring a smile to everyone’s face. We’re talking about a creamy, dreamy cheesecake filling swirled with the unmistakable flavors of chocolate chip cookie dough, all nestled on a buttery, brown sugar crust. It’s the perfect showstopper for parties, birthdays, or just because you deserve a treat that’s as playful as it is decadent. Let’s dive into how we’re going to create this culinary masterpiece.
Ingredients:
Cookie Dough Crust
The foundation of our Cookie Monster Cheesecake is a delightful cookie dough crust. It’s a simple yet incredibly satisfying base that adds a wonderful texture and flavor.
1. Prepare the Crust Mixture: In a medium bowl, combine the melted unsalted butter, 1/2 tsp salt, and packed brown sugar. Whisk these ingredients together until they are well combined and form a slightly thickened liquid. Then, beat in the egg and 1 tsp of vanilla extract until everything is smooth and homogenous. This is where the magic starts to happen, building the flavor profile for our crust.
2. Add Dry Ingredients and Chocolate Chips: Gradually add the all-purpose flour and the semisweet mini chocolate chips to the wet ingredients. Stir with a spatula or wooden spoon until just combined. Be careful not to overmix; we want to incorporate the flour without developing too much gluten, which can make the crust tough. The dough will be thick and slightly sticky, dotted with those tempting chocolate chips.
3. Press into Pan: Take a 9-inch springform pan and press the cookie dough mixture evenly into the bottom. You can use the bottom of a measuring cup or your hands to create a firm, even layer. Don’t worry about pressing it too far up the sides, as this crust is primarily for the base. We’re aiming for a solid, delicious foundation for our cheesecake.
Cheesecake Filling and Assembly
Now for the star of the show – the creamy, blue-hued cheesecake filling! This part requires a gentle touch to ensure that signature smooth and velvety texture.
1. Cream the Cream Cheese: In a large mixing bowl, beat the softened cream cheese until it is completely smooth and creamy. This is a crucial step to avoid any lumps in your cheesecake. You can use an electric mixer (stand or hand mixer) on medium speed for this. Make sure to scrape down the sides and bottom of the bowl frequently to ensure all the cream cheese is incorporated.
2. Add Sugars and Cornstarch: To the smooth cream cheese, add the granulated sugar, the pinch of salt, and the cornflour (cornstarch). Beat on medium speed until everything is well combined and no grainy texture remains. The cornflour helps to stabilize the cheesecake and prevent it from cracking.
3. Incorporate Wet Ingredients: Add the cold whipping cream and 1 tsp of vanilla extract to the cream cheese mixture. Beat on low speed until just combined. Then, gradually add the three room-temperature eggs, one at a time, beating on low speed after each addition until just incorporated. Overmixing at this stage can introduce too much air, which can lead to cracks. The mixture should be thick and smooth.
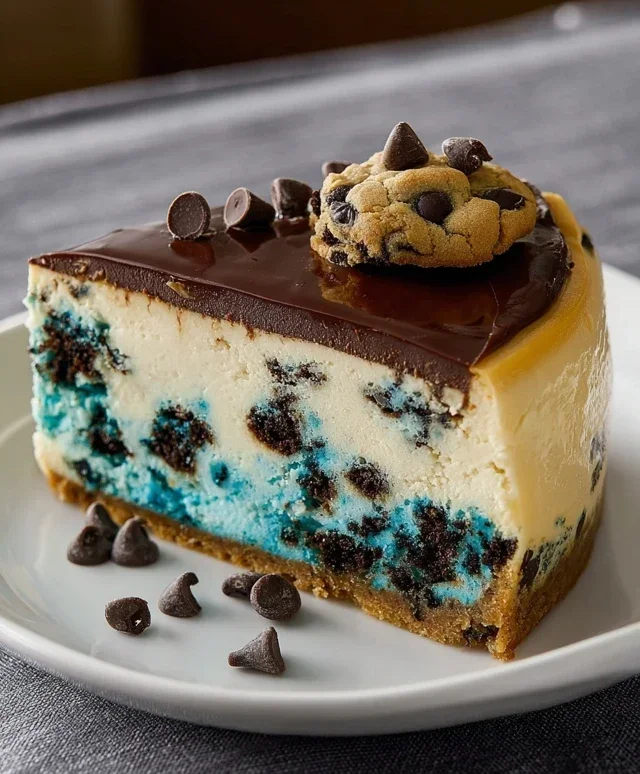
4. Achieve Cookie Monster Blue: This is where the fun really begin extracts! Add a few drops of blue gel food coloring to the cheesecake batter. Start with a small amount and gradually add more until you achieve your desired Cookie Monster blue hue. Gel food coloring is recommended as it’s highly concentrated and won’t add extra liquid to your batter. Gently swirl the color in with a spatula for a marbled effect, or mix it thoroughly for a uniform color. Then, gently fold in half of the remaining semisweet mini chocolate chips into the blue batter.
5. Bake the Cheesecake: Pour the blue, chocolate-chip-filled cheesecake batter over the prepared cookie dough crust in the springform pan. Gently spread it out evenly. You can optionally sprinkle the remaining mini chocolate chips on top for extra chocolatey goodness. Now, it’s time to bake! A water bath is highly recommended for cheesecakes to ensure even cooking and prevent cracking. Wrap the outside of your springform pan tightly with aluminum foil. Place the foil-wrapped pan into a larger baking pan. Carefully pour hot water into the larger pan until it comes about halfway up the sides of the springform pan. Bake in a preheated oven at 325°F (160°C) for about 55-70 minutes, or until the edges are set but the center still has a slight jiggle.
6. Cool and Chill: Once baked, carefully remove the cheesecake from the water bath and place it on a wire rack to cool completely at room temperature. This slow cooling process is also key to preventing cracks. Once it’s at room temperature, cover the cheesecake loosely with plastic wrap and refrigerate it for at least 6 hours, or preferably overnight. This allows the cheesecake to fully set and the flavors to meld beautifully.
When it’s time to serve, carefully run a knife around the edge of the pan before releasing the springform. Garnish with extra mini chocolate chips if you like, and prepare for applause! This Cookie Monster Cheesecake is a delightful adventure for your taste buds.
Conclusion:
And there you have it – your very own Cookie Monster Cheesecake! I hope you’re as excited as I am to dive into this ridiculously fun and delicious dessert. This recipe is fantastic because it combines the creamy, dreamy indulgence of cheesecake with the nostalgic joy of chocolate chip cookies, all wrapped up in a vibrant blue hue that’s instantly recognizable. It’s the perfect showstopper for any party, holiday gathering, or simply when you’re craving a serious sweet treat. I encourage you to give this Cookie Monster Cheesecake a try; you won’t regret the smiles it brings!
For serving suggestions, consider a dollop of whipped cream and a sprinkle of extra chocolate chips or cookie crum extractbles on top. You can also serve it alongside a glass of cold milk for the ultimate comforting experience. If you’re feeling adventurous, think about variations! Perhaps adding a layer of cookie dough batter to the filling, or even incorporating mini M&Ms for extra pops of color and flavor. The possibilities are truly endless!
Frequently Asked Questions:
Can I make this cheesecake ahead of time?
Absolutely! Cheesecakes are best when chilled for at least 6-8 hours, or preferably overnight. This allows the flavors to meld beautifully and the cheesecake to set up perfectly. Just cover it tightly with plastic wrap once it’s cooled to room temperature.
What kind of blue food coloring should I use?
Gel food coloring is generally recommended for cheesecakes as it provides vibrant color without adding excess liquid, which could affect the texture. Start with a small amount and gradually add more until you achieve your desired Cookie Monster blue.
My cheesecake cracked. Is it ruined?
Don’t worry! A cracked cheesecake is still delicious. The blue color and cookie elements will likely mask any minor cracks. To prevent cracking in the future, try using a water bath when baking and avoid over-mixing the batter.
Cookie Monster Cheesecake
A vibrant blue cheesecake with a chocolate chip cookie crust, inspired by the beloved Sesame Street character.
Ingredients
-
4 oz unsalted butter (1/2 cup)
-
2.6 oz brown sugar, tightly packed (1/3 cup)
-
1/2 tsp salt
-
4.4 oz all-purpose flour (125 g, 1 cup)
-
4 oz semisweet mini chocolate chips (2/3 cup)
-
16 oz cream cheese (2 packets)
-
3.5 oz granulated sugar (1/2 cup)
-
2 tsp cornflour (cornstarch)
-
1/2 cup whipping cream (118 ml)
-
1 egg
-
3 eggs
-
1 tsp vanilla extract
-
1 tsp vanilla extract
-
Blue gel food coloring
-
Pinch of salt
Instructions
-
Step 1
Preheat oven to 350°F (175°C). Grease a 9-inch springform pan. -
Step 2
In a bowl, combine melted unsalted butter, brown sugar, and salt. Stir in all-purpose flour until crumbly. Mix in semisweet mini chocolate chips. -
Step 3
Press the cookie mixture evenly into the bottom and 1 inch up the sides of the prepared springform pan to form the crust. Bake for 10-12 minutes, then let cool. -
Step 4
In a large bowl, beat cream cheese until smooth. Gradually add granulated sugar, cornflour, and pinch of salt, beating until well combined. -
Step 5
Add 1 egg and 1 tsp vanilla extract, beating until just incorporated. Add the remaining 2 eggs one at a time, beating after each addition. Stir in whipping cream and blue gel food coloring until desired color is reached. -
Step 6
Pour the cheesecake filling over the cooled crust. Bake for 50-60 minutes, or until the center is mostly set but still slightly jiggly. -
Step 7
Turn off the oven, leave the oven door slightly ajar, and let the cheesecake cool in the oven for 1 hour. This helps prevent cracking. -
Step 8
Remove from oven and let cool completely on a wire rack. Chill in the refrigerator for at least 4 hours, or preferably overnight, before serving.
Important Information
Nutrition Facts (Per Serving)
It is important to consider this information as approximate and not to use it as definitive health advice.
Allergy Information
Please check ingredients for potential allergens and consult a health professional if in doubt.


Leave a Comment