
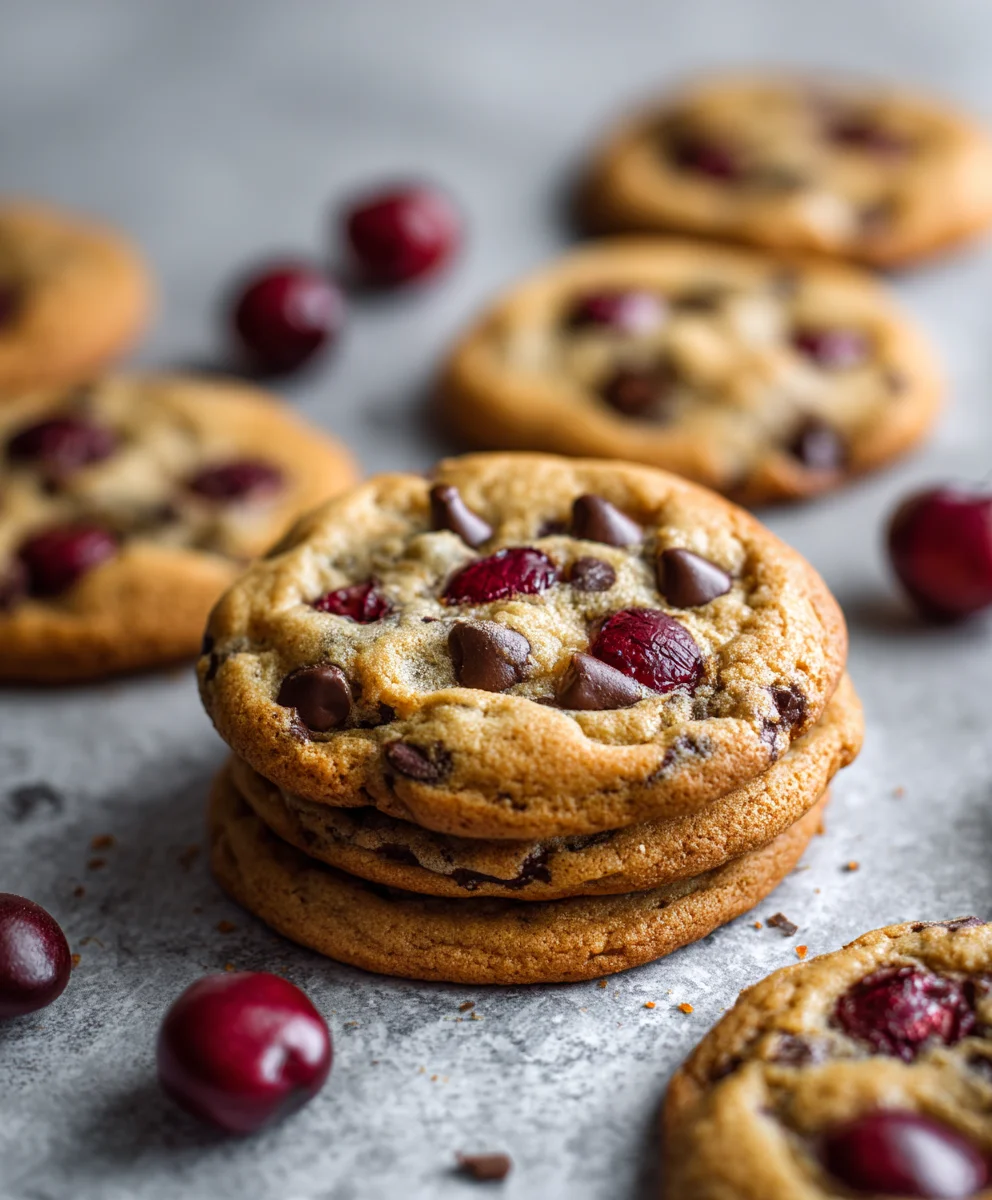
Cherry Chocolate Chip Cookies are more than just a delightful treat; they are a symphony of flavors that redefine the classic cookie experience. Have you ever wondered how a simple addition could elevate an already beloved dessert to new heights of culinary bliss? That’s precisely what happens when the luscious tartness of cherries meets the comforting sweetness of chocolate chips. While the humble chocolate chip cookie has a storied past, becoming an American icon, these Cherry Chocolate Chip Cookies introduce an exciting new chapter, blending traditional comfort with a sophisticated fruitiness.
Why Cherry Chocolate Chip Cookies Are Simply Irresistible
I find that what truly makes this dish so universally loved is its unique balance. The chewy texture, combined with the delightful bursts of sweet and slightly sour cherry, beautifully complements the rich, melted chocolate. They offer a refreshing and surprisingly complex twist on a familiar favorite, making them perfect for any occasion – from a casual family dessert to an elegant gathering. It’s not just a cookie; it’s an experience, promising a moment of pure joy with every single bite. Get ready to discover your new favorite indulgence!

Ingredients:
- 2 ¼ cups (270g) all-purpose flour
- 1 teaspoon baking soda
- 1 teaspoon salt
- 1 cup (226g) unsalted butter, softened to room temperature
- ¾ cup (150g) granulated sugar
- ¾ cup (165g) packed light brown sugar
- 2 large eggs
- 2 teaspoons pure vanilla extract
- 1 cup (170g) semisweet chocolate chips (or a mix of milk and dark)
- 1 cup (150g) dried tart cherries, roughly chopped if large
- Optional: Flaky sea salt for sprinkling, after baking
Preparing Your Kitchen and Ingredients
Before we dive into the delightful process of making our Cherry Chocolate Chip Cookies, it’s always a good idea to get our kitchen workspace ready. This ensures a smooth and enjoyable baking experience from start to finish. I find that a little bit of prep work upfront saves a lot of hassle later on.
- First things first, let’s preheat our oven. Turn your oven to 375°F (190°C). This temperature is absolutely perfect for achieving those beautifully golden-brown edges and a soft, chewy center that we all adore in a classic cookie. While the oven is warming up, we’ll prepare our baking sheets.
- Next, grab two large baking sheets. I always recommend lining them with parchment paper or silicone baking mats. This crucial step prevents our precious Cherry Chocolate Chip Cookies from sticking and makes for super easy cleanup. Plus, it helps the cookies bake more evenly by providing a slight buffer against direct heat.
- In a medium bowl, whisk together the dry ingredients: the all-purpose flour, baking soda, and salt. It’s important to make sure these are thoroughly combined. The baking soda is our leavening agent, and the salt balances the sweetness and enhances all the flavors. Sifting them together isn’t strictly necessary if you whisk well, but if your flour tends to be lumpy, a quick sift can ensure an even distribution. Set this bowl aside for now, as we’ll be adding it to our wet ingredients a little later.
Crafting the Perfect Cookie Dough
This is where the magic really begins! The foundation of truly amazing Cherry Chocolate Chip Cookies lies in how we combine our wet ingredients. Taking your time here will result in a wonderfully light and airy dough that bakes up beautifully.
- In a separate, large mixing bowl, combine the softened unsalted butter, granulated sugar, and light brown sugar. Make sure your butter is truly at room temperature – it should be soft enough to leave an indentation when gently pressed but not melted or greasy. This is key for proper creaming.
- Using an electric mixer (either a stand mixer with the paddle attachment or a hand mixer), beat the butter and sugars together on medium speed. We’re looking for a transformation here: the mixture should become light, fluffy, and noticeably pale in color. This process, known as creaming, incorporates air into the butter, which contributes significantly to the cookies’ texture, making them soft and tender. Continue to beat for about 2-3 minutes, scraping down the sides of the bowl occasionally to ensure everything is evenly mixed. Don’t rush this step; it’s vital for a superior cookie crumb.
- Once the butter and sugar mixture is beautifully creamed, it’s time to add our eggs. Crack in one large egg at a time, beating well after each addition. This allows each egg to be fully incorporated into the mixture, contributing to the dough’s structure and moisture. After adding the first egg, beat until it’s just combined, then add the second. Continue beating until the mixture is smooth and cohesive.
- Next, pour in the pure vanilla extract. Vanilla is a non-negotiable ingredient in my cookie recipes; it adds a depth of flavor that is simply irreplaceable and complements the chocolate and cherry notes wonderfully. Beat it in until it’s just incorporated, typically for about 30 seconds.
- Now, it’s time to gradually add the dry ingredients to the wet mixture. With your mixer on low speed, slowly add the flour mixture from our prepared bowl, a third at a time. Mix only until just combined after each addition. It’s incredibly important not to overmix the dough at this stage. Overmixing can develop the gluten in the flour too much, leading to tough, dense cookies instead of the soft, chewy texture we’re aiming for. We want our Cherry Chocolate Chip Cookies to be delightfully tender.
- Once all the dry ingredients are incorporated and you no longer see streaks of dry flour, stop the mixer. A perfectly mixed dough will look somewhat shaggy but will hold together when pressed.
Adding Those Signature Flavors: Cherries and Chocolate
This is the moment our cookies get their distinctive character! The combination of sweet chocolate and tart cherries is what makes these Cherry Chocolate Chip Cookies truly special. We want to incorporate them gently to ensure they’re evenly distributed without overworking our carefully crafted dough.
- Gently fold in the semisweet chocolate chips. I love using good quality chocolate chips because they melt beautifully and create pockets of rich, fudgy goodness throughout the cookies. You can also use a chopped chocolate bar for varying textures, or even a mix of milk and dark chocolate chips if you prefer a different balance of sweetness. Use a sturdy spatula for this and work carefully to distribute them throughout the dough.
- Next, add the dried tart cherries. I personally love dried tart cherries because their tanginess provides a wonderful counterpoint to the sweetness of the chocolate and the cookie dough itself. If your dried cherries are particularly large, I recommend giving them a rough chop to ensure a good distribution of flavor in every bite. Again, gently fold them into the dough until they are evenly dispersed. Remember, we’re aiming for a lovely medley of flavors in every single one of these Cherry Chocolate Chip Cookies.
Chilling and Shaping Your Cherry Chocolate Chip Cookies
While it might be tempting to skip this step and bake immediately, chilling the dough is a secret weapon for truly exceptional Cherry Chocolate Chip Cookies. It’s a non-negotiable step for me, and I promise you, the wait is absolutely worth it for the improved flavor and texture.
- Once the chocolate chips and cherries are folded in, cover the bowl with plastic wrap. Place the dough in the refrigerator to chill for at least 30 minutes, or up to 2 hours. Why chill the dough? Chilling allows the flour to fully hydrate, which reduces spread and leads to a chewier cookie. It also gives the flavors a chance to meld and deepen, resulting in a more complex and satisfying taste. Furthermore, cold dough is much easier to handle and scoop, ensuring uniform cookie shapes. For the very best results and a truly elevated flavor profile in your Cherry Chocolate Chip Cookies, I recommend chilling for at least an hour.
- After the dough has sufficiently chilled, remove it from the refrigerator. Now it’s time to portion out our cookies. Using a medium cookie scoop (about 1.5 to 2 tablespoons), scoop rounded balls of dough onto the prepared baking sheets. If you don’t have a scoop, you can use two spoons, but a scoop helps ensure uniform size, which is important for even baking.
- Arrange the cookie dough balls about 2 inches apart on the baking sheets. This spacing is crucial to prevent them from spreading into each other during baking. Remember, we want distinct, perfectly formed Cherry Chocolate Chip Cookies, not one giant cookie slab!
The Baking Process: Achieving Golden Perfection
Baking is where all our hard work comes to fruition. Pay close attention to your oven and the signs of doneness to ensure your Cherry Chocolate Chip Cookies are baked to absolute perfection – golden at the edges, and delightfully soft in the center.
- Place one baking sheet at a time into your preheated 375°F (190°C) oven. It’s better to bake one sheet at a time, especially if your oven has hot spots, to ensure even baking. If you have a convection oven and are comfortable using it, you might be able to bake two sheets at once, rotating them halfway through.
- Bake for 9 to 12 minutes, or until the edges are golden brown and the centers are still slightly soft and puffed. Keep a close eye on them, as oven temperatures can vary. The key to a chewy cookie is to take them out when they look slightly underdone in the very center. They will continue to cook and set up on the hot baking sheet even after they’ve been removed from the oven.
- Around the 6-7 minute mark, I like to rotate the baking sheet 180 degrees. This helps ensure that all the cookies bake evenly, especially if your oven has areas that are hotter than others. This small step can make a big difference in the uniformity of your batch of Cherry Chocolate Chip Cookies.
- Once the cookies are baked to your liking, carefully remove the baking sheet from the oven. If desired, immediately after removing them from the oven, you can gently press a few extra chocolate chips and dried cherries into the tops of the warm cookies for a more aesthetically pleasing finish. This is a purely optional step, but it makes them look even more enticing!
Cooling and Enjoying Your Delicious Cherry Chocolate Chip Cookies
The final steps are just as important as the baking itself. Proper cooling ensures your Cherry Chocolate Chip Cookies set up correctly and maintain their delightful texture. Then, all that’s left is to enjoy the fruits of your labor!
- Allow the cookies to cool on the baking sheet for about 5 minutes before transferring them to a wire rack. This initial cooling period on the warm baking sheet allows the cookies to firm up enough so they don’t break apart when you move them. If you try to transfer them too soon, they might be too fragile and fall apart.
- Once they are sturdy enough, carefully move the Cherry Chocolate Chip Cookies to a wire cooling rack to cool completely. Cooling on a rack allows air to circulate around all sides of the cookie, preventing the bottoms from becoming soggy and ensuring they cool evenly. Once completely cool, they are ready to be devoured! Store any leftover cookies in an airtight container at room temperature for up to 3-4 days. While they are best enjoyed fresh, they are still wonderfully delicious a few days later. Get ready to enjoy one of the most delightful cookie combinations you’ve ever tasted!
Welcome to the grand finale of our baking adventure! If you’ve followed along, you already know the magic that happens when tart cherries meet rich chocolate chips in a tender, chewy cookie. But allow me to reiterate why this recipe isn’t just another addition to your cookie jar – it’s a game-changer. These aren’t just cookies; they are little pockets of pure delight, each bite a symphony of textures and flavors that dance on your palate. The initial sweetness from the chocolate is beautifully cut by the bright, tangy burst of dried cherries, creating an unforgettable contrast that will have you reaching for just one more, then another. I genuinely believe that these cookies possess a unique charm, a sophisticated yet utterly comforting profile that sets them apart from the usual suspects. They are truly the kind of treat that brings a smile to anyone’s face, whether it’s a special occasion or simply an afternoon pick-me-up. The simple act of baking these cookies fills your home with an intoxicating aroma, a preview of the deliciousness to come. They are robust enough to travel well for potlucks and picnics, yet delicate enough to serve at an elegant tea party. I promise you, the effort is minimal compared to the incredible reward of sinking your teeth into one of these masterpieces.
Elevate Your Enjoyment: Serving Suggestions and Creative Variations
Now that you’re ready to master the art of these irresistible cookies, let’s talk about how to make them an even more incredible experience. While they are absolutely phenomenal straight from the cooling rack, still slightly warm with melty chocolate, there are countless ways to enjoy them and even put your own spin on the recipe. For an ultimate dessert experience, try serving them alongside a scoop of vanilla bean ice cream or a dollop of freshly whipped cream. The creamy coolness perfectly complements the warmth and chewiness of the cookie. A tall glass of cold milk is, of course, a timeless pairing that brings out the classic comfort in every bite. Or, if you prefer something a bit more sophisticated, pair them with a robust cup of coffee or a delicate black tea – the flavors truly shine. For those feeling adventurous, consider crumbling a few over a bowl of Greek yogurt for a decadent breakfast or dessert. They also make magnificent gifts, neatly stacked in a decorative tin for friends, family, or neighbors who deserve a special treat.
But don’t stop there! The beauty of baking is in experimentation. While our tried-and-true recipe for Cherry Chocolate Chip Cookies is perfected, feel free to explore variations. Instead of solely using semi-sweet chocolate chips, try a mix of dark chocolate chunks for a more intense cocoa flavor, or perhaps white chocolate chips for an added layer of sweetness and a beautiful visual contrast. If you’re a nut lover, a handful of toasted pecans or walnuts folded into the dough can add a wonderful crunch and earthy undertone. For a hint of warmth, a pinch of cinnamon or a dash of almond extract could elevate the cherry flavor even further. You could even get creative with the size; bake them as mini cookies for a bite-sized treat perfect for parties, or go grand with colossal cookies for an impressive individual dessert. Another fantastic idea is to press the dough into a square baking pan and make cookie bars – easy to slice and serve for a crowd. The possibilities are truly endless, limited only by your imagination.
Your Turn: Bake, Savor, and Share the Love!
So, there you have it – my heartfelt endorsement and all the reasons why you simply must try this recipe. I can’t emphasize enough how much joy these cookies bring. They’re not just a dessert; they’re an experience, a moment of pure culinary bliss waiting to happen in your kitchen. I’ve poured my passion into developing this recipe, and now it’s your turn to make it your own. Please, don’t hesitate. Gather your ingredients, preheat your oven, and prepare to be amazed by the incredible flavor and texture of these glorious cookies. Once you’ve baked your first batch of these phenomenal Cherry Chocolate Chip Cookies, I would absolutely love to hear about your experience! Did you stick to the recipe, or did you venture into some of the variations? What did your friends and family think? Did they disappear as quickly from your counter as they do from mine? Share your photos, your triumphs, and even any questions you might have. Your feedback and stories are what make this baking community so vibrant and exciting. Happy baking, and get ready to enjoy some of the most delicious cookies you’ll ever make!
Cherry Chocolate Chip Cookies
Sweet, chewy, and easy, these Cherry Chocolate Chip Cookies redefine the classic cookie experience, blending tart cherries with sweet chocolate chips for a truly irresistible treat.
Ingredients
-
2 ¼ cups (270g) all-purpose flour
-
1 tsp baking soda
-
1 tsp salt
-
1 cup (226g) unsalted butter, softened
-
¾ cup (150g) granulated sugar
-
¾ cup (165g) packed light brown sugar
-
2 large eggs
-
2 tsp pure vanilla extract
-
1 cup (170g) semisweet chocolate chips
-
1 cup (150g) dried tart cherries, chopped
-
Optional: Flaky sea salt for sprinkling
Instructions
-
Step 1
Preheat oven to 375°F (190°C). Line two large baking sheets with parchment paper or silicone mats. -
Step 2
In a medium bowl, whisk together the flour, baking soda, and salt. Set aside. -
Step 3
In a large mixing bowl, cream softened butter, granulated sugar, and light brown sugar with an electric mixer on medium speed for 2-3 minutes until light and fluffy. -
Step 4
Beat in eggs, one at a time, until just combined. Stir in vanilla extract. -
Step 5
Gradually add the dry ingredient mixture to the wet mixture on low speed, mixing only until just combined. Do not overmix. -
Step 6
Gently fold in the semisweet chocolate chips and chopped dried tart cherries until evenly distributed throughout the dough. -
Step 7
Cover the bowl with plastic wrap and refrigerate the dough for at least 30 minutes, or up to 2 hours, for best flavor and texture. -
Step 8
Remove chilled dough from the refrigerator. Using a medium cookie scoop (1.5-2 tablespoons), scoop rounded balls of dough onto the prepared baking sheets, spacing them about 2 inches apart. -
Step 9
Bake one baking sheet at a time in the preheated oven for 9 to 12 minutes, or until edges are golden brown and centers are still slightly soft. Rotate the baking sheet 180 degrees halfway through baking for even cooking. (Optional: Press extra chocolate chips/cherries on top immediately after baking). -
Step 10
Allow cookies to cool on the baking sheet for about 5 minutes before carefully transferring them to a wire rack to cool completely. Store any leftovers in an airtight container at room temperature for up to 3-4 days.
Important Information
Nutrition Facts (Per Serving)
It is important to consider this information as approximate and not to use it as definitive health advice.
Allergy Information
Please check ingredients for potential allergens and consult a health professional if in doubt.


Leave a Comment