
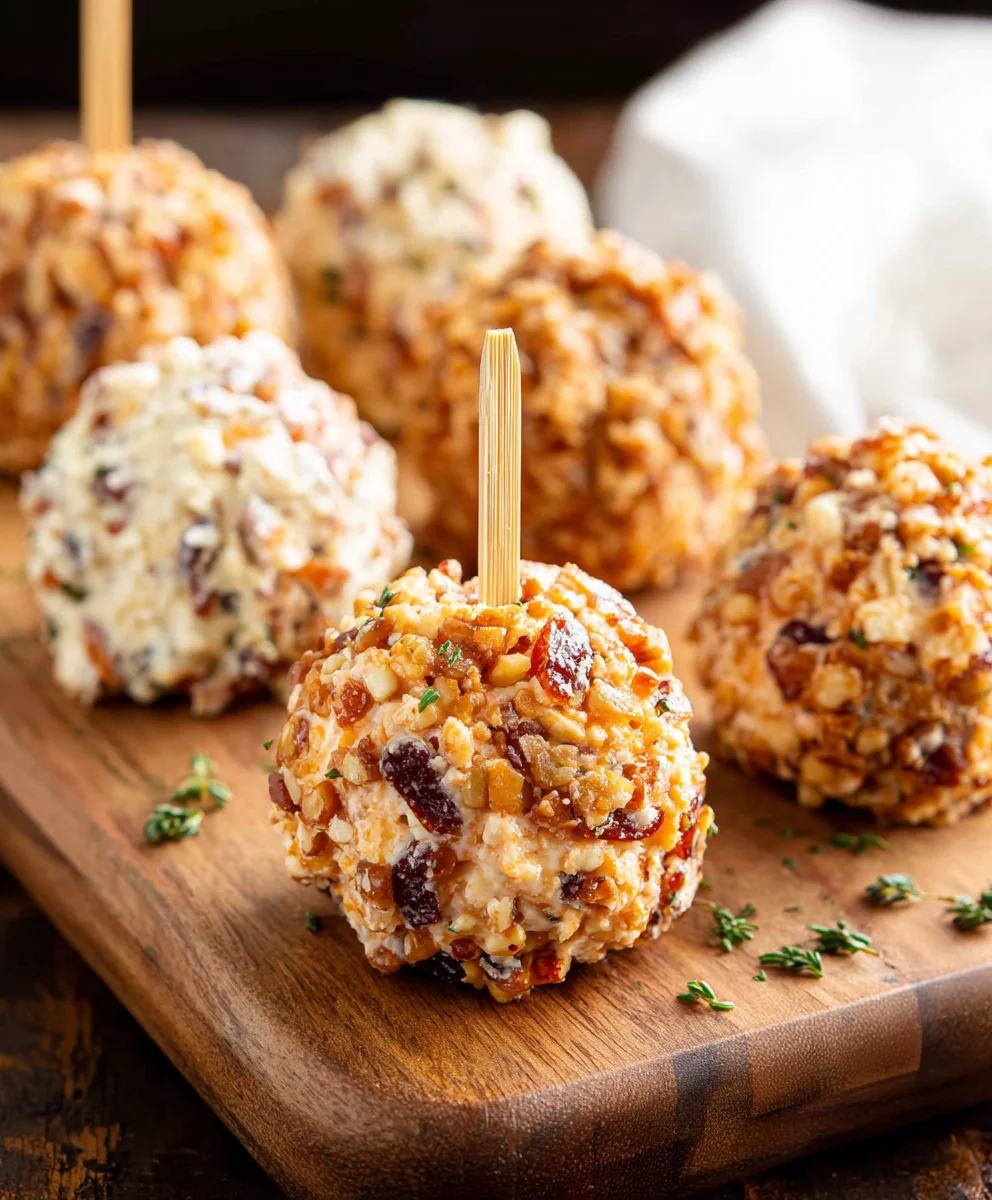
Mini Cheese Ball Bites: Your Ultimate Party Starter!
Mini Cheese Ball Bites are undoubtedly the unsung heroes of any gathering, instantly transforming a simple spread into an elegant appetizer extravaganza. I’ve always been captivated by how something so deceptively simple can elicit such widespread adoration. Think about it: a creamy, savory explosion of flavor, perfectly portioned for effortless enjoyment, and incredibly versatile. These delightful bites trace their lineage back to the classic, larger cheese ball, a beloved staple of American potlucks and holiday parties from the mid-20th century. Over time, culinary ingenuity led to their miniature transformation, making them even more appealing for modern entertaining.
Why Everyone Adorers These Irresistible Morsels
What makes these particular appetizers so irresistible? Is it the rich, tangy blend of cheeses, often complemented by aromatic herbs and a touch of spice? Or perhaps it’s the satisfying contrast between the smooth, melt-in-your-mouth interior and the crunchy, often nutty, exterior? For me, it’s the sheer convenience and universal appeal. Guests adore not having to fuss with knives or serving spoons; they simply grab a perfectly sized morsel and enjoy. Whether you’re hosting a sophisticated cocktail party or a casual game night, these delectable Mini Cheese Ball Bites are guaranteed to be the first to disappear, leaving your guests craving more. Let’s dive into how you can easily create these crowd-pleasing sensations!

Ingredients:
- 16 ounces full-fat cream cheese, room temperature
- 1/2 cup full-fat sour cream
- 2 cups shredded cheddar cheese
- 1 cup shredded Emmentaler or Gruyere cheese
- 1 tablespoon lemon juice
- 1/3 cup chopped dried cranberries
- 1/3 cup chopped pecans
- 1/2 teaspoon pepper
- 1/2 teaspoon garlic powder
- 1/2 teaspoon onion powder
- 1/4 teaspoon salt
- 1 tablespoon ranch seasoning
- 1/3 cup finely grated Parmesan cheese
- 1/3 cup chopped bacon
- 1 tablespoon chopped chives
Crafting the Creamy Base
- Prepare Your Workspace and Ingredients: Before we dive into mixing, I always find it helpful to have all my ingredients measured out and ready to go. This “mise en place” approach makes the process so much smoother and more enjoyable. Most importantly, ensure your 16 ounces of full-fat cream cheese is truly at room temperature. This isn’t just a suggestion; it’s a critical step for achieving that incredibly smooth, lump-free base we’re aiming for. Cold cream cheese will resist blending, leading to a lumpy texture that no amount of beating will fully resolve, impacting the overall elegance of your mini cheese ball bites. Place the softened cream cheese into a large mixing bowl.
- Whip the Cream Cheese: Using an electric mixer (either a stand mixer with the paddle attachment or a hand-held mixer), begin to beat the cream cheese on medium speed for about 1-2 minutes. Your goal here is to make it light, fluffy, and completely smooth. Scrape down the sides of the bowl frequently to ensure everything gets incorporated evenly. This initial whipping introduces air, making the texture of the finished cheese balls wonderfully airy, rather than dense.
- Incorporate the Sour Cream and Lemon Juice: Once the cream cheese is beautifully smooth, add the 1/2 cup of full-fat sour cream and the 1 tablespoon of fresh lemon juice to the bowl. The sour cream contributes a lovely tang and an even creamier consistency, while the lemon juice brightens all the flavors, cutting through the richness of the cheeses. Continue mixing on medium-low speed until these ingredients are fully combined and the mixture is uniformly smooth, approximately another 1-2 minutes. Again, don’t forget to scrape down the sides of the bowl to catch any unmixed bits. I love how these two ingredients really elevate the base, giving it a sophisticated edge.
- Season the Base to Perfection: Now it’s time to infuse our creamy base with an explosion of savory flavors! Add the 1/2 teaspoon of pepper, 1/2 teaspoon of garlic powder, 1/2 teaspoon of onion powder, 1/4 teaspoon of salt, and the generous 1 tablespoon of ranch seasoning to the cream cheese mixture. The ranch seasoning is a secret weapon here; it brings a delightful medley of herbs and spices that truly complements the cheeses. Mix on low speed until all the seasonings are thoroughly distributed throughout the cream cheese mixture. Be careful not to overmix at this stage; we just want everything nicely combined. The aroma developing in your kitchen right now should be absolutely fantastic!
Blending in the Cheeses and Savory Add-ins
- Introduce the Main Cheeses: It’s time for the stars of the show – the cheeses! Gently fold in the 2 cups of shredded cheddar cheese and the 1 cup of shredded Emmentaler or Gruyere cheese. I prefer to do this by hand using a sturdy spatula or a wooden spoon. This helps prevent overmixing and ensures the shredded cheese maintains some of its texture, contributing to a more interesting bite. The cheddar provides that classic sharp, comforting flavor, while the Emmentaler or Gruyere adds a nutty, slightly sweet complexity that elevates the entire dish. Mix until the cheeses are evenly distributed throughout the creamy base. You’ll notice the mixture starting to thicken and become more substantial at this point.
- Stir in the Cranberries and Pecans: Next, let’s add some delightful textural contrast and bursts of flavor. Carefully fold in the 1/3 cup of chopped dried cranberries and the 1/3 cup of chopped pecans. The cranberries offer a wonderful tart-sweet counterpoint to the savory cheeses, while the pecans provide a satisfying crunch and an earthy richness. I find that this combination is absolutely irresistible. Make sure to distribute them evenly throughout the mixture so every mini cheese ball bite gets a taste of these fantastic additions. Continue to mix by hand until these components are thoroughly incorporated. The mixture should now be thick, rich, and visually appealing with all its colorful additions.
Chilling for Perfect Formation
- Prepare for Chilling: Once your cheese ball mixture is perfectly combined, it’s crucial to chill it thoroughly. This step is non-negotiable for achieving easily rollable, firm mini cheese ball bites. Scoop the entire mixture into an airtight container, or transfer it to a bowl and cover it tightly with plastic wrap, pressing the plastic wrap directly onto the surface of the mixture to prevent a skin from forming.
- The Critical Chill: Place the covered mixture in the refrigerator for a minimum of 2 hours. However, I highly recommend chilling it for at least 4 hours, or even better, overnight. The longer it chills, the firmer it will become, making it much easier to handle and roll into neat balls. More importantly, this chilling period allows all those incredible flavors – the sharpness of the cheddar, the nuttiness of the Emmentaler, the tang of the sour cream, the zest of the lemon, and the savory ranch seasoning – to meld and deepen. This transformation is what truly sets apart a good cheese ball from an outstanding one. During this time, you can also prepare your coatings, which we’ll get to in the next section.
Preparing the Flavorful Coatings
- Gather Your Coating Ingredients: While your cheese ball mixture is chilling, this is the perfect time to get your coatings ready. Having them prepared in separate, shallow dishes or plates makes the assembly line process incredibly efficient later on. We’re working with 1/3 cup of finely grated Parmesan cheese, 1/3 cup of chopped bacon, and 1 tablespoon of chopped chives.
- Prepare the Parmesan Cheese: For the 1/3 cup of finely grated Parmesan cheese, ensure it’s truly finely grated. If you’re grating it yourself from a block, aim for a very fine texture, almost like a powder, so it adheres beautifully to the cheese balls. Place this into one of your shallow dishes. The nutty, salty Parmesan creates a delightful crust and an extra layer of savory depth that I simply adore.
- Chop the Bacon: For the 1/3 cup of chopped bacon, if it’s not already in small pieces, take the time to chop it finely. If you’re starting with cooked bacon strips, make sure they are crispy and cooled before crumbling or chopping them into small bits. The goal is small, uniform pieces that will stick well to the cheese ball and provide a satisfying crunch and smoky flavor in every bite. Place the chopped bacon in another shallow dish.
- Finely Chop the Chives: Lastly, for the 1 tablespoon of chopped chives, ensure they are freshly chopped. Fresh chives offer a delicate oniony flavor and a vibrant green color that adds both taste and visual appeal. Use a sharp knife to achieve a fine, even chop. Place the chopped chives into your third shallow dish. Having distinct piles for each coating will allow you to create a variety of mini cheese ball bites, which is always a crowd-pleaser.
Forming and Coating the Mini Bites
- Retrieve the Chilled Mixture: Once your cheese ball mixture has firmed up beautifully in the refrigerator, take it out. It should be significantly stiffer and much easier to handle than when you first mixed it. This firm consistency is key to forming neat, compact mini cheese balls.
- Scoop and Roll: Using a small cookie scoop (about 1-tablespoon size) or two small spoons, portion out the cheese mixture. I find a cookie scoop makes the process incredibly consistent, ensuring all your mini cheese ball bites are uniform in size, which looks lovely on a platter. Roll each portion gently between your palms to form a smooth, tight ball. Aim for about 1 to 1.5 inches in diameter. If the mixture starts to feel too sticky on your hands, you can lightly dampen your hands with water, or pop the entire bowl back into the fridge for a few minutes to firm up again. Work efficiently but gently.
-
The Coating Process: This is where the magic happens and where you can get creative! You have three fantastic coatings ready: Parmesan cheese, chopped bacon, and chopped chives.
- Parmesan Coated Bites: Take a formed cheese ball and gently roll it in the finely grated Parmesan cheese, pressing lightly to ensure an even coating. The Parmesan will cling beautifully, creating a savory, golden exterior.
- Bacon Coated Bites: For a smoky, crunchy option, roll another cheese ball in the chopped bacon. Press the bacon bits firmly into the surface so they adhere well. These are always a huge hit!
- Chive Coated Bites: For a fresh, herbaceous flavor and a pop of green, roll a third cheese ball in the chopped chives. The delicate onion flavor pairs wonderfully with the rich cheese.
- Get Creative with Combinations: Don’t feel limited to single coatings! I often like to mix and match. For instance, you could roll some in a combination of Parmesan and chives, or even a blend of all three if you’re feeling adventurous. The beauty of these mini bites is their versatility.
As you coat each ball, place them on a clean plate or baking sheet lined with parchment paper.
- Final Chill for Setting: Once all your mini cheese ball bites are formed and coated, I highly recommend placing them back into the refrigerator for at least another 30 minutes. This final chill helps the coatings adhere firmly and ensures the cheese balls are perfectly firm and chilled for serving. This step is especially important if you’re making them ahead of time, as it helps maintain their shape and integrity.
-
Serving Suggestions and Storage: These mini cheese ball bites are incredibly versatile and perfect for any gathering.
- Presentation: Arrange them artfully on a platter. You can group them by coating type or create a colorful mosaic with all the different variations.
- Pairings: Serve them with an assortment of crackers – from simple water crackers to more robust whole-wheat varieties. Pretzel crisps are also a fantastic option, offering an extra salty crunch. For a healthier touch, offer them alongside fresh vegetable sticks like carrot sticks, celery sticks, cucumber slices, or bell pepper strips.
- Storage: If you have any leftovers (which is rare in my experience!), store them in an airtight container in the refrigerator for up to 3-4 days. For best results, I always suggest serving them chilled.
Enjoy the fruits of your labor! These mini cheese ball bites are truly a delight to make and an even bigger delight to share.
Conclusion:
And there you have it, my friends! We’ve journeyed through the creation of what I truly believe will become your new go-to appetizer. If you’ve been searching for that elusive recipe that’s guaranteed to impress without demanding hours of your precious time, then look no further. This recipe for Mini Cheese Ball Bites isn’t just a collection of ingredients and steps; it’s a gateway to effortless entertaining, a secret weapon in your culinary arsenal that promises deliciousness with every pop-able morsel. I can’t emphasize enough how much I adore these little bundles of joy, and I am absolutely convinced you will too.
Why are these a must-try, you ask? Well, first and foremost, they are utterly delicious. The harmonious blend of creamy cheese, savory seasonings, and a perfectly textured coating creates an explosion of flavor and texture in every single bite. They’re rich, tangy, a little bit salty, and incredibly satisfying. Beyond the taste, their charm lies in their unparalleled convenience. Unlike a traditional large cheese ball that requires knives and potentially messy spreading, these individual portions are neat, elegant, and incredibly easy for guests to grab and enjoy. They’re naturally portion-controlled, which is a bonus, and they look absolutely stunning arranged on a platter, adding a touch of gourmet sophistication to any spread. Think about the holidays, game nights, impromptu get-togethers, or even a quiet evening at home when you crave something special – these bites fit every scenario seamlessly. They are truly the epitome of a crowd-pleaser, consistently disappearing from plates faster than you can say “more cheese, please!”
One of the aspects I love most about these mini delights is their incredible versatility. While the base recipe is fantastic as is, don’t hesitate to let your culinary creativity shine! For serving suggestions, think beyond the classic cracker. While buttery Ritz, sturdy wheat thins, or seedy artisan crackers are always excellent choices, consider an array of dippers to really elevate the experience. Pretzel sticks offer a delightful salty crunch and are easy to handle. Crisp vegetable sticks like celery, carrot, bell pepper slices (red, yellow, orange), or even cucumber rounds provide a refreshing counterpoint to the rich cheese. For something a little different, try apple or pear slices; their natural sweetness beautifully complements the savory cheese. Imagine serving these with a vibrant fruit platter alongside your cheese bites – pure bliss!
Now, let’s talk variations because this is where the fun truly begins! Feel free to experiment with different types of cheese in your blend. A sharp cheddar can add more pungency, smoked gouda offers a delightful depth, or a touch of blue cheese can introduce a sophisticated tang. Don’t be shy about playing with herbs and spices either. Fresh dill or chives folded into the mixture will lend a bright, herbaceous note, while a pinch of smoked paprika or a dash of cayenne pepper can introduce warmth and a subtle kick. For texture and flavor boosts, consider folding in finely crumbled cooked bacon, chopped toasted pecans or walnuts, sun-dried tomatoes (finely diced), or even a touch of finely minced jalapeño for those who love a bit of heat. And the coatings! Oh, the possibilities are endless. Beyond the recommended nuts, try rolling them in everything bagel seasoning for a trendy twist, finely chopped fresh parsley for a burst of green, or even a mix of toasted panko breadcrumbs for an extra crispy exterior. Each variation transforms the experience, allowing you to tailor these incredible bites to suit any palate or occasion.
My hope is that you’re now feeling inspired and eager to get into the kitchen to whip up a batch of these glorious Mini Cheese Ball Bites. Trust me, the smiles they bring to faces, including your own, will be worth every moment of effort – which, as you know, is minimal! I truly believe that sharing good food is one of life’s greatest pleasures, and I would absolutely love for you to share your experience with me. Once you’ve made them, snap a photo, post it on social media, and tag me! Or simply drop a comment below telling me how they turned out and what variations you tried. Your feedback and creativity inspire me and our entire community of food lovers. So go on, give this recipe a try, gather your loved ones, and savor these delightful bites together. Happy cooking, and even happier eating!
Frequently Asked Questions (FAQs)
How long do Mini Cheese Ball Bites last and how should I store them?
Your delicious Mini Cheese Ball Bites are best enjoyed fresh, but they can be safely stored. Once prepared, transfer them to an airtight container and refrigerate them. They will maintain their quality and flavor for up to 3-5 days in the refrigerator. Always ensure they are covered to prevent them from drying out or absorbing other odors from your fridge. If you’ve coated them with nuts, these might soften slightly over time, but they’ll still be absolutely delicious!
Can I make these Mini Cheese Ball Bites ahead of time for a party?
Absolutely! This is one of the best features of this recipe, making it perfect for entertaining. You can prepare the cheese mixture, roll it into individual balls, and even coat them up to 24-48 hours in advance. Simply arrange them on a platter or in an airtight container and keep them refrigerated until about 15-20 minutes before you plan to serve. Taking them out a little early allows them to soften slightly, bringing out their best texture and flavor. This advanced prep strategy significantly reduces stress on the day of your event!
What are the best serving suggestions for Mini Cheese Ball Bites?
The beauty of these bites is their versatility! While I covered many in the conclusion, some top picks for dippers include a variety of crackers like butter crackers, wheat thins, or artisan seeded crackers. Pretzel sticks or mini pretzels offer a fantastic salty crunch. For a healthier option, consider an assortment of crisp vegetables such as celery sticks, carrot sticks, bell pepper strips (any color!), or cucumber slices. Apple or pear slices also make a surprisingly delightful pairing, offering a sweet-tart contrast to the savory cheese. Don’t be afraid to set out a diverse spread to cater to all tastes!
Can I freeze Mini Cheese Ball Bites?
Yes, you can! Freezing is a great way to extend their shelf life and have them ready for last-minute gatherings. To freeze, prepare the cheese balls (without the outer coating, if you want the coating to be fresh) and arrange them in a single layer on a baking sheet. Freeze until firm, usually about 1-2 hours. Once firm, transfer the frozen cheese balls to a freezer-safe airtight container or a heavy-duty freezer bag, separating layers with parchment paper to prevent sticking. They can be stored in the freezer for up to 1 month. When ready to serve, thaw them in the refrigerator overnight, then roll in your desired coating just before serving. If they were already coated, you can still freeze, but the coating might lose some of its original crunch.
What kind of cheese works best for the cheese ball mixture?
The foundation of a great cheese ball is a blend of creamy and flavorful cheeses. I typically recommend a base of cream cheese for its smoothness and tang, combined with a shredded cheese like sharp cheddar for its robust flavor or a Monterey Jack for its mild, melty qualities. You can absolutely experiment! Adding a touch of smoked gouda, a pungent blue cheese, or even a little Parmesan can elevate the flavor profile. The key is to have a good balance of creaminess from the cream cheese and flavor from the harder cheeses. Always make sure your cream cheese is softened to room temperature for the easiest mixing and creamies results!
Best Mini Cheese Ball Bites Recipe – Quick & Easy Appetizer
Quick and easy mini cheese ball bites featuring a creamy cheese base with cheddar, Emmentaler/Gruyere, cranberries, and pecans, coated in Parmesan, beef bacon, and chives.
Ingredients
-
16 ounces full-fat cream cheese, room temperature
-
1/2 cup full-fat sour cream
-
2 cups shredded cheddar cheese
-
1 cup shredded Emmentaler or Gruyere cheese
-
1 tablespoon lemon juice
-
1/3 cup chopped dried cranberries
-
1/3 cup chopped pecans
-
1/2 teaspoon pepper
-
1/2 teaspoon garlic powder
-
1/2 teaspoon onion powder
-
1/4 teaspoon salt
-
1 tablespoon ranch seasoning
-
1/3 cup finely grated Parmesan cheese
-
1/3 cup chopped beef bacon
-
1 tablespoon chopped chives
Instructions
-
Step 1
Whip room temperature cream cheese in a large bowl with an electric mixer until light and smooth (1-2 min). Add sour cream and lemon juice; mix until uniformly smooth (1-2 min). Stir in pepper, garlic powder, onion powder, salt, and ranch seasoning until thoroughly distributed. -
Step 2
Gently fold in shredded cheddar and Emmentaler/Gruyere cheese by hand until evenly distributed. Then, fold in chopped dried cranberries and pecans until thoroughly incorporated into the mixture. -
Step 3
Transfer the cheese mixture to an airtight container, cover, and chill in the refrigerator for a minimum of 2 hours, preferably 4 hours or overnight, for firm handling. -
Step 4
While the mixture chills, prepare coatings: Place 1/3 cup finely grated Parmesan cheese, 1/3 cup chopped beef bacon, and 1 tablespoon chopped chives into separate shallow dishes. -
Step 5
Retrieve the chilled mixture. Using a 1-tablespoon cookie scoop, portion the mixture and roll gently between palms to form smooth, tight balls (1 to 1.5 inches). Roll each ball in desired coatings (Parmesan, beef bacon, chives, or combinations), pressing lightly to adhere. Place coated balls on a parchment-lined plate or baking sheet. -
Step 6
Refrigerate coated mini cheese balls for at least 30 minutes to set coatings. Serve chilled with crackers, pretzel crisps, or fresh vegetable sticks. Store leftovers in an airtight container in the refrigerator for up to 3-4 days.
Important Information
Nutrition Facts (Per Serving)
It is important to consider this information as approximate and not to use it as definitive health advice.
Allergy Information
Please check ingredients for potential allergens and consult a health professional if in doubt.


Leave a Comment