
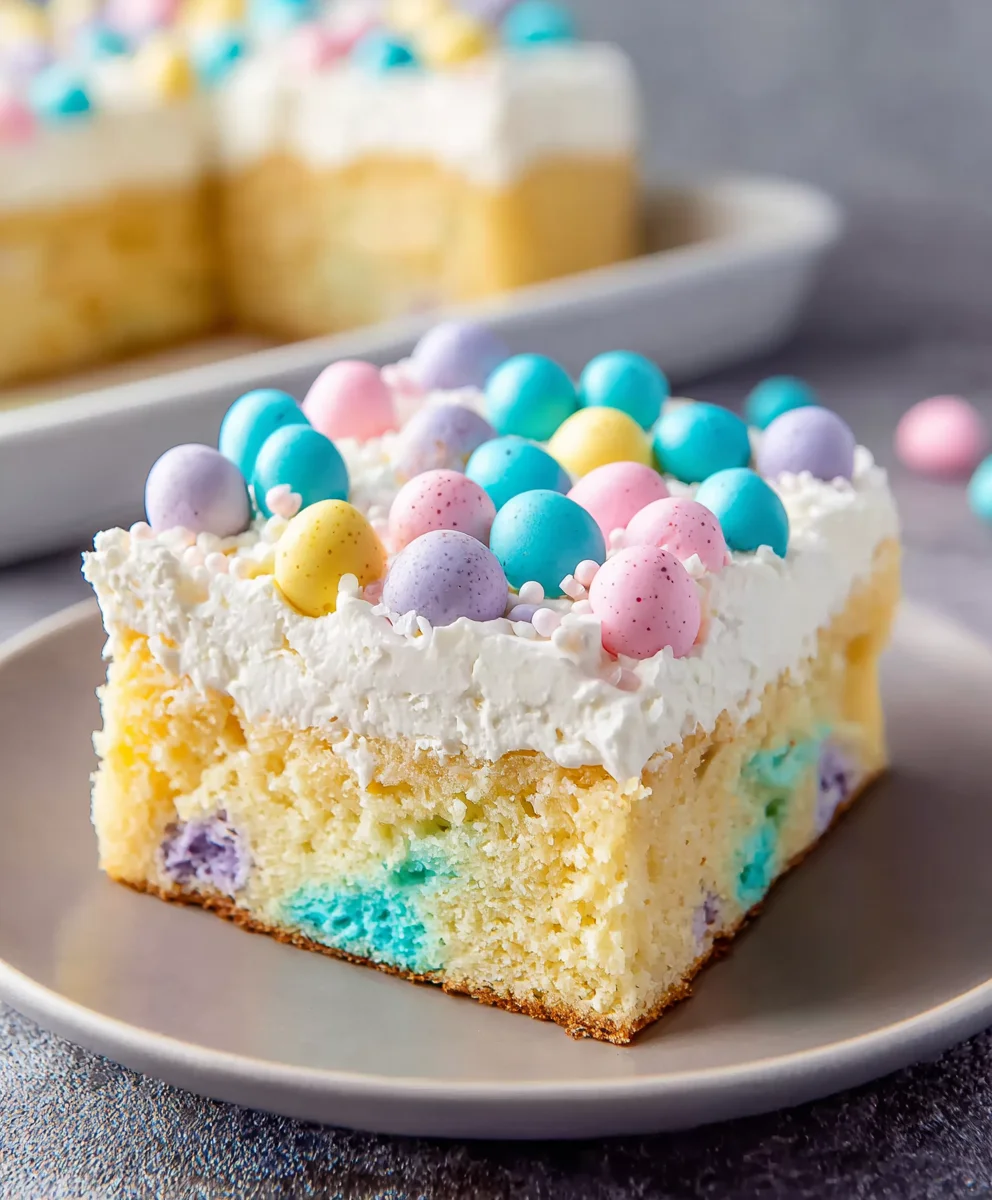
Easter Poke Cake is more than just a dessert; it’s a vibrant celebration encapsulated in every delightful bite. Imagine a supremely moist, tender cake infused with cheerful, spring-inspired colors, crowned with a cloud of creamy, ethereal topping. It’s the quintessential centerpiece for your holiday table, offering a delightful surprise and a burst of flavor with every forkful.
The ingenious concept of the “poke cake” emerged as a brilliant way to ensure maximum flavor saturation and an incredibly moist texture, quickly becoming a beloved choice for casual gatherings and festive occasions alike. For Easter, this particular rendition embraces the spirit of renewal and joy, often featuring pastel hues that perfectly capture the essence of spring’s fresh palette.
Why This Easter Poke Cake Will Be Your New Holiday Favorite!
What truly makes this dish a perennial favorite is its irresistible combination of textures and flavors. The cake remains incredibly tender, saturated with the sweet, fruity goodness from the gelatin, creating a unique, jiggly texture that’s utterly delightful. Topped with a luscious, airy frosting, it provides a beautiful contrast that appeals to all ages. It’s not just surprisingly convenient to prepare; it consistently delivers a show-stopping presentation with minimal effort, making it ideal for busy hosts.
Whether you’re hosting a grand family brunch or a simple get-together, this Easter Poke Cake promises to be a memorable and much-anticipated addition. I’m absolutely thrilled to guide you through creating your own stunning Easter Poke Cake, ensuring a sweet and joyful finish to your festive celebrations.
Ingredients:
-
For the Vanilla Cake:
- 2 ½ cups (300g) all-purpose flour, sifted
- 1 ½ cups (300g) granulated sugar
- 1 tablespoon baking powder
- ½ teaspoon salt
- 1 cup (226g) unsalted butter, softened to room temperature
- 4 large eggs, at room temperature
- 1 cup (240ml) whole milk, at room temperature
- 2 teaspoons pure vanilla extract
-
For the Colorful Pudding Layers:
- 2 (3.4 oz / 96g) packages instant vanilla pudding mix
- 4 cups (960ml) cold whole milk, divided into two 2-cup portions
- Food coloring gels: pastel pink, blue, and yellow (or your chosen Easter shades)
-
For the Whipped Topping:
- 2 cups (480ml) heavy cream, very cold
- ½ cup (60g) powdered sugar (confectioners’ sugar)
- 1 teaspoon pure vanilla extract
-
For the Easter Decorations:
- Cadbury Mini Eggs or similar chocolate eggs
- Assorted pastel jelly beans
- Peeps marshmallows (bunnies or chicks)
- Easter sprinkles (optional, for extra sparkle)
- Shredded coconut, dyed green (optional, for “grass”)
Preparing the Cake: The Foundation of Your Easter Poke Cake
Let’s begin by laying the groundwork for our delightful Easter Poke Cake. A perfectly baked, tender vanilla cake is absolutely essential for soaking up all those wonderful pudding flavors. Trust me, making it from scratch is incredibly rewarding and ensures the best texture for this type of cake.
- Preheat and Prepare: First things first, preheat your oven to 350°F (175°C). This ensures a consistent baking temperature from the moment your cake goes in. Generously grease and flour a 9×13 inch baking dish. Alternatively, you can line it with parchment paper for easy removal, leaving an overhang on the sides as “handles.” This small step can save a lot of frustration later!
- Combine Dry Ingredients: In a large mixing bowl, whisk together the sifted all-purpose flour, granulated sugar, baking powder, and salt. Make sure these are thoroughly combined; the baking powder needs to be evenly distributed to ensure a uniform rise. A good whisk for about 30 seconds should do the trick.
- Cream Butter and Sugar: In a separate, even larger bowl (or the bowl of a stand mixer fitted with the paddle attachment), beat the softened unsalted butter on medium speed until it’s light and creamy, about 1-2 minutes. Now, gradually add the granulated sugar, beating for another 3-5 minutes until the mixture is truly light in color and fluffy. This creaming process incorporates air, which is crucial for a tender cake crumb. Don’t rush this step! It’s fundamental to the cake’s texture.
- Add Eggs Gradually: Add the eggs one at a time, beating well after each addition. Scrape down the sides of the bowl frequently to ensure everything is incorporated. Each egg should be fully mixed in before the next is added, creating a smooth, emulsified batter.
- Alternate Wet and Dry: With the mixer on low speed, begin adding the dry ingredient mixture alternately with the whole milk, starting and ending with the dry ingredients. Start by adding about a third of the flour mixture, mix until just combined, then half of the milk, mix, then another third of the flour, the remaining milk, and finally the last third of the flour. Be careful not to overmix! Overmixing develops the gluten in the flour, leading to a tough cake. Mix only until just combined, with no visible streaks of flour.
- Incorporate Vanilla: Stir in the pure vanilla extract. Vanilla is the heart of a good vanilla cake, so use a quality extract for the best flavor.
- Bake to Perfection: Pour the batter evenly into your prepared 9×13 inch baking dish. Bake for 30-35 minutes, or until a wooden skewer or toothpick inserted into the center comes out clean. The cake should be golden brown on top and spring back lightly when gently pressed.
- Cool Completely: Remove the cake from the oven and let it cool in the pan on a wire rack for at least 1-2 hours, or until it is completely cooled to room temperature. This step is non-negotiable for a perfect Easter Poke Cake; if you poke a warm cake, it might crumble, and the pudding won’t set properly. Patience is a virtue here!
Crafting the Colorful Pudding Layers for Your Easter Poke Cake
Now for the fun, colorful part that gives our Easter Poke Cake its signature look and delightful moistness! We’ll be using instant pudding mixes to create vibrant pockets of flavor throughout the cake. This is where you can really play with the festive Easter theme.
- Prepare Pudding Base: In a medium-sized bowl, pour 2 cups of the cold whole milk. Add one package of instant vanilla pudding mix. Whisk vigorously for 2 minutes until the pudding starts to thicken. Don’t worry if it’s not super thick yet; it will continue to set as it chills.
- Divide and Color: Divide this prepared pudding equally into three separate small bowls. Now, for the magic! Add a few drops of food coloring gel to each bowl – a pastel pink to one, a pastel blue to another, and a pastel yellow to the third. Stir each color thoroughly until you achieve your desired pastel shade. If you want more intense colors, add a drop or two more, but remember we’re aiming for soft Easter hues. Set these aside while you prepare the second batch.
- Repeat for More Colors/Volume: Repeat step 1 and 2 with the second package of instant vanilla pudding mix and the remaining 2 cups of cold whole milk. You can either create more of the same colors, or introduce new pastel shades like lavender or mint green. Having a good volume of pudding ensures every poke hole is deliciously filled. For this recipe, I find two packages of pudding create the perfect amount to truly drench the cake.
- Allow to Set Slightly: Let the colored puddings sit for about 5-10 minutes at room temperature. They will thicken up a bit more, which makes them easier to pour into the cake holes without immediately spreading too much on the surface. You want them to be pourable but not watery.
Poking and Filling: The Heart of the Easter Poke Cake Experience
This is arguably the most satisfying part of making an Easter Poke Cake! Watching those vibrant colors seep into the cake is just wonderful. This step is where the cake truly transforms into its “poke cake” identity.
- Prepare for Poking: Once your vanilla cake is completely cooled, grab a utensil for poking. A wooden spoon handle is my preferred tool for creating perfectly sized holes, but the tines of a large fork or even a chopstick will work wonderfully. The key is to make holes that are about ¾ of the way through the cake – not quite to the bottom, but deep enough to hold a good amount of pudding.
- Poke Away: Begin poking holes all over the top of the cake. Try to make them fairly evenly spaced, about 1 inch apart. Don’t be shy! This is the “poke” in Easter Poke Cake. Make sure you have a good number of holes; more holes mean more pudding, and more pudding means a moister, more flavorful cake. Aim for at least 30-40 holes across the entire surface.
- Fill with Colorful Pudding: Now for the magic! Take your prepared colored puddings. Using a spoon or a small measuring cup, carefully pour each color into different holes. Alternate the colors as you go, creating a beautiful mosaic of pastel shades. Don’t worry if some spills onto the cake surface; the whipped topping will cover it. The goal is to get as much pudding into each hole as possible. You might need to gently coax the pudding down with the back of your spoon. This step is truly what makes an Easter Poke Cake so special and visually appealing when sliced.
- Chill for Setting: Once all the holes are filled, place the entire cake, uncovered, into the refrigerator. Allow it to chill for at least 3-4 hours, or preferably overnight. This chilling time is absolutely crucial for the pudding to fully set within the cake, creating those distinct, colorful pockets and ensuring the cake becomes incredibly moist. Do not skip or shorten this step! It’s what makes the Easter Poke Cake structurally sound and perfectly chilled.
Whipping Up the Topping and Decorating Your Festive Easter Poke Cake
With the cake thoroughly chilled and the pudding perfectly set, it’s time for the crowning glory – a luscious whipped topping and a festive Easter decoration. This final stage is where your creativity can truly shine, transforming a simple dessert into a show-stopping Easter centerpiece.
- Prepare the Whipped Topping: In a very cold bowl (I like to chill my mixing bowl and whisk attachment in the freezer for 15 minutes beforehand), pour the very cold heavy cream. Begin beating on medium speed. As the cream starts to thicken, gradually add the powdered sugar and vanilla extract. Increase the speed to high and continue beating until stiff peaks form. Be careful not to overbeat, or you’ll end up with butter! The whipped topping should be light, airy, and hold its shape beautifully.
- Spread the Topping: Remove your chilled Easter Poke Cake from the refrigerator. Gently spread the homemade whipped topping evenly over the entire surface of the cake. Use an offset spatula or the back of a spoon to create lovely swirls and peaks, giving it an inviting, rustic look. Ensure the topping covers any visible pudding for a clean, elegant finish.
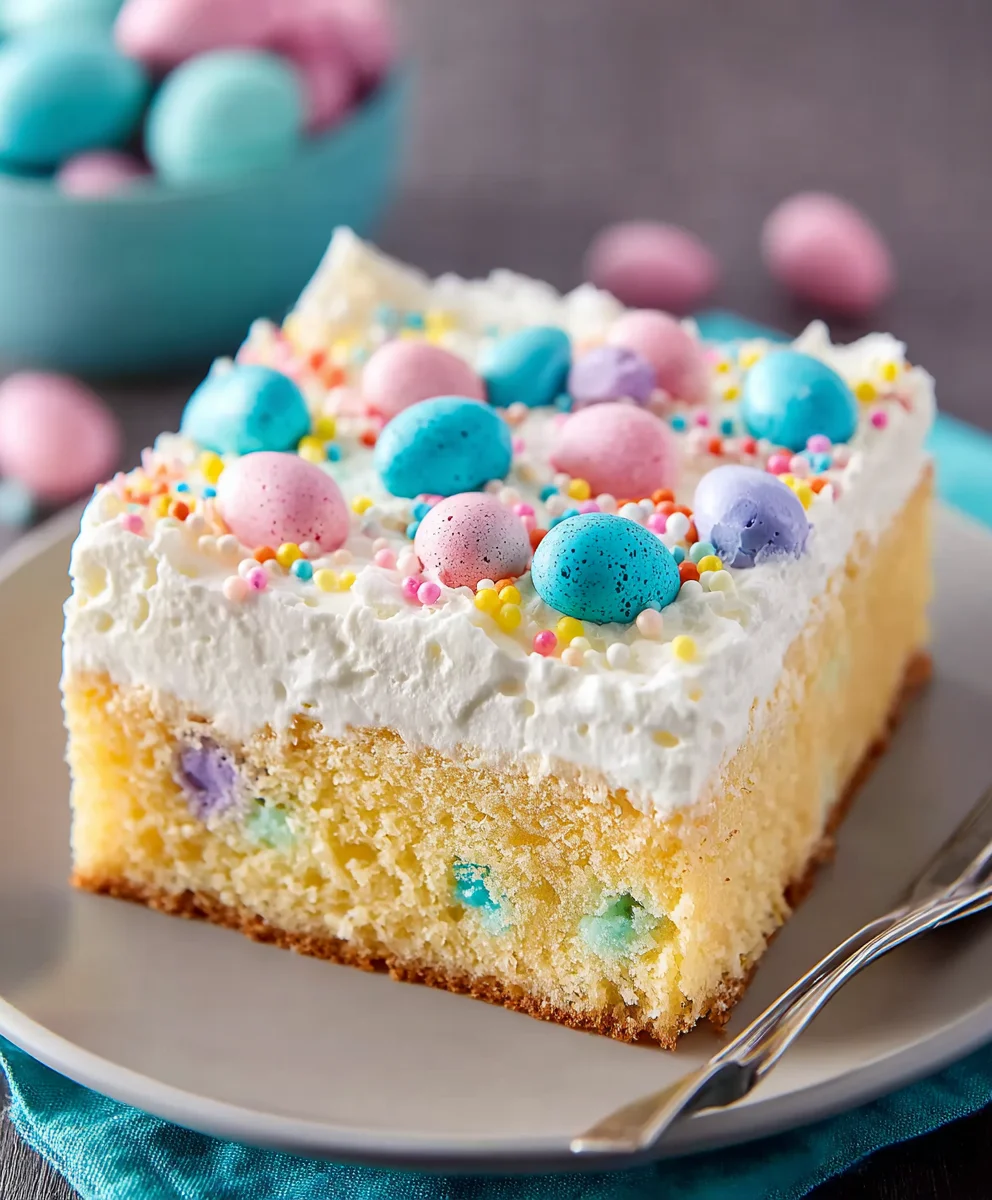
- Decorate with Easter Candies: Now for the artistic part! Arrange your chosen Easter decorations on top of the whipped topping.
- Cadbury Mini Eggs: These are a classic for an Easter Poke Cake. Scatter them generously across the cake, or arrange them in clusters or patterns. Their pastel colors and chocolate crunch are simply irresistible.
- Assorted Pastel Jelly Beans: These add a burst of color and a chewy texture. You can create specific designs, borders, or just sprinkle them randomly for a playful look.
- Peeps Marshmallows: If you’re using Peeps bunnies or chicks, place them strategically on the cake. They add height, whimsy, and a definite Easter charm. You can group them or have them “peeping” out from different spots.
- Green Coconut “Grass”: If you want to create a more elaborate scene, gently sprinkle some dyed green shredded coconut over portions of the cake to resemble grass. This creates a lovely base for your chocolate eggs and Peeps.
- Easter Sprinkles: A final dusting of festive Easter sprinkles (think tiny bunnies, carrots, or pastel jimmies) can add that extra sparkle and complete the look.
Have fun with it! There’s no right or wrong way to decorate your Easter Poke Cake. Let your imagination run wild and create a scene that brings joy.
- Final Chill (Optional but Recommended): For the best serving experience, return the decorated Easter Poke Cake to the refrigerator for at least 30 minutes to allow the whipped topping to firm up a bit and for all the flavors to meld beautifully. This also ensures the decorations stay securely in place.
- Serve and Enjoy: When you’re ready to serve, slice into generous portions and reveal the stunning, colorful pudding layers within. Each bite of this Easter Poke Cake is a delightful surprise of moist cake, creamy pudding, and sweet whipped topping, all perfectly complemented by your festive decorations. It’s truly a showstopper and a perfect treat for your Easter celebration!
Conclusion:
And there you have it, my friends! We’ve journeyed through the simple yet utterly delightful process of creating what I firmly believe will become one of your most requested desserts. This isn’t just any cake; it’s a celebration in every bite, a testament to how humble ingredients can come together to create something truly spectacular. The moist, tender cake infused with vibrant, fruity gelatin, all topped with a cloud of creamy sweetness, makes this dessert an absolute showstopper without any of the stress. It’s the kind of treat that looks incredibly impressive but secretly requires minimal effort, making you look like a seasoned pastry chef even if you’re just starting your baking adventure. The ease of preparation, combined with its undeniable crowd-pleasing power, is precisely why this recipe is a must-try for your next gathering. I can practically guarantee that once you experience the joy of making and sharing this incredible dessert, you’ll understand exactly what I mean.
What I adore most about this particular rendition of the
Easter Poke Cake is its sheer versatility. While it shines brightly during the spring festivities with its cheerful colors, its charm isn’t limited to one season. Imagine adapting the colors and flavors for other occasions!
Serving Suggestions & Creative Variations to Elevate Your Poke Cake Experience:
- Classic Chill: Always serve your poke cake well chilled. This allows the gelatin to fully set and gives the cake that signature moist, refreshing texture that is simply irresistible. A clean, sharp knife will ensure beautiful slices, revealing those delightful jello-filled pockets.
-
Whipped Topping Wonders: While a classic store-bought whipped topping is convenient and delicious, don’t hesitate to experiment!
- Homemade Whipped Cream: For an extra touch of luxury, whip up your own heavy cream with a touch of powdered sugar and vanilla extract. It’s surprisingly easy and adds an incomparable richness.
- Cream Cheese Frosting: If you prefer a denser, tangier topping, a light cream cheese frosting would be divine, especially if you used a vanilla or lemon cake base.
-
Flavor Fusion Fun:
- Jell-O Jamboree: Don’t limit yourself to just one or two Jell-O flavors! For an even more vibrant and playful cake, use three or four different colors. Think lime, cherry, and blue raspberry for a rainbow effect, or orange, grape, and lemon for a fruity fiesta.
- Cake Base Bliss: While a white or yellow cake mix is a fantastic canvas, try a chocolate cake with raspberry or cherry Jell-O for a black forest twist. A lemon cake with lemon or lime Jell-O would be wonderfully zesty and refreshing, perfect for summer. Even a funfetti cake base could add another layer of visual excitement!
- Extract Enhancements: Add a teaspoon of almond extract to your white cake batter for a subtle, sophisticated flavor, or a touch of coconut extract to the whipped topping for a tropical vibe.
-
Garnish Galore: This is where you can truly let your personality shine!
- Seasonal Sprinkles: Use pastel sprinkles for Easter, red and green for Christmas, or school colors for a graduation party.
- Fresh Fruit Fiesta: Adorn your cake with fresh berries – sliced strawberries, blueberries, raspberries – or kiwi for a pop of natural color and freshness. The fruit offers a beautiful contrast to the sweet cake.
-
Candy Carnival: For a truly festive
Easter Poke Cake, miniature chocolate eggs, jelly beans, or even a sprinkling of toasted coconut flakes can add wonderful texture and thematic flair. Chocolate shavings or a drizzle of chocolate syrup can also be a delightful addition.
- Dietary Adaptations: For those with specific dietary needs, sugar-free gelatin can be easily substituted, and many brands offer dairy-free whipped toppings that work wonderfully, allowing everyone to enjoy a slice of this joyous dessert.
I truly hope I’ve inspired you to roll up your sleeves and give this incredible recipe a try. There’s an immense satisfaction that comes from creating something so beautiful and delicious, especially when you know it’s going to bring smiles to faces around your table. I’m absolutely confident that once you experience the ease and the sheer deliciousness of this dessert, it will become a cherished part of your recipe repertoire, ready to be pulled out for celebrations big and small, or simply when you need a little burst of happiness in your day.
Please, please, don’t keep your culinary triumphs to yourself! I would absolutely love to hear about your experience with this recipe. What variations did you try? Did you use a special kind of Jell-O? How did your family and friends react? Your insights and creativity are incredibly valuable, and they inspire me just as much as I hope to inspire you. Feel free to share your photos and comments; let’s build a delicious community of enthusiastic home bakers together. Happy baking, and happy sharing!
Easter Poke Cake
Easy, moist, and festive Easter Poke Cake. A vibrant dessert with colorful pudding layers and a creamy topping, perfect for holiday celebrations.
Ingredients
-
2 ½ cups all-purpose flour
-
1 ½ cups granulated sugar
-
1 tablespoon baking powder
-
½ teaspoon salt
-
1 cup unsalted butter, softened
-
4 large eggs, room temperature
-
1 cup whole milk, room temperature
-
2 teaspoons pure vanilla extract
-
2 (3.4 oz) instant vanilla pudding mix
-
4 cups cold whole milk, divided
-
Pastel food coloring gels (pink, blue, yellow)
-
2 cups heavy cream, very cold
-
½ cup powdered sugar
-
1 teaspoon pure vanilla extract
-
Cadbury Mini Eggs
-
Assorted pastel jelly beans
-
Peeps marshmallows (bunnies or chicks)
-
Easter sprinkles (optional)
-
Shredded coconut, dyed green (optional)
Instructions
-
Step 1
Preheat oven to 350°F (175°C). Grease and flour a 9×13 inch baking dish. In a bowl, whisk flour, sugar, baking powder, and salt. In a separate large bowl, cream softened butter until light, then gradually add sugar and beat until fluffy (3-5 min). Add eggs one at a time, beating well after each. Alternately add dry ingredients and milk to the butter mixture, beginning and ending with dry, mixing until just combined. Stir in vanilla extract. Pour batter into prepared pan and bake for 30-35 minutes, or until a toothpick comes out clean. Cool completely in the pan on a wire rack for 1-2 hours. -
Step 2
In a medium bowl, whisk 2 cups cold milk with one package of instant vanilla pudding mix for 2 minutes. Divide this pudding into three small bowls and color each with a few drops of pastel food coloring (pink, blue, yellow). Stir well. Repeat with the second package of pudding mix and remaining 2 cups cold milk, creating more colored puddings. Let the colored puddings sit for 5-10 minutes to thicken slightly. -
Step 3
Once the cake is completely cooled, use the handle of a wooden spoon or a similar tool to poke 30-40 holes about ¾ of the way through the cake, spaced about 1 inch apart. Carefully pour each colored pudding into different holes, alternating colors to create a vibrant mosaic. Ensure as much pudding as possible fills each hole. -
Step 4
Place the filled cake, uncovered, into the refrigerator. Chill for at least 3-4 hours, or preferably overnight, to allow the pudding to fully set within the cake and make it incredibly moist. -
Step 5
In a very cold bowl (chilled if possible), beat very cold heavy cream until it starts to thicken. Gradually add powdered sugar and vanilla extract, beating until stiff peaks form. Remove the chilled cake from the refrigerator and gently spread the whipped topping evenly over the entire surface. Decorate with Cadbury Mini Eggs, pastel jelly beans, Peeps marshmallows, optionally dyed green shredded coconut for ‘grass,’ and Easter sprinkles. Be creative and have fun! -
Step 6
For best serving, return the decorated cake to the refrigerator for at least 30 minutes to allow the whipped topping to firm up. Slice into generous portions and serve to reveal the stunning, colorful pudding layers within. Enjoy your festive Easter Poke Cake!
Important Information
Nutrition Facts (Per Serving)
It is important to consider this information as approximate and not to use it as definitive health advice.
Allergy Information
Please check ingredients for potential allergens and consult a health professional if in doubt.


Leave a Comment