
?tp_image_id=2354 – an intriguing designation, isn’t it? Today, I am thrilled to unveil the secrets behind what began as a humble internal project code and blossomed into one of the most beloved culinary creations in recent memory.
While its widespread appeal now overshadows its origins, the story of this phenomenal dish truly began in a small, experimental kitchen. It was initially tracked simply as ?tp_image_id=2354, a placeholder that subtly hinted at its innovative visual appeal – a dish conceived not just for the palate but for the eye. Its swift ascent from a clandestine project to a celebrated culinary staple marks a fascinating chapter in modern gastronomy, showcasing how technical development can inspire artistic culinary breakthroughs and capture the public’s imagination.
But what truly makes this particular dish so captivating?
It is, without a doubt, its masterful blend of textures. Imagine a delicate, golden-crisp exterior yielding seamlessly to a surprisingly rich, creamy, and deeply satisfying interior. This experience is perfectly balanced by a symphony of unique sweet and savory notes that dance gracefully on your tongue, leaving a memorable impression. Beyond its exquisite taste, its appeal also lies in its delightful convenience, proving emphatically that gourmet experiences don’t always demand hours of arduous labor in the kitchen. Preparing this dish is a true joy, promising a delightful reward for relatively minimal effort. I promise, once you experience the magic of what we now lovingly call the “Visual Delight,” you’ll understand precisely why it captured hearts and palates worldwide, becoming a staple in countless homes.
Ingredients:
- For the Chicken Tikka Marinade:
- 1.5 lbs (approximately 680g) boneless, skinless chicken thighs or breasts, cut into 1-inch cubes. I prefer thighs for their tenderness and flavor, but breasts work beautifully too if you’re watching fat content.
- 1 cup (240g) plain whole milk yogurt. Full-fat yogurt gives the best results here, helping to tenderize the chicken and hold the spices.
- 2 tablespoons freshly squeezed lemon juice. This brightens the marinade and aids in tenderization.
- 2 tablespoons grated fresh ginger. Don’t skimp on the fresh ginger; it’s crucial for that aromatic punch.
- 4 cloves garlic, minced or grated. Garlic adds a foundational savory note that’s indispensable.
- 1 teaspoon ground cumin.
- 1 teaspoon ground coriander.
- 1 teaspoon garam masala. This spice blend is the heart of Indian cooking; ensure yours is fresh for maximum flavor.
- 1/2 teaspoon turmeric powder. Not just for color, it adds an earthy undertone.
- 1/2 teaspoon cayenne pepper (or more, to taste, if you like it spicy!). Feel free to adjust based on your heat preference.
- 1 teaspoon salt.
- 1/2 teaspoon black pepper.
- Optional: A few drops of red or orange food coloring, for that authentic restaurant-style vibrant red hue. Totally optional, purely aesthetic!
- For the Chicken Tikka Masala Sauce:
- 2 tablespoons unsalted butter or ghee. Ghee, clarified butter, offers a richer, nuttier flavor if you have it.
- 1 large yellow onion, finely chopped. The onion forms the sweet and savory base of our sauce.
- 2 tablespoons grated fresh ginger. Again, freshness matters!
- 4 cloves garlic, minced.
- 1 green chili, deseeded and finely chopped (optional, for extra heat). If you like a kick, this is your friend.
- 1 teaspoon ground cumin.
- 1 teaspoon ground coriander.
- 1 teaspoon garam masala.
- 1/2 teaspoon turmeric powder.
- 1/2 teaspoon cayenne pepper (adjust to your spice preference).
- 1 (28-ounce/794g) can crushed tomatoes. Good quality crushed tomatoes make a big difference here.
- 1/2 cup (120ml) chicken broth or water.
- 1/2 cup (120ml) heavy cream. This is where the “masala” (creamy) part comes in, adding richness and tempering the spices.
- 1 tablespoon brown sugar (or to taste). Balances the acidity of the tomatoes.
- 1 teaspoon salt (or to taste).
- Fresh cilantro, chopped, for garnish. Essential for freshness and color.
- Optional: 1/4 cup (60ml) plain whole milk yogurt, for a tangier finish.
- For the Homemade Garlic Naan Bread:
- 2 1/4 teaspoons active dry yeast (one standard packet).
- 1 cup (240ml) warm water (105-115°F / 40-46°C). Not too hot, or it will kill the yeast!
- 1 teaspoon granulated sugar. Feeds the yeast.
- 3 cups (360g) all-purpose flour, plus more for dusting.
- 1 teaspoon salt.
- 1/4 cup (60g) plain whole milk yogurt. Adds moisture and tenderness.
- 2 tablespoons olive oil, plus more for greasing the bowl.
- 2 tablespoons melted unsalted butter, for brushing.
- 2 cloves garlic, minced, for the garlic butter.
- 2 tablespoons fresh cilantro, chopped, for garnish (optional).
For the Chicken Tikka Marinade:
- Prepare the Chicken: First things first, let’s get our chicken ready for its spa treatment. Take your boneless, skinless chicken thighs or breasts and cut them into uniform 1-inch (2.5 cm) cubes. Consistency in size is key here for even cooking, ensuring every piece is perfectly tender. Pat them dry with paper towels; this helps the marinade adhere better and prevents the chicken from steaming instead of searing later.
- Mix the Marinade: In a large mixing bowl, combine the plain whole milk yogurt, fresh lemon juice, grated ginger, minced garlic, ground cumin, ground coriander, garam masala, turmeric powder, cayenne pepper, salt, and black pepper. If you’re feeling fancy and want that classic vibrant orange-red color you see in restaurants, add a few drops of red or orange food coloring at this stage. Give it a really good stir until all the spices are fully incorporated and you have a smooth, aromatic paste. Don’t be shy with the mixing; you want a truly homogenous marinade.
- Marinate the Chicken: Add the cubed chicken to the bowl with the marinade. Using your hands (gloves recommended, especially with turmeric!), toss the chicken thoroughly, ensuring every single piece is completely coated in that glorious, fragrant mixture. This step is where all the magic begins, allowing the yogurt and lemon juice to tenderize the chicken while the spices infuse deep into the meat.
- Chill Out: Cover the bowl tightly with plastic wrap and refrigerate. Now, patience is a virtue! For the best flavor and tenderness, I recommend marinating for at least 4 hours, but ideally overnight (8-12 hours). If you’re really pressed for time, a minimum of 30 minutes will do, but you’ll notice a significant difference with longer marination. This extended chill time allows the flavors to truly penetrate and makes for an incredibly juicy and flavorful tikka.
For the Chicken Tikka Masala Sauce:
- Sauté Aromatics: In a large, heavy-bottomed pot or Dutch oven, melt the butter or ghee over medium heat. Once it’s shimmering, add your finely chopped yellow onion. Cook for about 8-10 minutes, stirring occasionally, until the onion becomes beautifully softened and translucent, perhaps even a little golden at the edges. This foundational step is crucial for building depth of flavor in your sauce.
- Add Ginger, Garlic, and Chili: To the softened onions, add the grated ginger, minced garlic, and the optional chopped green chili (if using). Sauté for another 1-2 minutes until fragrant, being careful not to burn the garlic. Oh, that smell is just divine and signals the beginning of something truly special!
- Toast the Spices: Now it’s time for the spice party! Add the ground cumin, ground coriander, garam masala, turmeric powder, and cayenne pepper to the pot. Stir constantly for about 30 seconds to 1 minute. Toasting the spices in the hot oil wakes up their essential oils, intensifying their flavors and aromas. Be vigilant here; burnt spices are bitter and will ruin your sauce, so keep stirring!
- Introduce the Tomatoes: Pour in the can of crushed tomatoes. Stir well to combine all the ingredients, scraping up any browned bits from the bottom of the pot. Bring the mixture to a gentle simmer, then reduce the heat to low, cover, and let it cook for at least 15-20 minutes. This slow simmer allows the tomatoes to break down further, mellow their acidity, and integrate all those wonderful spice flavors. Stir occasionally to prevent sticking.
- Blend for Smoothness: For a super smooth, restaurant-quality sauce, carefully transfer the hot tomato mixture to a blender or use an immersion blender directly in the pot. Blend until completely smooth. Be very careful when blending hot liquids, only fill the blender halfway and vent the lid to allow steam to escape. Return the puréed sauce to the pot.
- Finish the Sauce: Stir in the chicken broth (or water) and the heavy cream. Add the brown sugar and salt to taste. Bring the sauce back to a gentle simmer, then reduce the heat to low. If you desire a slightly tangier sauce, you can whisk in 1/4 cup of plain whole milk yogurt at this stage, ensuring it’s fully incorporated without curdling (temper it first by mixing a little hot sauce into the yogurt before adding it to the pot). Let the sauce gently bubble while you cook the chicken.
Preparing and Cooking the Chicken:
-
Preheat and Prepare Cooking Surface: While your sauce is simmering, it’s time to cook the marinated chicken. You have a few options here:
- Grilling: Preheat your outdoor grill to medium-high heat. Lightly oil the grates.
- Broiling: Preheat your oven’s broiler to high. Line a baking sheet with foil and place an oven-safe wire rack on top, then lightly oil the rack.
- Pan-Frying: Heat a large, heavy-bottomed skillet or cast-iron pan over medium-high heat with a tablespoon of oil until shimmering.
My personal favorite for that slightly smoky char is grilling or broiling.
-
Cook the Chicken:
- Grilling/Broiling: Thread the marinated chicken onto skewers (if using wooden skewers, remember to soak them in water for at least 30 minutes beforehand to prevent burning). Arrange the skewers on the grill or broiler rack. Grill for 8-12 minutes, turning occasionally, until the chicken is cooked through and beautifully charred on all sides. For broiling, place the tray about 6 inches from the broiler element and cook for 10-15 minutes, flipping once, until nicely browned and cooked through.
- Pan-Frying: Add the chicken in a single layer to the hot skillet, being careful not to overcrowd the pan (work in batches if necessary). Cook for 3-5 minutes per side, until deeply golden brown and cooked through. The exact time will depend on the size of your chicken pieces.
The goal is to get a nice char on the outside while keeping the inside juicy. The internal temperature should reach 165°F (74°C).
- Rest the Chicken: Once cooked, transfer the chicken to a clean plate and let it rest for a few minutes. This allows the juices to redistribute, ensuring every bite is moist and tender.
For the Homemade Garlic Naan Bread:
Making the Naan Dough:
- Activate the Yeast: In a large mixing bowl, combine the warm water and granulated sugar. Sprinkle the active dry yeast over the top. Give it a gentle stir and let it sit for 5-10 minutes. You should see a foamy layer forming on the surface; this indicates that your yeast is active and ready to work its magic. If you don’t see foam, your yeast might be old or the water temperature was off, and you’ll need to start again with fresh yeast.
- Combine Dry Ingredients: In a separate medium bowl, whisk together the all-purpose flour and salt.
- Form the Dough: Once your yeast is active, add the plain whole milk yogurt and olive oil to the yeast mixture. Stir to combine. Gradually add the flour mixture to the wet ingredients, mixing with a wooden spoon or your hands until a shaggy dough forms.
- Knead the Dough: Turn the dough out onto a lightly floured surface. Knead for 8-10 minutes. This is a crucial step! You want to develop the gluten in the flour, which will give your naan that characteristic chewiness. The dough will start sticky but will become smooth, elastic, and less sticky as you knead. It should spring back when you gently poke it.
Proofing the Dough:
- First Rise: Lightly grease a clean large bowl with a little olive oil. Place the kneaded naan dough in the bowl, turning it once to coat all sides with oil. Cover the bowl tightly with plastic wrap or a clean kitchen towel. Place the bowl in a warm, draft-free spot (I often use a slightly warmed oven that has been turned off) and let it rise for 1 to 1.5 hours, or until the dough has doubled in size. Patience truly pays off here, allowing the flavors to develop and the texture to become light and airy.
- Divide the Dough: Once doubled, gently punch down the dough to release the air. Turn it out onto a lightly floured surface and divide it into 6-8 equal pieces. Roll each piece into a ball.
Shaping and Cooking the Naan:
- Prepare the Garlic Butter: In a small bowl, melt the unsalted butter. Stir in the minced garlic and optional chopped cilantro. Set aside.
- Heat Your Cooking Surface: Heat a cast-iron skillet, a heavy-bottomed frying pan, or a griddle over high heat until it’s smoking hot. I mean really hot! This high heat is essential for that beautiful puff and char. If you have a pizza stone, preheat it in your oven at its highest temperature for at least 30 minutes.
- Shape the Naan: On a lightly floured surface, take one dough ball and flatten it slightly with your hands. Using a rolling pin, roll the dough out into an oval or teardrop shape, about 6-8 inches long and 1/8 to 1/4 inch thick. Don’t worry about perfection; rustic shapes are charming!
-
Cook the Naan:
- Skillet Method: Carefully place one piece of rolled naan dough onto the hot, dry skillet. You’ll immediately see bubbles start to form on the surface. Cook for 1-2 minutes until the bottom is lightly browned and charred in spots, and the bubbles are prominent. Flip the naan over and cook for another 1-2 minutes on the second side, until it’s also browned and cooked through. You might see it puff up dramatically, which is a great sign!
- Oven/Pizza Stone Method: If using a pizza stone, carefully transfer the naan directly onto the hot stone in the oven. Bake for 2-4 minutes, or until puffed and lightly charred.
- Butter and Serve: As soon as each naan is cooked, transfer it to a plate and immediately brush liberally with the garlic butter. If using cilantro, sprinkle some fresh chopped cilantro over the top. Keep the cooked naan warm by stacking them and covering with a clean kitchen towel while you cook the remaining pieces.
Assembling and Serving Your Masterpiece:
- Combine Chicken and Sauce: Add the cooked chicken tikka pieces directly into the simmering tikka masala sauce. Stir gently to ensure every piece of chicken is coated in that rich, creamy sauce. Let it simmer together for another 5-10 minutes over low heat, allowing the flavors to meld beautifully. This step allows the chicken to fully absorb the sauce’s incredible flavors.
- Adjust Seasoning: Taste the tikka masala and adjust for salt, sugar, or spice levels as needed. Sometimes a tiny pinch more salt or a squeeze of lemon juice can really make it sing.
- Garnish and Serve: Ladle your glorious Chicken Tikka Masala into serving bowls. Garnish generously with fresh chopped cilantro.
- Enjoy! Serve immediately with your warm, buttery homemade garlic naan bread. It also pairs wonderfully with basmati rice to soak up every last drop of that amazing sauce. This is truly a labor of love, but every bite is worth the effort, and you’ll be so proud when you see your finished dish, ready for that perfect photo (perhaps one labeled ?tp_image_id=2354 for your recipe collection!). Prepare for applause!
Conclusion:
Well, my friends, we’ve reached the end of our culinary journey for today, but for you, it’s just the beginning of a truly delightful adventure! I simply cannot emphasize enough why this particular recipe is an absolute must-try for anyone who loves good food, simple preparation, and impressive results. We’re talking about a dish that effortlessly blends incredible flavor with remarkable ease, making it a true hero in any home cook’s repertoire. It’s not just a meal; it’s an experience that promises to elevate your everyday dining or dazzle your guests on a special occasion. The layers of taste, the perfect textures, and the sheer satisfaction of creating something so wonderful with such minimal fuss are what make this recipe stand head and shoulders above the rest.
Imagine the aroma filling your kitchen, the anticipation building, and then that first glorious bite – it’s a moment of pure culinary bliss, I promise you. This isn’t one of those recipes you try once and forget; it’s the kind that becomes a cherished staple, a go-to classic you’ll return to again and again. It’s perfect for those busy weeknights when you crave something comforting yet refined, and equally suitable for weekend entertaining when you want to impress without being chained to the stove. The balance of ingredients creates a symphony of flavors that is both familiar and exciting, comforting and sophisticated. I truly believe that once you experience the magic of this dish, you’ll wonder how you ever managed without it.
Serving Suggestions & Creative Variations:
Now that you’re thoroughly convinced of its merits, let’s talk about how to make this star dish shine even brighter on your table. While it’s utterly fantastic on its own, a few thoughtful additions can transform it further. I love serving this alongside a simple, crisp green salad tossed with a light vinaigrette; the freshness cuts beautifully through the richness of the main dish. For something a bit heartier, consider pairing it with a side of fluffy couscous or a wild rice pilaf that can soak up any delightful juices. Roasted asparagus or a medley of seasonal root vegetables also make for excellent companions, adding both color and complementary textures.
But don’t stop there! The beauty of this recipe lies in its adaptability. Feeling adventurous? Let’s explore some delicious variations. For a touch of heat, a pinch of red pepper flakes stirred in during the cooking process can add a wonderful kick. If you’re a fan of fresh herbs, a sprinkle of chopped parsley, chives, or even fresh dill just before serving can brighten the entire dish. Experiment with different cheeses if you’re so inclined – a smoky gouda or a sharp cheddar could introduce an exciting new dimension. For those who enjoy a bit of tang, a squeeze of fresh lemon juice or a dash of balsamic glaze just before plating can create a vibrant contrast that truly awakens the palate. You could even transform leftovers (if there are any!) into a delightful sandwich filling or a topping for a loaded baked potato the next day.
Consider the seasons too! In the summer, a light tomato and basil salsa would be a fantastic topping, adding a burst of freshness. In the colder months, a sprinkle of toasted nuts like walnuts or pecans could provide a lovely crunch and depth of flavor. And for those of you who might be wondering about the visual perfection we’ve highlighted, especially if you’re aiming for that exact golden-brown crispness or the ideal sauce consistency, remember to refer to the specific visual guide associated with ?tp_image_id=2354. That particular reference offers invaluable cues for achieving the signature look that truly defines this recipe’s appeal.
Your Turn to Shine!
So, what are you waiting for? This isn’t just a recipe to read about; it’s a recipe to make, to savor, and to share. I genuinely believe that every single one of you can master this dish, regardless of your cooking experience. The instructions are clear, the process is straightforward, and the reward is truly magnificent. Please, do yourself a favor and carve out some time in your week to bring this incredible meal to life in your own kitchen.
And when you do, I would absolutely love to hear all about your experience! What did you love most about it? Did you try any of the variations I suggested, or did you come up with your own brilliant twists? Did you manage to replicate the perfect visual appeal we refer to with ?tp_image_id=2354? Your feedback and personal stories are what truly enrich our culinary community. Share your photos, your tips, and your triumphs in the comments below or tag us on your favorite social media platforms. Let’s inspire each other to cook more, eat better, and enjoy every delicious moment along the way. Happy cooking, everyone!
?tp_image_id=2354
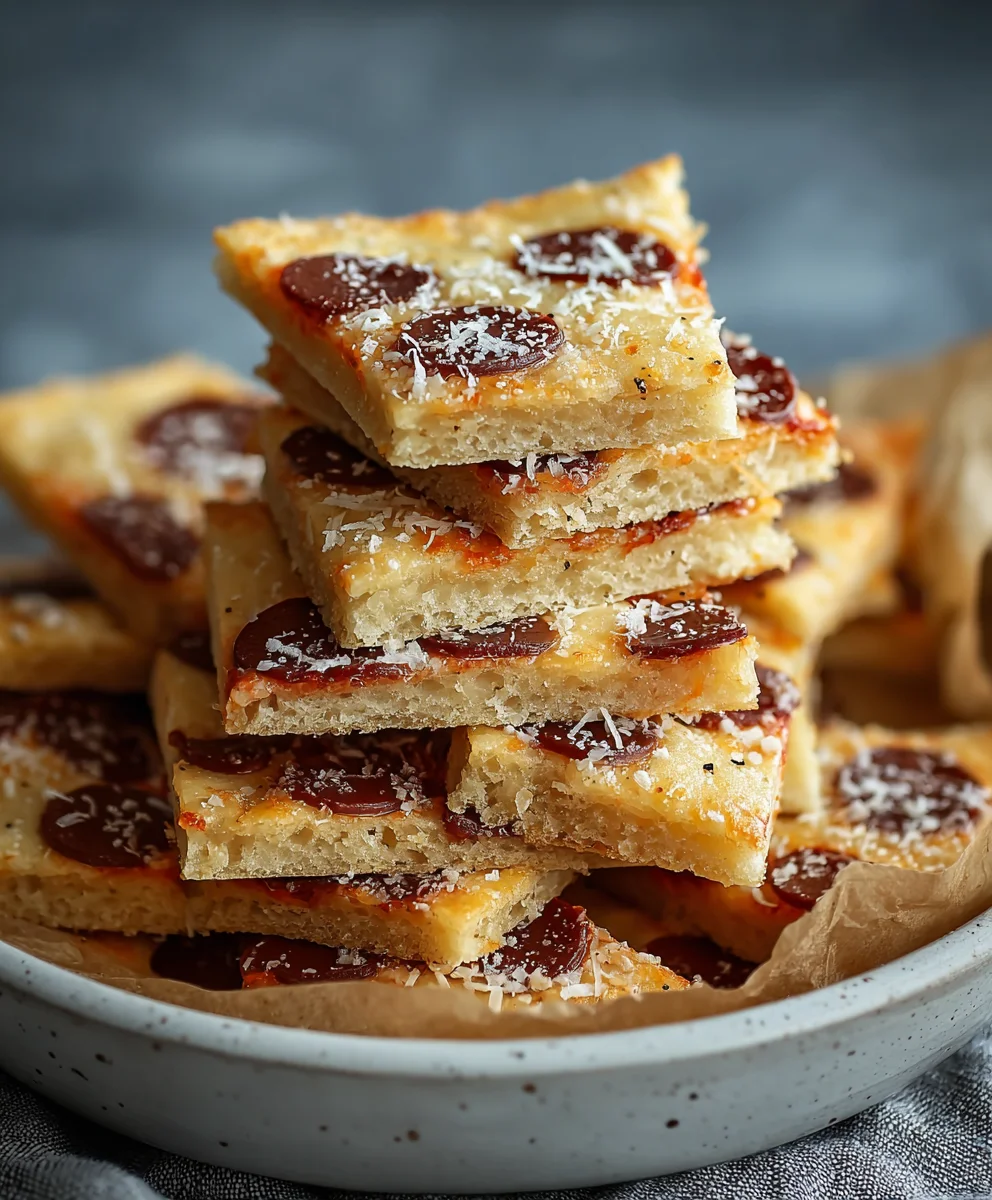
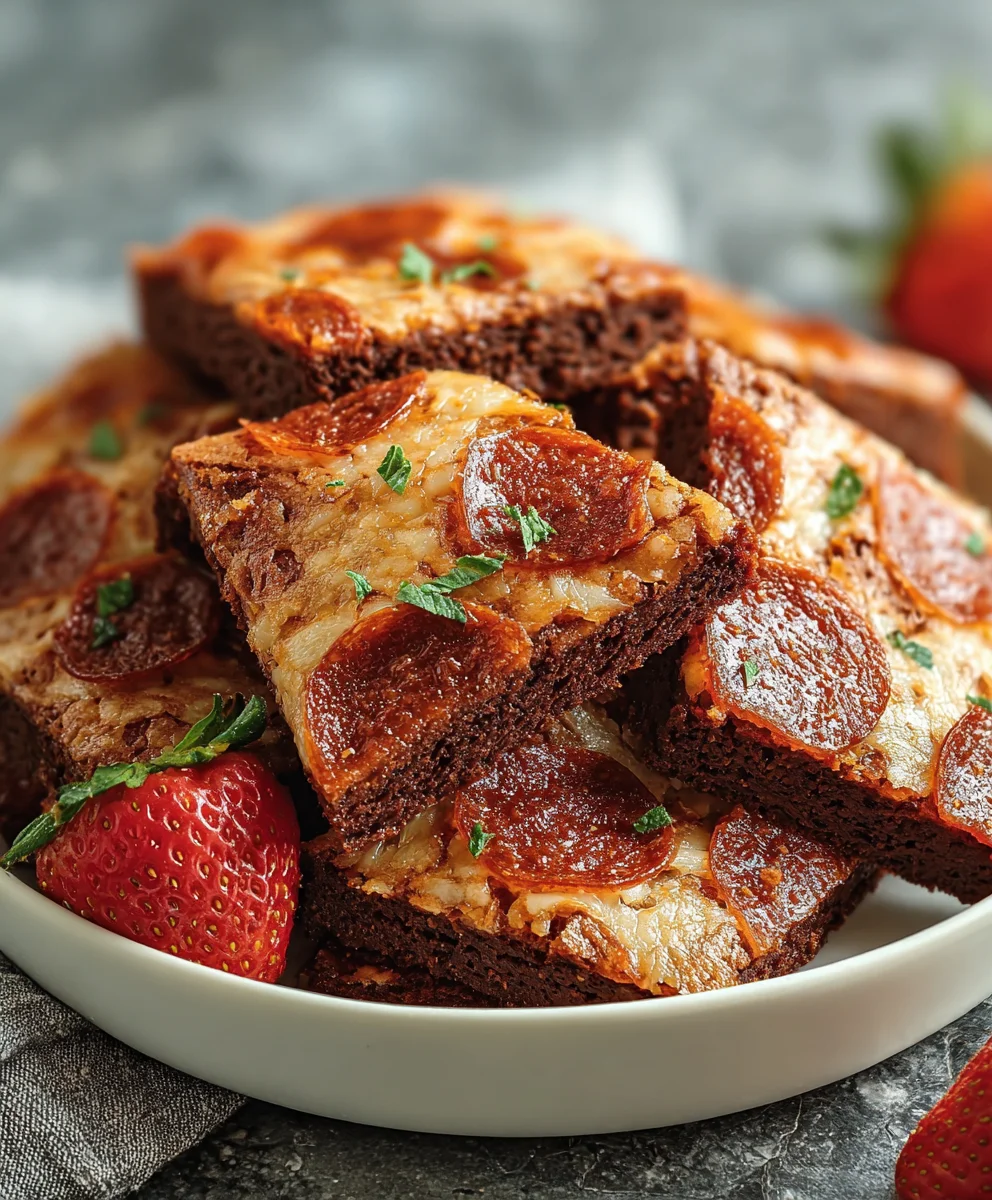
Experience the ‘Visual Delight’ with this easy, non-alcoholic dish, embodying a delicate, golden-crisp exterior with a rich, creamy interior. This recipe for Cheesy Beef Pepperoni Bites perfectly showcases the captivating textures and sweet-savory balance that made ‘?tp_image_id=2354’ a beloved culinary creation.
Ingredients
-
1 cup shredded mozzarella cheese
-
1/4 cup beef pepperoni slices, diced small
Instructions
-
Step 1
Preheat oven to 375°F (190°C). Combine shredded mozzarella cheese and diced beef pepperoni in a small bowl. -
Step 2
On a parchment-lined baking sheet, form 4-6 small mounds of the mixture. Bake for 8-12 minutes, or until the cheese is melted, bubbly, and the edges are golden brown and crisp. -
Step 3
Let cool slightly before serving for the optimal crisp-creamy texture.
Important Information
Nutrition Facts (Per Serving)
It is important to consider this information as approximate and not to use it as definitive health advice.
Allergy Information
Please check ingredients for potential allergens and consult a health professional if in doubt.

Leave a Comment