

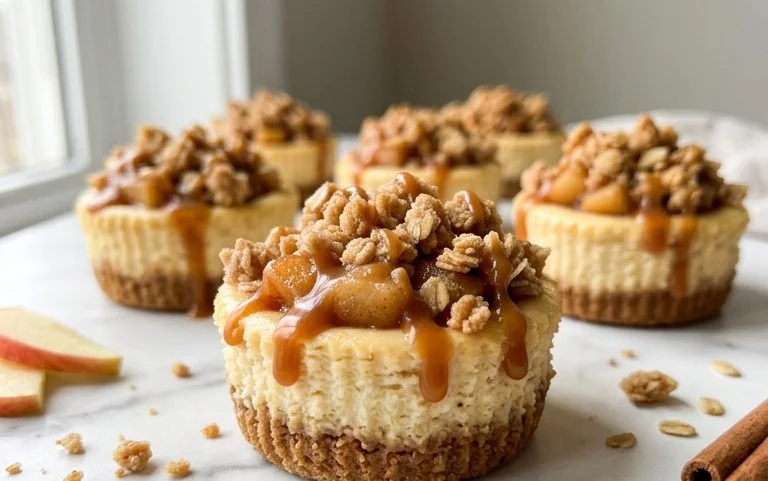
These Apple Crisp Mini Cheesecakes bring together the comforting flavors of autumn with a fun, individual-sized dessert. Imagine a perfectly creamy cheesecake filling, nestled inside a buttery graham cracker crust, all crowned with that signature crunchy, spiced apple crumble topping. I love making these because they feel special enough for guests, but are simple enough for a weeknight treat. The combination of textures is what makes them so good: the slight tang of the cream cheese, the sweet-tart apples, and the satisfying crisp of the topping.
What makes them special?
The beauty of these mini cheesecakes is their adaptability. You can adjust the spices in the apple filling and the topping to your liking. Plus, serving them in mini form means everyone gets their own perfect portion, making dessert distribution a breeze. They are a delightful way to enjoy the classic apple crisp flavors in a sophisticated, bite-sized package. Making Apple Crisp Mini Cheesecakes is a rewarding baking project that yields impressive results with manageable steps.
Ingredients:
- 3/4 cup graham cracker crumbs
- 1 and 1/2 Tablespoons sugar
- 1/2 teaspoon cinnamon
- 3 Tablespoons unsalted butter-melted
- 1/3 cup all-purpose flour
- 1/3 cup light brown sugar
- 1/3 cup quick-cooking oats
- 3/4 teaspoon cinnamon
- 1/8 teaspoon nutmeg
- 2 and 1/2 Tablespoons unsalted butter-melted
- 2 medium-small apples-peeled and chopped finely
- 2 teaspoons freshly squeezed lemon juice
- 1 and 1/2 teaspoons cinnamon
- 1/4 teaspoon nutmeg
- 2 Tablespoons light brown sugar
Apple Crumble Topping
This is where the magic begins, creating that irresistible crunchy contrast to the creamy cheesecake. First, in a small bowl, combine the graham cracker crumbs, 1 and 1/2 Tablespoons of sugar, and 1/2 teaspoon of cinnamon. This simple mixture forms the base of our delightful topping. Give it a good stir with a fork to ensure everything is evenly distributed. Next, pour in the 3 Tablespoons of melted unsalted butter. Continue to stir until the crumbs are moistened and clump together. It should have the texture of damp sand. This ensures it will hold its shape when baked. You can press this mixture directly into your muffin tin cups or a mini cheesecake pan, creating a firm base for the cheesecake filling. Don’t pack it down too aggressively, just a gentle press is enough.
The Oat Streusel Layer
Now, let’s build on that crunchy foundation. In a separate medium bowl, whisk together the all-purpose flour, 1/3 cup of light brown sugar, the quick-cooking oats, 3/4 teaspoon of cinnamon, and 1/8 teaspoon of nutmeg. Make sure these dry ingredients are thoroughly combined. You want the spices and sugars to be evenly distributed throughout the flour and oats for consistent flavor in every bite. Then, add the 2 and 1/2 Tablespoons of melted unsalted butter to this dry mixture. Use a fork or your fingertips to blend the butter into the dry ingredients until the mixture forms coarse crumbs. This is your streusel topping. It will be a bit clumpy, and that’s exactly what you want. This streusel will be sprinkled over the cheesecake filling before baking, adding another layer of texture and flavor.
Preparing the Apples
For the apple component, take your 2 medium-small apples. It’s important to peel them first, then chop them into very small, uniform pieces. Aim for pieces that are about 1/4 inch in size. Smaller pieces will cook more quickly and evenly within the cheesecake. Toss the chopped apples with the 2 teaspoons of freshly squeezed lemon juice. The lemon juice not only adds a bright, fresh flavor but also helps prevent the apples from browning, keeping them looking appetizing. In a small bowl, mix together the 1 and 1/2 teaspoons of cinnamon, 1/4 teaspoon of nutmeg, and 2 Tablespoons of light brown sugar. Add this spiced sugar mixture to the chopped apples and toss everything together gently. This coating will infuse the apples with a warm, comforting spice.
Assembling the Mini Cheesecakes
This is where all our prepared components come together. If you’re using a muffin tin, line it with paper liners or grease it well to prevent sticking. If you’re using a mini cheesecake pan, ensure it’s also greased or lined. First, press the graham cracker crumb mixture evenly into the bottom of each muffin cup or mini cheesecake mold. This forms your crust. Next, carefully spoon the cheesecake filling into each prepared crust. You can make your own cheesecake filling from cream cheese, sugar, eggs, and vanilla, or use a store-bought cheesecake mix for a quicker option. Fill each cup about two-thirds of the way full. Then, gently spoon the spiced apple mixture over the cheesecake filling, distributing it as evenly as possible. Finally, sprinkle the oat streusel topping generously over the apples. Ensure you get a good amount of streusel on each mini cheesecake for that classic crisp topping.
Baking and Cooling
Preheat your oven to 350 degrees Fahrenheit (175 degrees Celsius). Carefully place your assembled mini cheesecakes on a baking sheet. This makes it easier to transfer them into and out of the oven. Bake for 18 to 22 minutes, or until the edges are set and the centers are just slightly jiggly. The streusel topping should be golden brown and fragrant. Overbaking can lead to dry cheesecakes, so keep a close eye on them. Once baked, remove the cheesecakes from the oven and let them cool in the muffin tin or pan on a wire rack for about 10 to 15 minutes. This initial cooling period allows them to set up properly. After that, you can gently remove them from the tin and place them directly on the wire rack to cool completely. For the best texture and flavor, it’s recommended to chill the mini cheesecakes in the refrigerator for at least 2 hours, or even overnight, before serving. This allows the cheesecake to firm up and the flavors to meld. Serve them chilled with a dollop of whipped cream or a drizzle of caramel sauce, if desired.
Conclusion:
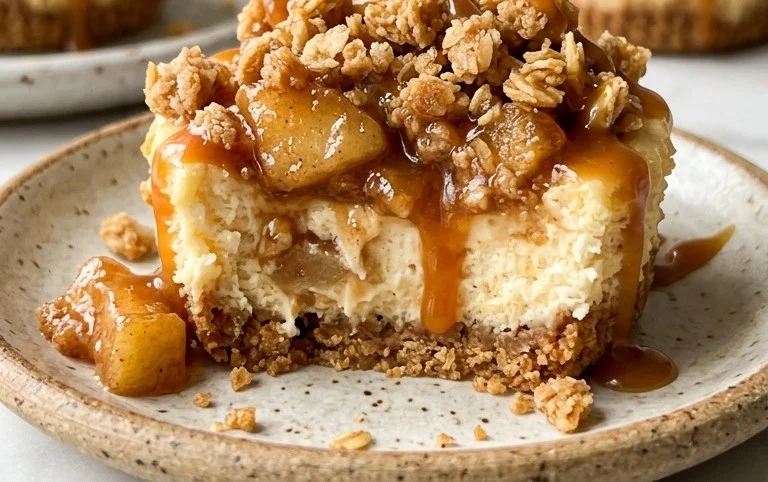
These Apple Crisp Mini Cheesecakes are a delightful way to enjoy fall flavors in a convenient, individual portion. The contrast between the creamy cheesecake, the crisp apple filling, and the buttery graham cracker base makes every bite a treat. They’re surprisingly simple to assemble, proving you don’t need a full-sized springform pan to create an impressive dessert. Whether you’re serving them at a holiday gathering, a potluck, or just want a special dessert for your family, these mini cheesecakes are sure to be a hit. Don’t be afraid to customize them further – a drizzle of caramel sauce or a dollop of whipped cream takes them over the top.
Tips and Variations:
For an extra layer of flavor, add a pinch of ground ginger to the oat streusel. You can also swap the apples for pears or a mix of both. If you don’t have mini cheesecake pans, muffin tins lined with paper liners work well, though the sides won’t be as straight. For a dairy-free option, use dairy-free cream cheese and butter substitutes, though the texture might vary slightly.
FAQs:
Can I make the apple crumble topping ahead of time?
Yes, you can prepare the apple crumble topping ingredients and store them separately in an airtight container in the refrigerator for up to 2 days. Combine them just before assembling to ensure maximum crispness.
How do I prevent the cheesecakes from cracking?
While mini cheesecakes are less prone to cracking than full-sized ones, a water bath can still help ensure a smoother texture. Place your muffin tin or mini cheesecake pan in a larger baking pan and add about an inch of hot water to the larger pan before baking.
How long do Apple Crisp Mini Cheesecakes last?
Stored in an airtight container in the refrigerator, these mini cheesecakes will stay fresh for up to 3-4 days. They are best enjoyed within the first couple of days for optimal texture.
Apple Crisp Mini Cheesecakes
Delightful mini cheesecakes with a crunchy apple crisp topping, perfect for a sweet treat.
Ingredients
-
3/4 cup graham cracker crumbs
-
1 and 1/2 Tablespoons sugar
-
1/2 teaspoon cinnamon
-
3 Tablespoons unsalted butter-melted
-
1/3 cup all-purpose flour
-
1/3 cup light brown sugar
-
1/3 cup quick-cooking oats
-
3/4 teaspoon cinnamon
-
1/8 teaspoon nutmeg
-
2 and 1/2 Tablespoons unsalted butter-melted
-
2 medium-small apples-peeled and chopped finely
-
2 teaspoons freshly squeezed lemon juice
-
1 and 1/2 teaspoons cinnamon
-
1/4 teaspoon nutmeg
-
2 Tablespoons light brown sugar
Instructions
-
Step 1
Preheat oven to 350°F (175°C). Line a 12-cup muffin tin with liners. -
Step 2
In a small bowl, combine graham cracker crumbs, 1 and 1/2 Tablespoons sugar, and 1/2 teaspoon cinnamon. Stir in 3 Tablespoons melted butter until crumbs are moistened. Press mixture evenly into the bottom of each muffin liner. -
Step 3
In another small bowl, combine 1/3 cup all-purpose flour, 1/3 cup light brown sugar, 1/3 cup quick-cooking oats, 3/4 teaspoon cinnamon, and 1/8 teaspoon nutmeg. Stir in 2 and 1/2 Tablespoons melted butter until well combined. -
Step 4
In a separate bowl, toss the chopped apples with lemon juice, 1 and 1/2 teaspoons cinnamon, 1/4 teaspoon nutmeg, and 2 Tablespoons light brown sugar. Set aside. -
Step 5
Divide the cream cheese filling evenly among the muffin cups, on top of the graham cracker crust. -
Step 6
Spoon the apple crisp topping evenly over the cream cheese filling in each muffin cup. -
Step 7
Bake for 20-25 minutes, or until the edges are set and the topping is golden brown. -
Step 8
Let cool completely in the muffin tin before removing. Chill for at least 1 hour before serving.
Important Information
Nutrition Facts (Per Serving)
It is important to consider this information as approximate and not to use it as definitive health advice.
Allergy Information
Please check ingredients for potential allergens and consult a health professional if in doubt.



Leave a Comment