
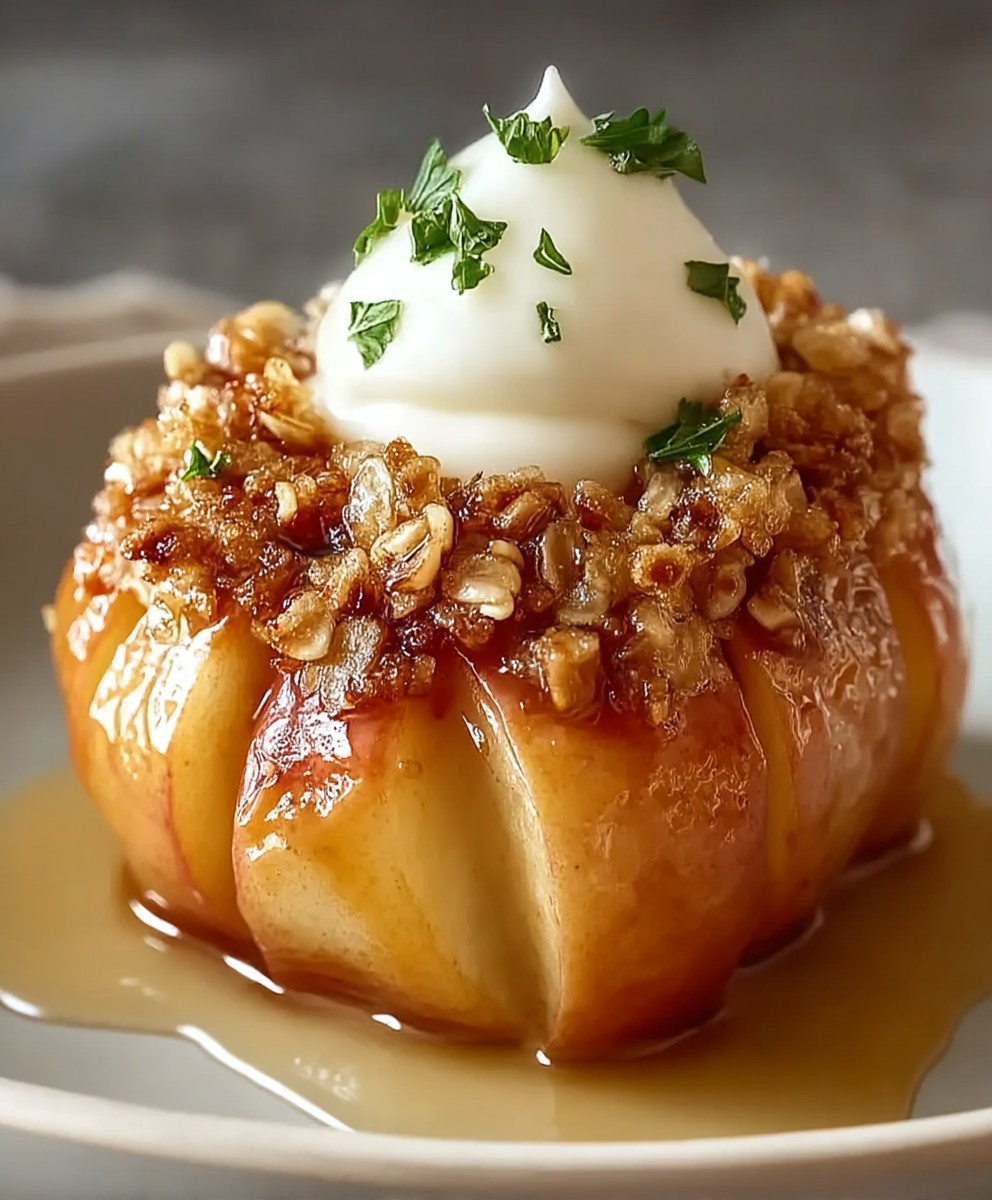
Air Fryer Baked Apples: Craving a warm, comforting dessert that’s both incredibly easy and surprisingly healthy? Look no further! Imagine biting into a tender, cinnamon-spiced apple, its sweetness intensified by the gentle heat of the air fryer. This isn’t just a recipe; it’s a hug in a bowl, perfect for chilly evenings or a quick treat any time of day.
Baked apples, in their various forms, have been a beloved dessert across cultures for centuries. From simple farmhouse kitchens to elegant Victorian tea parties, the humble baked apple has always held a special place. The beauty lies in its simplicity taking a readily available fruit and transforming it into something truly special with just a few basic ingredients.
What makes air fryer baked apples so irresistible? It’s the perfect combination of textures and flavors. The apples become wonderfully soft and yielding, while the filling, often a mix of oats, nuts, and spices, adds a delightful crunch and warmth. And let’s not forget the convenience! The air fryer cooks these beauties in a fraction of the time compared to a traditional oven, making it a weeknight-friendly dessert option. Plus, they’re naturally gluten-free and can easily be adapted to be vegan, making them a crowd-pleasing choice for everyone. Get ready to experience the magic of air fryer baked apples you won’t be disappointed!
Ingredients:
- 4 medium-sized apples (Granny Smith, Honeycrisp, or Fuji work well)
- 2 tablespoons butter, unsalted
- 1/4 cup brown sugar, packed
- 1/4 cup rolled oats (old-fashioned)
- 1/4 cup chopped pecans or walnuts (optional)
- 1 teaspoon ground cinnamon
- 1/4 teaspoon ground nutmeg
- 2 tablespoons water or apple juice
- Pinch of salt
- Optional toppings: vanilla ice cream, caramel sauce, whipped cream
Preparing the Apples:
Okay, let’s get started! First things first, we need to prep our apples. This is a super important step, so pay close attention.
- Wash and Dry: Thoroughly wash the apples under cool running water to remove any dirt or residue. Then, pat them completely dry with a clean paper towel. This helps the butter and sugar mixture stick better.
- Core the Apples: Now, carefully core each apple using an apple corer. If you don’t have an apple corer, you can use a sharp paring knife. Cut around the core in a circular motion, being careful not to cut all the way through the bottom of the apple. You want to create a well in the center for our delicious filling. Aim for a diameter of about 1 inch for the core.
- Score the Apples (Optional): This is totally optional, but I like to score the skin of the apples around the circumference. This helps prevent the apples from bursting during the air frying process and also allows the heat to penetrate more evenly. Use a sharp knife to make shallow cuts around the apple, about 1/2 inch apart. Don’t cut too deep, just through the skin.
Making the Filling:
This is where the magic happens! The filling is what makes these air fryer baked apples so incredibly delicious. It’s sweet, nutty, and perfectly spiced.
- Melt the Butter: In a small microwave-safe bowl, melt the butter. You can do this in the microwave in 30-second intervals, stirring in between, until it’s completely melted. Alternatively, you can melt the butter in a small saucepan over low heat.
- Combine the Ingredients: In a medium bowl, combine the melted butter, brown sugar, rolled oats, chopped pecans or walnuts (if using), cinnamon, nutmeg, and a pinch of salt. Mix everything together until it’s well combined and forms a crumbly mixture. The brown sugar should be evenly distributed throughout the oats and nuts.
- Taste and Adjust: Give the filling a quick taste. If you prefer a sweeter filling, you can add a little more brown sugar. If you want more spice, add a pinch more cinnamon or nutmeg. This is your chance to customize the filling to your liking!
Stuffing the Apples:
Time to get those apples ready for their air fryer adventure! We’re going to pack them with all that yummy filling we just made.
- Fill the Cores: Using a spoon, carefully fill the cored centers of each apple with the oat and brown sugar mixture. Pack the filling in tightly, pressing down gently to make sure it’s secure. You want to fill the cores completely, but don’t overfill them so that the filling spills out during cooking.
- Top with Remaining Filling: If you have any filling left over, sprinkle it over the tops of the apples. This will create a nice, caramelized crust on top.
- Add Water or Apple Juice: Pour about 1/2 tablespoon of water or apple juice into the bottom of each cored apple. This will help to keep the apples moist and prevent them from drying out during air frying.
Air Frying the Apples:
Now for the main event! We’re going to use the air fryer to cook these apples to perfection. The air fryer will give them a slightly crispy exterior and a soft, tender interior.
- Preheat the Air Fryer (Optional): Some air fryers recommend preheating, while others don’t. Check your air fryer’s manual to see if preheating is necessary. If so, preheat it to 350°F (175°C) for about 5 minutes.
- Place Apples in Air Fryer Basket: Carefully place the stuffed apples in the air fryer basket in a single layer. Make sure the apples are not touching each other, as this will ensure even cooking. If your air fryer basket is small, you may need to cook the apples in batches.
- Air Fry: Air fry the apples at 350°F (175°C) for 15-20 minutes, or until the apples are tender and the filling is golden brown and bubbly. The exact cooking time will depend on the size and variety of your apples, as well as your air fryer.
- Check for Doneness: To check if the apples are done, insert a fork or knife into the flesh of the apple. It should be easily pierced with little resistance. The filling should also be bubbling and slightly caramelized.
- Add More Time if Needed: If the apples are not tender enough after 20 minutes, continue air frying for another 5-10 minutes, checking for doneness every few minutes.
Serving and Enjoying:
The moment we’ve all been waiting for! It’s time to serve up these delicious air fryer baked apples and enjoy the fruits (pun intended!) of our labor.
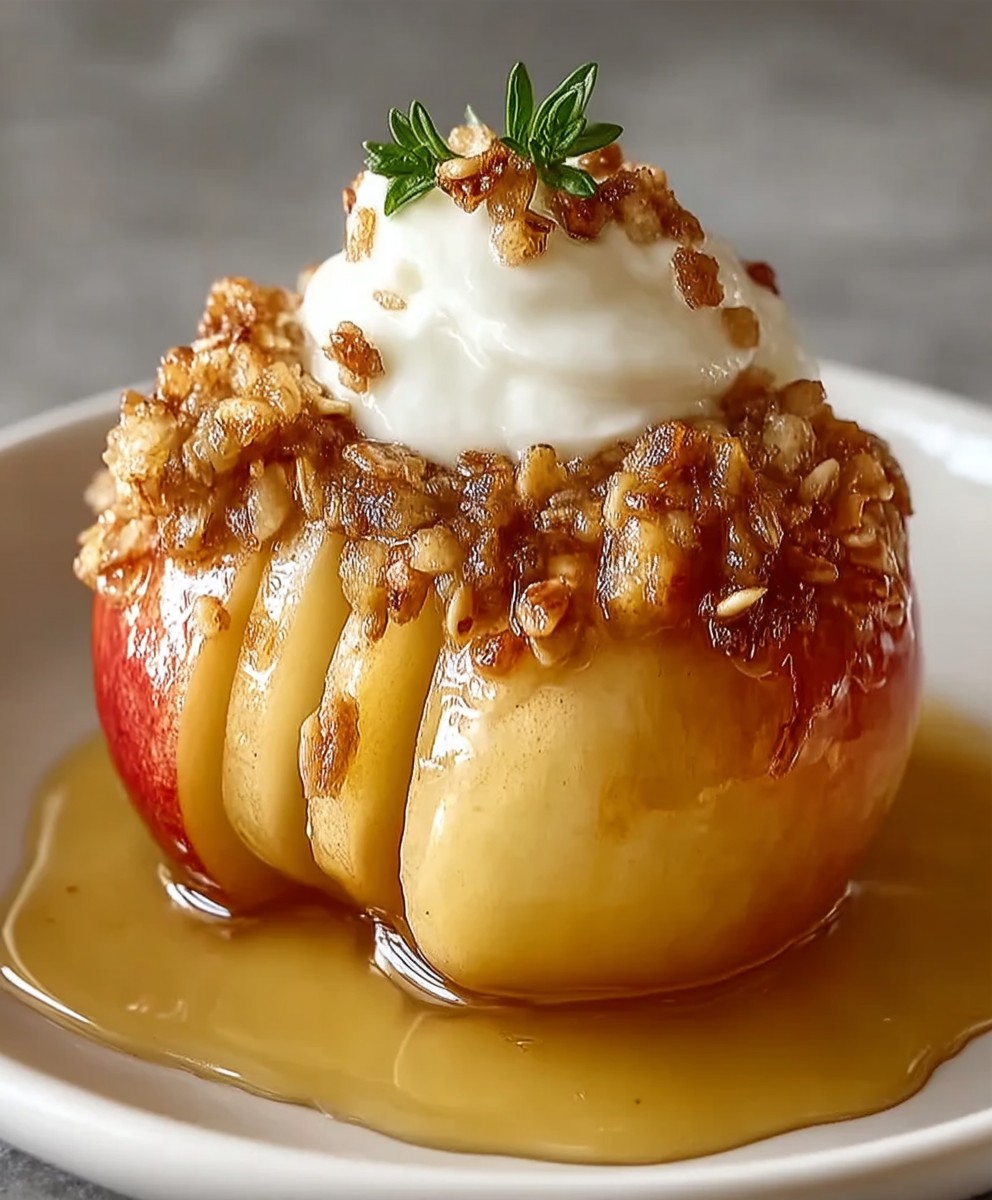
- Let Cool Slightly: Carefully remove the baked apples from the air fryer basket and let them cool for a few minutes before serving. They will be very hot!
- Add Toppings (Optional): This is where you can get creative! Top the baked apples with a scoop of vanilla ice cream, a drizzle of caramel sauce, a dollop of whipped cream, or a sprinkle of extra chopped nuts. The possibilities are endless!
- Serve Warm: Serve the air fryer baked apples warm and enjoy! They are best enjoyed immediately, but can also be stored in the refrigerator for up to 3 days. Reheat them in the microwave or air fryer before serving.
Tips and Variations:
Here are a few extra tips and variations to help you make the perfect air fryer baked apples:
- Apple Variety: As mentioned earlier, Granny Smith, Honeycrisp, and Fuji apples are all great choices for baking. Granny Smith apples are tart and hold their shape well, while Honeycrisp and Fuji apples are sweeter and more tender. Feel free to experiment with other apple varieties to find your favorite.
- Spice it Up: Add a pinch of ground ginger, allspice, or cloves to the filling for a more complex flavor.
- Dried Fruit: Add some chopped dried cranberries, raisins, or apricots to the filling for extra sweetness and texture.
- Lemon Zest: A little lemon zest in the filling can add a bright, citrusy note.
- Maple Syrup: Substitute maple syrup for the brown sugar for a more natural sweetener.
- Vegan Option: Use vegan butter and ensure your brown sugar is vegan-friendly (some brands use bone char in the refining process).
- Gluten-Free Option: Ensure your rolled oats are certified gluten-free.
- No Nuts: If you have a nut allergy, simply omit the pecans or walnuts from the filling. You can also substitute them with sunflower seeds or pumpkin seeds.
- Make Ahead: You can prepare the apples and filling ahead of time and store them in the refrigerator for up to 24 hours. When you’re ready to bake, simply air fry them as directed.
- Air Fryer Size: Cooking times may vary depending on the size and model of your air fryer. Keep an eye on the apples and adjust the cooking time as needed.
Troubleshooting:
Here are some common issues you might encounter and how to fix them:
- Apples are too soft: If your apples are too soft, reduce the cooking time or lower the temperature of your air fryer.
- Apples are not tender enough: If your apples are not tender enough, increase the cooking time or add a little more water or apple juice to the bottom of the cored apples.
- Filling is burning: If the filling is burning, cover the apples with a piece of aluminum foil during the last few minutes of cooking.
- Apples are bursting: If your apples are bursting, score the skin of the apples before air frying.
<
Conclusion:
Okay, friends, let’s recap why these Air Fryer Baked Apples are about to become your new go-to dessert (or even breakfast!). We’ve talked about the ease, the speed, and the incredible flavor explosion you get from that warm, spiced apple filling nestled inside a perfectly tender apple. But beyond the practical benefits, these baked apples are pure comfort food. They evoke memories of cozy autumn evenings, the scent of cinnamon filling the air, and that feeling of utter contentment after a delicious, satisfying treat. And honestly, who doesn’t need a little more of that in their life?
This recipe is a must-try because it’s ridiculously simple. Seriously, you can have these ready to devour in under 30 minutes, start to finish. No complicated techniques, no fancy ingredients, just pure, unadulterated apple goodness. Plus, it’s a healthier alternative to traditional baked desserts, allowing you to indulge without the guilt. The air fryer magic ensures a perfectly cooked apple without all the added butter and sugar often found in oven-baked versions.
But the best part? The versatility! While the recipe we’ve outlined is a classic for a reason, feel free to get creative and experiment with different fillings and toppings.
Serving Suggestions and Variations:
* Vanilla Ice Cream Dream: Serve warm with a scoop of creamy vanilla ice cream for the ultimate indulgence. The contrast of warm apple and cold ice cream is simply divine.
* Nutty Delight: Add a sprinkle of chopped walnuts, pecans, or almonds to the filling for a delightful crunch.
* Caramel Craze: Drizzle with warm caramel sauce for an extra touch of sweetness.
* Spice It Up: Experiment with different spices like nutmeg, allspice, or even a pinch of cardamom for a unique flavor profile.
* Berry Boost: Add a handful of fresh or frozen berries to the filling for a burst of fruity flavor. Blueberries, raspberries, or cranberries would all work beautifully.
* Breakfast Bliss: Top with a dollop of Greek yogurt and a sprinkle of granola for a healthy and satisfying breakfast.
* Savory Twist: For a less sweet version, try adding a pinch of salt and a drizzle of balsamic glaze after cooking. This creates a surprisingly delicious sweet and savory combination.
* Cheese, Please!: A small cube of sharp cheddar cheese melted on top of the warm apple is a classic pairing that shouldn’t be overlooked.
I truly believe that once you try these Air Fryer Baked Apples, you’ll be hooked. They’re the perfect dessert for a weeknight treat, a cozy weekend brunch, or even a special occasion. They’re also a fantastic way to use up those extra apples you have lying around.
So, what are you waiting for? Grab your apples, preheat your air fryer, and get ready to experience the magic of this simple yet incredibly satisfying recipe. I’m confident you’ll love it as much as I do.
And finally, I’d absolutely love to hear about your experience! Did you try any of the variations I suggested? Did you come up with your own unique twist? Please, share your photos and comments below. Let me know what you think, and let’s spread the apple-loving joy! Happy cooking!
Air Fryer Baked Apples: Easy Recipe & Guide
Delicious and easy air fryer baked apples filled with a sweet and spiced oat and brown sugar mixture. A perfect fall dessert!
Ingredients
- 4 medium-sized apples (Granny Smith, Honeycrisp, or Fuji work well)
- 2 tablespoons butter, unsalted
- 1/4 cup brown sugar, packed
- 1/4 cup rolled oats (old-fashioned)
- 1/4 cup chopped pecans or walnuts (optional)
- 1 teaspoon ground cinnamon
- 1/4 teaspoon ground nutmeg
- 2 tablespoons water or apple juice
- Pinch of salt
- Optional toppings: vanilla ice cream, caramel sauce, whipped cream
Instructions
- Prepare the Apples: Wash and dry the apples. Core each apple using an apple corer or paring knife, creating a well in the center. Optionally, score the skin of the apples around the circumference.
- Make the Filling: In a small microwave-safe bowl, melt the butter. In a medium bowl, combine the melted butter, brown sugar, rolled oats, chopped pecans or walnuts (if using), cinnamon, nutmeg, and a pinch of salt. Mix well. Taste and adjust sweetness or spice as desired.
- Stuff the Apples: Fill the cored centers of each apple with the oat and brown sugar mixture, packing it in tightly. Sprinkle any remaining filling over the tops of the apples. Pour about 1/2 tablespoon of water or apple juice into the bottom of each cored apple.
- Air Fry the Apples: Preheat the air fryer to 350°F (175°C) if required by your model. Place the stuffed apples in the air fryer basket in a single layer, ensuring they are not touching. Air fry at 350°F (175°C) for 15-20 minutes, or until the apples are tender and the filling is golden brown and bubbly. Check for doneness by inserting a fork or knife into the apple flesh; it should pierce easily. Add more time if needed.
- Serve and Enjoy: Carefully remove the baked apples from the air fryer basket and let them cool slightly before serving. Top with optional toppings like vanilla ice cream, caramel sauce, or whipped cream. Serve warm.
Notes
- Apple Variety: Granny Smith, Honeycrisp, and Fuji apples are all great choices for baking.
- Spice it Up: Add a pinch of ground ginger, allspice, or cloves to the filling for a more complex flavor.
- Dried Fruit: Add some chopped dried cranberries, raisins, or apricots to the filling for extra sweetness and texture.
- Lemon Zest: A little lemon zest in the filling can add a bright, citrusy note.
- Maple Syrup: Substitute maple syrup for the brown sugar for a more natural sweetener.
- Vegan Option: Use vegan butter and ensure your brown sugar is vegan-friendly (some brands use bone char in the refining process).
- Gluten-Free Option: Ensure your rolled oats are certified gluten-free.
- No Nuts: If you have a nut allergy, simply omit the pecans or walnuts from the filling. You can also substitute them with sunflower seeds or pumpkin seeds.
- Make Ahead: You can prepare the apples and filling ahead of time and store them in the refrigerator for up to 24 hours. When you’re ready to bake, simply air fry them as directed.
- Air Fryer Size: Cooking times may vary depending on the size and model of your air fryer. Keep an eye on the apples and adjust the cooking time as needed.


Leave a Comment