
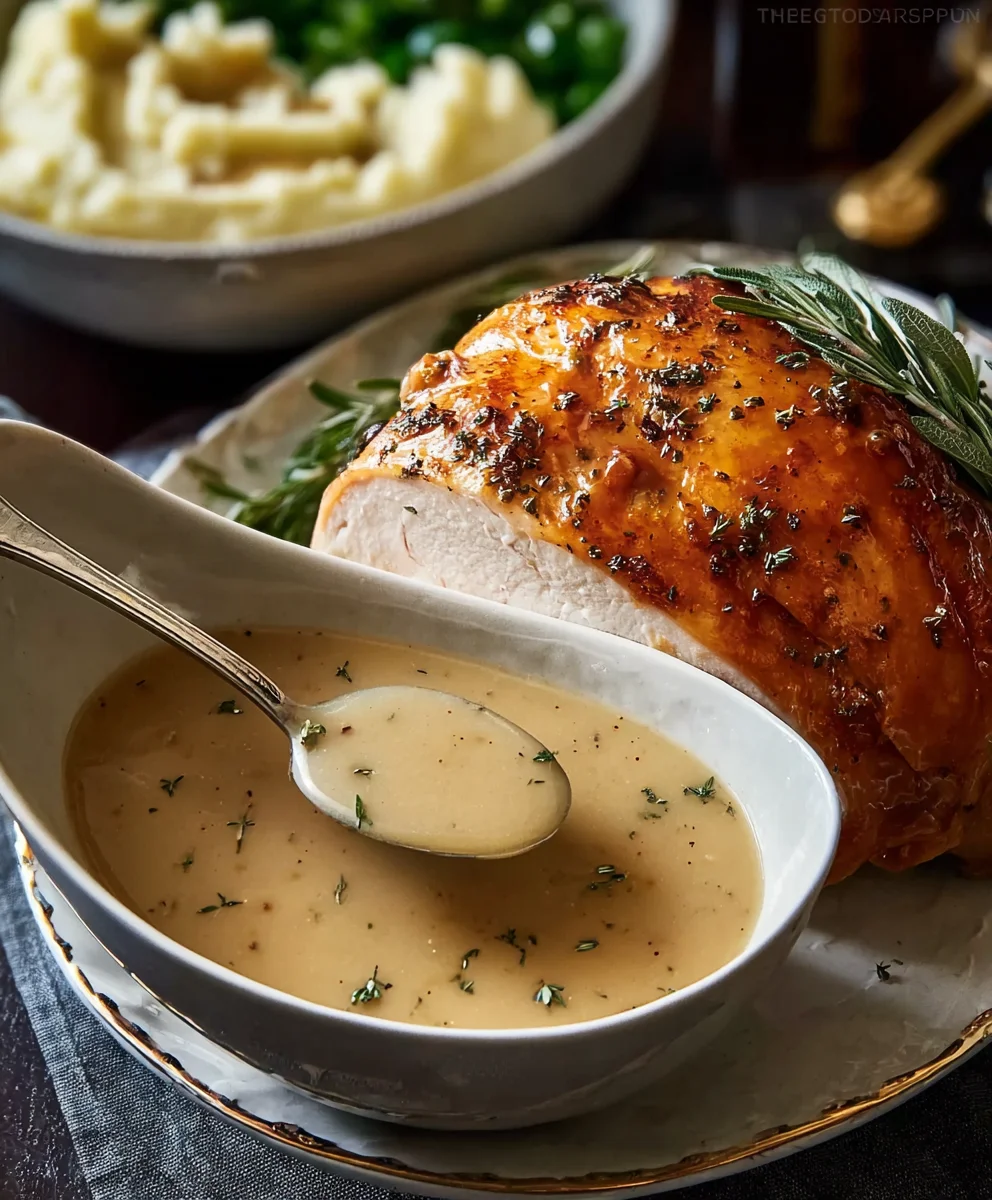
Turkey Gravy is more than just a side dish; it’s the silky, savory hug that brings your entire Thanksgiving feast together. That moment when you ladle a generous spoonful over your golden-brown turkey, fluffy mashed potatoes, and stuffing – it’s pure culinary bliss. We all crave that perfect, rich flavor that coats every bite, isn’t that right? But achieving truly sublime turkey gravy can sometimes feel like a mystical art. Many home cooks struggle with lumps, a bland taste, or a gravy that’s too thin. This recipe is designed to banish those worries forever! We’re going to unlock the secrets to a restaurant-quality turkey gravy right in your own kitchen. Get ready to elevate your holiday table with a turkey gravy that will have everyone asking for seconds, and maybe even thirds!

Ingredients:
- ½ cup unsalted butter (cut into 8 pieces), for a rich base.
- 1 tsp coarse black pepper, for seasoning.
- ½ cup all-purpose flour, to create the roux.
- 4 cups pan drippings or chicken/turkey stock, for flavor and consistency.
Preparing Your Perfect Turkey Gravy
Making truly delicious Turkey Gravy from scratch is a rewarding experience, and it all starts with a solid foundation. The key to a silky smooth and deeply flavorful gravy lies in the quality of your ingredients and a little patience as you build the flavors. We’re going to focus on creating a rich, savory gravy that perfectly complements any roasted bird or comforting mashed potatoes.
Building the Roux: The Flavor Foundation
The first crucial step in creating our Turkey Gravy is to prepare the roux. This is essentially a cooked mixture of fat and flour that acts as a thickener for our gravy. We’ll be using butter for its wonderful richness and flavor, which will contribute significantly to the final taste of our gravy.
- In a large saucepan or skillet, melt the ½ cup of unsalted butter over medium heat. It’s important to use medium heat here rather than high heat. This allows the butter to melt slowly and evenly without browning too quickly. You want the butter to be fully melted and shimmering, but not sizzling excessively. Once the butter is melted, we’re ready for the next step in creating our flavor base. This is where the magic of a good roux begins to happen.
- Gradually whisk in the ½ cup of all-purpose flour into the melted butter. Continue whisking constantly until the mixture is smooth and forms a paste. This is your roux. For this recipe, we’re aiming for a “white” or “blond” roux, which means we’ll cook it for just a few minutes. You’ll notice the color will change from a pale yellow to a slightly golden hue. Keep stirring to ensure there are no lumps of flour remaining. Cooking the flour for a minute or two helps to remove the raw flour taste and allows it to start developing a toasty, nutty aroma, which will contribute to the depth of flavor in your Turkey Gravy. Don’t rush this part; a well-made roux is the backbone of great gravy.
Incorporating Liquids for Silky Smoothness
Once our roux has been built and gently cooked, it’s time to begin the process of transforming it into a luscious gravy. This stage requires a steady hand and continuous whisking to ensure a smooth, lump-free consistency.
- Slowly begin to whisk in your 4 cups of pan drippings or chicken/turkey stock, about ½ cup at a time. This is where the gradual addition is crucial. Adding the liquid too quickly can cause lumps to form. As you add each portion of liquid, whisk vigorously until it’s fully incorporated into the roux and the mixture is smooth before adding more. The heat from the roux will start to thicken the liquid as you go. Continue this process until all 4 cups of liquid have been added and the mixture is relatively smooth. You might notice it starts to thicken up significantly as you continue adding the liquid.
- Bring the mixture to a gentle simmer over medium-low heat, stirring frequently. Once simmering, continue to cook and stir the Turkey Gravy for at least 5 to 10 minutes. This simmering period is essential for two reasons: it allows the gravy to thicken to your desired consistency and, more importantly, it allows the flour to cook through completely, removing any starchy or raw flour taste. You’ll see the gravy transform from a thin liquid to a beautifully thick, glossy sauce. Don’t be tempted to walk away during this time; a little bit of stirring will prevent scorching on the bottom of the pan and ensure even cooking. Adjust the heat as needed to maintain a gentle simmer.
Seasoning and Finishing Touches
The final stage of preparing your Turkey Gravy involves bringing all the flavors together with careful seasoning. This is where you’ll taste and adjust to perfection.
- Once the gravy has reached your desired thickness and has simmered for the recommended time, it’s time for seasoning. Stir in the 1 teaspoon of coarse black pepper. Taste the gravy carefully. This is your chance to adjust the flavor profile. If you’ve used unsalted pan drippings, you might need to add salt to taste. If you’re using store-bought stock, it likely contains salt, so taste before adding any additional salt. You can also add more pepper if you prefer a spicier kick. Continue stirring until the seasoning is evenly distributed. If the gravy is too thick for your liking, you can whisk in a little more warm stock or water, a tablespoon at a time, until you achieve the perfect consistency. Conversely, if it’s too thin, you can let it simmer a little longer, or if you’re in a pinch, you can make a slurry of a teaspoon of cornstarch mixed with a tablespoon of cold water and whisk it into the simmering gravy until thickened.
Conclusion:
You’ve done it! With this recipe, you’re well on your way to crafting a truly exceptional Turkey Gravy that will elevate any meal. We’ve covered the essential steps, from building a rich flavor base with drippings and aromatics to achieving that perfect, silky smooth consistency. Remember, the key to a fantastic gravy lies in patience and tasting as you go. Don’t be afraid to adjust the seasoning until it sings!
For serving suggestions, this homemade Turkey Gravy is, of course, a classic accompaniment to roasted turkey, mashed potatoes, and stuffing. It also works wonderfully over biscuits, roasted vegetables, or even as a base for a savory shepherd’s pie. Get creative and let your culinary imagination run wild!
If you’re feeling adventurous, consider variations like adding a splash of white wine or sherry for an extra layer of complexity, or a pinch of nutmeg for a subtle warmth. You can also make this gravy ahead of time and reheat it gently before serving, making it a stress-free addition to any holiday feast. We encourage you to give this recipe a try and experience the difference homemade makes. Happy cooking!
Frequently Asked Questions about Turkey Gravy:
Q1: How do I prevent my turkey gravy from being lumpy?
Lumps in gravy are usually caused by an uneven distribution of flour or cornstarch. The best way to avoid them is to whisk the flour or cornstarch into the cold pan drippings (or a separate liquid like broth) to create a smooth paste, known as a roux or slurry, before adding it to the hot liquid. Once added, whisk constantly over medium heat until thickened. If lumps do appear, you can try passing the gravy through a fine-mesh sieve.
Q2: My turkey gravy is too thin, what can I do?
If your Turkey Gravy is too thin, don’t despair! You can easily thicken it by creating a cornstarch slurry. In a small bowl, whisk together 1 tablespoon of cornstarch with 2 tablespoons of cold water until smooth. Gradually whisk this slurry into your simmering gravy, a little at a time, until it reaches your desired consistency. Let it simmer for a minute or two to cook out the raw cornstarch taste.
Best Turkey Gravy – Easy Homemade Flavor
A simple yet deeply flavorful homemade turkey gravy recipe perfect for any meal.
Ingredients
-
½ cup unsalted butter, cut into 8 pieces
-
½ cup all-purpose flour
-
4 cups pan drippings or chicken/turkey stock
-
1 tsp coarse black pepper
-
Salt to taste (if needed)
-
1 tsp cornstarch mixed with 1 tbsp cold water (optional, for thinning)
Instructions
-
Step 1
In a large saucepan or skillet, melt the ½ cup of unsalted butter over medium heat until fully melted and shimmering. -
Step 2
Gradually whisk in the ½ cup of all-purpose flour into the melted butter until smooth, forming a paste. Cook, whisking constantly, for a few minutes until it turns a slightly golden hue, creating a blond roux. -
Step 3
Slowly whisk in the 4 cups of pan drippings or chicken/turkey stock, about ½ cup at a time, ensuring each addition is fully incorporated and smooth before adding more. -
Step 4
Bring the mixture to a gentle simmer over medium-low heat, stirring frequently. Continue to cook and stir for 5 to 10 minutes until the gravy thickens to your desired consistency and any raw flour taste is gone. -
Step 5
Stir in the 1 teaspoon of coarse black pepper. Taste and adjust seasoning with salt if needed, especially if using unsalted drippings or stock. If the gravy is too thick, whisk in a little more warm stock or water, a tablespoon at a time. If too thin, simmer longer or whisk in a cornstarch slurry until thickened.
Important Information
Nutrition Facts (Per Serving)
It is important to consider this information as approximate and not to use it as definitive health advice.
Allergy Information
Please check ingredients for potential allergens and consult a health professional if in doubt.


Leave a Comment