
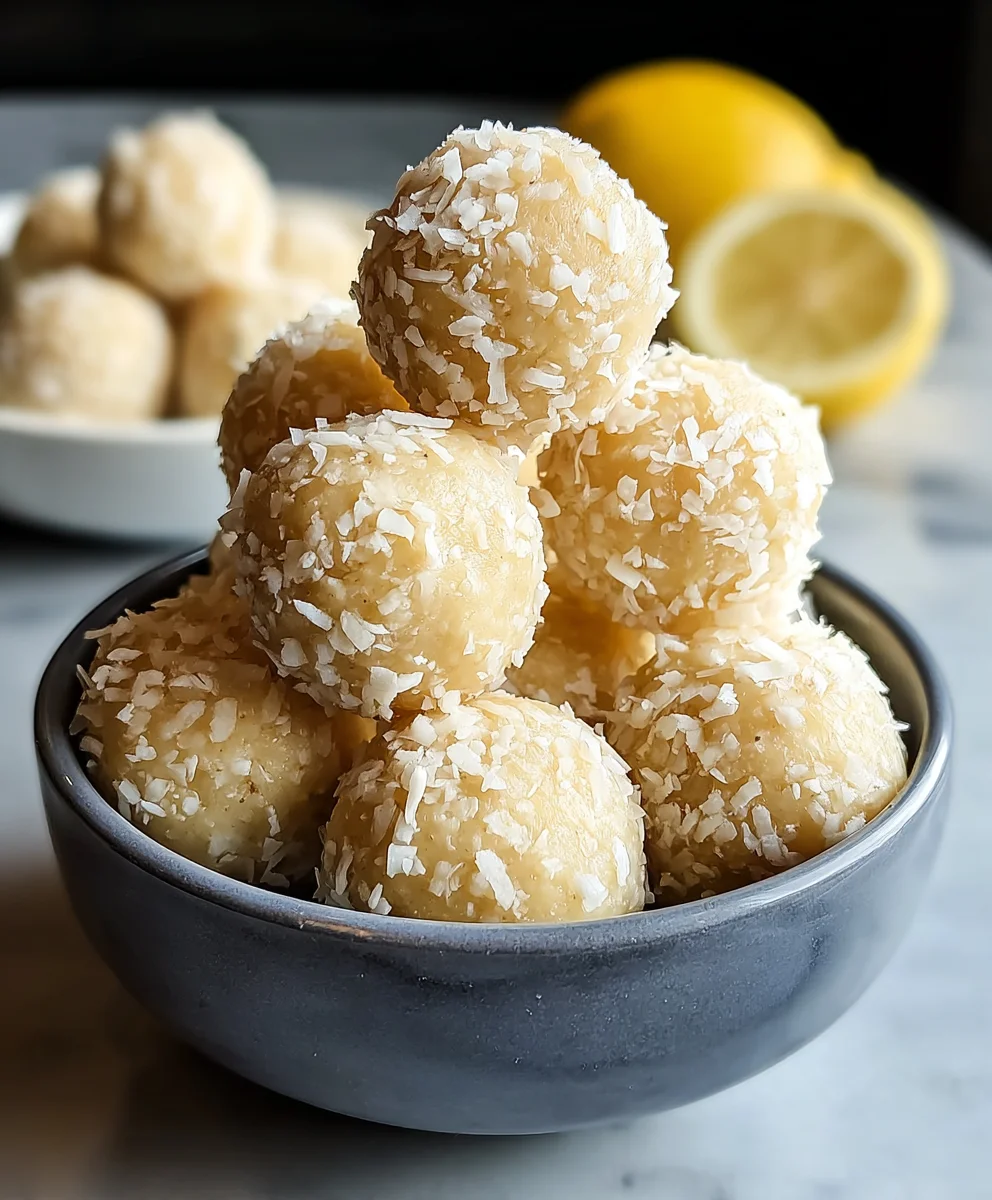
Lemon Coconut Protein Balls are more than just a snack; they are a vibrant burst of sunshine, perfectly packaged for your busiest days. Imagine a moment of pure, guilt-free indulgence, where zesty lemon meets tropical coconut in a chewy, satisfying bite. In our ever-accelerating lives, the quest for convenient yet wholesome fuel often leads us down challenging paths. This is precisely where these incredible no-bake treats become an absolute game-changer, offering a delightful solution for those seeking both nourishment and incredible flavor.
Why These Lemon Coconut Protein Balls Have Become a Beloved Staple
I genuinely believe that the universal appeal of these Lemon Coconut Protein Balls lies in their ingenious combination of invigorating flavor and incredible nutritional value. There’s something undeniably refreshing about the bright, tangy notes of fresh lemon zest dancing with the subtle sweetness of shredded coconut. Not only do they deliver a delightful sensory experience, but their protein-packed composition ensures sustained energy, making them an ideal pre-workout boost, a mid-afternoon slump-buster, or even a healthier dessert option. I’ve personally come to rely on these delicious bites for their unparalleled ease of preparation and the sheer joy they bring to my snack routine. They are simply fantastic for anyone seeking a delicious, convenient, and healthy option that truly delivers on taste and energy.
Ingredients:
- 1 cup (approx. 90g) unsweetened shredded coconut, divided
- ½ cup (approx. 50g) vanilla or unflavored protein powder (whey, casein, or plant-based work well)
- ¼ cup (approx. 30g) coconut flour
- Zest of 2 medium lemons
- ¼ cup (60ml) freshly squeezed lemon juice (from approximately 2 medium lemons)
- ½ cup (120ml) pure maple syrup or agave nectar (adjust to taste)
- 2 tablespoons (30ml) coconut oil, melted
- 1 teaspoon pure vanilla extract
- Pinch of sea salt (optional, but highly recommended for flavor balance)
Phase 1: Gathering and Initial Preparation
- Prepare Your Workspace and Tools: Before we dive into crafting these amazing Lemon Coconut Protein Balls, take a moment to set up your kitchen. Gather all your ingredients and necessary equipment: a large mixing bowl, a microplane or fine grater for the lemon zest, a citrus juicer, measuring cups and spoons, a small bowl for melted coconut oil, and a shallow dish for coating. Having everything within reach will make the process much smoother and more enjoyable. I always find that a tidy start leads to a happy finish, especially when I’m excited to make a batch of these vibrant, energy-boosting treats.
- Zesting the Lemons: First things first, we need to extract that beautiful, aromatic lemon zest. Using a microplane or the fine side of a grater, carefully zest both lemons. Be sure to only get the bright yellow part of the rind, avoiding the bitter white pith underneath. The zest is where so much of the concentrated lemon flavor lives, giving our Lemon Coconut Protein Balls that essential bright, tangy kick. Don’t underestimate the power of fresh zest; it’s truly the star alongside the coconut! Once you’ve zested them, set the lemons aside as we’ll be juicing them shortly.
- Measuring Dry Ingredients with Precision: Accuracy in measuring dry ingredients is key for the perfect texture of our Lemon Coconut Protein Balls. Into your large mixing bowl, measure out ½ cup of your chosen protein powder. I often use a vanilla-flavored protein powder because it complements the lemon and coconut so beautifully, but unflavored works wonderfully too, allowing the citrus notes to shine even brighter. Next, add ¼ cup of coconut flour. Coconut flour is incredibly absorbent, so precise measurement here is crucial to prevent your mixture from becoming too dry and crumbly. Finally, add about ¼ cup of the unsweetened shredded coconut (we’ll save the remaining ¾ cup for coating later) and an optional pinch of sea salt. The salt really helps to enhance all the other flavors, balancing the sweetness and brightness. Give these dry ingredients a good whisk together to ensure they are thoroughly combined and there are no lumps of protein powder or coconut flour. This initial mixing creates a uniform base that will absorb our wet ingredients evenly.
Phase 2: Crafting the Core Mixture for Your Lemon Coconut Protein Balls
- Preparing the Wet Ingredients for Optimal Blend: Now, let’s turn our attention to the liquid components that will bind our Lemon Coconut Protein Balls into their delightful form. In a separate medium-sized bowl, squeeze the juice from your zested lemons. You should aim for approximately ¼ cup (60ml) of fresh lemon juice. This, along with the zest, provides the signature tang. Next, add ½ cup of pure maple syrup or agave nectar. I personally love maple syrup for its subtle warmth and richness, but agave is also a fantastic, neutral-tasting option. Then, melt your 2 tablespoons of coconut oil; a quick zap in the microwave or a gentle heating over a double boiler works perfectly. Ensure it’s fully liquid, but not boiling hot. Stir in the melted coconut oil, along with 1 teaspoon of pure vanilla extract. The vanilla extract adds a lovely depth and rounds out the flavors, making these treats even more irresistible. Whisk these wet ingredients vigorously until everything is well combined and homogenous.
- Gradually Combining Wet and Dry for the Perfect Consistency: This is arguably the most crucial step in achieving the ideal texture for your Lemon Coconut Protein Balls. Slowly pour the wet mixture into the large bowl containing your whisked dry ingredients. Use a sturdy spatula or a wooden spoon to begin mixing. Start gently, folding the ingredients together. You’ll notice the mixture transforming from a dry powder into a thick, cohesive dough. Continue mixing until all the dry ingredients are fully incorporated and there are no dry pockets remaining. The mixture should be thick, pliable, and slightly sticky, resembling a firm dough. It’s important not to overmix, as this can sometimes make protein balls tough. Instead, mix just until everything is combined. If, by chance, your mixture seems a little too dry and crumbly (perhaps due to differences in protein powder brands or coconut flour absorption), you can add an additional teaspoon of lemon juice or a tiny bit more melted coconut oil at a time until the desired consistency is reached. Conversely, if it feels too wet or sticky, you can gently mix in another teaspoon of coconut flour or protein powder until it firms up. The goal is a dough that holds its shape when pressed and isn’t overly greasy.
- The Importance of Resting the Mixture: Once your mixture for the Lemon Coconut Protein Balls is thoroughly combined and has that perfect consistency, cover the bowl with plastic wrap and place it in the refrigerator for at least 15-20 minutes. This resting period is not just for convenience; it’s a vital step. The chilling allows the coconut flour and protein powder to fully absorb the liquids, firming up the mixture significantly. This makes the rolling process much easier and less messy, preventing the balls from being too sticky or falling apart. Think of it as a brief meditation for your dough, allowing all the flavors to meld beautifully and the structure to stabilize. Don’t skip this step for the best results!
Phase 3: Shaping and Coating Your Delightful Lemon Coconut Protein Balls
- Preparing Your Coating Station: While your protein ball mixture is chilling, prepare your coating station. Pour the remaining ¾ cup of unsweetened shredded coconut into a shallow dish or plate. This will be the beautiful, textured outer layer of our Lemon Coconut Protein Balls, adding both visual appeal and an extra burst of coconut flavor and texture. Spread it out evenly so it’s ready for rolling. You might also want to lightly dampen your hands or have a small bowl of water nearby for dipping your fingertips, as this can help prevent the mixture from sticking to your hands during the rolling process.
- Portioning for Uniformity: Retrieve your chilled mixture from the refrigerator. It should now be much firmer and easier to handle. Using a small cookie scoop (about 1.5-inch diameter) or a tablespoon, scoop out uniform portions of the mixture. Uniformity in size is not just for aesthetics; it also ensures that all your Lemon Coconut Protein Balls have a consistent texture and make for easier portion control. If you don’t have a scoop, simply use a spoon and eyeball the portions. Aim for balls roughly the size of a golf ball or slightly smaller.
- Rolling into Perfect Spheres: Take each scooped portion and, using the palms of your hands, gently roll it into a smooth, compact ball. Apply firm but not crushing pressure. If the mixture starts to stick to your hands, a quick rinse under cold water or lightly dampening your palms can help immensely. Continue rolling until you have a nice, spherical shape. The chilled mixture should hold its form beautifully at this stage. Place the rolled balls onto a clean plate or baking sheet as you finish each one. This step might seem simple, but the tactile experience of transforming the dough into these perfect little spheres is quite satisfying.
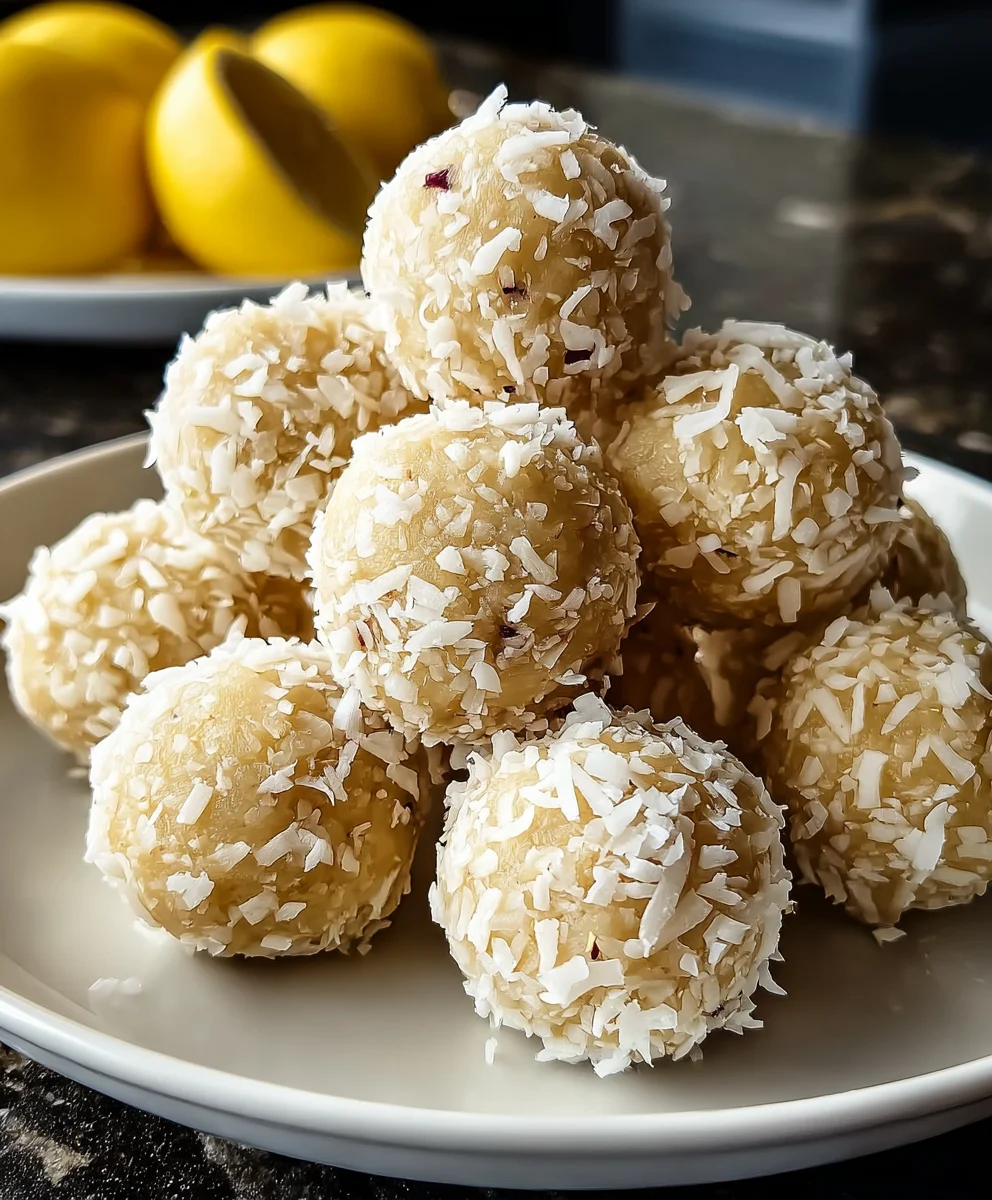
- Coating the Lemon Coconut Protein Balls: Now for the finishing touch! Take each rolled protein ball and gently place it into the shallow dish of shredded coconut. Roll the ball around, pressing lightly, to ensure it gets an even and generous coating of coconut on all sides. The natural stickiness of the protein ball mixture will help the coconut adhere perfectly. Once coated, place the finished Lemon Coconut Protein Balls back onto your plate or baking sheet. Repeat this process for all the remaining balls. This final coating adds a lovely texture, enhances the coconut flavor, and makes them look incredibly inviting.
Phase 4: Chilling and Storing for Optimal Enjoyment
- The Crucial Chilling Process: Once all your Lemon Coconut Protein Balls are shaped and beautifully coated, arrange them on a plate or a baking sheet lined with parchment paper. Transfer them to the refrigerator and chill for at least 30 minutes. This final chilling step is absolutely essential. It allows the coconut oil to fully solidify, firming up the balls and ensuring they hold their shape perfectly when you pick them up. It also helps to meld all the flavors even further, intensifying that delightful lemon-coconut symphony. Do not skip this chilling step! It’s what transforms them from soft, pliable dough into firm, satisfying bites.
- Storage Recommendations for Freshness: After chilling, your delectable Lemon Coconut Protein Balls are ready to be enjoyed! For optimal freshness and texture, transfer them to an airtight container. I usually layer them in a container, sometimes with a piece of parchment paper between layers if I’ve made a particularly large batch, to prevent them from sticking together. Store them in the refrigerator. This method will keep them fresh and firm for up to 1-2 weeks, making them a fantastic make-ahead snack for your busy week.
- Long-Term Storage and Shelf Life: If you find yourself with an abundance of these wonderful Lemon Coconut Protein Balls, or if you simply want to prepare a stash for future enjoyment, they freeze exceptionally well! Place the fully chilled balls on a baking sheet and freeze them individually for about 1-2 hours until solid. This prevents them from clumping together. Once frozen solid, transfer them to a freezer-safe airtight container or a heavy-duty freezer bag. They will keep perfectly in the freezer for up to 2-3 months. When you’re ready to enjoy one, simply pull it out of the freezer and let it thaw for about 10-15 minutes at room temperature, or enjoy it straight from frozen for a delightful, firm chew. They’re a fantastic, quick grab-and-go option straight from the freezer on a busy morning!
Expert Tips for Perfect Lemon Coconut Protein Balls
Achieving the Ideal Texture and Flavor Balance
Creating the perfect batch of Lemon Coconut Protein Balls goes beyond just following the steps; it’s about understanding the nuances of the ingredients. The type of protein powder you use can significantly impact the final texture. Whey protein tends to yield a softer, slightly chewier ball, while plant-based proteins (especially those with a high pea protein content) might result in a firmer texture. If you notice your mixture is too dry, try adding an extra splash of lemon juice or even a tiny bit of water or plant milk, about a teaspoon at a time, until it reaches that pliable, dough-like consistency. For an extra citrus punch, consider adding a few drops of food-grade lemon essential oil (ensure it’s safe for consumption) along with the zest and juice. This can really elevate the “lemon” in your Lemon Coconut Protein Balls to a whole new level. Remember, tasting the mixture (before rolling, of course!) is key to adjusting the sweetness and tang to your personal preference.
Customizing Your Lemon Coconut Protein Balls
One of the best things about making your own Lemon Coconut Protein Balls is the endless possibilities for customization. Don’t be afraid to experiment and make them truly your own!
- Nutty Additions: For an added crunch and a boost of healthy fats, finely chop a tablespoon or two of almonds, cashews, or walnuts and mix them into the dough before rolling. You could even use some almond flour or cashew butter to alter the texture slightly and add a different flavor profile.
- Seed Power: A teaspoon of chia seeds, flax seeds, or hemp seeds can be stirred into the mixture. They not only add nutritional benefits like omega-3s and fiber but also contribute to a slightly denser, more satisfying texture.
- Sweetness Variations: While maple syrup and agave nectar are my go-to, you could experiment with other natural sweeteners. Date paste (blended pitted dates) can provide a rich, caramel-like undertone and additional fiber, though it might change the color and overall flavor profile slightly. Just ensure the consistency remains manageable.
- Extract Experiments: Beyond vanilla, a tiny drop of almond extract can offer a beautiful complement to the lemon and coconut. Or, if you’re feeling adventurous, a hint of orange extract could create a delightful “lemon-orange” twist on your Lemon Coconut Protein Balls.
- Chocolate Drizzle: For those who love a bit of chocolate, once the balls are chilled and firm, you can melt some dark chocolate chips with a tiny bit of coconut oil and drizzle it over the finished balls. Let the chocolate set in the fridge before serving. This adds an indulgent touch without overpowering the main flavors.
- Superfood Boosts: Consider adding a teaspoon of spirulina for an extra boost of greens (though it will change the color!) or maca powder for adaptogenic benefits. Start with small amounts to ensure the flavor isn’t too strong.
These variations allow you to tailor your Lemon Coconut Protein Balls to your dietary needs, flavor preferences, and desired nutrient profile, making them a truly versatile snack.
Boosting Nutrition and Flavor in Every Bite
Beyond the core recipe, there are subtle ways to enhance both the nutritional value and the complexity of flavor in your Lemon Coconut Protein Balls. For example, if you’re using an unflavored protein powder, a higher quality vanilla extract (like a Madagascar Bourbon vanilla) can make a significant difference. Furthermore, consider the type of shredded coconut you’re using; unsweetened desiccated coconut will absorb liquids differently than larger, flakier unsweetened shredded coconut. For maximum lemon flavor, try to use organic lemons, as their zest tends to be more aromatic and less likely to contain pesticide residues. Some individuals like to add a tiny pinch of turmeric for a subtle color boost and its anti-inflammatory properties, though be mindful not to add too much, as it has a distinct flavor. The simple addition of the sea salt in the dry ingredients really acts as a flavor enhancer, much like in baking, it brings out the sweetness and tanginess of the lemon and coconut more vividly. Don’t underestimate the power of these small adjustments in elevating your Lemon Coconut Protein Balls from good to truly extraordinary.
Troubleshooting Common Issues
My Mixture is Too Sticky!
If you’ve mixed your ingredients and find that your dough for the Lemon Coconut Protein Balls is too sticky to handle, don’t worry, this is a very common issue and easily fixable! It often happens if there’s slightly too much liquid or if your protein powder isn’t as absorbent. The first thing I recommend is to chill the mixture for a longer period, perhaps 30-45 minutes. A colder mixture is always firmer and less sticky. If after chilling it’s still unmanageable, gradually add a small amount (start with 1 teaspoon at a time) of additional coconut flour or protein powder, mixing it in thoroughly until it reaches a more workable, pliable consistency. You want it to be firm enough to roll without excessively sticking to your hands. Sometimes, even just lightly dampening your hands with water before rolling can make a big difference without altering the mixture itself.
My Mixture is Too Dry and Crumbly!
On the flip side, if your mixture is too dry and crumbly, making it difficult to form into balls, it means there isn’t enough moisture to bind the dry ingredients. This can happen if your coconut flour or protein powder is particularly absorbent, or if you’ve added too much dry ingredient. To remedy this, add a small amount (again, starting with 1 teaspoon at a time) of additional liquid. You can use extra lemon juice, a little more melted coconut oil, or even a splash of water or plant-based milk. Mix thoroughly after each addition until the dough becomes cohesive and holds together when pressed. The goal is a dough that is moist enough to stick together but not overly wet. Remember, coconut flour absorbs liquid over time, so give it a minute or two to absorb before adding more liquid.
My Protein Balls Aren’t Holding Their Shape!
If your rolled Lemon Coconut Protein Balls are collapsing or not maintaining their spherical shape, it usually points to two main issues. Firstly, the mixture might not have been chilled enough. Chilling is crucial for the coconut oil to solidify and for the flours to fully hydrate and bind, providing structure. Ensure you allow at least 30 minutes, if not longer, for the mixture to firm up in the refrigerator before rolling. Secondly, the ratio of ingredients might be slightly off, making the mixture either too wet or too dry (refer to the troubleshooting tips above for adjusting consistency). If they’re too wet, they’ll be mushy; if too dry, they’ll crumble apart. Ensure you’re using firm pressure when rolling the balls in your hands to really compact the mixture. A well-compacted ball will hold its shape much better. If all else fails, pop the rolled balls back into the fridge or even the freezer for a quick 10-15 minute chill before coating and serving. This extra chill time often does wonders for firmness.
Conclusion:
So, there you have it! We’ve journeyed through the simple steps to create a truly remarkable snack that I genuinely believe will become a staple in your kitchen. From the very first moment I whipped up a batch of these, I knew I had stumbled upon something special, and I’m so excited for you to experience that same delightful discovery. This isn’t just another recipe; it’s a revelation for anyone seeking a guilt-free indulgence that doesn’t compromise on flavor or convenience. What truly makes this recipe a must-try is its incredible trifecta of attributes: unparalleled ease of preparation, a vibrant, fresh taste that brightens any day, and a nutritional profile that genuinely supports your wellness goals.
Forget the endless hours spent baking; these beauties come together in mere minutes, requiring absolutely no oven time, which makes them perfect for those busy days when you need a quick win. The combination of zesty lemon and tropical coconut creates a symphony of flavors that is both refreshing and comforting, hitting all the right notes for a satisfying treat. But beyond the deliciousness, these balls pack a powerful punch of protein, making them an ideal fuel for your body, whether you’re heading to the gym, tackling a mountain of emails, or simply need a wholesome pick-me-up. I’ve found myself reaching for them countless times, knowing that I’m giving my body something truly good without sacrificing an ounce of enjoyment. Trust me, once you try them, you’ll understand why I’m so enthusiastic!
Now that you’re armed with this fantastic recipe, let’s talk about how to integrate these delightful snacks into your daily routine and some fun ways to experiment with them. Personally, I find them absolutely perfect as a pre-workout boost, providing sustained energy without feeling heavy. They’re equally brilliant as a post-workout recovery aid, helping to replenish and rebuild. Beyond fitness, these are my go-to for battling that infamous mid-afternoon slump – far better than reaching for something sugary and processed! They’re also a fantastic addition to kids’ lunchboxes (and yours!), a smart alternative to traditional desserts after dinner, or even a thoughtful, edible gift when bundled up nicely.
But the fun doesn’t stop there! One of the things I love most about this recipe is its versatility. Feel free to get creative! For an extra nutritional kick, try adding a tablespoon of chia seeds or ground flaxseed to the mixture – they blend in seamlessly. If you’re a fan of different citrus notes, a hint of lime zest could be a wonderful variation, offering a slightly tangier profile. Don’t be afraid to play with your protein powder flavors; a vanilla protein powder works beautifully, but an unflavored one allows the lemon and coconut to truly shine. For an added layer of texture and flavor, you could fold in finely chopped nuts like almonds or cashews, or even some mini chocolate chips for a touch of indulgence. And for a truly decadent twist, once chilled, you could drizzle a little melted dark chocolate over them – trust me, it’s divine! Rolling them in cocoa powder instead of coconut also offers a sophisticated alternative. The possibilities are truly endless, allowing you to tailor them exactly to your taste and nutritional needs.
So, my friend, what are you waiting for? I wholeheartedly encourage you to carve out a little time this week, gather your ingredients, and give these incredible Lemon Coconut Protein Balls a try. I promise you won’t regret it. They are truly a game-changer for healthy snacking, offering maximum flavor with minimal effort. Once you’ve made your batch, I would absolutely love to hear about your experience! Did you stick to the original recipe, or did you venture into some exciting variations? How did they fit into your day? Please share your thoughts, tips, and even photos in the comments section below or on social media. Your feedback inspires me and helps our whole community grow! Happy rolling, and enjoy every delicious bite!
Lemon Coconut Protein Balls
Vibrant and nutritious no-bake Lemon Coconut Protein Balls combine zesty lemon and tropical coconut for a guilt-free, energy-boosting snack, perfect for busy days.
Ingredients
-
1 cup (90g) unsweetened shredded coconut, divided
-
½ cup (50g) vanilla or unflavored protein powder
-
¼ cup (30g) coconut flour
-
Zest of 2 medium lemons
-
¼ cup (60ml) fresh lemon juice
-
½ cup (120ml) pure maple syrup or agave nectar
-
2 tablespoons (30ml) coconut oil, melted
-
1 teaspoon pure vanilla extract
-
Pinch of sea salt
Instructions
-
Step 1
Gather all ingredients and equipment. Zest 2 medium lemons, then juice them for ¼ cup (60ml) of fresh lemon juice. -
Step 2
In a large mixing bowl, whisk together ½ cup protein powder, ¼ cup coconut flour, ¼ cup of the shredded coconut, and a pinch of sea salt. -
Step 3
In a separate medium bowl, combine ¼ cup lemon juice, ½ cup pure maple syrup (or agave nectar), 2 tablespoons melted coconut oil, and 1 teaspoon pure vanilla extract. Whisk until well combined. -
Step 4
Slowly pour the wet mixture into the dry ingredients. Mix with a sturdy spatula or wooden spoon until a thick, cohesive dough forms. If the mixture is too dry, add a tiny bit more lemon juice or melted coconut oil; if too sticky, add more coconut flour. Avoid overmixing. -
Step 5
Cover the bowl with plastic wrap and refrigerate for 15-20 minutes. This allows the mixture to firm up, making it easier to handle. -
Step 6
While the mixture chills, pour the remaining ¾ cup of unsweetened shredded coconut into a shallow dish to prepare your coating station. -
Step 7
Retrieve the chilled mixture. Using a small cookie scoop or tablespoon, portion out uniform amounts. Roll each portion into a smooth, compact ball between your palms. -
Step 8
Roll each formed ball in the shredded coconut in the shallow dish, pressing lightly to ensure an even and generous coating on all sides. Place coated balls on a plate or baking sheet. -
Step 9
Refrigerate the coated protein balls for at least 30 minutes. This crucial step solidifies them, ensuring they hold their shape and flavors meld. -
Step 10
Store the finished Lemon Coconut Protein Balls in an airtight container in the refrigerator for up to 1-2 weeks. For long-term storage, freeze them individually on a baking sheet, then transfer to a freezer-safe container for up to 2-3 months. Thaw briefly or enjoy frozen.
Important Information
Nutrition Facts (Per Serving)
It is important to consider this information as approximate and not to use it as definitive health advice.
Allergy Information
Please check ingredients for potential allergens and consult a health professional if in doubt.


Leave a Comment