

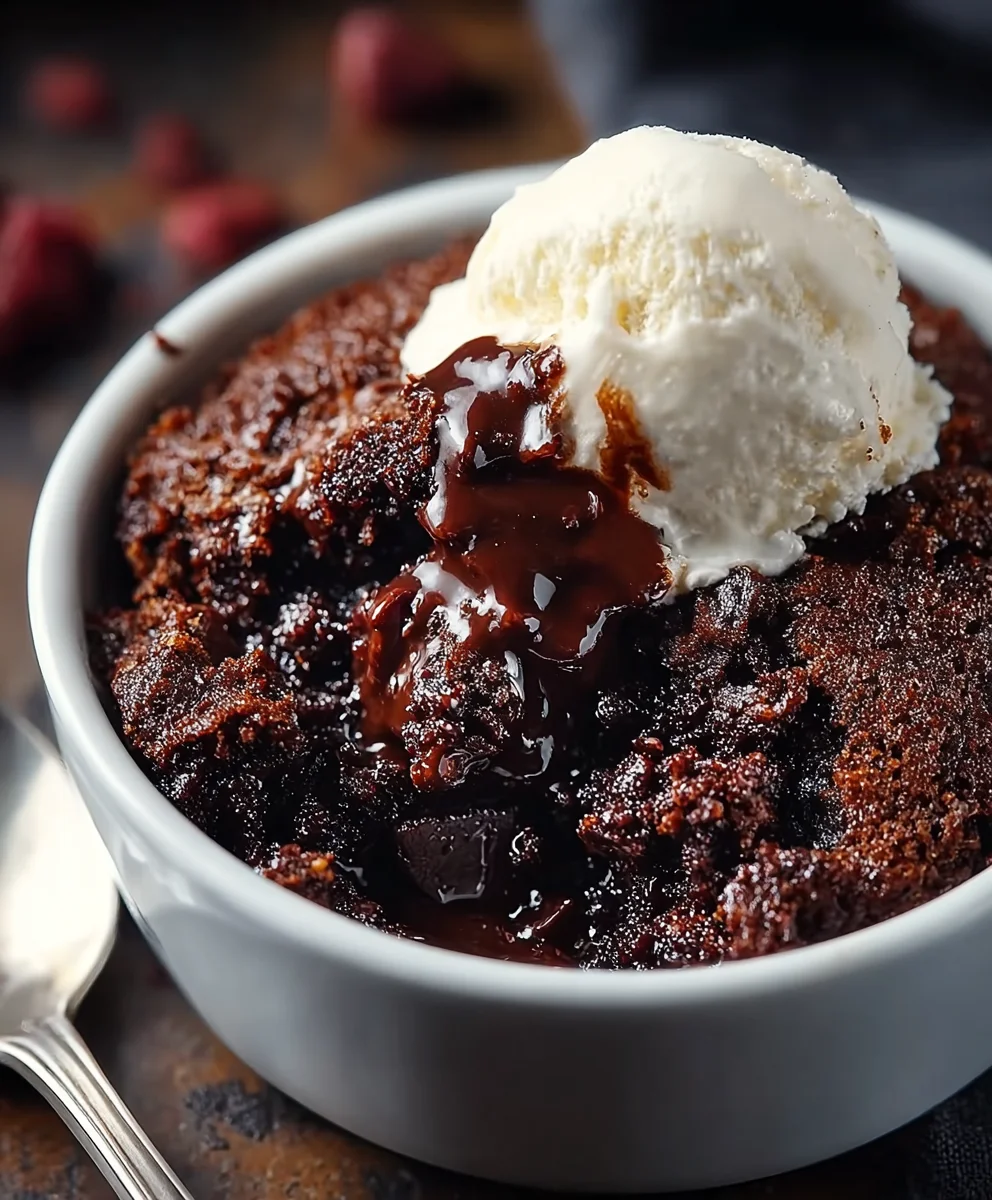
Chocolate Cobbler. Imagine a dessert so profoundly comforting, so exquisitely rich, that each spoonful feels like a warm, tender embrace. That’s precisely what awaits you with this incredible recipe. I am absolutely delighted to share a dish that transcends the ordinary, offering a unique blend of cake-like topping and a molten, self-saucing chocolate pudding base that truly defines indulgent comfort food.
The Allure of This Unique Dessert
While traditional fruit cobblers have long held a cherished spot in American culinary history, especially throughout the South, the concept of a chocolate cobbler elevates this humble dessert to a new level of decadence. It takes the simplicity and homey appeal of a classic cobbler and infuses it with the universal joy of chocolate. People adore this dish not only for its intensely rich flavor but also for its remarkable texture: a crisp, tender cake layer on top, giving way to a luxuriously gooey, almost fudge-like chocolate sauce below. It’s the perfect harmony of textures and temperatures, especially when served warm with a scoop of vanilla ice cream.
This particular Chocolate Cobbler recipe is celebrated for its ease of preparation and its spectacular, deeply satisfying results. It’s a testament to how simple ingredients can create something truly extraordinary, making it a beloved treat for gatherings or a quiet evening indulgence. Get ready to experience a dessert that will undoubtedly become a new favorite in your repertoire.
Ingredients:
-
For the Rich Chocolate Cobbler Topping:
- 1 ½ cups (180g) all-purpose flour
- ¾ cup (150g) granulated sugar
- ¼ cup (25g) unsweetened cocoa powder (Dutch-processed or natural, your preference!)
- 2 teaspoons baking powder
- ½ teaspoon salt
- ½ cup (113g) unsalted butter, very cold and cut into small cubes
- ½ cup (120ml) whole milk (or any milk you have on hand)
- 1 teaspoon pure vanilla extract
-
For the Deep Chocolate Sauce:
- 1 ½ cups (300g) granulated sugar
- ¾ cup (75g) unsweetened cocoa powder
- ¼ cup (30g) cornstarch (this is our secret weapon for a thick, luscious sauce!)
- ½ teaspoon salt
- 3 cups (720ml) very hot water (freshly boiled or microwaved works perfectly)
- 2 teaspoons pure vanilla extract
-
Optional Garnishes and Serving Suggestions:
- Vanilla bean ice cream
- Whipped cream
- Fresh berries (raspberries or strawberries are delightful)
- A dusting of extra cocoa powder or powdered sugar
Preparation – Getting Ready to Bake a Decadent Chocolate Cobbler
- Preheat your oven: First things first, let’s get that oven ready. I always set my oven to 375°F (190°C) well in advance, usually about 15-20 minutes before I even start mixing. This ensures it’s truly up to temperature when your magnificent Chocolate Cobbler is ready to go in. A consistently hot oven is key for even baking and a perfectly risen topping.
- Prepare your baking dish: Grab a 9×13-inch baking dish. You don’t need to butter or grease it, which is one of the joys of this particular cobbler recipe! The magic of the chocolate sauce will ensure nothing sticks, and we want that sauce to do its thing directly against the dish. This specific size is important to ensure the proper depth for the topping and the sauce, allowing everything to bake beautifully.
- Gather your ingredients: Before you dive into the mixing, take a moment to lay out all your ingredients. I find this “mise en place” approach incredibly helpful, especially when I’m baking. It prevents those frantic searches for an ingredient mid-recipe and ensures you haven’t forgotten anything crucial for your delicious Chocolate Cobbler. Make sure your butter for the topping is still very cold, and your water for the sauce is hot.
Crafting the Irresistible Chocolate Cobbler Topping
This is where we create the cake-like, fudgy topping that makes this Chocolate Cobbler so unique. It’s similar to making biscuits or scones, relying on cold butter for tenderness.
- Combine dry ingredients for the topping: In a large mixing bowl, whisk together the all-purpose flour, granulated sugar, unsweetened cocoa powder, baking powder, and salt. I like to use a balloon whisk to ensure everything is thoroughly combined and there are no lumps, especially from the cocoa powder. You want a uniformly colored, smooth mixture before moving on. This foundational step is crucial for the flavor and texture of your Chocolate Cobbler topping.
-
Cut in the cold butter: Now for the fun part! Add the very cold, cubed unsalted butter to your dry ingredients. You have a few options here:
- Using a pastry blender: This is my preferred method. Work the butter into the flour mixture until it resembles coarse crumbs, with some pieces of butter still visible, about the size of small peas. This takes a few minutes of steady effort.
- Using your fingertips: If you don’t have a pastry blender, your clean fingertips work wonderfully. Gently rub the butter into the flour mixture. Be quick, as you don’t want the warmth of your hands to melt the butter too much.
- Using a food processor: For a super quick method, pulse the dry ingredients with the cold butter in a food processor a few times until you reach that coarse crumb consistency. Just be careful not to overmix!
The key here is that the butter remains cold, creating pockets of steam during baking, which results in a tender and flaky texture for your Chocolate Cobbler topping.
- Add wet ingredients to the topping: In a separate small bowl or measuring cup, whisk together the whole milk and pure vanilla extract. Once combined, pour this liquid mixture into your flour and butter mixture.
- Gently mix the topping: Using a wooden spoon or a spatula, gently mix until just combined. Important: Avoid overmixing! Overmixing develops the gluten in the flour, which can lead to a tough cobbler topping, and we’re aiming for tender and delicious. A few dry streaks are perfectly fine; they’ll disappear during baking. The batter will be thick, almost like a scone dough. Set this bowl aside for a moment while we prepare the sauce for our Chocolate Cobbler.
Whipping Up the Rich Chocolate Sauce for Your Chocolate Cobbler
This is the magical element of our Chocolate Cobbler – a rich, self-saucing chocolate layer that forms underneath the cakey topping. It’s surprisingly simple to make!
- Combine dry ingredients for the sauce: In another medium-sized bowl, whisk together the granulated sugar, unsweetened cocoa powder, cornstarch, and salt. Again, a good whisk here helps ensure everything is evenly distributed and breaks up any cocoa lumps. The cornstarch is essential; it will thicken the sauce beautifully as it bakes, creating that luscious texture you expect from a perfect Chocolate Cobbler.
- Whisk in the hot water and vanilla: Carefully pour the 3 cups of very hot water into the dry mixture. Whisk continuously until the sugar and cocoa powder are fully dissolved and you have a smooth, dark chocolate liquid. It might look a little thin now, but trust the process – the cornstarch will work its magic in the oven. Stir in the 2 teaspoons of pure vanilla extract for that extra layer of aroma and flavor. This fragrant chocolate liquid is the heart of your Chocolate Cobbler.
Assembling and Baking Your Delicious Chocolate Cobbler
Now comes the exciting part – bringing it all together and letting the oven transform these simple ingredients into a warm, gooey, chocolatey masterpiece!
- Assemble the cobbler: Pour the hot chocolate sauce evenly into the bottom of your ungreased 9×13-inch baking dish. It will be a thin layer, don’t worry. Then, take spoonfuls of your chocolate cobbler topping mixture and drop them gently over the chocolate sauce. You don’t need to spread them out or make them perfectly even; just aim for relatively uniform dollops across the surface. Leave small gaps between the dollops; this allows the sauce to bubble up and around the topping as it bakes, creating that signature cobbler effect. As it bakes, the topping will expand and sink slightly into the sauce in places, creating a beautiful rustic appearance for your Chocolate Cobbler.
-
Bake the Chocolate Cobbler: Carefully transfer the baking dish to your preheated 375°F (190°C) oven. Bake for approximately 35-45 minutes.
- How to tell it’s done: The cobbler topping should be puffed, golden brown, and set. A toothpick inserted into the cakey topping should come out clean (though remember, the sauce underneath will be liquid and bubbling!). You’ll also notice the edges of the chocolate sauce bubbling vigorously. The entire kitchen will fill with the most incredible aroma of baking chocolate – that’s often my first clue that my Chocolate Cobbler is nearing perfection!
- Rotation (optional): If your oven has hot spots, you might want to rotate the dish halfway through baking to ensure even browning.
Do not be alarmed by the liquid sauce underneath; that’s exactly what we want! This is a self-saucing cobbler, and the sauce will be thick and fudgy.
Serving Suggestions and Enjoying Your Homemade Chocolate Cobbler
The moment you’ve been waiting for! This Chocolate Cobbler is truly something special, especially when served warm.
- Rest and serve: Once your Chocolate Cobbler emerges from the oven, resist the immediate urge to dig in! Let it rest on a wire rack for at least 10-15 minutes. This resting period allows the sauce to thicken a bit more and the topping to set properly. The residual heat will continue to cook it gently.
-
Plate and garnish: This is my favorite part! Carefully scoop generous portions of the warm Chocolate Cobbler into bowls. Make sure each serving gets a good mix of the fluffy, cake-like topping and the rich, gooey chocolate sauce from beneath.
- Vanilla Ice Cream: My absolute favorite way to enjoy this is with a generous scoop of cold vanilla bean ice cream. The contrast of the warm, rich chocolate and the cool, creamy vanilla is simply divine. The ice cream will melt slightly into the warm sauce, creating an even more luxurious experience.
- Whipped Cream: A dollop of freshly whipped cream adds a wonderful lightness and balances the intensity of the chocolate.
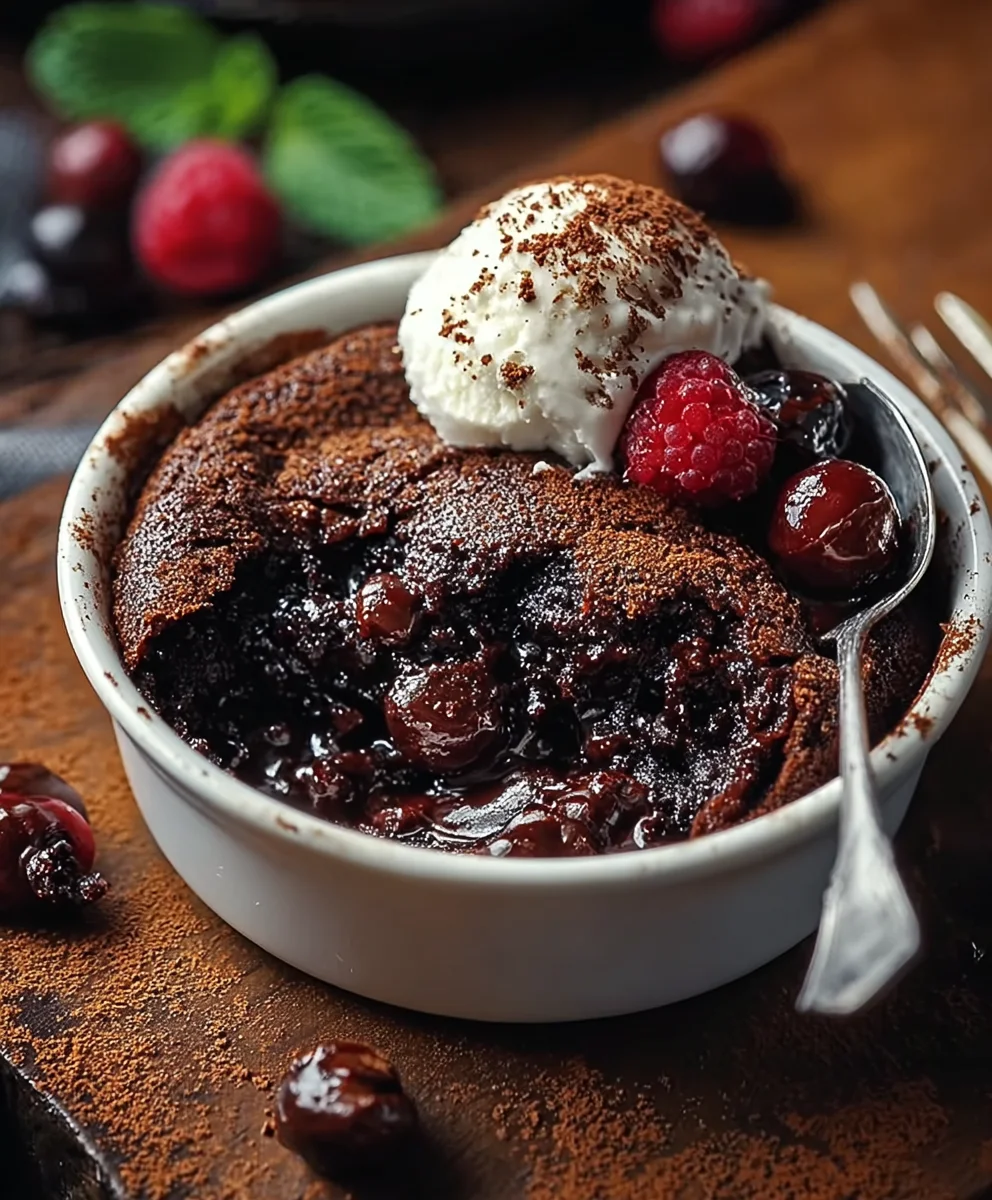
- Fresh Berries: A scattering of fresh raspberries or sliced strawberries can add a touch of acidity and freshness, cutting through the richness beautifully. It also adds a lovely pop of color!
- Dusting: For an elegant finish, a light dusting of extra cocoa powder or powdered sugar over the top can make your homemade Chocolate Cobbler look even more appealing.
This dessert is perfect for cozy nights in, entertaining guests, or simply satisfying that deep, chocolate craving. Enjoy every warm, chocolatey spoonful of your spectacular Chocolate Cobbler! It’s a dessert that truly speaks to the soul.
Conclusion:
This isn’t just another dessert recipe; it’s an invitation to pure, unadulterated comfort and joy, wrapped up in a package of glorious chocolatey goodness. What makes this particular Chocolate Cobbler a truly indispensable addition to your baking repertoire is its remarkable ability to deliver a complex sensory experience with minimal fuss. Imagine: the moment you pull this bubbling, fragrant masterpiece from your oven, you’re not just preparing a treat, you’re crafting an instant classic that will have everyone clamoring for more. The magic, as I’ve discovered time and again, lies in the brilliant interplay of textures and temperatures. You get a gorgeously rich, almost molten chocolate pudding-like base that’s incredibly deep in flavor, a testament to the quality of the cocoa. This luscious foundation is then beautifully contrasted by a tender, cakey, golden-brown topping that bakes right into the luxurious cocoa bath, soaking up some of that irresistible warmth and flavor. It’s a symphony of soft, yielding chewiness against that smooth, decadent interior.
I’ve found that this cobbler strikes the perfect balance – it’s profoundly warm, utterly comforting, and utterly satisfies that deep-seated craving for something profoundly decadent without being overly heavy or cloyingly sweet. It avoids the dryness that can sometimes plague traditional cakes or brownies, maintaining an incredible moistness throughout. It’s a dessert that feels both incredibly special and delightfully approachable, perfect for a cozy weeknight or a festive gathering. The sheer ease of preparation belies the impressive results, making it an ideal choice for bakers of all skill levels. This recipe promises not just a dessert, but a delightful culinary experience that will quickly become a cherished family favorite, a go-to for impromptu potlucks, or simply your secret weapon for making any ordinary day feel a little bit extraordinary.
Elevate Your Experience: Serving Suggestions & Creative Twists
While this Chocolate Cobbler is absolutely divine straight from the dish, especially when it’s still warm and sending aromatic wisps into the air, I always encourage a little extra flair! My go-to serving suggestion, hands down, is a generous scoop of vanilla bean ice cream. The cold, creamy ice cream melting into the warm, rich cobbler creates an unforgettably luxurious contrast that is simply heavenly. Alternatively, a dollop of freshly whipped cream, perhaps lightly sweetened with a touch of vanilla or a hint of espresso powder, adds another layer of sophisticated richness without overwhelming the star of the show. For those who love a bit of tangy counterpoint, a scattering of fresh raspberries or sliced strawberries can cut through the richness beautifully, adding a burst of fruitiness and vibrant color. Imagine the vibrant red berries against the dark chocolate – absolutely stunning!
But don’t stop there! This recipe is incredibly adaptable, inviting you to put your own creative spin on it. For an even deeper chocolate profile, try incorporating a mixture of dark and semi-sweet chocolate chips into the base alongside the cocoa powder. If you’re feeling adventurous, a pinch of cayenne pepper or chili powder can introduce a subtle, exciting warmth, creating a ‘Mexican chocolate’ vibe that’s truly captivating. A teaspoon of instant espresso powder dissolved in the water will intensify the chocolate flavor without making it taste overtly like coffee – it’s my secret weapon for making chocolate taste “more chocolaty.” A splash of orange zest grated directly into the dry ingredients for the topping, or even a tablespoon of orange liqueur mixed into the base, can offer a bright, aromatic lift that pairs wonderfully with chocolate. For a nutty crunch, a sprinkle of toasted pecans or walnuts over the top before baking adds another fantastic texture dimension. You could also drizzle a homemade caramel sauce or a raspberry coulis over individual servings for a gourmet touch. Remember, the beauty of baking is in the experimentation, so feel free to play around with these ideas to tailor the cobbler perfectly to your taste.
Your Turn to Create Sweet Memories!
Now that I’ve shared all my insights and enthusiasm for this incredible dessert, it’s truly your turn to experience the magic firsthand. I genuinely believe that once you try making this Chocolate Cobbler, it will become a cherished part of your culinary collection. Don’t be intimidated; the steps are straightforward, and the reward is immense. Picture the smiles on the faces of your loved ones as they take their first bite, or the quiet satisfaction of enjoying a warm serving all to yourself after a long day. This isn’t just about following a recipe; it’s about creating moments, sharing joy, and indulging in a little bit of pure, unadulterated bliss.
So, gather your ingredients, preheat your oven, and prepare to embark on a delightful baking adventure. I am so excited for you to discover the profound comfort and sheer deliciousness that awaits. And when you do, please, please share your experience! I absolutely adore hearing about your successes and seeing your beautiful creations. Leave a comment below, tell me about your favorite serving suggestion, or any creative variations you came up with. Did you add nuts? A dash of spice? How did your family react? Your feedback and stories are what truly bring these recipes to life for me and for other aspiring bakers. Happy baking, my friends!
Irresistible Chocolate Cobbler
A warm, gooey, and easy chocolate cobbler featuring a tender cake-like topping over a molten, self-saucing chocolate pudding base. An indulgent and comforting dessert.
Ingredients
-
1 ½ cups all-purpose flour
-
¾ cup granulated sugar (for topping)
-
¼ cup unsweetened cocoa powder (for topping)
-
2 teaspoons baking powder
-
½ teaspoon salt (for topping)
-
½ cup unsalted butter, very cold and cubed
-
½ cup whole milk
-
1 teaspoon pure vanilla extract (for topping)
-
1 ½ cups granulated sugar (for sauce)
-
¾ cup unsweetened cocoa powder (for sauce)
-
¼ cup cornstarch
-
½ teaspoon salt (for sauce)
-
3 cups very hot water
-
2 teaspoons pure vanilla extract (for sauce)
-
Vanilla bean ice cream (optional garnish)
-
Whipped cream (optional garnish)
-
Fresh berries (raspberries or strawberries, optional garnish)
-
Extra cocoa powder or powdered sugar (optional garnish)
Instructions
-
Step 1
Preheat oven to 375°F (190°C). Prepare an ungreased 9×13-inch baking dish. -
Step 2
In a large bowl, whisk together 1 ½ cups all-purpose flour, ¾ cup granulated sugar, ¼ cup unsweetened cocoa powder, 2 teaspoons baking powder, and ½ teaspoon salt. Cut in ½ cup cold, cubed unsalted butter until mixture resembles coarse crumbs. In a separate small bowl, whisk together ½ cup whole milk and 1 teaspoon pure vanilla extract. Add wet ingredients to dry and mix gently until just combined. Set aside. -
Step 3
In another medium bowl, whisk together 1 ½ cups granulated sugar, ¾ cup unsweetened cocoa powder, ¼ cup cornstarch, and ½ teaspoon salt. Whisk in 3 cups very hot water and 2 teaspoons pure vanilla extract until smooth. -
Step 4
Pour the hot chocolate sauce evenly into the prepared baking dish. Drop spoonfuls of the topping mixture gently over the sauce, leaving small gaps. -
Step 5
Bake for 35-45 minutes, or until the topping is puffed, golden brown, and set. The sauce underneath will be bubbling. -
Step 6
Let the cobbler rest on a wire rack for 10-15 minutes before serving. -
Step 7
Serve warm, scooping generous portions to get both topping and sauce. Garnish optionally with vanilla ice cream, whipped cream, or fresh berries.
Important Information
Nutrition Facts (Per Serving)
It is important to consider this information as approximate and not to use it as definitive health advice.
Allergy Information
Please check ingredients for potential allergens and consult a health professional if in doubt.

Leave a Comment