
Salted Caramel Apple Crumble Bars Fall Treat – the very name conjures images of crisp autumn days, vibrant foliage, and the cozy warmth of a kitchen filled with irresistible aromas. As the leaves begin their spectacular transformation and a gentle chill enters the air, our thoughts often drift to comforting, seasonal delights. For generations, apple desserts have held a cherished place in fall traditions, from rustic crumbles to elegant pies, symbolizing abundance and the sweet conclusion of the harvest season. These bars take that timeless affection for apples and elevate it with a sophisticated twist, marrying classic flavors with an undeniably modern appeal.
Why We Adore This Salted Caramel Apple Crumble Bars Fall Treat
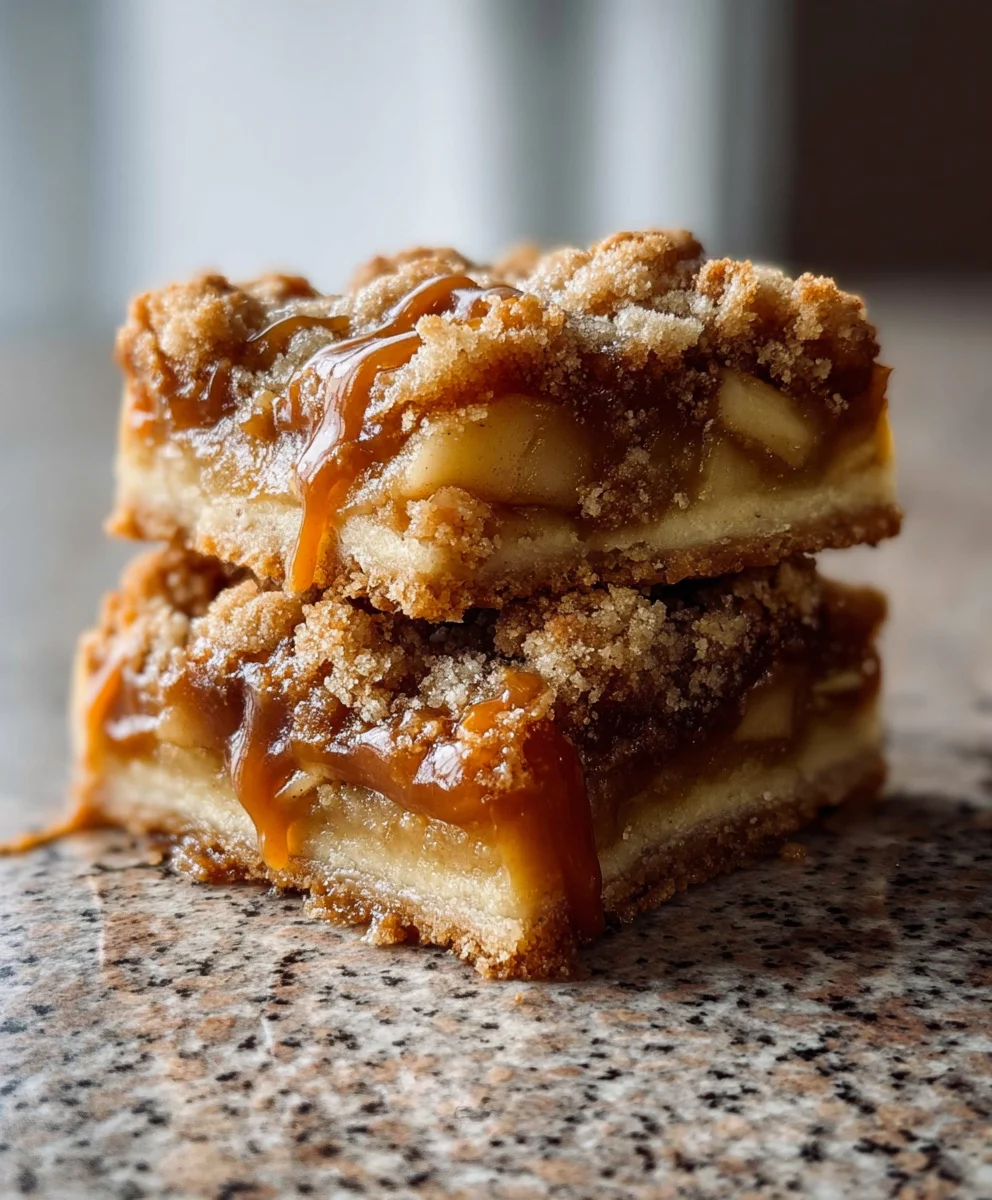
I find that what truly makes this recipe a standout is the harmonious blend of textures and tastes. Imagine tender, spiced apple chunks nestled beneath a luscious layer of homemade salted caramel, all crowned with a buttery, golden crumble topping. It’s a symphony for the senses: the tartness of the apples, the rich sweetness of the caramel, and the perfect hint of salt to balance it all, culminating in a satisfyingly crumbly finish. Beyond its exquisite flavor profile, the bar format offers unparalleled convenience – easy to make, share, and enjoy without the fuss of a fork and plate, making it the ideal companion for potlucks, family gatherings, or simply a cozy evening at home. This is more than just a dessert; it’s an edible celebration of autumn, offering a warm hug in every delightful bite.
Ingredients:
- For the Shortbread Crust:
- 2 ½ cups (300g) all-purpose flour, spooned and leveled
- ¾ cup (150g) granulated sugar
- 1 teaspoon salt
- 1 cup (226g) unsalted butter, very cold and cut into ½-inch cubes
- 1 large egg yolk
- 1 teaspoon pure vanilla extract
- For the Apple Filling:
- 6-7 medium apples (about 2 ½ – 3 pounds), a mix of Granny Smith, Honeycrisp, or Fuji works beautifully for a balance of tartness and sweetness
- ½ cup (100g) packed light brown sugar
- 2 tablespoons all-purpose flour (or cornstarch for a gluten-free option)
- 1 teaspoon ground cinnamon
- ¼ teaspoon ground nutmeg
- 1 tablespoon fresh lemon juice
- For the Salted Caramel Sauce:
- 1 cup (200g) granulated sugar
- ¼ cup water
- ½ cup (120ml) heavy cream, warmed slightly in the microwave or a small saucepan
- ¼ cup (56g) unsalted butter, cut into pieces
- 1 teaspoon pure vanilla extract
- ½ teaspoon flaky sea salt, plus more for garnish
- For the Crumble Topping:
- 1 ½ cups (180g) all-purpose flour, spooned and leveled
- ¾ cup (150g) packed light brown sugar
- 1 teaspoon ground cinnamon
- ½ teaspoon salt
- 1 cup (90g) old-fashioned rolled oats (not instant)
- ¾ cup (170g) unsalted butter, very cold and cut into ½-inch cubes
Prepare the Shortbread Crust
- Preheat your oven and prepare the pan: First things first, let’s get that oven ready. Preheat it to 350°F (175°C). While it’s heating up, grab a 9×13 inch baking pan. I like to line mine with parchment paper, leaving an overhang on the longer sides. This makes lifting the bars out much, much easier later on and ensures a clean release for your perfect Salted Caramel Apple Crumble Bars Fall Treat. Give the parchment paper a light spray with non-stick cooking spray for good measure.
- Combine dry ingredients for the crust: In a large mixing bowl, whisk together the 2 ½ cups of all-purpose flour, ¾ cup of granulated sugar, and 1 teaspoon of salt. Make sure it’s well combined so that all the flavors are evenly distributed.
- Cut in the cold butter: Now for the butter! Add the 1 cup of very cold, cubed unsalted butter to the dry ingredients. Using a pastry blender, two knives, or even your fingertips (working quickly so the butter doesn’t melt), cut the butter into the flour mixture until it resembles coarse crumbs with some pea-sized pieces of butter remaining. This step is crucial for creating a tender, flaky crust, so resist the urge to overmix.
- Add wet ingredients: In a small bowl or measuring cup, whisk together the 1 large egg yolk and 1 teaspoon of pure vanilla extract. Pour this mixture over the flour and butter crumbs. Mix until just combined and a dough starts to form. Be careful not to overwork the dough; we’re just aiming for it to come together.
- Press into the baking pan: Transfer the dough to your prepared 9×13 inch baking pan. Using your hands or the bottom of a flat glass, press the dough evenly into the bottom of the pan. Make sure it’s a uniform layer from edge to edge.
- Chill the crust: For the best results and to prevent shrinkage during baking, I always recommend chilling the pressed crust in the refrigerator for at least 30 minutes. If you’re in a hurry, 15 minutes in the freezer can also do the trick.
- Pre-bake the crust: Once chilled, remove the pan from the refrigerator and prick the bottom of the crust all over with a fork. This helps steam escape and prevents the crust from puffing up. Bake for 15-18 minutes, or until the edges are lightly golden. This pre-baking step ensures your crust is perfectly cooked and doesn’t get soggy from the apple filling. Remove from the oven and set aside to cool slightly while you prepare the other components.
Prepare the Apple Filling
- Prepare the apples: This is where the magic of the fruit comes in! Take your 6-7 medium apples. I find that a mix of tart Granny Smith apples with sweeter varieties like Honeycrisp or Fuji gives the best flavor profile for these bars, providing a wonderful balance. Peel, core, and then slice the apples into roughly ¼-inch thick pieces. You want them thin enough to soften evenly but thick enough to hold their shape.
- Toss with seasonings: In a large bowl, combine the sliced apples with ½ cup of packed light brown sugar, 2 tablespoons of all-purpose flour (or cornstarch if you prefer a gluten-free option or a slightly clearer sauce), 1 teaspoon of ground cinnamon, ¼ teaspoon of ground nutmeg, and 1 tablespoon of fresh lemon juice. The lemon juice isn’t just for flavor; it also helps prevent the apples from browning. Toss everything together gently until the apples are evenly coated with the sugar and spices.
- Cook the apple filling slightly (optional, but recommended): While you could put the apples directly onto the crust, I often find that gently cooking the apples for about 5-7 minutes in a large skillet over medium heat before assembly helps them soften just enough and releases some of their juices. This prevents the filling from being too watery in the final bars and ensures the apples are tender when baked. Stir occasionally until they are slightly softened but still hold their shape – we’re not aiming for applesauce here! Remove from heat and set aside.
Prepare the Salted Caramel Sauce
- Start the caramel: In a medium, heavy-bottomed saucepan, combine the 1 cup of granulated sugar and ¼ cup of water. Stir gently just to moisten all the sugar.
- Cook without stirring: Place the saucepan over medium heat. Bring the mixture to a boil. Do not stir the caramel once it starts boiling, as this can cause crystallization. You can gently swirl the pan occasionally if you see certain spots cooking faster. Watch carefully as the sugar syrup begins to change color. It will progress from clear to a very pale yellow, then to a beautiful amber. This usually takes about 8-12 minutes, but it can happen quickly once the color starts to deepen, so stay focused!
- Achieve the perfect amber: Continue to cook until the caramel reaches a deep amber color. This is the flavor sweet spot for a rich caramel. As soon as it reaches your desired color, immediately remove the pan from the heat. Be extremely careful, as molten sugar is very hot.
- Whisk in warm heavy cream: Slowly and carefully pour the ½ cup of warmed heavy cream into the hot caramel while continuously whisking. The mixture will bubble up vigorously, so be prepared for a strong reaction! Keep whisking until the bubbling subsides and the mixture is smooth. Warming the cream beforehand helps reduce the temperature shock and prevents the caramel from seizing as much.
- Add butter, vanilla, and salt: Now, add the ¼ cup of unsalted butter, cut into pieces, 1 teaspoon of pure vanilla extract, and ½ teaspoon of flaky sea salt. Continue to whisk until the butter has fully melted and the caramel sauce is smooth and glossy.
- Cool the caramel: Pour the finished salted caramel sauce into a heatproof bowl or jar. Let it cool for at least 15-20 minutes at room temperature. It will thicken considerably as it cools, reaching that perfect drizzle-able consistency for your Salted Caramel Apple Crumble Bars Fall Treat. If it gets too thick, you can gently warm it for a few seconds in the microwave or over a double boiler.
Prepare the Crumble Topping
- Combine dry ingredients: In a medium mixing bowl, whisk together the 1 ½ cups of all-purpose flour, ¾ cup of packed light brown sugar, 1 teaspoon of ground cinnamon, ½ teaspoon of salt, and 1 cup of old-fashioned rolled oats. The oats add a wonderful chewiness and texture to the crumble.
- Cut in the cold butter: Add the ¾ cup of very cold, cubed unsalted butter to the dry ingredients. Use a pastry blender, your fingertips, or a fork to cut the butter into the mixture. Work quickly until the mixture resembles coarse, wet sand with some larger pea-sized pieces of butter still visible. The key here is to keep the butter cold, which will create a light and crumbly texture as it bakes. Avoid overworking the mixture, as we want distinct crumbs, not a paste.
- Ensure proper crumble consistency: I often like to give the mixture a final gentle squeeze with my hands to create some larger clusters. These larger pieces will bake up beautifully golden and crunchy, adding another layer of texture to your delicious bars. Set the crumble topping aside.
Assemble and Bake the Salted Caramel Apple Crumble Bars
- Spread the apple filling: Once your pre-baked crust has cooled slightly, evenly spread the prepared apple filling over the crust. Make sure the apples are distributed from edge to edge.
- Drizzle with salted caramel: Now for one of my favorite parts! Take your cooled (but still pourable) salted caramel sauce and generously drizzle about half to two-thirds of it over the apple layer. You can use a spoon or a squeeze bottle for a more controlled drizzle. Reserve some caramel for serving, as a final flourish truly makes these Salted Caramel Apple Crumble Bars Fall Treat special.
- Add the crumble topping: Evenly sprinkle the prepared crumble topping over the apples and caramel. Ensure good coverage, gently patting it down if needed, but avoid pressing too firmly; we want that lovely crumbly texture.
- Bake the bars: Place the pan back into your preheated 350°F (175°C) oven. Bake for approximately 45-55 minutes. You’ll know they’re ready when the crumble topping is beautifully golden brown, the apple filling is bubbling around the edges, and your kitchen is filled with the most incredible aroma of cinnamon, apples, and caramel. The longer baking time ensures the apples are perfectly tender and the crust is fully cooked.
- Check for doneness: If you notice the topping browning too quickly, you can loosely tent the pan with aluminum foil for the last 10-15 minutes of baking. A quick peek with a knife into the apple filling will confirm they’re soft enough.
Cooling and Serving Your Fall Treat
- Cool completely (this is crucial!): This step is arguably the most important for perfectly structured bars. Once baked, remove the pan from the oven and place it on a wire rack. It is absolutely essential to let the Salted Caramel Apple Crumble Bars cool completely at room temperature, which can take anywhere from 3 to 4 hours, or even longer. For the cleanest cuts and best set, I often chill them in the refrigerator for an additional 1-2 hours after they’ve cooled down. Resist the urge to cut into them too soon, as the filling needs time to set, and the bars will fall apart if cut warm.
- Lift and cut: Once fully cooled and firm, use the parchment paper overhang to carefully lift the entire slab of bars out of the pan and transfer it to a cutting board.
- Cut into bars: Using a sharp knife, cut the slab into individual bars. I usually go for 12 or 16 bars, depending on how large I want each serving of this delightful Fall Treat. Wipe your knife clean between cuts for the neatest edges.
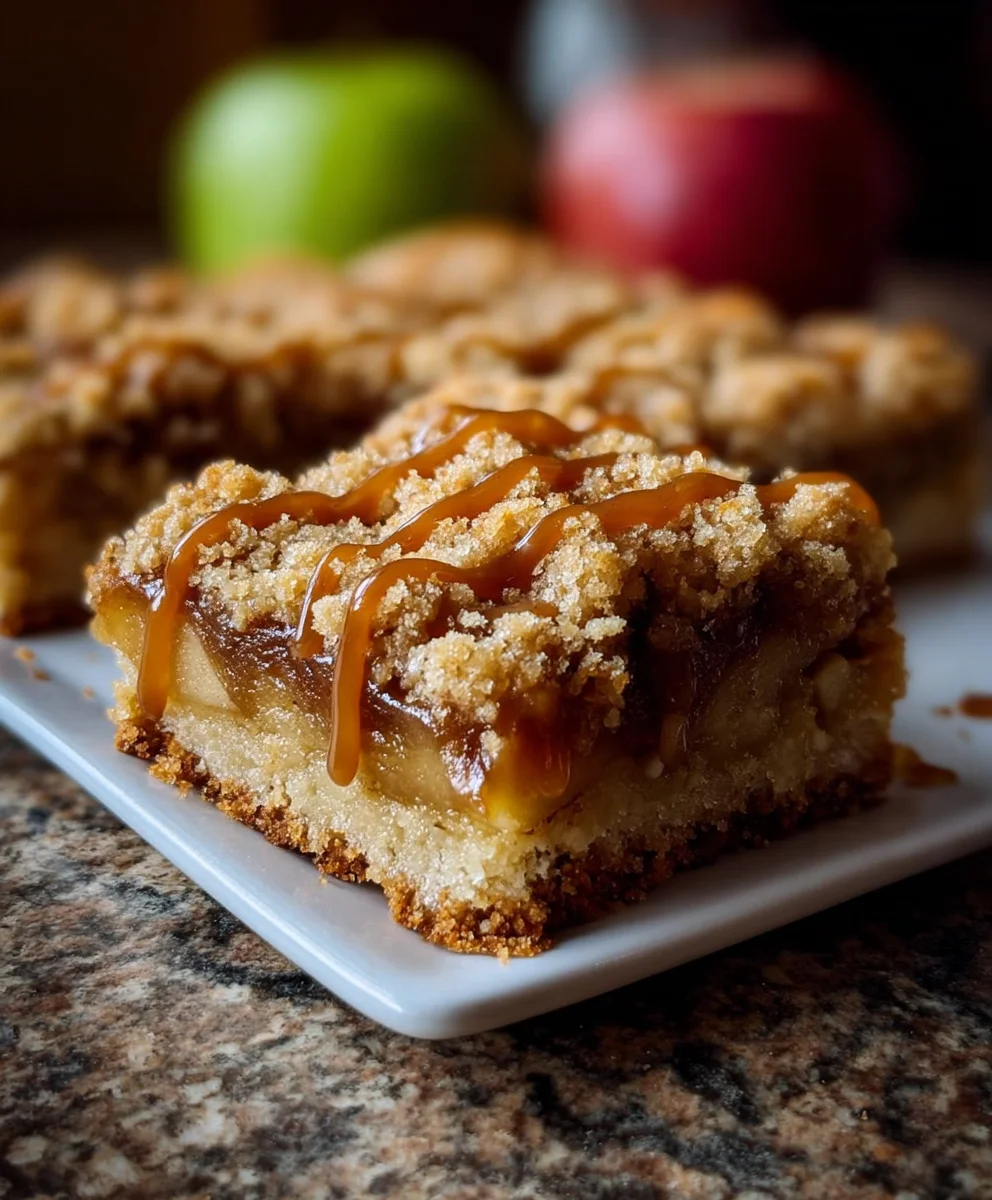
- Drizzle and garnish: Before serving, rewarm the remaining salted caramel sauce slightly if it has thickened too much. Drizzle a little extra caramel over each bar. For an extra touch of gourmet elegance and to enhance that “salted caramel” flavor, sprinkle a tiny pinch of flaky sea salt over the top of each bar.
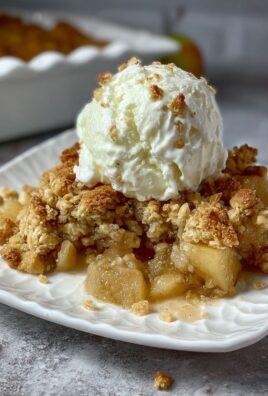
- Serving suggestions: These bars are absolutely divine on their own, but they also pair wonderfully with a scoop of vanilla bean ice cream or a dollop of fresh whipped cream. They are truly the quintessential Salted Caramel Apple Crumble Bars Fall Treat, perfect for any autumn gathering or just a cozy evening in.
- Storage: Store any leftover bars in an airtight container at room temperature for up to 3 days, or in the refrigerator for up to 5 days. You can gently warm them in the microwave for a few seconds before serving to bring back that freshly baked warmth and gooey caramel.
Conclusion:
And there you have it, my friends! We’ve journeyed together through the delightful process of creating what I truly believe is the ultimate autumn dessert. If you’ve been on the fence about trying a new baking project, let this be the one that truly captivates your senses and warms your heart. These bars aren’t just a recipe; they are an experience, a symphony of flavors and textures that perfectly encapsulate everything wonderful about the crisp, cozy days of fall. The buttery, slightly salty shortbread crust provides a sturdy, comforting foundation for the tender, spiced apples, which are then generously enrobed in a luscious, gooey salted caramel. And finally, the crumbly, oat-studded topping adds that essential textural contrast and a hint of golden-brown perfection. It’s the kind of treat that doesn’t just satisfy a sweet tooth; it evokes memories, creates new ones, and makes every bite feel like a hug.
I genuinely cannot recommend this recipe enough. It’s the kind of bake that makes your kitchen smell absolutely heavenly, drawing everyone in with its irresistible aroma. Imagine the joy of pulling a tray of these golden beauties from the oven, the caramel bubbling gently, the apples soft and sweet, and the crumb topping perfectly toasted. It’s a sight, and a smell, that truly embodies comfort. The balance between the sweetness of the caramel and apples, cut by that crucial pinch of sea salt, is what truly elevates these bars from merely good to absolutely unforgettable. Trust me when I say, once you try them, you’ll understand why they’re destined to become a staple in your fall baking repertoire. This is more than just a dessert; it’s a celebration of the season, baked right into a convenient, delightful bar.
Serving Suggestions and Delightful Variations:
While these bars are absolutely divine served at room temperature, straight from the pan, I have a few suggestions to take your indulgence to the next level. For an extra touch of decadence, serve them slightly warm with a generous scoop of vanilla bean ice cream. The cold, creamy ice cream melting into the warm, gooey caramel and tender apples is an experience you won’t soon forget. A dollop of freshly whipped cream, perhaps infused with a hint of cinnamon or maple syrup, also makes for a fantastic pairing. They are also incredibly robust and travel well, making them an ideal candidate for potlucks, bake sales, or as a thoughtful homemade gift for friends and family. Imagine bringing a plate of these to a holiday gathering – you’d be an instant legend!
And if you’re feeling adventurous, don’t hesitate to experiment with variations. You could add a handful of chopped toasted pecans or walnuts to the crumb topping for an extra layer of nutty flavor and crunch. For a bolder spice profile, consider incorporating a pinch of freshly grated nutmeg or a touch of allspice alongside the cinnamon. While I adore the classic apple, a mix of apples and pears could also be a delicious twist. For those who love a little extra something, a light drizzle of extra salted caramel sauce or a simple powdered sugar glaze over the cooled bars would add another layer of visual appeal and sweetness. Remember, recipes are just guidelines; feel free to make them your own!
Your Turn to Bake and Share!
Now that you have all the tips and tricks, it’s your turn to experience the magic of these incredible Salted Caramel Apple Crum extractble Bars Fall Treat. I wholeheartedly encourage you to carve out some time this autumn, gather your ingredients, and immerse yourself in the joy of baking them. The satisfaction of creating something so delicious from scratch is truly unmatched. Once you’ve baked them, tasted them, and inevitably fallen in love with them, I would absolutely adore hearing about your experience. Did you add any unique twists? What did your family and friends think? Please don’t hesitate to leave a comment below and share your thoughts. Even better, snap a photo and share it on your social media, tagging me so I can see your wonderful creations! Your feedback and shared joy are what make this community so special. Happy baking, and enjoy every glorious bite!
Salted Caramel Apple Crumble Bars: Perfect Fall Treat!
As autumn arrives, these Salted Caramel Apple Crumble Bars capture the essence of the season. Featuring tender, spiced apple chunks, a luscious salted caramel layer, and a buttery crumble topping, these bars offer a harmonious blend of textures and tastes. Easy to share and enjoy, they are an edible celebration of autumn, offering a warm hug in every delightful bite.
Ingredients
-
1 cup (2 sticks) unsalted butter, melted
-
1 1/2 cups granulated sugar
-
1 teaspoon vanilla extract
-
1/2 teaspoon salt
-
2 1/2 cups all-purpose flour
-
3 cups peeled and thinly sliced apples (about 3 medium)
-
1/2 cup salted caramel sauce
-
1 teaspoon ground cinnamon
-
1/4 teaspoon ground nutmeg
Instructions
-
Step 1
Preheat oven to 350°F (175°C). Line a 9×13 inch baking pan with parchment paper, leaving an overhang for easy lifting. Lightly spray parchment with non-stick spray. -
Step 2
In a large bowl, combine the melted butter, granulated sugar, vanilla extract, and salt. Gradually mix in the all-purpose flour until the mixture is crumbly. -
Step 3
Press about two-thirds of the crumb mixture evenly into the bottom of the prepared pan to form the crust. -
Step 4
In a separate bowl, toss the sliced apples with ground cinnamon and ground nutmeg until evenly coated. -
Step 5
Spread the spiced apple filling over the crust. Drizzle the salted caramel sauce evenly over the apple layer. -
Step 6
Evenly sprinkle the remaining one-third of the crumb mixture over the caramel and apples. Bake for 45-55 minutes, or until the topping is golden brown and the apple filling is bubbling. -
Step 7
Cool completely on a wire rack for 3-4 hours (or chill for 1-2 hours) before lifting and cutting into 12-16 bars. Optionally, drizzle with more caramel or sprinkle flaky sea salt. Store leftovers in an airtight container.
Important Information
Nutrition Facts (Per Serving)
It is important to consider this information as approximate and not to use it as definitive health advice.
Allergy Information
Please check ingredients for potential allergens and consult a health professional if in doubt.

Leave a Comment