
Cherry Pie Bombs – the very name promises an explosion of flavor and fun! Have you ever wished you could enjoy the comforting, nostalgic taste of a classic cherry pie without the fuss of a fork and plate? I certainly have, and that’s precisely where these delightful creations come into their own. While the traditional cherry pie has been a beloved American dessert for centuries, particularly cherished during summer cherry season and holiday gatherings, these innovative “bombs” offer a modern, convenient twist.
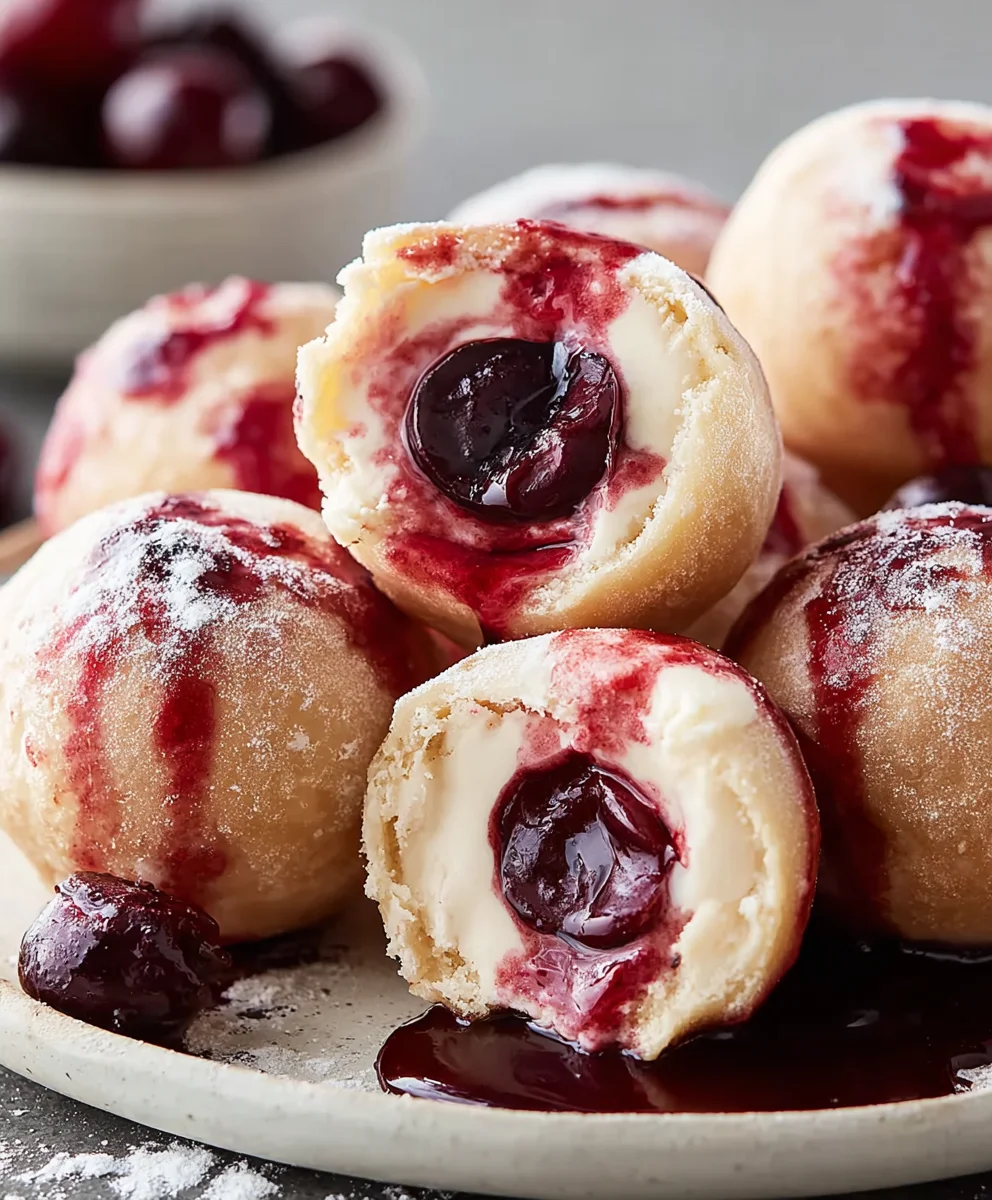
They encapsulate all the sweet, tangy goodness of a traditional cherry pie filling, wrapped in a golden, flaky crust, perfectly portioned for a single, satisfying bite. People adore this dish not only for its familiar and appealing flavor profile but also for its incredible convenience and portability.
Imagine sinking your teeth into a warm, gooey center bursting with vibrant cherry notes, encased in a perfectly crisp shell – pure bliss!
These bite-sized wonders are perfect for parties, picnics, or simply as an easy-to-eat treat for yourself. I’m thrilled to share how you can bring these irresistible Cherry Pie Bombs to life in your own kitchen.
Ingredients:
- For the Flaky Pie Dough:
- 2 ½ cups (300g) all-purpose flour, plus more for dusting
- 1 teaspoon granulated sugar
- 1 teaspoon fine sea salt
- 1 cup (226g) unsalted butter, very cold and cut into ½-inch cubes
- ½ cup (120ml) ice water, plus an additional 1-2 tablespoons if needed
- For the Sweet Cherry Filling:
- 4 cups (about 1.5 lbs or 680g) fresh or frozen pitted sweet cherries (if using frozen, do not thaw completely)
- ¾ cup (150g) granulated sugar, adjust to your desired sweetness and the tartness of your cherries
- 3 tablespoons cornstarch (this is our secret weapon for a perfectly thick filling!)
- ½ teaspoon pure almond extract (optional, but it truly elevates the cherry flavor!)
- ¼ teaspoon ground cinnamon (optional, for a warm hint)
- 1 tablespoon fresh lemon juice (to brighten the flavors)
- For the Egg Wash:
- 1 large egg
- 1 tablespoon water
- For the Vanilla Glaze (Optional, but highly recommended!):
- 1 ½ cups (180g) powdered sugar, sifted
- 2-3 tablespoons milk (any kind works, whole milk gives a richer glaze)
- ½ teaspoon pure vanilla extract
Crafting Your Perfect Pie Dough: The Foundation of Delicious Cherry Pie Bombs
Making your own pie dough from scratch is incredibly rewarding, and it truly makes a difference in the final taste and texture of these delightful Cherry Pie Bombs. Don’t be intimidated; with a few simple steps, you’ll have a wonderfully flaky dough!
- Whisk the Dry Ingredients: In a large mixing bowl, combine the 2 ½ cups of all-purpose flour, 1 teaspoon of granulated sugar, and 1 teaspoon of fine sea salt. Give them a good whisk to ensure everything is evenly distributed. This small amount of sugar in the crust helps with browning and adds a subtle sweetness.
- Incorporate the Cold Butter: Now, for the star of the show: the butter! Add your very cold, ½-inch cubed unsalted butter directly into the flour mixture. It’s absolutely crucial that your butter is as cold as possible; this is the key to a flaky crust. Using a pastry blender, two forks, or even your fingertips, cut the butter into the flour until the mixture resembles coarse crumbs with some pea-sized pieces of butter still visible. Avoid overworking the butter, as warmth from your hands can melt it, which prevents flakiness. If you have a food processor, you can pulse the flour and butter together for about 10-15 pulses until the desired consistency is reached.
- Add the Ice Water: Gradually, add the ½ cup of ice water, one tablespoon at a time, sprinkling it over the flour-butter mixture. Use a fork or your clean hands to gently mix it in. Continue adding water, a tablespoon at a time, until the dough just begins to come together. You’re looking for a dough that holds its shape when squeezed but isn’t sticky or wet. You might not need all the water, or you might need an extra tablespoon or two, depending on your environment and flour. The goal is to hydrate the flour just enough to bind the dough without developing too much gluten, which can lead to a tough crust.
- Form and Chill the Dough: Turn the dough out onto a lightly floured surface. Gently gather it into a cohesive ball, then divide it in half. Flatten each half into a disc, approximately 1-inch thick. Wrap each disc tightly in plastic wrap. This chilling step is non-negotiable! Place both discs in the refrigerator for at least 1-2 hours, or even better, overnight. Chilling allows the gluten to relax, making the dough easier to roll, and solidifies the butter, which creates those beautiful flaky layers during baking.
- Prepare for Rolling: Before you’re ready to assemble your Cherry Pie Bombs, remove one disc of dough from the refrigerator about 15-20 minutes before rolling. This allows it to soften slightly, making it easier to work with without it becoming too warm. Keep the other disc chilled until needed.
Preparing Your Luscious Sweet Cherry Filling: The Heart of the Bomb
While your pie dough is chilling, it’s the perfect time to prepare the star of our show: the vibrant and juicy cherry filling. This filling is designed to be thick enough to hold its shape within our little bombs, preventing any soggy bottoms!
- Combine Cherries and Sugar: In a medium saucepan, combine the 4 cups of pitted cherries. If using frozen cherries, there’s no need to thaw them completely; just use them as is. Sprinkle the ¾ cup of granulated sugar over the cherries. Give it a gentle stir.
- The Cornstarch Power-Up: In a small separate bowl, whisk together the 3 tablespoons of cornstarch with 2 tablespoons of cold water to create a slurry. This prevents the cornstarch from clumping when added to the hot cherries. Add the cornstarch slurry directly to the saucepan with the cherries and sugar. The cornstarch is vital here; it acts as a thickener, ensuring our filling is beautifully set and doesn’t make our pastry soggy.
- Add Flavor Enhancers: Stir in the ½ teaspoon of pure almond extract (if using), the ¼ teaspoon of ground cinnamon (if using), and the 1 tablespoon of fresh lemon juice. The almond extract, though optional, truly enhances the natural cherry flavor, giving it a gourmet touch. The lemon juice brightens everything up and provides a lovely counterpoint to the sweetness.
- Cook the Filling: Place the saucepan over medium heat. Bring the mixture to a gentle simmer, stirring frequently to prevent sticking and to dissolve the sugar. Continue to cook for 5-8 minutes, or until the mixture has thickened considerably and coats the back of a spoon. The cherries will release their juices, and the cornstarch will work its magic, transforming the liquid into a glossy, thick sauce. It should look like a rich, bubbling cherry sauce.
- Cool the Filling: Once thickened, remove the saucepan from the heat. Pour the cherry filling into a clean bowl or onto a plate and allow it to cool completely to room temperature. You can even pop it in the refrigerator for about 30 minutes to speed up the cooling process. It’s crucial that the filling is cool before assembling the Cherry Pie Bombs; hot filling will melt the butter in your dough, leading to a less flaky crust and potential leaks.
Assembling Your Irresistible Cherry Pie Bombs: The Art of the Bomb
This is where the magic truly happens! We’ll transform our perfectly flaky dough and delicious filling into individual, adorable Cherry Pie Bombs.
- Prepare Your Workspace: Lightly flour your work surface and your rolling pin. Take one chilled disc of dough from the refrigerator. If it’s too firm, let it sit for a few more minutes, but don’t let it get warm.
- Roll Out the Dough: Roll out the dough evenly to a thickness of about 1/8 inch. You want it thin enough to be tender but sturdy enough to hold the filling. Using a 3-inch round cookie cutter (or a clean glass with a 3-inch diameter), cut out as many circles as you can. Gather the scraps, gently re-roll them, and cut out more circles until you’ve used up most of the dough. Repeat this process with the second disc of dough. You should yield about 18-24 circles in total.
- Spoon in the Filling: Lay your dough circles out on your floured surface. Spoon about 1 to 1 ½ tablespoons of the cooled cherry filling onto the center of one half of each dough circle, making sure to leave a clear border around the edges. Do not overfill, as this can lead to leaks during baking.
- Moisten and Seal: Using your finger or a small pastry brush, lightly moisten the edges of the dough circles with a little water. This acts as a glue, helping the dough seal tightly.
- Fold and Crimp: Carefully fold the unfilled half of the dough over the cherry filling, creating a perfect half-moon shape. Gently press down on the edges to seal them. To create a decorative and secure seal, use the tines of a fork to crimp all around the curved edge of each pie bomb. This not only looks pretty but also helps prevent the filling from escaping during baking. Place the assembled Cherry Pie Bombs onto a baking sheet lined with parchment paper, leaving about an inch of space between each one.
- Chill Again (Optional but Recommended!): If you have time, pop the baking sheet with the assembled Cherry Pie Bombs back into the refrigerator for 15-20 minutes. This helps the butter in the dough firm up again, promoting even flakier results.
Baking Your Golden Cherry Pie Bombs: The Grand Finale
The anticipation builds as our beautiful Cherry Pie Bombs are ready for their golden transformation in the oven!
- Preheat the Oven: Preheat your oven to 375°F (190°C). Ensure your oven rack is in the middle position for even baking.
- Prepare the Egg Wash: In a small bowl, whisk together the 1 large egg and 1 tablespoon of water until well combined. This is our egg wash, which will give our Cherry Pie Bombs a beautiful golden-brown sheen and a slightly crispier crust.
- Brush and Vent: Once your pie bombs are out of the fridge, lightly brush the tops of each one with the egg wash. This is important for that lovely golden color! Then, using a small sharp knife or the tip of a paring knife, make 2-3 small slits on the top of each pie bomb. These vents allow steam to escape during baking, preventing the bombs from bursting and ensuring a perfectly cooked crust.
- Bake to Perfection: Transfer the baking sheet to the preheated oven. Bake for 20-25 minutes, or until the Cherry Pie Bombs are puffed up, deeply golden brown, and the filling is visibly bubbling slightly through the vents. The exact baking time may vary slightly depending on your oven, so keep an eye on them towards the end.
- Cool Before Glazing: Once baked, carefully remove the baking sheet from the oven. Let the Cherry Pie Bombs cool on the baking sheet for about 5-10 minutes before transferring them to a wire rack to cool completely. They will be quite hot and delicate straight out of the oven, and the filling will be molten. Cooling allows the filling to set further and the pastry to firm up.
For the Vanilla Glaze: The Sweet Finishing Touch
While our Cherry Pie Bombs are cooling, let’s whip up a simple, sweet vanilla glaze to drizzle over the top. This adds another layer of sweetness and a beautiful visual appeal.
- Combine Ingredients: In a medium bowl, combine the 1 ½ cups of sifted powdered sugar, 2 tablespoons of milk, and ½ teaspoon of pure vanilla extract. Sifting the powdered sugar is a small extra step that ensures a super smooth, lump-free glaze.
- Whisk to Desired Consistency: Whisk vigorously until the mixture is smooth and creamy. If the glaze is too thick, add more milk, a tiny bit (about ½ teaspoon) at a time, until it reaches your desired drizzling consistency. If it’s too thin, you can add a little more powdered sugar. We’re looking for a glaze that flows smoothly off a spoon but isn’t watery.
- Drizzle and Serve: Once the Cherry Pie Bombs have cooled down (they can be slightly warm, but not hot, or the glaze will just melt off), generously drizzle the vanilla glaze over the tops of each one. You can use a spoon for a rustic look or transfer the glaze to a piping bag (or a plastic bag with a snipped corner) for more controlled lines.
Serving and Storage: Enjoying Your Cherry Pie Bombs
These delightful Cherry Pie Bombs are best enjoyed fresh, ideally while still slightly warm, allowing the flaky crust and warm, sweet cherry filling to truly shine. The vanilla glaze adds that perfect touch of sweetness to each bite.
To serve, simply arrange them on a platter. They make a fantastic dessert, a charming addition to a brunch spread, or a perfect portable snack. Each bite of these Cherry Pie Bombs promises a burst of sweet, tart cherry encased in a tender, flaky pastry.
If you happen to have any leftovers (which is a big “if” with these treats!), store them in an airtight container at room temperature for up to 2 days, or in the refrigerator for up to 4 days. If refrigerated, you can gently warm them in a toaster oven or microwave for a few seconds to bring back that fresh-baked appeal before serving.
A Note on Fresh vs. Frozen Cherries:
Both fresh and frozen cherries work wonderfully for these Cherry Pie Bombs. If using fresh, make sure they are pitted thoroughly. If using frozen, there’s no need to thaw them completely; in fact, using them partially frozen can help keep the filling from becoming too watery. Just be sure to adjust the cooking time for the filling slightly if using fully frozen cherries, as they will release more liquid initially.

Conclusion:
And there you have it, my friends! We’ve journeyed through the steps to create what I believe are truly some of the most delightful and undeniably addictive treats you’ll ever pull from your oven. If you’ve been following along, you already know that these aren’t just any dessert; they are a revelation, a bite-sized burst of pure joy that encapsulates everything wonderful about a classic pie, but in a fun, approachable, and delightfully convenient package. I can honestly say that every time I make these, they disappear faster than I can put them on the cooling rack, and that’s a testament to their irresistible charm.
So, why are these Cherry Pie Bombs an absolute must-try? For starters, they strip away all the intimidation often associated with baking a full pie. No struggling with a perfect top crust, no worrying about soggy bottoms, just simple, straightforward steps that yield spectacular results every single time. The golden-brown, buttery exterior, whether you opt for the quick convenience of store-bought dough or a homemade version, provides a perfect crisp shell. Break through that, and you’re greeted with a warm, bubbling, sweet-tart cherry filling that is utterly intoxicating. It’s the kind of dessert that brings smiles to faces, sparks conversations, and quite frankly, makes you feel like a baking wizard, even if it’s your first time attempting anything beyond brownies from a box.
Elevate Your Dessert Experience: Serving Suggestions
Now, while these beauties are absolutely divine on their own, fresh and warm, I have a few suggestions to truly elevate your dessert experience. The quintessential pairing, in my humble opinion, is a generous scoop of high-quality vanilla bean ice cream. The contrast of the warm, fruity pie bomb with the cold, creamy ice cream is simply out of this world. As the ice cream slowly melts, it mingles with the cherry juices, creating a rich, flavorful sauce that’s pure heaven. Another fantastic option is a dollop of freshly whipped cream, perhaps infused with a hint of vanilla or almond extract, adding a light, airy contrast to the rich filling. A simple dusting of powdered sugar makes them look extra special, or for a touch of elegance, drizzle a little caramel sauce or a homemade chocolate ganache over them just before serving. Imagine the rich dark chocolate with the sweet-tart cherries—pure bliss!
Creative Variations to Spark Your Culinary Imagination
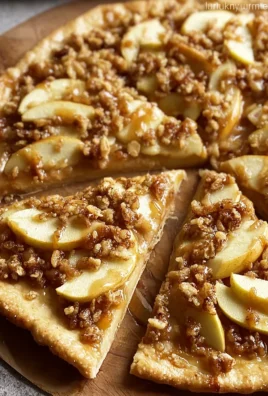
But don’t stop there! While the cherry filling is a classic for a reason, these bombs are incredibly versatile. You could experiment with a different fruit filling, like apple cinnamon, blueberry lemon, or even a mixed berry concoction. Just be sure to adjust the sweetness and thickener according to the fruit’s natural sugars and water content. You could also try adding a pinch of ground cinnamon, nutmeg, or even a tiny splash of almond extract to your cherry filling to deepen its flavor profile. For those feeling adventurous, puff pastry can offer an even flakier, lighter crust, while a biscuit dough would give them a more rustic, comforting texture. These small changes can open up a whole new world of flavor and texture, making this foundational recipe a jumping-off point for endless culinary creativity. And don’t forget about the perfect beverage pairing; a strong cup of coffee, a warm cup of herbal tea, or even a chilled glass of milk can complement these treats beautifully.
Ultimately, what I want most is for you to experience the sheer delight of making and sharing these wonderful Cherry Pie Bombs. They are more than just a recipe; they are an invitation to create memories, to gather loved ones around the table, and to savor a moment of pure, unadulterated sweetness. The process is enjoyable, the aroma that fills your kitchen is heavenly, and the taste is simply unforgettable. I truly believe that once you try them, they’ll become a cherished addition to your recipe repertoire.
So, please, take the plunge! Gather your ingredients, follow my simple steps, and prepare to be amazed. I am so excited for you to try these, and I can’t wait to hear all about your experience. Did you add a special twist? What did your family and friends think? Don’t hesitate to share your photos, your triumphs, and any clever variations you discover. Your feedback and creativity inspire me, and I absolutely love seeing your culinary adventures unfold. Happy baking, everyone!
Irresistible Cherry Pie Bombs
Delight in these irresistible Cherry Pie Bombs, a modern twist on classic cherry pie. These bite-sized treats feature sweet, tangy cherry filling encased in a golden, flaky crust, perfect for parties, picnics, or an easy-to-eat dessert. Enjoy the comforting taste of cherry pie in a convenient, portable package.
Ingredients
-
2 ½ cups (300g) all-purpose flour
-
1 teaspoon granulated sugar (for dough)
-
1 teaspoon fine sea salt
-
1 cup (226g) very cold unsalted butter, cut into ½-inch cubes
-
½ cup (120ml) ice water, plus 1-2 tablespoons if needed
-
4 cups (680g) fresh or frozen pitted sweet cherries
-
¾ cup (150g) granulated sugar (for filling)
-
3 tablespoons cornstarch
-
½ teaspoon pure almond extract (optional)
-
¼ teaspoon ground cinnamon (optional)
-
1 tablespoon fresh lemon juice
-
1 large egg (for egg wash)
-
1 tablespoon water (for egg wash)
-
1 ½ cups (180g) powdered sugar, sifted (for glaze)
-
2-3 tablespoons milk (for glaze)
-
½ teaspoon pure vanilla extract (for glaze)
Instructions
-
Step 1
Whisk flour, 1 tsp granulated sugar, and salt. Cut very cold butter into flour until pea-sized crumbs form. Gradually add ice water, 1 tbsp at a time, mixing until dough just comes together. Divide into two 1-inch thick discs, wrap tightly, and chill in the refrigerator for at least 1-2 hours, or overnight. -
Step 2
In a medium saucepan, combine pitted cherries and ¾ cup granulated sugar. In a small bowl, whisk 3 tbsp cornstarch with 2 tbsp cold water to create a slurry; add to saucepan. Stir in almond extract (if using), cinnamon (if using), and lemon juice. Cook over medium heat, stirring frequently, for 5-8 minutes until thickened and glossy. Remove from heat and cool completely at room temperature, or in the refrigerator for 30 minutes. -
Step 3
Lightly flour your work surface and rolling pin. Roll out one chilled dough disc to 1/8 inch thickness. Use a 3-inch round cookie cutter to cut circles. Gather and re-roll scraps. Spoon 1-1.5 tablespoons of cooled cherry filling onto the center of one half of each dough circle, leaving a clear border. Lightly moisten edges with water, fold the dough over to form a half-moon, and crimp edges with a fork to seal securely. Place assembled bombs on a parchment-lined baking sheet. Repeat with the second dough disc. For flakier results, chill the assembled bombs for 15-20 minutes. -
Step 4
Preheat oven to 375°F (190°C). Whisk 1 large egg and 1 tbsp water for the egg wash. Brush the tops of each pie bomb with egg wash. Make 2-3 small slits on top of each bomb using a sharp knife to allow steam to escape. Bake for 20-25 minutes, or until deeply golden brown and the filling is visibly bubbling through the vents. Remove from oven and let cool on the baking sheet for 5-10 minutes, then transfer to a wire rack to cool completely. -
Step 5
While bombs cool, in a medium bowl, whisk together sifted powdered sugar, 2-3 tablespoons milk, and vanilla extract until smooth and creamy. Adjust milk for desired drizzling consistency. Drizzle generously over the tops of the cooled or slightly warm Cherry Pie Bombs. -
Step 6
Serve Cherry Pie Bombs fresh, ideally while slightly warm. Store any leftovers in an airtight container at room temperature for up to 2 days, or in the refrigerator for up to 4 days. Gently warm refrigerated bombs in a toaster oven or microwave for a fresh-baked appeal.
Important Information
Nutrition Facts (Per Serving)
It is important to consider this information as approximate and not to use it as definitive health advice.
Allergy Information
Please check ingredients for potential allergens and consult a health professional if in doubt.


Leave a Comment