
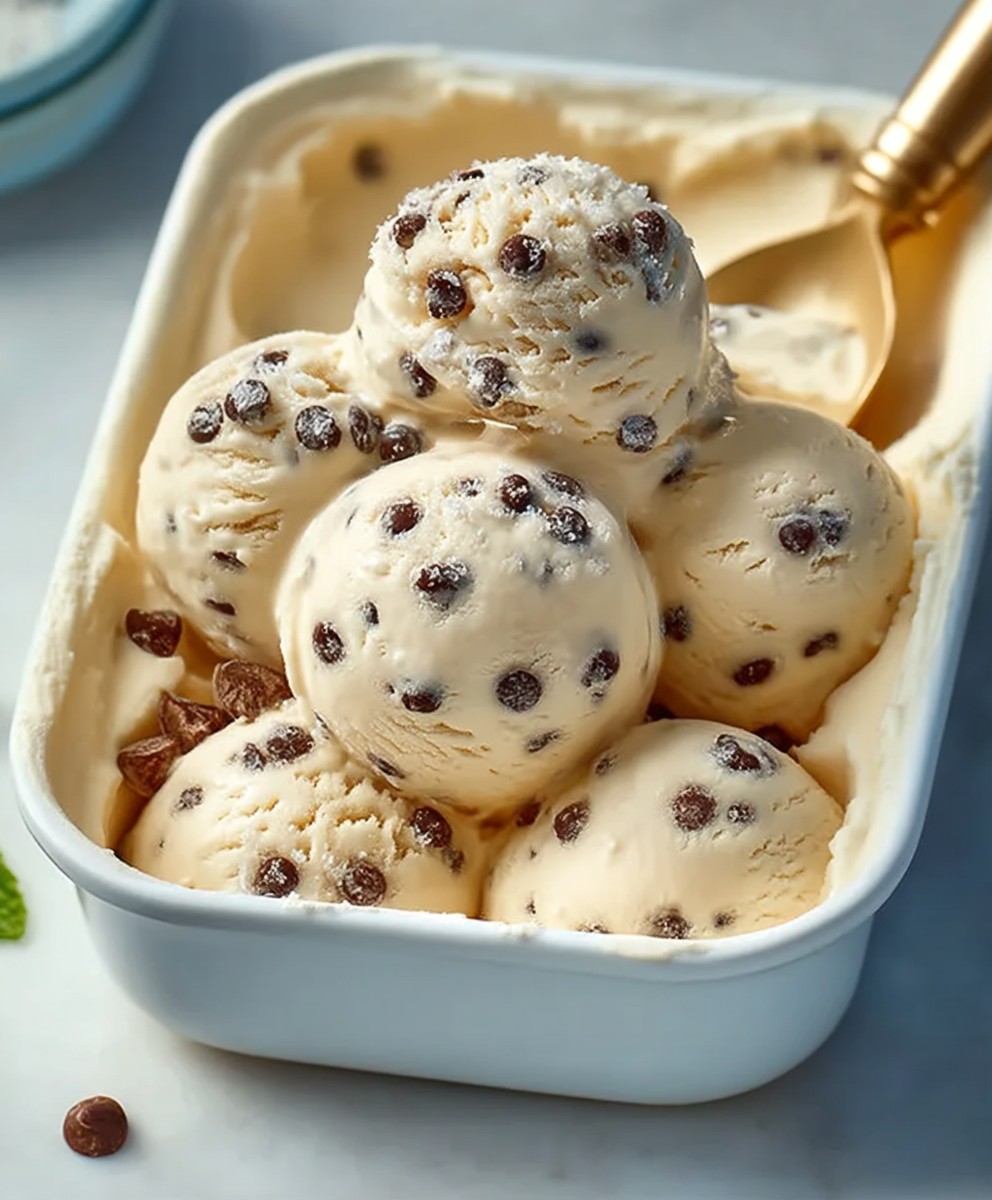
Cookie Dough Ice Cream, that creamy, dreamy concoction studded with chunks of sweet, chewy cookie dough, is a dessert that transcends generations. Have you ever wondered how such a simple idea became a global phenomenon? The story goes that it was born from an anonymous suggestion at a Ben & Jerry’s scoop shop a testament to the power of customer inspiration!
This delightful treat perfectly marries the comforting nostalgia of freshly baked cookies with the refreshing coolness of ice cream. It’s a symphony of textures and flavors: the smooth, velvety ice cream melting on your tongue, followed by the satisfying chewiness of the cookie dough. What’s not to love?
But beyond its deliciousness, Cookie Dough Ice Cream holds a special place in our hearts because it’s pure, unadulterated fun. It’s the perfect pick-me-up after a long day, the ideal treat to share with friends, and a guaranteed crowd-pleaser at any gathering. So, are you ready to learn how to make your own batch of this iconic dessert? Let’s get started!
Ingredients:
- For the Cookie Dough:
- 1 cup (2 sticks) unsalted butter, softened
- ¾ cup granulated sugar
- ¾ cup packed light brown sugar
- 2 teaspoons vanilla extract
- 2 ¼ cups all-purpose flour
- 1 teaspoon baking soda
- 1 teaspoon salt
- 1 cup semi-sweet chocolate chips
- 2 tablespoons milk (or more, if needed)
- For the Ice Cream Base:
- 2 cups heavy cream
- 1 cup whole milk
- ¾ cup granulated sugar
- ? teaspoon salt
- 1 teaspoon vanilla extract
Making the Cookie Dough
Okay, let’s start with the heart of this recipe the cookie dough! Don’t worry, we’re making it egg-free so it’s perfectly safe (and delicious) to eat raw in our ice cream.
- Cream the Butter and Sugars: In a large bowl (or the bowl of your stand mixer), cream together the softened butter, granulated sugar, and brown sugar until light and fluffy. This usually takes about 3-5 minutes. Make sure to scrape down the sides of the bowl occasionally to ensure everything is evenly mixed. The mixture should be pale and airy.
- Add Vanilla: Stir in the vanilla extract. Don’t skimp on the vanilla; it really enhances the flavor of the cookie dough.
- Combine Dry Ingredients: In a separate medium bowl, whisk together the flour, baking soda, and salt. Whisking ensures that the baking soda and salt are evenly distributed throughout the flour, which is important for the texture of the cookie dough.
- Gradually Add Dry Ingredients to Wet Ingredients: Gradually add the dry ingredients to the wet ingredients, mixing on low speed until just combined. Be careful not to overmix! Overmixing can develop the gluten in the flour, resulting in a tough cookie dough.
- Stir in Chocolate Chips: Stir in the chocolate chips until evenly distributed throughout the dough. I like to use semi-sweet chocolate chips, but you can use milk chocolate, dark chocolate, or even a combination!
- Adjust Consistency (if needed): If the dough seems too dry, add milk, one tablespoon at a time, until it reaches a slightly sticky consistency. The dough should be firm enough to hold its shape but soft enough to be easily scooped.
- Chill the Cookie Dough: Wrap the cookie dough in plastic wrap and chill in the refrigerator for at least 30 minutes. This will help the dough firm up and make it easier to handle. Chilling also allows the flavors to meld together. You can chill it for longer, even overnight, if you prefer.
- Cut into Small Pieces: Once chilled, remove the cookie dough from the refrigerator and cut it into small, bite-sized pieces. I like to roll the dough into small balls, about ¼ to ½ inch in diameter. The smaller the pieces, the better they will be distributed throughout the ice cream.
- Freeze the Cookie Dough Pieces: Place the cookie dough pieces on a baking sheet lined with parchment paper and freeze for at least 30 minutes. This will prevent the cookie dough from sticking together in the ice cream and will help it maintain its shape. Freezing the cookie dough is a crucial step!
Making the Ice Cream Base
Now, let’s move on to the creamy, dreamy ice cream base. This is a classic custard-based ice cream, which gives it a rich and smooth texture.
- Combine Ingredients: In a medium saucepan, combine the heavy cream, whole milk, granulated sugar, and salt.
- Heat and Dissolve Sugar: Heat the mixture over medium heat, stirring constantly, until the sugar is completely dissolved and the mixture is just beginning to simmer. Be careful not to boil the mixture! Boiling can cause the proteins in the milk to curdle.
- Remove from Heat: Remove the saucepan from the heat and stir in the vanilla extract.
- Cool the Mixture: Pour the ice cream base into a bowl, cover it with plastic wrap (pressing the plastic wrap directly onto the surface of the mixture to prevent a skin from forming), and chill in the refrigerator for at least 4 hours, or preferably overnight. This allows the flavors to meld together and the mixture to fully cool. A well-chilled base is essential for a smooth and creamy ice cream.
Churning and Assembling the Ice Cream
Alright, we’re in the home stretch! This is where the magic happens and we turn our chilled base into delicious ice cream.
- Prepare Ice Cream Maker: Follow the manufacturer’s instructions for your ice cream maker. Most ice cream makers require the bowl to be frozen for at least 24 hours before use.
- Churn the Ice Cream: Pour the chilled ice cream base into the prepared ice cream maker and churn according to the manufacturer’s instructions. This usually takes about 20-25 minutes, or until the ice cream reaches a soft-serve consistency.
- Add the Cookie Dough: During the last few minutes of churning, gradually add the frozen cookie dough pieces to the ice cream maker. This will ensure that the cookie dough is evenly distributed throughout the ice cream.
- Transfer to Container: Transfer the ice cream to an airtight container and freeze for at least 2-3 hours, or until firm. This will allow the ice cream to fully harden and develop its final texture.
- Enjoy! Scoop and enjoy your homemade Cookie Dough Ice Cream! It’s best served within a week or two for optimal flavor and texture.
Tips for Success
- Use High-Quality Ingredients: The better the ingredients, the better the ice cream! Use good quality heavy cream, whole milk, and vanilla extract.
- Don’t Overmix the Cookie Dough: Overmixing the cookie dough can result in a tough texture. Mix until just combined.
- Chill Everything Thoroughly: Chilling the cookie dough and the ice cream base is essential for a good final product.
- Freeze the Cookie Dough Pieces: Freezing the cookie dough pieces prevents them from sticking together and helps them maintain their shape in the ice cream.
- Don’t Overfill the Ice Cream Maker: Overfilling the ice cream maker can prevent the ice cream from churning properly. Follow the manufacturer’s instructions for capacity.
- Be Patient: Allow the ice cream to fully harden in the freezer before serving. This will improve the texture and flavor.
Variations
- Different Chocolate Chips: Experiment with different types of chocolate chips, such as milk chocolate, dark chocolate, white chocolate, or even peanut butter chips.
- Add Nuts: Add chopped nuts, such as walnuts, pecans, or almonds, to the cookie dough or the ice cream.
- Add Sprinkles: Add sprinkles to the cookie dough or the ice cream for a fun and festive touch.
- Use a Different Flavor Extract: Try using almond extract, peppermint extract, or rum extract in the cookie dough or the ice cream.
- Make it Vegan: Substitute the butter with vegan butter, the milk with plant-based milk, and the heavy cream with coconut cream to make a vegan version of this recipe.
Conclusion:
And there you have it! I truly believe this Cookie Dough Ice Cream recipe is a must-try for anyone who loves the classic combination of creamy ice cream and chunks of sweet, chewy cookie dough. It’s surprisingly easy to make at home, and the results are far superior to anything you can buy in the store. Forget those tiny, hard cookie dough bits we’re talking generous, melt-in-your-mouth pieces scattered throughout a rich and decadent vanilla base.
But why is this recipe so special? First, the homemade cookie dough is specifically designed to be safe and delicious in ice cream. No raw eggs here! We’re using heat-treated flour and a carefully balanced recipe to ensure a soft, chewy texture that holds up perfectly in the freezer. Second, the ice cream base is incredibly creamy and flavorful, providing the perfect canvas for the cookie dough to shine. And finally, the entire process is just plain fun! There’s something incredibly satisfying about creating your own ice cream from scratch, and the look on people’s faces when they taste it is priceless.
Now, let’s talk serving suggestions and variations. Of course, this Cookie Dough Ice Cream is fantastic on its own, served in a bowl or cone. But don’t be afraid to get creative! Try layering it with hot fudge sauce and whipped cream for an indulgent sundae. Or, use it to make ice cream sandwiches with your favorite cookies. For a truly decadent treat, blend it into a milkshake with a splash of milk and a few extra cookie dough pieces.
If you’re feeling adventurous, there are plenty of ways to customize this recipe to your liking. For a chocolate twist, add a tablespoon or two of cocoa powder to the ice cream base. Or, stir in some chopped nuts, chocolate chips, or sprinkles for added texture and flavor. You could even experiment with different types of cookie dough, such as peanut butter cookie dough or oatmeal raisin cookie dough. The possibilities are endless!
Here are a few more ideas to get your creative juices flowing:
Serving Suggestions:
- Classic Sundae: Top with hot fudge, whipped cream, and a cherry.
- Ice Cream Sandwiches: Use chocolate chip cookies, sugar cookies, or even brownies.
- Milkshake Magic: Blend with milk and a few extra cookie dough pieces for an ultra-creamy shake.
- Affogato Upgrade: Pour a shot of hot espresso over a scoop for a delightful coffee-infused treat.
Variations to Try:
- Chocolate Chunk: Add mini chocolate chips to the cookie dough and the ice cream base.
- Peanut Butter Swirl: Swirl in peanut butter into the ice cream before freezing.
- Oatmeal Raisin: Use an oatmeal raisin cookie dough recipe instead of the classic chocolate chip.
- Brown Butter Bliss: Brown the butter for the cookie dough for a nutty, complex flavor.
I truly hope you’ll give this recipe a try. It’s a labor of love, but the reward is well worth the effort. I’m confident that you and your loved ones will absolutely adore this homemade Cookie Dough Ice Cream.
So, grab your ingredients, put on your apron, and get ready to create some ice cream magic! And most importantly, don’t forget to share your experience with me. I’d love to hear how your ice cream turned out, what variations you tried, and what your family and friends thought. Leave a comment below, tag me on social media, or send me an email. I can’t wait to see your creations! Happy ice cream making!
Cookie Dough Ice Cream: The Ultimate Guide to Homemade Bliss
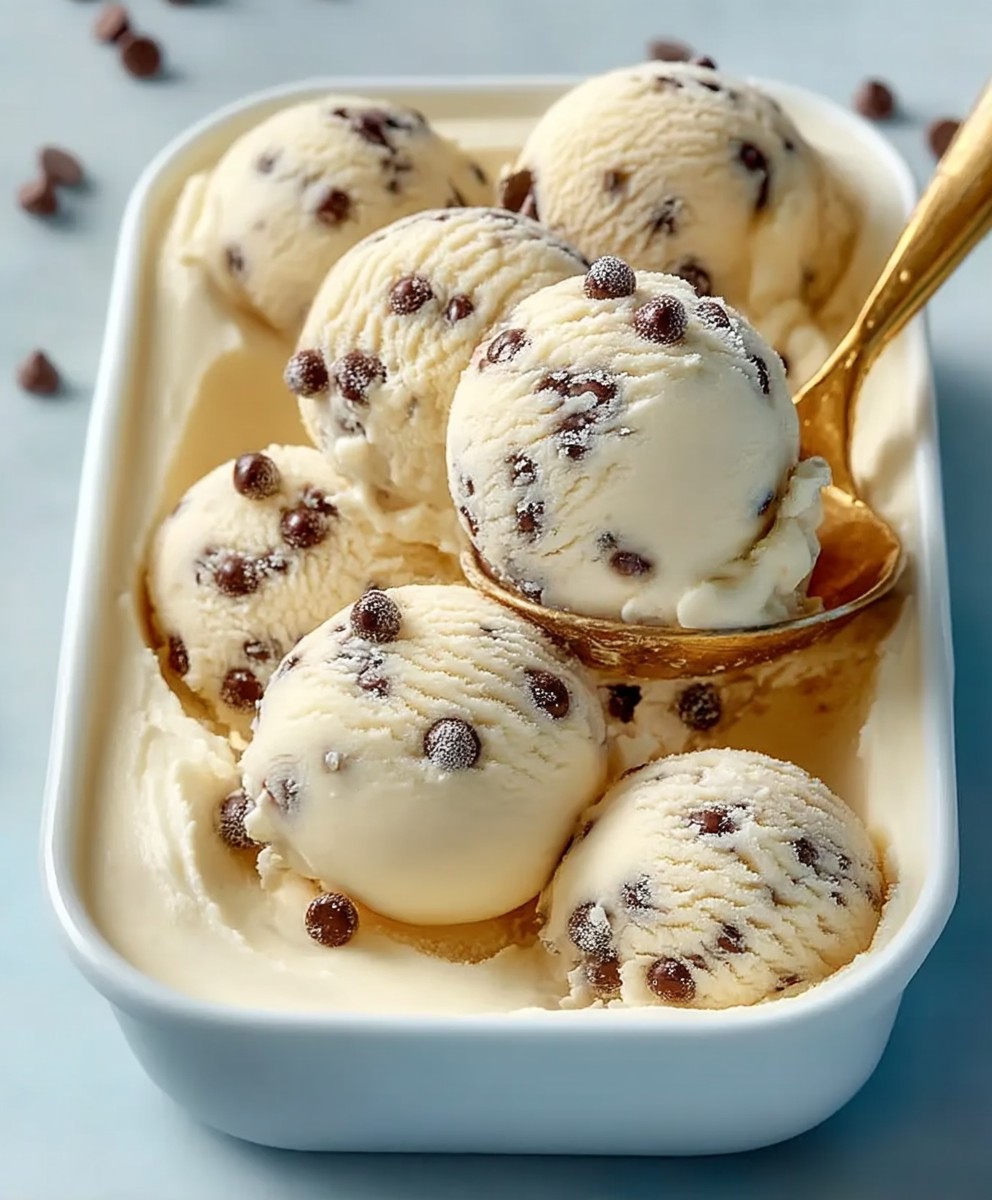
Creamy vanilla ice cream swirled with chunks of egg-free chocolate chip cookie dough. A classic homemade treat!
Ingredients
- 1 cup (2 sticks) unsalted butter, softened
- ¾ cup granulated sugar
- ¾ cup packed light brown sugar
- 2 teaspoons vanilla extract
- 2 ¼ cups all-purpose flour
- 1 teaspoon baking soda
- 1 teaspoon salt
- 1 cup semi-sweet chocolate chips
- 2 tablespoons milk (or more, if needed)
- 2 cups heavy cream
- 1 cup whole milk
- ¾ cup granulated sugar
- ? teaspoon salt
- 1 teaspoon vanilla extract
Instructions
- In a large bowl (or the bowl of your stand mixer), cream together the softened butter, granulated sugar, and brown sugar until light and fluffy (3-5 minutes). Scrape down the sides of the bowl occasionally.
- Stir in the vanilla extract.
- In a separate medium bowl, whisk together the flour, baking soda, and salt.
- Gradually add the dry ingredients to the wet ingredients, mixing on low speed until just combined. Be careful not to overmix.
- Stir in the chocolate chips until evenly distributed.
- If the dough seems too dry, add milk, one tablespoon at a time, until it reaches a slightly sticky consistency.
- Wrap the cookie dough in plastic wrap and chill in the refrigerator for at least 30 minutes.
- Once chilled, remove the cookie dough from the refrigerator and cut it into small, bite-sized pieces (¼ to ½ inch in diameter).
- Place the cookie dough pieces on a baking sheet lined with parchment paper and freeze for at least 30 minutes.
- In a medium saucepan, combine the heavy cream, whole milk, granulated sugar, and salt.
- Heat the mixture over medium heat, stirring constantly, until the sugar is completely dissolved and the mixture is just beginning to simmer. Be careful not to boil.
- Remove the saucepan from the heat and stir in the vanilla extract.
- Pour the ice cream base into a bowl, cover it with plastic wrap (pressing the plastic wrap directly onto the surface of the mixture), and chill in the refrigerator for at least 4 hours, or preferably overnight.
- Follow the manufacturer’s instructions for your ice cream maker.
- Pour the chilled ice cream base into the prepared ice cream maker and churn according to the manufacturer’s instructions (20-25 minutes, or until soft-serve consistency).
- During the last few minutes of churning, gradually add the frozen cookie dough pieces to the ice cream maker.
- Transfer the ice cream to an airtight container and freeze for at least 2-3 hours, or until firm.
- Scoop and enjoy your homemade Cookie Dough Ice Cream!
Notes
- Use high-quality ingredients for the best flavor.
- Don’t overmix the cookie dough.
- Chill everything thoroughly.
- Freeze the cookie dough pieces to prevent sticking.
- Don’t overfill the ice cream maker.
- Be patient and allow the ice cream to fully harden.


Leave a Comment