

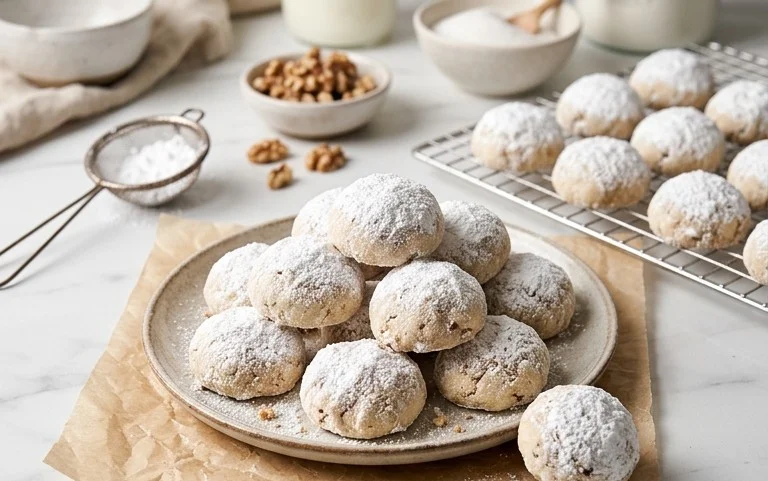
Snowball cookies are a classic for a reason, and I love making them when the weather turns cooler. They’re so tender and melt right in your mouth, with a delicate nuttiness that comes from finely chopped walnuts. The generous dusting of powdered sugar gives them their signature snowy look, making them perfect for any holiday spread or just with a cup of coffee on a chilly afternoon. What I really love about these snowball cookies is how simple they are to whip up. You likely have all the ingredients in your pantry right now. They don’t require any fancy techniques, just a little patience as the dough chills. The texture is wonderfully crumbly on the outside, but inside they are soft and buttery. It’s that contrast, along with the sweet coating, that makes them so addictive. Everyone always asks for the recipe when I bring these around.
Snowball Cookies
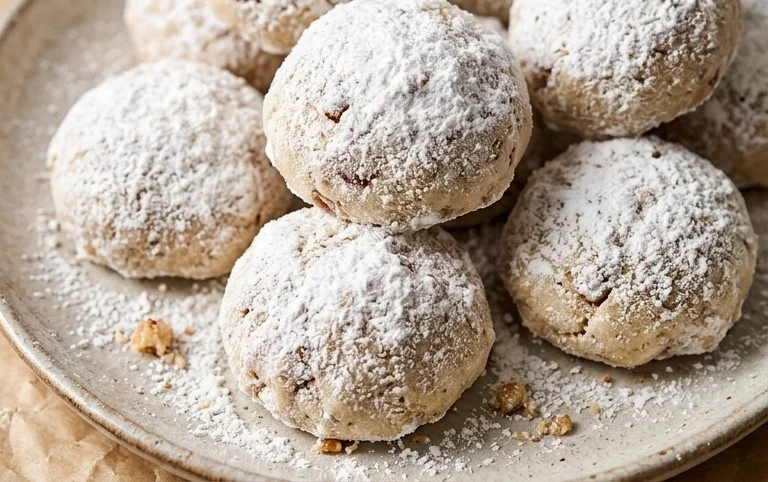
Snowball cookies, also known as Mexican wedding cookies or Russian tea cakes, are a delightful classic for a reason. They’re melt-in-your-mouth tender, with a subtle nuttiness and a sweet, snowy coating that makes them perfect for holiday gatherings or just a simple treat with your afternoon tea. The beauty of these cookies lies in their simplicity; they come together with basic pantry staples and transform into something truly special with just a few steps. They have a wonderfully crumbly texture that gives way to a soft, buttery interior, and the generous dusting of powdered sugar gives them their signature “snowball” appearance.
Ingredients:
- 2 cups flour (white, spelt, ww pastry, or Bob’s gf work)
- 1/2 cup finely chopped walnuts (or almonds or pecans)
- 1 cup butter (or coconut oil)
- 1/2 cup powdered sugar
- optional additional powdered sugar (or cocoa powder, for rolling)
Making the Dough
The foundation of these tender cookies is a well-balanced dough. Using room temperature butter is key here. If you’re using coconut oil, make sure it’s softened but not liquid. This will help it cream properly with the powdered sugar. The type of flour you choose can subtly alter the final texture. All-purpose flour will give you a classic result. Whole wheat pastry flour will add a slightly heartier, nuttier flavor and a tender crumb. If you’re opting for a gluten-free version, Bob’s Red Mill gluten-free 1-to-1 baking flour is a reliable choice and often yields excellent results, mimicking the texture of traditional flour. Ensure your nuts are chopped very finely. You want them to be small enough to integrate smoothly into the dough without creating large, hard chunks. If you have whole nuts, a food processor works well for this, but be careful not to over-process them into a paste. Pulse until they are just finely chopped.
Combining and Chilling
In a large mixing bowl, cream together the softened butter (or coconut oil) and the 1/2 cup of powdered sugar. You want this mixture to be light and fluffy. This process incorporates air, which contributes to the cookies’ tender texture. Beat until there are no streaks of butter or sugar visible. Next, gradually add the flour to the creamed mixture, mixing on low speed until just combined. Be careful not to overmix the dough at this stage, as overworking the flour can develop gluten, leading to tougher cookies. Finally, stir in the finely chopped nuts. The dough will be soft and somewhat crumbly. At this point, it’s essential to chill the dough. Wrap the dough tightly in plastic wrap and refrigerate for at least 30 minutes, or up to 2 days. Chilling makes the dough firm enough to handle and shape without becoming too sticky, and it also allows the flavors to meld together. If you try to shape the cookies before chilling, they will likely be too soft and spread excessively during baking.
Shaping and Baking
Preheat your oven to 350 degrees Fahrenheit (175 degrees Celsius). Line baking sheets with parchment paper to prevent sticking and ensure even baking. Once the dough is chilled and firm, roll it into small balls, about 1 inch in diameter. A cookie scoop can be helpful for achieving uniform size, which ensures consistent baking. Place the dough balls about 2 inches apart on the prepared baking sheets. Don’t flatten them; they will spread slightly on their own. Bake for 10-12 minutes, or until the edges are lightly golden and the centers are set but still pale. The key here is not to overbake them. You want them to remain soft in the center, as they will continue to cook slightly as they cool. Overbaked snowball cookies can become dry and hard. Keep a close eye on them during the last few minutes of baking.
The Final Flourish: Rolling
This is where the snowball cookies get their name and their signature look. While the cookies are still warm (but cool enough to handle safely), gently roll them in the optional additional powdered sugar. I like to do this while they are still warm because the residual heat helps the sugar adhere better. If you want a thicker coating, you can let the cookies cool completely and then roll them again in fresh powdered sugar. For a chocolatey twist, you can mix a tablespoon or two of unsweetened cocoa powder into the powdered sugar before rolling. Some people also prefer to roll the cookies twice: once while warm, and then again once fully cooled for an extra thick snowy coating. Ensure you have enough powdered sugar in a shallow bowl or on a plate for easy rolling. Gently roll each cookie until evenly coated.
Cooling and Storage
Once rolled in powdered sugar, place the cookies on a wire rack to cool completely. This is important for allowing the cookies to set properly. If you try to store them while still warm, the powdered sugar can become sticky and clump. Snowball cookies are best stored in an airtight container at room temperature. They tend to stay fresh for about a week. If you find they are drying out slightly, you can place a slice of bread in the container to help maintain moisture. They also freeze surprisingly well. Place cooled, coated cookies in a single layer on a baking sheet and freeze until solid, then transfer them to a freezer-safe bag or container. They can be stored in the freezer for up to 3 months. Thaw them at room temperature before serving. Enjoy these delicate, nutty, and sweet treats!
Conclusion:
These snowball cookies truly are a joy to make and even more of a joy to eat. They come together with simple ingredients and techniques, resulting in a cookie that feels special enough for holidays but is easy enough for any day. The buttery, nutty crumb and sweet sugary coating are a winning combination. Don’t be afraid to experiment with different nuts like almonds or pecans, or even add a hint of vanilla extract to the dough for an extra layer of flavor. For a festive twist, you can also roll some of them in cocoa powder mixed with powdered sugar after baking for a marbled effect.
Serving Suggestions: They are wonderful on their own with a warm drink, but also look beautiful arranged on a cookie platter. You can also place them in small paper candy cups for individual treats.
Variations: Try adding a bit of finely grated orange or lemon zest to the dough for a citrusy note, or a pinch of cardamom for a warmer spice. For gluten-free bakers, stick to a good 1-to-1 baking blend.
FAQ: How do I get the powdered sugar to stick?
Make sure the cookies have cooled completely before rolling them in powdered sugar. If they are even slightly warm, the sugar will melt and clump. You can also do a second dusting after they’ve sat for a bit to get an extra snowy coating.
FAQ: Can I make these ahead of time?
Absolutely! Snowball cookies keep well in an airtight container at room temperature for up to a week. They are a great make-ahead option for parties and holidays.
FAQ: What’s the best way to store them?
Store them in a single layer in an airtight container, with parchment paper between layers if you stack them. This prevents them from sticking together and maintains their delicate texture.
Snowball Cookies
Delicate, melt-in-your-mouth cookies coated in powdered sugar, perfect for the holidays or any time you need a sweet treat.
Ingredients
-
2 cups flour (white, spelt, ww pastry, or Bob’s gf)
-
1/2 cup finely chopped walnuts (or almonds or pecans)
-
1 cup butter (or coconut oil)
-
1/2 cup powdered sugar
-
optional additional powdered sugar (or cocoa powder, for rolling)
Instructions
-
Step 1
In a large bowl, cream together the butter (or coconut oil) and powdered sugar until light and fluffy. -
Step 2
Gradually add the flour to the creamed mixture, mixing until just combined. -
Step 3
Stir in the finely chopped nuts. -
Step 4
Roll the dough into small balls, about 1-inch in diameter. -
Step 5
Place the balls on a baking sheet lined with parchment paper. -
Step 6
Bake at 350°F (175°C) for 10-12 minutes, or until lightly golden around the edges. -
Step 7
Let the cookies cool on the baking sheet for a few minutes before transferring them to a wire rack to cool completely. -
Step 8
Once cooled, roll the cookies in optional additional powdered sugar (or cocoa powder).
Important Information
Nutrition Facts (Per Serving)
It is important to consider this information as approximate and not to use it as definitive health advice.
Allergy Information
Please check ingredients for potential allergens and consult a health professional if in doubt.
Leave a Comment