
Chickpea Feta Avocado Salad is more than just a dish; it’s a vibrant celebration of fresh flavors and textures that will undoubtedly become a staple in your culinary repertoire. Have you ever wished for a meal that is both incredibly satisfying and effortlessly quick to prepare? Look no further!
This delightful salad, while not boasting centuries of ancient history as a single entity, beautifully marries ingredients with rich cultural roots. Chickpeas have been a staple in Mediterranean and Middle Eastern diets for millennia, revered for their nutritional value. Feta cheese, a cornerstone of Greek cuisine, brings its distinctive salty tang, while the creamy avocado, a gift from the Americas, adds a luxurious smoothness. Together, these elements create a modern classic that truly transcends geographical boundaries.
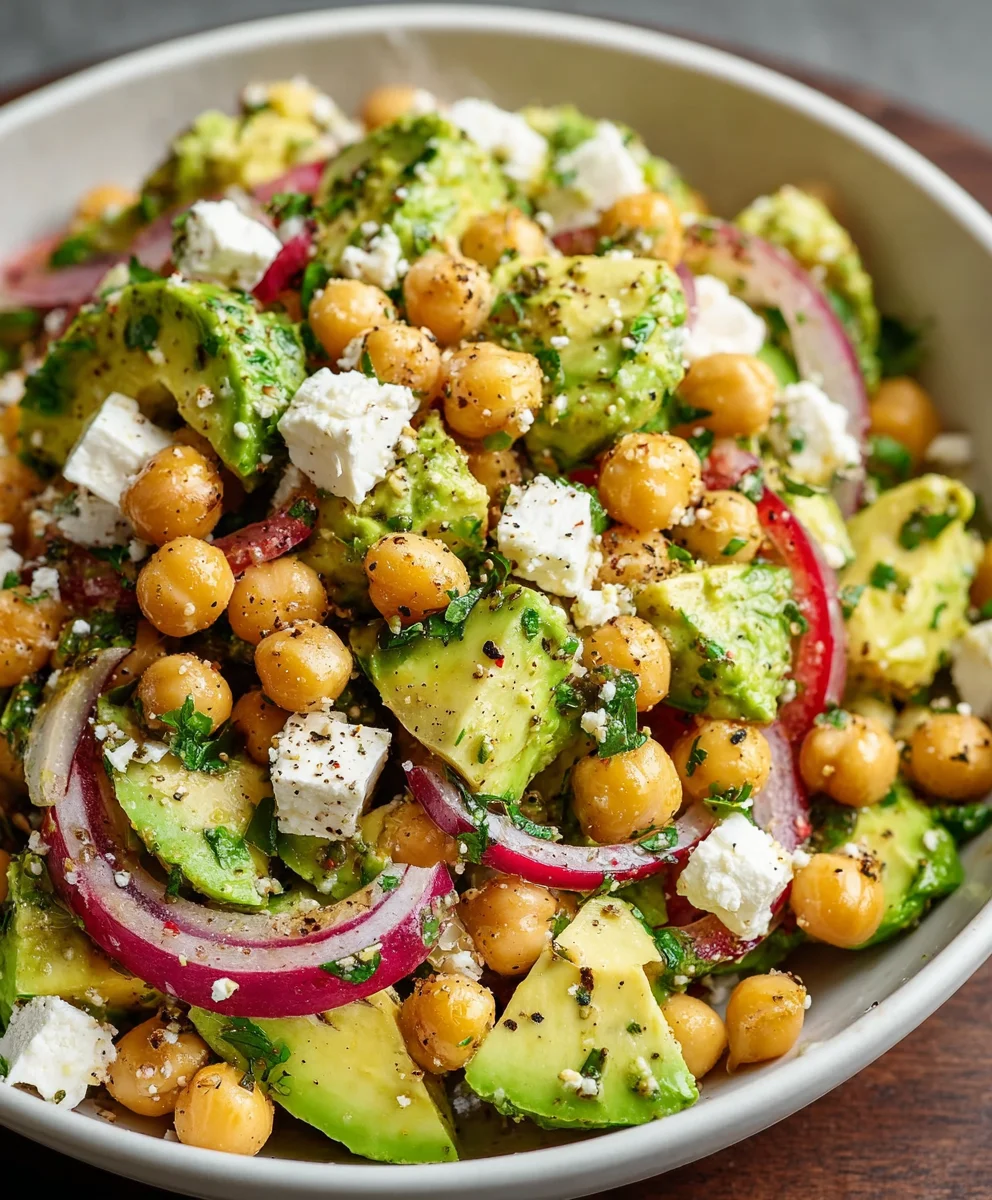
People absolutely adore this Chickpea Feta Avocado Salad for a myriad of reasons. Its refreshing zest, combined with the hearty chickpeas, the tangy feta, and the rich, buttery avocado, creates a symphony of flavors that is simply irresistible. It’s incredibly versatile – perfect as a light lunch, a vibrant side dish, or even a protein-packed meal on its own.
Effortless Preparation for Delicious Results
The beauty of its no-cook preparation means you can whip up this nutritious and delicious salad in minutes, making it an ideal choice for busy weeknights or a quick, healthy option for meal prep. Prepare to fall in love with its irresistible charm and ease!

Ingredients:
-
For the Chickpea Feta Avocado Salad Base:
- 2 cans (15 ounces each) chickpeas: I always opt for organic if possible. Make sure to drain and rinse them really well; this step is crucial for removing excess sodium and that canned bean flavor.
- 1 large English cucumber: I love the crispness of an English cucumber, as it has fewer seeds and a thinner skin, meaning no need to peel!
- 1 large red bell pepper: For a burst of vibrant color and a sweet, fresh crunch that truly elevates this Chickpea Feta Avocado Salad.
- 1/2 small red onion: A little goes a long way here. It adds a delightful sharp bite; I find soaking it briefly in cold water can mellow its intensity if you prefer.
- 1 cup crumbled or cubed feta cheese: The salty, tangy star that brings so much character to our Chickpea Feta Avocado Salad. Choose a good quality feta, preferably one stored in brine.
- 2 ripe avocados: Creamy, rich, and essential! Look for avocados that yield slightly to gentle pressure. These will be the last addition to ensure they stay perfect.
- 1/2 cup fresh parsley: Finely chopped. This herb adds a wonderful freshness and a hint of peppery flavor.
- 1/4 cup fresh mint: Finely chopped. The mint is a game-changer, introducing a bright, refreshing note that balances the richness of the avocado and feta beautifully in this Chickpea Feta Avocado Salad.
-
For the Zesty Lemon-Herb Dressing:
- 1/2 cup extra virgin olive oil: Use a good quality one, as its flavor really shines through in the dressing.
- 1/4 cup fresh lemon juice: From about 1-2 large lemons. Freshly squeezed is non-negotiable for that bright, zesty kick!
- 1 tablespoon lemon zest: Adds an intense burst of lemon aroma and flavor that’s more concentrated than the juice alone.
- 2 cloves garlic: Minced very finely. Garlic adds a foundational savory note to the dressing.
- 1 teaspoon dried oregano: Classic Mediterranean flavor that complements the feta and vegetables perfectly.
- 1/2 teaspoon sea salt: Or to taste. Remember feta is salty, so we’ll adjust later.
- 1/4 teaspoon freshly ground black pepper: Or to taste. I love a good amount of fresh pepper!
- 1 teaspoon honey or maple syrup (optional): Just a touch to balance the acidity of the lemon if you find it too tart. I often include it for that perfect harmony.
Preparing Your Chickpea Feta Avocado Salad Base
- Prepare the Chickpeas: First things first, let’s get those chickpeas ready! I like to grab my two cans of chickpeas and head straight to the sink. Pop open the cans, and then carefully pour them into a fine-mesh colander. This allows all that canning liquid to drain away. Once drained, I give them a thorough rinse under cold running water. I mean, really rinse them! This helps to remove any residual sodium and that slightly metallic taste that canned beans can sometimes have. After rinsing, I gently shake the colander to remove as much water as possible. For an even better result, I sometimes spread them out on a clean kitchen towel or a few layers of paper towels and gently pat them dry. This step, while seemingly small, is quite important because it ensures the dressing will adhere beautifully to the chickpeas later, rather than just sliding off watery surfaces. A dry chickpea is a happy chickpea, ready to soak up all those delicious flavors for our Chickpea Feta Avocado Salad.
- Chop the Fresh Vegetables: Now for the vibrant heart of our salad! I start with the English cucumber. Since its skin is so thin and tender, there’s no need to peel it, which is a time-saver and keeps all those good nutrients. I’ll typically slice it lengthwise, then scoop out any larger seeds if they look particularly watery, though English cucumbers usually have very few. Then, I dice it into nice, bite-sized pieces, aiming for about 1/2-inch cubes. Next up is the red bell pepper. I remove the stem and seeds, then cut it into similar 1/2-inch dice. This size is perfect because it ensures every forkful of our Chickpea Feta Avocado Salad gets a good mix of ingredients. For the red onion, I use only half a small one – it packs a punch! I dice it very finely, almost minced, because we want its flavor to be present but not overpowering. If you find red onion too strong, a little trick I often use is to soak the diced onion in a small bowl of cold water for about 5-10 minutes, then drain it thoroughly. This mellows its sharpness considerably, making it more palatable for those who prefer a milder onion flavor in their salad.
- Prepare the Fresh Herbs: Fresh herbs are what truly make this Chickpea Feta Avocado Salad sing! I take my fresh parsley and fresh mint, give them a good rinse under cold water, and then gently pat them dry with a paper towel. This is crucial as any excess water can dilute the dressing. For the parsley, I typically remove the thicker stems, though the tender top stems are fine to keep. Then, I gather the leaves into a tight bunch and finely chop them. We’re looking for about 1/2 cup of finely chopped parsley. For the mint, I pick the leaves off the stems and do the same, finely chopping them until I have about 1/4 cup. The combination of these two herbs brings an incredible freshness and aromatic lift to the salad. The parsley offers a slight peppery, earthy note, while the mint introduces a cool, bright, and almost citrusy whisper that perfectly complements the rich avocado and tangy feta. Don’t skip the mint; it’s a secret weapon for an outstanding Chickpea Feta Avocado Salad!
- Cube the Feta Cheese: Ah, feta! The salty, creamy counterpoint to all our fresh veggies. I prefer to buy a block of feta that’s packed in brine, as I find it has a much richer flavor and better texture than pre-crumbled varieties. I drain the brine, pat the block dry, and then I cube it into small, roughly 1/2-inch pieces. You can also crumble it by hand if you prefer a more rustic look, but I find that cubing allows for more distinct pockets of salty goodness throughout the salad. The small cubes hold their shape well and provide delightful bursts of tangy flavor with every bite. The quality of your feta really shines through in this Chickpea Feta Avocado Salad, so choose wisely!
- Dice the Avocados: This is a delicate step, as avocados can brown quickly! I usually save this for just before I’m ready to combine everything. I start by carefully slicing each avocado lengthwise around the pit, twisting the two halves apart. Then, I gently remove the pit, either by giving it a sharp tap with the blade of a knife and twisting, or by carefully prying it out with a spoon. Next, I score the flesh in a crosshatch pattern inside the skin, making sure not to cut through the skin itself. Finally, I scoop out the diced avocado with a spoon. I aim for roughly 3/4-inch to 1-inch cubes. The larger size helps them maintain their shape and creamy texture when gently tossed into our Chickpea Feta Avocado Salad. Since avocado can oxidize and turn brown, I like to immediately add it to the bowl with the other ingredients, especially after it’s tossed with the lemon dressing, which helps slow down the browning process.
- Combine Main Salad Components: Now for the grand assembly! In a very large mixing bowl – I always go for one that seems almost too big, just to give myself plenty of room for gentle tossing – I combine all the prepared ingredients. First go the well-drained and dried chickpeas. Then I add the diced cucumber, red bell pepper, and the finely diced red onion. Next, I gently add the cubed feta cheese. Finally, I carefully spoon in the freshly diced avocado. At this stage, I resist the urge to stir vigorously. We’re just getting everything into the bowl, ready for the dressing. The vibrant colors alone are a feast for the eyes, promising a delicious and healthy Chickpea Feta Avocado Salad.
Crafting the Zesty Lemon-Herb Dressing for Your Chickpea Feta Avocado Salad
- Prepare the Lemon and Garlic: For this dressing, freshness is key! I start by zesting one of my lemons directly into a small mixing bowl or a measuring cup. I use a microplane grater for this to ensure I only get the bright yellow zest and none of the bitter white pith. Then, I cut the lemons in half and squeeze out about 1/4 cup of fresh lemon juice, making sure to catch any seeds. The combination of zest and juice provides an incredible, multi-layered lemon flavor. Next, I take my two cloves of garlic. I find it best to mince them very, very finely, or even use a garlic press, so that their flavor is evenly distributed throughout the dressing without any large chunks. Garlic adds that essential savory depth that grounds the bright citrus notes in this dressing for our Chickpea Feta Avocado Salad.
- Combine Dressing Ingredients: Into that same bowl with the lemon zest, lemon juice, and minced garlic, I now add the rest of the dressing components. First, I pour in the 1/2 cup of good quality extra virgin olive oil. The olive oil not only provides a lovely richness but also helps to carry all the other flavors. Then comes the 1 teaspoon of dried oregano, which brings a classic Mediterranean aroma. I add 1/2 teaspoon of sea salt and 1/4 teaspoon of freshly ground black pepper. Remember, we can always adjust the seasoning later, so I start with these amounts. If I feel the dressing might be too tart, or if I simply want to add a little roundness to the flavors, I’ll include that optional teaspoon of honey or maple syrup. It’s not about making the dressing sweet, but rather about balancing the acidity of the lemon and creating a more harmonious flavor profile.
- Whisk the Dressing Thoroughly: Now for the satisfying part – bringing it all together! With all the ingredients in the bowl, I take a small whisk and start whisking vigorously. The goal here is to emulsify the dressing, meaning to combine the oil and acidic liquid into a smooth, cohesive mixture. I whisk continuously for at least 30 seconds to a minute, until the dressing looks slightly thicker and opaque, rather than separated. You’ll notice the lemon juice and olive oil will no longer appear as distinct layers, but rather as one uniform, slightly creamy dressing. This thorough whisking ensures that every single ingredient in our Chickpea Feta Avocado Salad will be coated evenly with a burst of flavor, and it really helps to release the aromatic oils from the lemon zest and dried oregano. This dressing is truly the heart and soul of this vibrant salad!
Assembling and Serving Your Perfect Chickpea Feta Avocado Salad
- Pour Dressing Over Salad Ingredients: With all the main components gathered in the large mixing bowl and our perfectly whisked lemon-herb dressing ready, it’s time to unite them! I gently pour the entire dressing over the beautiful medley of chickpeas, cucumber, bell pepper, red onion, feta, avocado, and fresh herbs. I try to drizzle it evenly over all the ingredients to ensure every part of our Chickpea Feta Avocado Salad gets a generous coating of that zesty goodness. The aroma that fills the air at this stage is absolutely intoxicating, a fresh and vibrant preview of what’s to come.
- Gently Toss the Salad: This step requires a delicate touch, especially because of the tender avocado and the soft feta cheese. I grab two large spoons or a pair of salad tongs and begin to gently fold the ingredients together. Instead of stirring, I use an upward motion, lifting the ingredients from the bottom of the bowl to the top, allowing the dressing to permeate everything without mashing the avocado or breaking up the feta too much. I continue this gentle tossing for a minute or two, ensuring that all the chickpeas, vegetables, and herbs are thoroughly coated with the vibrant lemon-herb dressing. The goal is to achieve an even distribution of all the flavors and textures, creating a harmonious and aesthetically pleasing Chickpea Feta Avocado Salad. You’ll see the colors brighten even more as the dressing embraces each component.
- Taste and Adjust Seasoning: This is my favorite part – the taste test! I spoon a small amount of the mixed Chickpea Feta Avocado Salad onto a separate plate and take a bite. I pay attention to the balance of flavors: Is it zesty enough? Does it need more salt or pepper? Sometimes, even with careful measuring, personal preference dictates a slight adjustment. If I feel it needs a bit more zing, I might squeeze in a touch more fresh lemon juice. If it needs more savory depth, a pinch more salt and pepper will do the trick. If the red onion feels too prominent, I might add a tiny drizzle of olive oil to soften the edges. This step ensures that the salad is seasoned perfectly to my liking, or to the preference of my guests. Don’t be shy about tasting and tweaking; it’s what makes a good salad truly great.
- Allow to Chill (Recommended): While you can certainly serve this Chickpea Feta Avocado Salad immediately, I highly recommend letting it chill in the refrigerator for at least 20-30 minutes, or even an hour. This short chilling time works wonders! It allows all the incredible flavors from the dressing to meld and deepen into the chickpeas and vegetables. The freshness of the mint and parsley becomes more pronounced, and the tang of the feta really shines through. If you have the time, cover the bowl with plastic wrap and let it sit. It transforms a good salad into an outstanding one, making it incredibly refreshing, especially on a warm day. The slight chill also enhances the crispness of the cucumber and bell pepper, providing a truly delightful texture experience with every forkful of our perfectly harmonized Chickpea Feta Avocado Salad.
- Serving Suggestions: When it’s time to serve, I transfer the chilled Chickpea Feta Avocado Salad into a beautiful serving bowl. I often garnish it with a final sprinkle of fresh parsley or mint leaves, and perhaps a thin slice of lemon, just to make it visually appealing. This salad is incredibly versatile! It makes a fantastic light lunch on its own, packed with protein and healthy fats. It’s also an excellent side dish for grilled chicken, fish, or lamb, adding a bright and refreshing counterpoint to richer main courses. I love to serve it alongside some warm pita bread or crunchy crackers, which are perfect for scooping up every last bit of that delicious dressing and creamy avocado. For an even more substantial meal, you could even mix in some grilled halloumi cheese or a handful of baby spinach.
- Storage Tips: If by some miracle you have any leftovers of this delectable Chickpea Feta Avocado Salad, you can store it in an airtight container in the refrigerator. Due to the fresh avocado, it’s best enjoyed within 1-2 days. The lemon juice in the dressing does help to slow down the browning of the avocado, but it will eventually oxidize. I usually give it a gentle stir before serving any leftovers. While the texture of the avocado might soften slightly overnight, the flavors will have deepened beautifully, still making for a wonderfully satisfying meal the next day. This salad is so fresh and vibrant, it’s often hard to have any left!
<h2>Conclusion:</h2>
<p>And so, we arrive at the grand finale of our culinary journey with what I genuinely believe is a game-changer for your meal rotation. If there’s one recipe I could implore you to try this week, it would undoubtedly be this incredible <strong>Chickpea Feta Avocado Salad</strong>. What makes it so utterly irresistible, you ask? Well, it’s a symphony of textures and flavors that come together in a way that’s both refreshing and deeply satisfying. Imagine the creamy, almost buttery goodness of ripe avocado melding perfectly with the salty, tangy bite of crumbled feta cheese. Add to that the hearty, earthy substance of chickpeas, offering a fantastic source of plant-based protein and fiber, ensuring you feel full and energized without any heaviness. Then, we layer in the bright, zesty notes of fresh lemon and aromatic herbs, which elevate the entire dish from simply “good” to <strong>truly spectacular</strong>. It’s a dish that proves healthy eating doesn’t have to be boring or complicated; in fact, it can be an absolute celebration of fresh ingredients. It’s incredibly quick to prepare, making it an ideal choice for busy weeknights, effortless lunches, or even a stunning contribution to a potluck or backyard barbecue. The visual appeal alone is enough to entice – a vibrant medley of greens, creams, and whites that truly brightens any table.</p>
<h4>Elevate Your Experience: Serving Suggestions & Variations</h4>
<p>One of the things I adore most about this salad is its incredible versatility. While it’s absolutely perfect enjoyed straight from the bowl as a light and fulfilling meal, don’t stop there! Think of it as a fantastic base for so many other culinary adventures. For a delightful lunch, try scooping it into warm pita pockets or wrapping it up in soft tortillas or crisp lettuce cups – Bibb or romaine work wonderfully here. It also makes an <strong>exquisite side dish</strong> alongside grilled chicken, flaky baked salmon, or even a simple veggie burger, adding a burst of freshness and flavor to any main course. If you’re hosting, serving it in elegant individual parfait glasses can turn it into a chic appetizer that’s sure to impress.</p>
<p>But the fun doesn’t end with serving! This recipe is a playground for personalization. Feel free to <strong>experiment with different additions</strong> to make it uniquely yours. For an extra crunch and a pop of color, finely diced cucumber, bell peppers (red, yellow, or orange would be beautiful!), or even some crisp red onion can be fantastic additions. If you’re a fan of more herbs, consider adding a sprinkle of fresh dill or chopped mint for an even brighter flavor profile. Want to amp up the protein? Toss in some cooked quinoa, a handful of toasted pumpkin seeds, or even some leftover grilled shrimp. For those who enjoy a little heat, a pinch of red pepper flakes would introduce a delightful zing. And if feta isn’t quite your thing, crumbled goat cheese or even a dairy-free feta alternative would work beautifully, maintaining that creamy, tangy element. <strong>Don’t be afraid to get creative</strong> – that’s where the true magic of cooking lies! This salad adapts wonderfully to whatever fresh ingredients you have on hand or whatever your taste buds are craving at the moment.</p>
<h4>Your Turn: Taste, Create, and Share!</h4>
<p>Now that you have all the reasons and inspiration, it’s time for you to experience this vibrant salad for yourself. I truly believe that once you try this recipe, it will become a regular fixture in your kitchen. It’s more than just a salad; it’s a testament to how simple, wholesome ingredients can come together to create something truly extraordinary. <strong>I encourage you wholeheartedly to grab your ingredients</strong> and whip up a batch this week. Taste the difference that fresh, high-quality components make, and savor the balance of flavors and textures. Don’t be shy about making it your own – add those extra veggies, swap in your favorite herbs, or even adjust the dressing to your preference. Once you’ve had a chance to try it, I would absolutely love to hear about your experience! What variations did you try? What did you love most about it? How did you serve it? Your feedback and personal touches are what truly bring recipes to life and inspire others. So, go forth, create, enjoy, and share your delicious journey with this fantastic <strong>Chickpea Feta Avocado Salad</strong>! I have a feeling you’re going to fall in love, just like I have.</p>
Zesty Chickpea Feta Avocado Salad: Quick & Refreshing!
Chickpea Feta Avocado Salad is more than just a dish; it’s a vibrant celebration of fresh flavors and textures that will undoubtedly become a staple in your culinary repertoire. Have you ever wished for a meal that is both incredibly satisfying and effortlessly quick to prepare? Look no further!
Ingredients
-
1 (15-ounce/425g) can chickpeas, drained and rinsed
-
1 avocado, pitted and diced
-
4 ounces/115g feta cheese, crumbled
-
1/2 cup/75g red onion, thinly sliced
-
1/2 cup/50g fresh parsley, chopped
-
1/4 cup/25g fresh mint, chopped
-
3 tablespoons/45ml extra virgin olive oil
-
2 tablespoons/30ml fresh lemon juice
-
1 clove garlic, minced
-
1/2 teaspoon/2.5ml dried oregano
-
Salt and freshly ground black pepper to taste
Instructions
-
Step 1
Thoroughly rinse and drain the chickpeas, then pat them dry. Dice the avocado. Cube or crumble the feta cheese. Thinly slice the red onion (soak in cold water for 5-10 minutes if a milder flavor is preferred, then drain). Finely chop the fresh parsley and mint. -
Step 2
In a large mixing bowl, combine the prepared chickpeas, avocado, feta, red onion, parsley, and mint. -
Step 3
In a separate small bowl, whisk together the extra virgin olive oil, fresh lemon juice, minced garlic, dried oregano, salt, and freshly ground black pepper until well combined and slightly emulsified. -
Step 4
Pour the prepared dressing over the salad base. Gently toss the ingredients until all components are evenly coated. Taste and adjust seasoning as needed. For optimal flavor, chill in the refrigerator for at least 20-30 minutes before serving. -
Step 5
Store any leftover salad in an airtight container in the refrigerator for 1-2 days. Gently stir before serving leftovers.
Important Information
Nutrition Facts (Per Serving)
It is important to consider this information as approximate and not to use it as definitive health advice.
Allergy Information
Please check ingredients for potential allergens and consult a health professional if in doubt.


Leave a Comment