
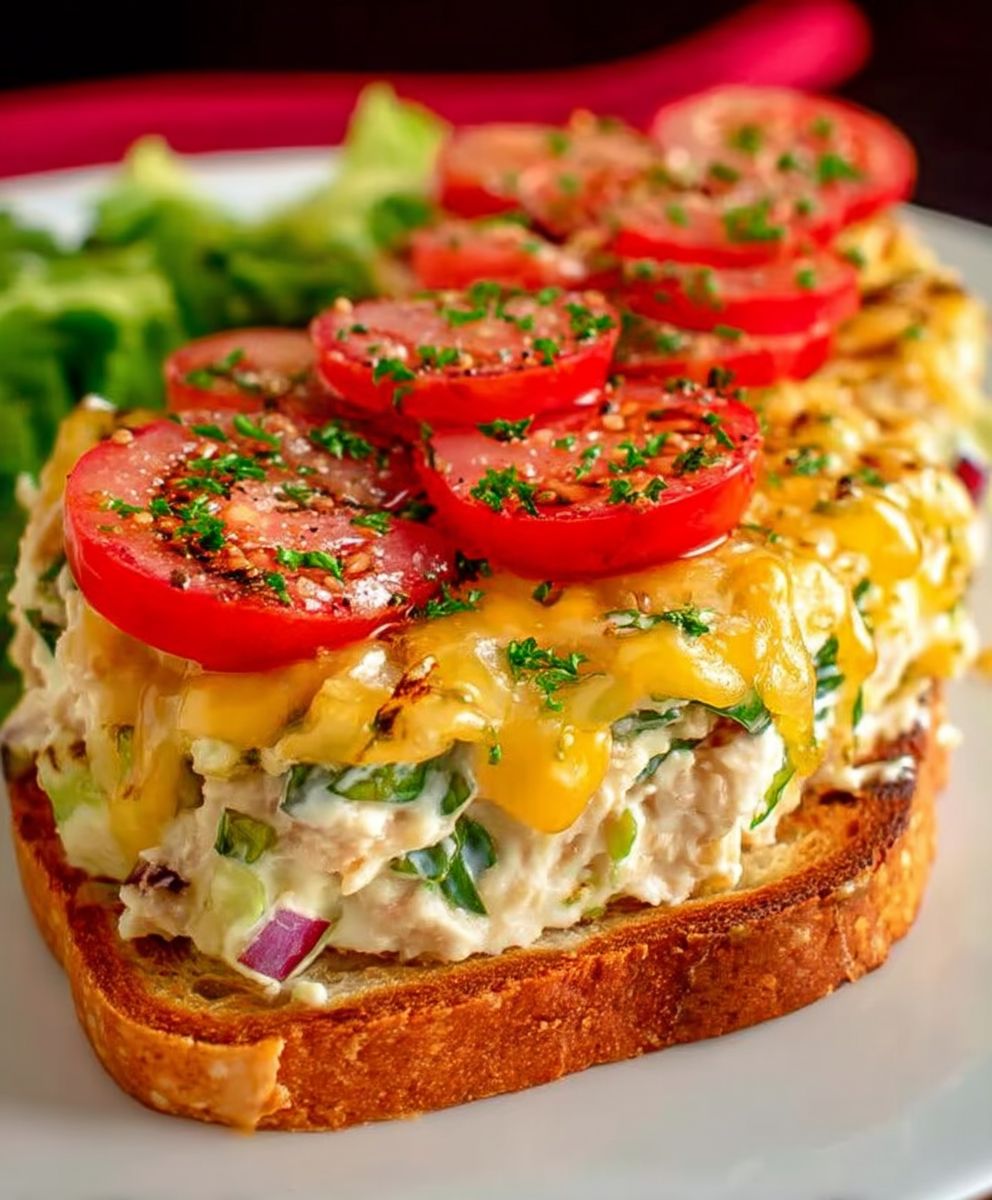
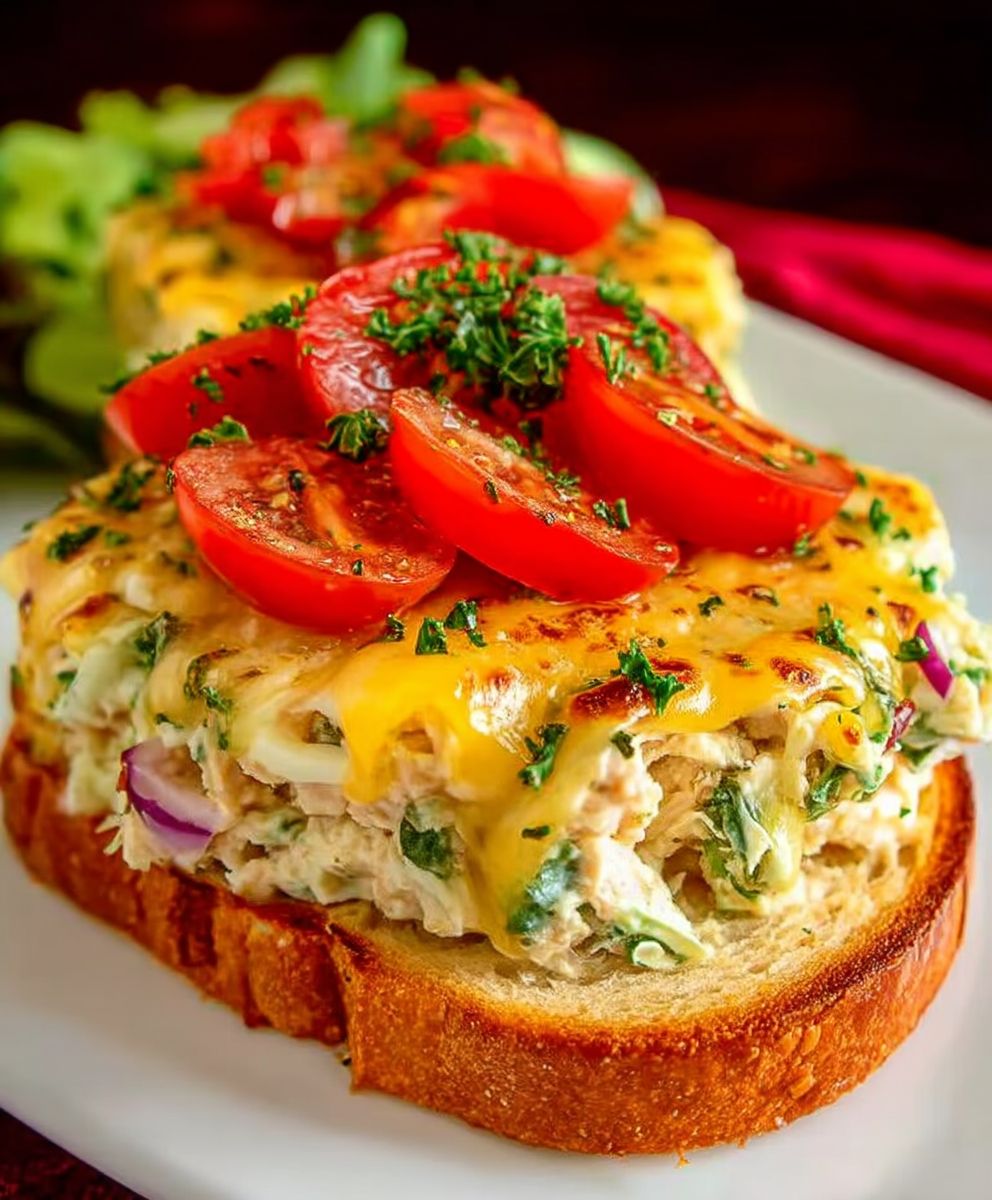
Tuna melt sandwich: just the name conjures up images of warm, gooey cheese cascading over a savory tuna salad, nestled between perfectly toasted bread. But this isn’t just any sandwich; it’s a culinary hug, a comforting classic that has warmed hearts and satisfied cravings for generations. Have you ever wondered about the origins of this simple yet sublime creation?
While its exact beginnings are shrouded in a bit of mystery, the tuna melt gained popularity in the mid-20th century, quickly becoming a diner staple across America. It’s a testament to the power of simple ingredients combined in perfect harmony. The creamy, tangy tuna salad, often brightened with celery and onion, provides a delightful counterpoint to the rich, melted cheese. And let’s not forget the bread toasted to golden perfection, offering a satisfying crunch with every bite.
What makes the tuna melt sandwich so universally loved? Perhaps it’s the ease of preparation a quick and satisfying meal that can be whipped up in minutes. Or maybe it’s the nostalgic appeal, reminding us of simpler times and comforting flavors. Whatever the reason, this sandwich has earned its place as a true culinary icon. Join me as we explore the secrets to creating the ultimate tuna melt, a sandwich that’s guaranteed to become a new favorite (or a cherished old one!).
Ingredients:
- 5 ounces canned tuna in water, drained
- 1/4 cup mayonnaise
- 1 tablespoon finely chopped celery
- 1 tablespoon finely chopped red onion
- 1 teaspoon Dijon mustard
- 1/4 teaspoon black pepper
- Pinch of salt, or to taste
- 2 slices sourdough bread (or your favorite bread)
- 2 slices cheddar cheese (or your favorite cheese, like Swiss or Monterey Jack)
- 1 tablespoon butter, softened
Preparing the Tuna Salad:
Alright, let’s get started! The heart of a great tuna melt is, of course, the tuna salad. We want it creamy, flavorful, and perfectly balanced. Trust me, a little extra effort here makes a world of difference.
- Drain the Tuna: First things first, thoroughly drain the canned tuna. I like to press it gently with the back of a spoon to get rid of any excess water. Nobody wants a soggy tuna melt!
- Combine Ingredients: In a medium-sized bowl, add the drained tuna, mayonnaise, finely chopped celery, finely chopped red onion, Dijon mustard, black pepper, and a pinch of salt.
- Mix Gently: Now, gently mix all the ingredients together until they are well combined. Be careful not to overmix, as you want to keep some texture in the tuna salad. I find that a folding motion works best.
- Taste and Adjust: This is the crucial step! Taste the tuna salad and adjust the seasonings as needed. Does it need a little more salt? A touch more Dijon for a bit of tang? This is your chance to make it perfect for your palate. I sometimes add a tiny squeeze of lemon juice for brightness.
- Chill (Optional): If you have time, cover the bowl and refrigerate the tuna salad for at least 15 minutes. This allows the flavors to meld together even more. However, if you’re impatient (like me sometimes!), you can skip this step.
Assembling the Tuna Melt:
Now for the fun part building our masterpiece! The key here is to layer everything just right to ensure a melty, gooey, and delicious experience.
- Butter the Bread: Spread a thin layer of softened butter on one side of each slice of bread. This will help the bread get golden brown and crispy in the pan. Don’t skimp on the butter!
- Layer the Cheese: Place one slice of bread, butter-side down, in a non-stick skillet. Top with one slice of cheddar cheese. Make sure the cheese covers most of the bread surface.
- Add the Tuna Salad: Spread the tuna salad evenly over the cheese. Don’t pile it too high, or it might be difficult to melt the cheese properly.
- Top with Cheese: Place the second slice of cheddar cheese on top of the tuna salad. This will create a cheesy barrier and help hold everything together.
- Top with Bread: Place the second slice of bread on top of the cheese, butter-side up.
Cooking the Tuna Melt:
This is where the magic happens! We want to achieve that perfect golden-brown crust and melty, gooey cheese. Patience is key here don’t rush the process.
- Heat the Skillet: Place the skillet over medium-low heat. This is important! If the heat is too high, the bread will burn before the cheese has a chance to melt.
- Cook Slowly: Cook the tuna melt for about 3-5 minutes per side, or until the bread is golden brown and the cheese is melted and gooey. Use a spatula to gently press down on the sandwich to help the cheese melt evenly.
- Check for Doneness: To check if the cheese is melted, gently lift the edge of the top slice of bread with a spatula. If the cheese is melted and gooey, it’s ready to flip.
- Flip Carefully: Carefully flip the tuna melt with a spatula. Be gentle, as the sandwich can be a bit fragile at this point.
- Cook the Other Side: Cook the other side for another 3-5 minutes, or until the bread is golden brown and the cheese is completely melted. Again, gently press down on the sandwich with a spatula.
- Remove from Skillet: Once the tuna melt is cooked to perfection, carefully remove it from the skillet and place it on a cutting board.
Serving and Enjoying:
The moment we’ve all been waiting for! Time to slice, serve, and savor every delicious bite of your homemade tuna melt.
- Slice and Serve: Use a sharp knife to slice the tuna melt in half diagonally. This makes it easier to handle and eat.
- Serve Immediately: Serve the tuna melt immediately while it’s still hot and the cheese is melty.
- Optional Sides: Tuna melts are delicious on their own, but they also pair well with a variety of sides. Consider serving it with a side of tomato soup, potato chips, coleslaw, or a simple green salad.
- Enjoy! Take a bite and savor the combination of crispy bread, creamy tuna salad, and gooey melted cheese. You deserve it!
Tips and Variations:
Want to take your tuna melt to the next level? Here are a few tips and variations to try:
- Add a Pickle: A slice or two of dill pickle adds a nice tangy crunch to the tuna melt.
- Spice it Up: Add a pinch of red pepper flakes to the tuna salad for a little heat.
- Use Different Cheese: Experiment with different types of cheese, such as Swiss, Monterey Jack, provolone, or pepper jack.
- Add Tomato: A slice of tomato adds a juicy and refreshing element to the tuna melt.
- Use Different Bread: Try using different types of bread, such as rye, whole wheat, or ciabatta.
- Grilled Cheese Style: For an extra crispy tuna melt, spread mayonnaise instead of butter on the outside of the bread. This will create a super golden-brown and crispy crust.
- Open-Faced Tuna Melt: For a lighter option, make an open-faced tuna melt by only using one slice of bread.
- Add Avocado: Sliced avocado adds creaminess and healthy fats.
- Use Fresh Herbs: Add chopped fresh dill or parsley to the tuna salad for a burst of flavor.
- Make it a Breakfast Tuna Melt: Add a fried egg on top for a breakfast twist!
Troubleshooting:
Sometimes things don’t go exactly as planned. Here are a few common problems and how to fix them:
- Bread is Burning: If the bread is burning before the cheese melts, reduce the heat to low and cook for a longer period of time.
- Cheese Isn’t Melting: If the cheese isn’t melting, try covering the skillet with a lid for a few minutes to trap the heat and help the cheese melt. You can also add a few drops of water to the skillet and quickly cover it to create steam.
- Tuna Salad is Dry: If the tuna salad is too dry, add a little more mayonnaise until it reaches your desired consistency.
- Tuna Melt is Falling Apart: Make sure you’re not overfilling the sandwich with tuna salad. Also, gently press down on the sandwich with a spatula while it’s cooking to help it hold together.
Storage:
Tuna melts are best enjoyed fresh, but if you have leftovers, you can store them in the refrigerator for up to 24 hours. Reheat in a skillet or toaster oven for best results. Keep in mind that the bread may become a bit soggy during storage.
Conclusion:
So there you have it! This isn’t just any tuna melt sandwich; it’s the tuna melt sandwich you’ve been searching for. The perfect balance of creamy, savory, and melty goodness, all nestled between slices of perfectly toasted bread. I truly believe this recipe elevates the humble tuna melt to a whole new level of deliciousness, and I’m confident you’ll agree once you take that first bite.
But why is this tuna melt a must-try? It’s simple: it’s quick, easy, and incredibly satisfying. Whether you’re looking for a speedy lunch, a comforting dinner, or a late-night snack, this recipe delivers every single time. The combination of high-quality tuna, the tangy zip of the Dijon mustard, and the sharp cheddar cheese creates a symphony of flavors that will tantalize your taste buds. Plus, the crispy, golden-brown bread adds the perfect textural contrast to the creamy filling. Its a culinary experience packed into a sandwich!
And the best part? It’s incredibly versatile! Feel free to experiment with different types of bread. Sourdough, rye, or even a crusty baguette would work beautifully. For a little extra kick, try adding a pinch of red pepper flakes to the tuna mixture. Or, if you’re feeling adventurous, swap out the cheddar for Gruyere or pepper jack cheese. The possibilities are endless!
Serving Suggestions and Variations:
* Serve your tuna melt with a side of crispy potato chips or a fresh green salad for a complete and satisfying meal.
* For a heartier option, pair it with a bowl of creamy tomato soup. The acidity of the tomato soup complements the richness of the tuna melt perfectly.
* Want to make it even more decadent? Spread a thin layer of mayonnaise on the outside of the bread before grilling for an extra crispy and golden-brown crust.
* Consider adding some thinly sliced tomato or avocado to the sandwich for added freshness and flavor.
* If you’re watching your carb intake, you can even enjoy the tuna melt filling on its own, served over a bed of lettuce or mixed greens.
I’ve poured my heart and soul into perfecting this recipe, and I’m so excited for you to try it. I truly believe that everyone deserves a truly amazing tuna melt in their life, and I hope this recipe helps you achieve just that. It’s more than just a sandwich; it’s a little bit of comfort, a little bit of nostalgia, and a whole lot of deliciousness.
So, what are you waiting for? Head to your kitchen, gather your ingredients, and get ready to create the ultimate tuna melt experience. I promise you won’t be disappointed.
And most importantly, I want to hear about your experience! Did you try any variations? Did you add any special ingredients? What did you think of the overall flavor? Share your photos and comments with me I can’t wait to see your creations and hear your feedback. Happy cooking, and happy melting! Let me know what you think! I’m confident this will become a staple in your recipe rotation. Enjoy!
Tuna Melt Sandwich: The Ultimate Guide to a Perfect Melt
Creamy tuna salad and gooey melted cheddar cheese between slices of crispy golden-brown sourdough bread.
Ingredients
- 5 ounces canned tuna in water, drained
- 1/4 cup mayonnaise
- 1 tablespoon finely chopped celery
- 1 tablespoon finely chopped red onion
- 1 teaspoon Dijon mustard
- 1/4 teaspoon black pepper
- Pinch of salt, or to taste
- 2 slices sourdough bread (or your favorite bread)
- 2 slices cheddar cheese (or your favorite cheese, like Swiss or Monterey Jack)
- 1 tablespoon butter, softened
Instructions
- Prepare the Tuna Salad: Thoroughly drain the canned tuna, pressing out excess water. In a medium bowl, combine the drained tuna, mayonnaise, celery, red onion, Dijon mustard, black pepper, and salt. Gently mix until well combined, being careful not to overmix. Taste and adjust seasonings as needed. Chill for 15 minutes (optional).
- Assemble the Tuna Melt: Butter one side of each slice of bread. Place one slice of bread, butter-side down, in a non-stick skillet. Top with one slice of cheddar cheese, then spread the tuna salad evenly over the cheese. Top with the second slice of cheddar cheese and the second slice of bread, butter-side up.
- Cook the Tuna Melt: Place the skillet over medium-low heat. Cook for 3-5 minutes per side, or until the bread is golden brown and the cheese is melted and gooey. Gently press down on the sandwich with a spatula to help the cheese melt evenly.
- Serve: Remove from skillet, slice in half diagonally, and serve immediately.
Notes
- For extra flavor, add a squeeze of lemon juice to the tuna salad.
- Experiment with different cheeses, breads, and additions like pickles, tomato, or avocado.
- If the bread is burning before the cheese melts, reduce the heat.
- If the cheese isn’t melting, cover the skillet with a lid for a few minutes.
- Leftovers can be stored in the refrigerator for up to 24 hours, but the bread may become soggy.


Leave a Comment