
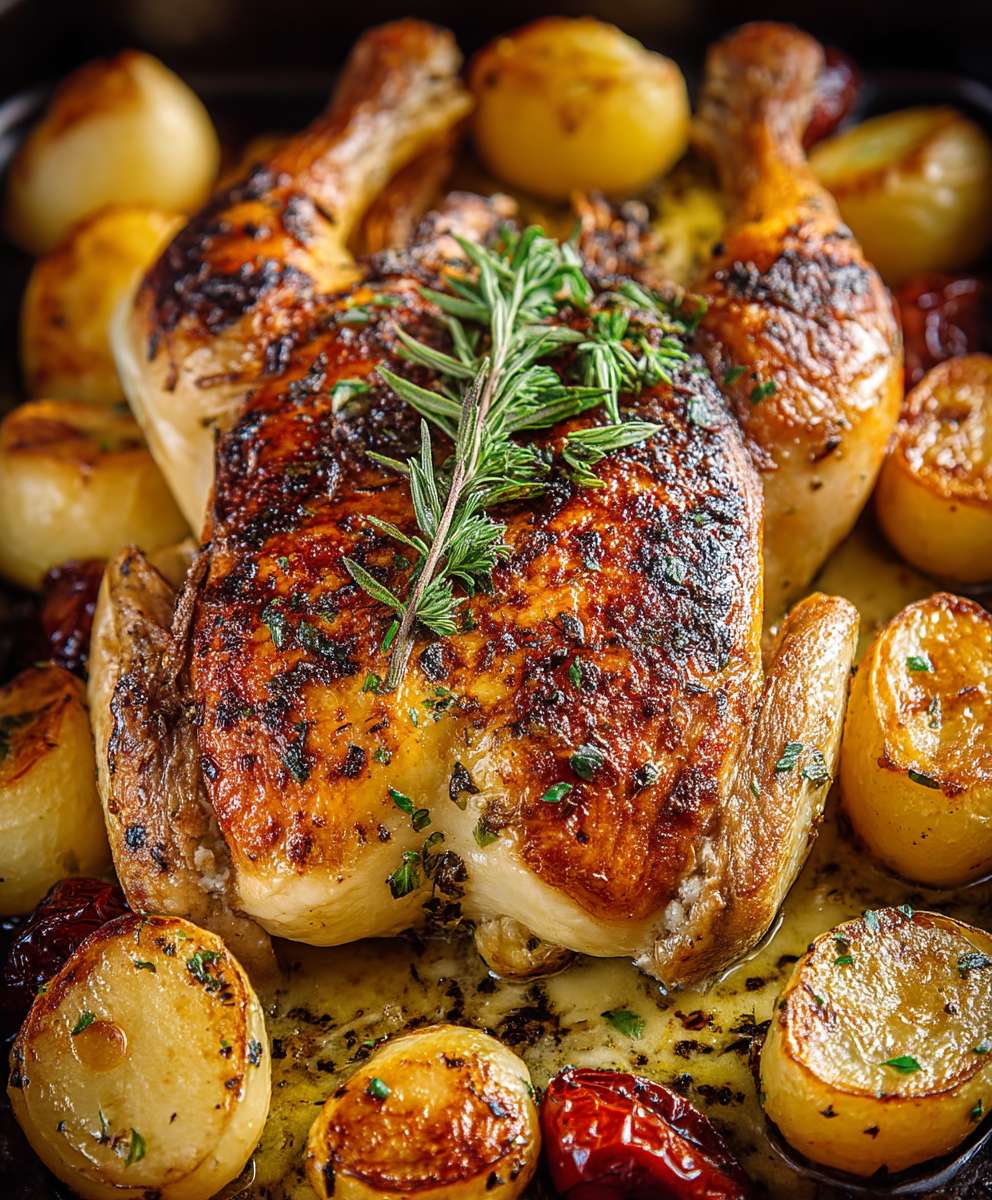
Spatchcock Chicken: Prepare to revolutionize your roast chicken game! Imagine a perfectly cooked bird, boasting incredibly crispy skin and juicy, tender meat throughout all achieved in significantly less time than traditional roasting. Sounds too good to be true? It’s not! This simple technique, also known as butterflying, unlocks a whole new level of deliciousness and efficiency.
While the exact origins of spatchcocking are debated, the method has been used for centuries to cook poultry and game birds more evenly. Some culinary historians trace it back to 18th-century Ireland, where “spatchcock” may have referred to a dispatch cook preparing a bird quickly. Regardless of its precise beginnings, the technique has stood the test of time for good reason.
What makes spatchcock chicken so irresistible? For starters, flattening the chicken allows it to cook more evenly, eliminating the dreaded dry breast and undercooked thighs. The increased surface area also means more skin is exposed to the heat, resulting in unparalleled crispiness. Beyond the texture, the flavor is simply outstanding. The shorter cooking time helps retain moisture, and the even cooking ensures every bite is packed with savory goodness. Plus, let’s be honest, the speed and ease of this method make it a weeknight dinner champion. Get ready to impress your family and friends with this foolproof technique that delivers restaurant-quality results every time!
Ingredients:
- 1 whole chicken (3-4 lbs), preferably organic and air-chilled
- 2 tablespoons olive oil
- 2 tablespoons lemon juice
- 2 tablespoons chopped fresh rosemary
- 2 tablespoons chopped fresh thyme
- 4 cloves garlic, minced
- 1 tablespoon smoked paprika
- 1 teaspoon garlic powder
- 1 teaspoon onion powder
- 1/2 teaspoon cayenne pepper (optional, for a little heat)
- Salt and freshly ground black pepper to taste
- Optional: 1 lemon, quartered, for stuffing the cavity
- Optional: Fresh herbs (rosemary, thyme, sage) for stuffing the cavity
Preparing the Chicken: Spatchcocking
Okay, let’s get started! The first and most important step is spatchcocking the chicken. Don’t be intimidated; it’s easier than it sounds, and it makes for a much faster and evenly cooked bird. Spatchcocking, also known as butterflying, involves removing the backbone so the chicken can lay flat.
- Prepare Your Workspace: Make sure you have a clean, sturdy cutting board. It’s also a good idea to have some paper towels handy to wipe down any surfaces.
- Locate the Backbone: Place the chicken breast-side down on the cutting board. You’ll see the backbone running down the center.
- Cut Along One Side of the Backbone: Using kitchen shears (these are essential!), cut along one side of the backbone. Start at the tail end and work your way up towards the neck. You’ll need to apply some pressure, but the shears should cut through the ribs fairly easily. If you don’t have kitchen shears, you can use a sharp chef’s knife, but be extra careful.
- Cut Along the Other Side of the Backbone: Now, cut along the other side of the backbone, removing it completely. You can save the backbone to make chicken stock later just toss it in a freezer bag and store it until you’re ready.
- Flip the Chicken Over: Flip the chicken over so it’s breast-side up.
- Press Down on the Breastbone: Use the palm of your hand to firmly press down on the breastbone. You should hear a crack. This will flatten the chicken even further, ensuring even cooking.
- Check for Pin Feathers: Take a moment to check the chicken for any remaining pin feathers. If you find any, pluck them out with tweezers.
- Pat the Chicken Dry: Use paper towels to thoroughly pat the chicken dry, inside and out. This is crucial for getting crispy skin.
Making the Marinade
Now that the chicken is spatchcocked and prepped, let’s make the marinade. This is where all the flavor comes from!
- Combine the Ingredients: In a small bowl, whisk together the olive oil, lemon juice, chopped rosemary, chopped thyme, minced garlic, smoked paprika, garlic powder, onion powder, and cayenne pepper (if using).
- Season with Salt and Pepper: Add salt and freshly ground black pepper to taste. Don’t be shy with the salt it’s important for seasoning the chicken properly.
- Taste and Adjust: Give the marinade a taste and adjust the seasonings as needed. If you want it spicier, add more cayenne pepper. If you want it more herbaceous, add more rosemary or thyme.
Marinating the Chicken
This is a crucial step, so don’t skip it! The longer you marinate the chicken, the more flavorful it will be. I recommend marinating it for at least 4 hours, or even better, overnight.
- Rub the Marinade All Over: Place the spatchcocked chicken in a large resealable plastic bag or a shallow dish. Pour the marinade over the chicken, making sure to coat it evenly, both under and over the skin. Use your hands to rub the marinade into every nook and cranny.
- Massage the Marinade Under the Skin: Gently loosen the skin from the breast meat and thighs, and massage some of the marinade directly onto the meat. This will help to keep the meat moist and flavorful during cooking.
- Add Optional Aromatics: If you’re using them, stuff the cavity with lemon quarters and fresh herbs. This will add even more flavor to the chicken.
- Seal and Refrigerate: Seal the bag or cover the dish tightly with plastic wrap. Refrigerate for at least 4 hours, or preferably overnight.
- Turn Occasionally: If possible, turn the chicken occasionally while it’s marinating to ensure that it’s evenly coated.
Cooking the Chicken
Alright, it’s time to cook the chicken! I prefer to roast it in the oven, but you can also grill it. I’ll give you instructions for both methods.
Oven Roasting
- Preheat the Oven: Preheat your oven to 425°F (220°C).
- Prepare a Baking Sheet: Line a baking sheet with parchment paper or aluminum foil. This will make cleanup much easier.
- Place the Chicken on the Baking Sheet: Remove the chicken from the marinade and place it on the prepared baking sheet, skin-side up.
- Roast the Chicken: Roast the chicken for 45-60 minutes, or until a meat thermometer inserted into the thickest part of the thigh registers 165°F (74°C). The exact cooking time will depend on the size of your chicken.
- Check for Doneness: To ensure the chicken is cooked through, insert a meat thermometer into several different spots, including the breast and thigh.
- Baste (Optional): If you want extra crispy skin, you can baste the chicken with the pan juices every 15-20 minutes during the last half of the cooking time.
- Broil for Extra Crispiness (Optional): If the skin isn’t as crispy as you’d like, you can broil the chicken for the last few minutes of cooking. Watch it carefully to prevent burning.
- Let it Rest: Once the chicken is cooked through, remove it from the oven and let it rest for 10-15 minutes before carving. This allows the juices to redistribute, resulting in a more tender and flavorful bird.
Grilling
- Prepare the Grill: Preheat your grill to medium-high heat. Make sure the grates are clean and lightly oiled.
- Place the Chicken on the Grill: Place the spatchcocked chicken on the grill, skin-side up.
- Grill the Chicken: Grill the chicken for about 45-60 minutes, or until a meat thermometer inserted into the thickest part of the thigh registers 165°F (74°C). The exact cooking time will depend on the heat of your grill.
- Rotate and Flip: Rotate the chicken every 15-20 minutes to ensure even cooking. You may need to flip it skin-side down for the last few minutes to crisp up the skin.
- Check for Doneness: Use a meat thermometer to check for doneness, inserting it into the thickest part of the thigh.
- Let it Rest: Once the chicken is cooked through, remove it from the grill and let it rest for 10-15 minutes before carving.
Carving and Serving
Now for the best part enjoying your delicious spatchcock chicken!
- Carve the Chicken: Use a sharp carving knife to carve the chicken. Start by separating the legs and thighs from the body. Then, slice the breast meat.
- Serve and Enjoy: Serve the chicken immediately. It’s delicious with roasted vegetables, mashed potatoes, salad, or any of your favorite side dishes.
- Enjoy the Crispy Skin: Don’t forget to enjoy that crispy, flavorful skin!
Tips and Variations
- Experiment with Different Marinades: Feel free to experiment with different marinades. You can use different herbs, spices, or citrus fruits.
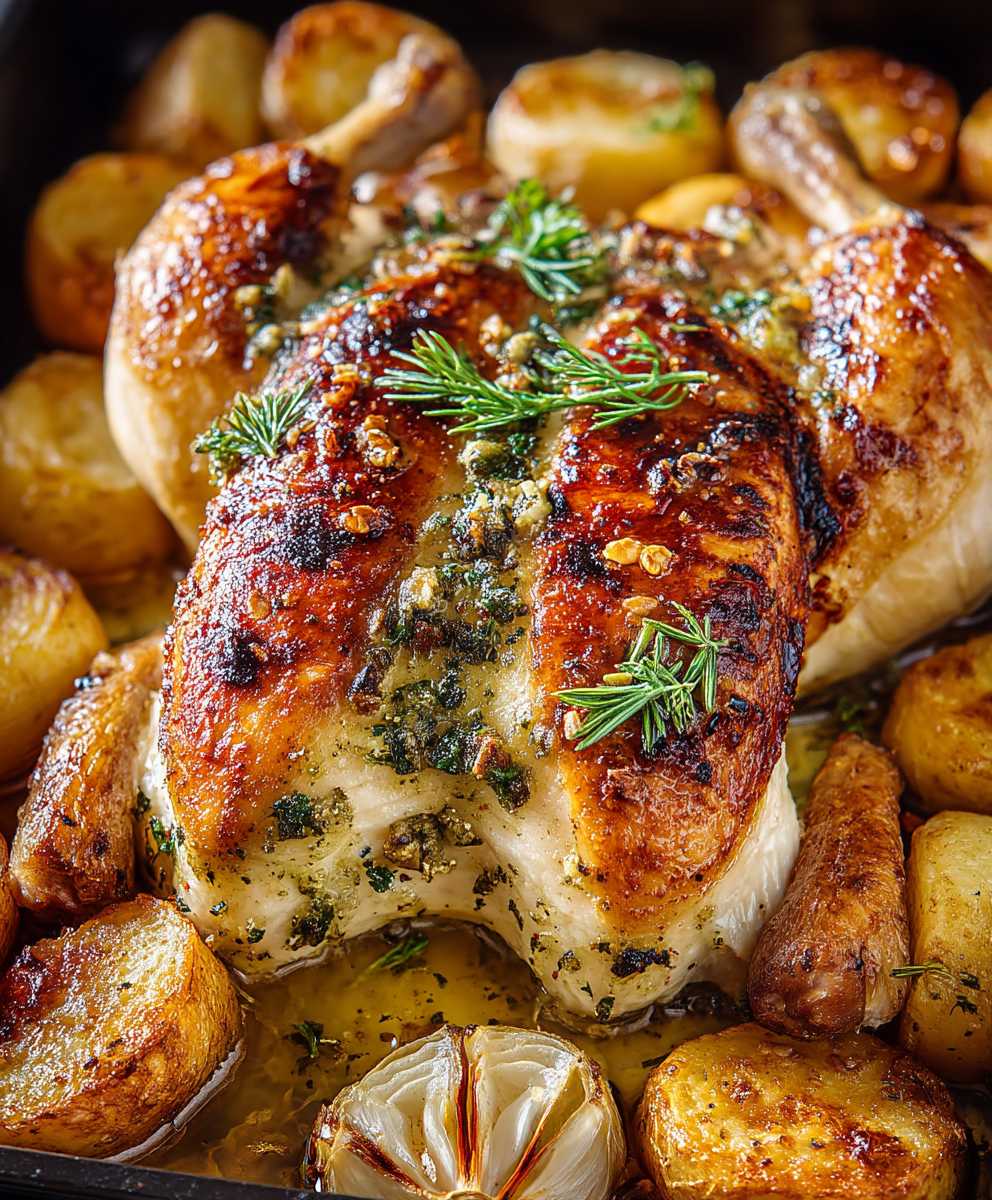
- Add Vegetables to the Baking Sheet: You can roast vegetables alongside the chicken on the baking sheet. Root vegetables like potatoes, carrots, and parsnips are a great choice.
- Use a Dry Rub: If you prefer, you can use a dry rub instead of a marinade. Simply combine your favorite spices and rub them all over the chicken.
- 1 whole chicken (3-4 lbs), preferably organic and air-chilled
- 2 tablespoons olive oil
- 2 tablespoons lemon juice
- 2 tablespoons chopped fresh rosemary
- 2 tablespoons chopped fresh thyme
- 4 cloves garlic, minced
- 1 tablespoon smoked paprika
- 1 teaspoon garlic powder
- 1 teaspoon onion powder
- 1/2 teaspoon cayenne pepper (optional, for a little heat)
- Salt and freshly ground black pepper to taste
- Optional: 1 lemon, quartered, for stuffing the cavity
- Optional: Fresh herbs (rosemary, thyme, sage) for stuffing the cavity
- Prepare Your Workspace: Make sure you have a clean, sturdy cutting board. It’s also a good idea to have some paper towels handy to wipe down any surfaces.
- Locate the Backbone: Place the chicken breast-side down on the cutting board. You’ll see the backbone running down the center.
- Cut Along One Side of the Backbone: Using kitchen shears (these are essential!), cut along one side of the backbone. Start at the tail end and work your way up towards the neck. You’ll need to apply some pressure, but the shears should cut through the ribs fairly easily. If you don’t have kitchen shears, you can use a sharp chef’s knife, but be extra careful.
- Cut Along the Other Side of the Backbone: Now, cut along the other side of the backbone, removing it completely. You can save the backbone to make chicken stock later just toss it in a freezer bag and store it until you’re ready.
- Flip the Chicken Over: Flip the chicken over so it’s breast-side up.
- Press Down on the Breastbone: Use the palm of your hand to firmly press down on the breastbone. You should hear a crack. This will flatten the chicken even further, ensuring even cooking.
- Check for Pin Feathers: Take a moment to check the chicken for any remaining pin feathers. If you find any, pluck them out with tweezers.
- Pat the Chicken Dry: Use paper towels to thoroughly pat the chicken dry, inside and out. This is crucial for getting crispy skin.
- Combine the Ingredients: In a small bowl, whisk together the olive oil, lemon juice, chopped rosemary, chopped thyme, minced garlic, smoked paprika, garlic powder, onion powder, and cayenne pepper (if using).
- Season with Salt and Pepper: Add salt and freshly ground black pepper to taste. Don’t be shy with the salt it’s important for seasoning the chicken properly.
- Taste and Adjust: Give the marinade a taste and adjust the seasonings as needed. If you want it spicier, add more cayenne pepper. If you want it more herbaceous, add more rosemary or thyme.
- Rub the Marinade All Over: Place the spatchcocked chicken in a large resealable plastic bag or a shallow dish. Pour the marinade over the chicken, making sure to coat it evenly, both under and over the skin. Use your hands to rub the marinade into every nook and cranny.
- Massage the Marinade Under the Skin: Gently loosen the skin from the breast meat and thighs, and massage some of the marinade directly onto the meat. This will help to keep the meat moist and flavorful during cooking.
- Add Optional Aromatics: If you’re using them, stuff the cavity with lemon quarters and fresh herbs. This will add even more flavor to the chicken.
- Seal and Refrigerate: Seal the bag or cover the dish tightly with plastic wrap. Refrigerate for at least 4 hours, or preferably overnight.
- Turn Occasionally: If possible, turn the chicken occasionally while it’s marinating to ensure that it’s evenly coated.
- Preheat the Oven: Preheat your oven to 425°F (220°C).
- Prepare a Baking Sheet: Line a baking sheet with parchment paper or aluminum foil. This will make cleanup much easier.
- Place the Chicken on the Baking Sheet: Remove the chicken from the marinade and place it on the prepared baking sheet, skin-side up.
- Roast the Chicken: Roast the chicken for 45-60 minutes, or until a meat thermometer inserted into the thickest part of the thigh registers 165°F (74°C). The exact cooking time will depend on the size of your chicken.
- Check for Doneness: To ensure the chicken is cooked through, insert a meat thermometer into several different spots, including the breast and thigh.
- Baste (Optional): If you want extra crispy skin, you can baste the chicken with the pan juices every 15-20 minutes during the last half of the cooking time.
- Broil for Extra Crispiness (Optional): If the skin isn’t as crispy as you’d like, you can broil the chicken for the last few minutes of cooking. Watch it carefully to prevent burning.
- Let it Rest: Once the chicken is cooked through, remove it from the oven and let it rest for 10-15 minutes before carving. This allows the juices to redistribute, resulting in a more tender and flavorful bird.
- Prepare the Grill: Preheat your grill to medium-high heat. Make sure the grates are clean and lightly oiled.
- Place the Chicken on the Grill: Place the spatchcocked chicken on the grill, skin-side up.
- Grill the Chicken: Grill the chicken for about 45-60 minutes, or until a meat thermometer inserted into the thickest part of the thigh registers 165°F (74°C). The exact cooking time will depend on the heat of your grill.
- Rotate and Flip: Rotate the chicken every 15-20 minutes to ensure even cooking. You may need to flip it skin-side down for the last few minutes to crisp up the skin.
- Check for Doneness: Use a meat thermometer to check for doneness, inserting it into the thickest part of the thigh.
- Let it Rest: Once the chicken is cooked through, remove it from the grill and let it rest for 10-15 minutes before carving.
- Carve the Chicken: Use a sharp carving knife to carve the chicken. Start by separating the legs and thighs from the body. Then, slice the breast meat.
- Serve and Enjoy: Serve the chicken immediately. It’s delicious with roasted vegetables, mashed potatoes, salad, or any of your favorite side dishes.
- Enjoy the Crispy Skin: Don’t forget to enjoy that crispy, flavorful skin!
- Spatchcocking the chicken (removing the backbone) allows it to cook faster and more evenly.
- Marinating the chicken for at least 4 hours, or preferably overnight, will result in a more flavorful and juicy bird.
- Use a meat thermometer to ensure the chicken is cooked to a safe internal temperature of 165°F (74°C).
- Letting the chicken rest for 10-15 minutes before carving allows the juices to redistribute, resulting in a more tender and flavorful bird.
- Experiment with different marinades and herbs to customize the flavor of the chicken.
- Roast vegetables alongside the chicken for a complete meal.
Conclusion:
So, there you have it! This spatchcock chicken recipe isn’t just another way to cook a bird; it’s a game-changer. I truly believe that once you try this method, you’ll never go back to roasting a chicken the traditional way. The even cooking, the crispy skin, and the unbelievably juicy meat all combine to create a truly unforgettable dining experience. It’s a must-try for anyone who loves chicken, whether you’re a seasoned chef or just starting out in the kitchen.
Why is it a must-try? Well, let’s recap. First, the spatchcocking technique itself drastically reduces cooking time. We’re talking about getting a perfectly roasted chicken on the table in significantly less time than you’re probably used to. That’s a win for busy weeknights or when you’re entertaining and want to spend less time in the kitchen and more time with your guests. Second, the flattened shape ensures that the entire chicken cooks evenly. No more dry breast meat and undercooked thighs! Every single bite will be moist and flavorful. And finally, that crispy skin! Because the chicken is flattened, more surface area is exposed to the heat, resulting in a beautifully browned and incredibly crispy skin that’s simply irresistible.
But the best part is how versatile this recipe is. You can easily adapt it to suit your own tastes and preferences. For serving suggestions, think beyond the usual sides. While roasted vegetables like potatoes, carrots, and Brussels sprouts are always a classic pairing, consider adding a fresh salad with a bright vinaigrette to balance the richness of the chicken. Quinoa or couscous are also excellent choices for a lighter meal. And don’t forget the sauce! A simple pan sauce made with the chicken drippings, a squeeze of lemon juice, and a touch of herbs is the perfect finishing touch.
Looking for variations? The possibilities are endless! Experiment with different spice rubs and marinades to create your own signature flavor. Try a smoky paprika rub for a Southwestern-inspired chicken, or a lemon-herb marinade for a Mediterranean twist. You could even brush the chicken with a honey-mustard glaze during the last few minutes of cooking for a sweet and savory flavor. And if you’re feeling adventurous, try stuffing herbs and garlic under the skin before roasting for an extra layer of flavor.
Don’t be intimidated by the spatchcocking process itself. It might seem a little daunting at first, but it’s actually quite simple once you get the hang of it. Just remember to use a good pair of kitchen shears and follow the instructions carefully. And if you’re still unsure, there are plenty of videos online that can guide you through the process.
I’m so confident that you’ll love this recipe that I urge you to give it a try. Seriously, what are you waiting for? Gather your ingredients, grab your kitchen shears, and get ready to experience the best roasted chicken of your life.
And once you’ve tried it, I’d love to hear about your experience! Share your photos and comments on social media using [Your Hashtag Here] or leave a review on the recipe page. Let me know what variations you tried, what sides you served, and what your family and friends thought. I’m always looking for new ideas and inspiration, and I can’t wait to see what you create. Happy cooking! I hope you enjoy this spatchcock chicken as much as I do!
Spatchcock Chicken: The Ultimate Guide to Perfectly Flattened Chicken
Juicy, flavorful spatchcock chicken roasted or grilled with rosemary and thyme. Spatchcocking ensures even cooking and crispy skin!

Leave a Comment