
Reeses Pieces Peanut Butter Bark is a dessert that truly captures the heart and palate with its irresistible blend of classic flavors and delightful textures. Prepare to have your taste buds embark on an unforgettable journey of creamy, crunchy, sweet, and salty perfection that will leave everyone asking for more!
While the concept of bark as a simple, no-bake confection has been around for ages, the magic truly happens when we introduce the iconic pairing of chocolate and peanut butter, particularly with the beloved Reese’s brand. This distinctly American flavor combination has captivated generations, becoming a nostalgic staple in many households. I find that people absolutely adore this Reeses Pieces Peanut Butter Bark for its incredible ease of preparation – it’s a no-bake wonder perfect for busy schedules – but even more so for its utterly addictive flavor profile.
Why This Bark Is a Must-Make!
The smooth, rich chocolate base, generously swirled with creamy peanut butter, creates a luxurious foundation. But it’s the vibrant, candy-coated Reeses Pieces that truly elevate it, adding a delightful crunch and that unmistakable burst of peanut butter goodness in every single bite. It’s the ultimate treat for satisfying those intense sweet cravings, offering a perfect balance of textures that makes it an instant favorite for parties, gifts, or simply a delightful indulgence.

Ingredients:
- For the Peanut Butter Layer:
- 1 ½ cups (approximately 9 ounces or 255g) semi-sweet chocolate chips or chopped baking chocolate. I find good quality chips melt more smoothly.
- ½ cup (approximately 4 ounces or 113g) creamy peanut butter. Make sure it’s not the natural, oil-separated kind, as that can affect the texture. A classic, processed peanut butter works best here for consistency.
- 2 tablespoons (30g) unsalted butter. This adds a lovely richness and helps achieve that perfect melt-in-your-mouth texture.
- 1 teaspoon pure vanilla extract. A little touch of vanilla always enhances the flavor profile.
- ¼ teaspoon sea salt. Just a pinch to balance the sweetness and really make that peanut butter flavor pop.
- For the Chocolate Topping:
- 1 ½ cups (approximately 9 ounces or 255g) milk chocolate chips or chopped milk chocolate. The creaminess of milk chocolate complements the peanut butter beautifully.
- 1 tablespoon (15g) unsalted butter. Again, for that smooth, luxurious finish.
- ¼ teaspoon pure vanilla extract.
- For the Topping and Garnish:
- 1 ½ cups (approximately 7.5 ounces or 210g) Reeses Pieces candies. This is the star of our show, providing that iconic peanut butter and chocolate crunch!
- Optional: A light sprinkle of flaky sea salt for an extra gourmet touch and to enhance the flavors even further.
Preparation – Getting Started with Your Reeses Pieces Peanut Butter Bark
Before we dive into the delicious world of chocolate and peanut butter, it’s always a great idea to set up your workspace. This not only makes the process smoother but also ensures you have everything at hand when you need it, which is especially important when working with melting chocolate. Trust me, you don’t want to be scrambling for ingredients or tools once your chocolate is perfectly tempered!
- Line Your Baking Sheet: First things first, grab a standard 9×13-inch baking sheet. This size is ideal for creating a beautifully proportioned bark that’s not too thick or too thin. Line it meticulously with parchment paper. This step is absolutely crucial because it will prevent your delicious Reeses Pieces Peanut Butter Bark from sticking, making it incredibly easy to remove and break into pieces once it’s set. You could also use a silicone baking mat if you have one; they work wonderfully for this purpose too. Just make sure the parchment paper extends slightly over the edges, creating little “handles” that will aid in lifting the finished bark.
- Measure All Ingredients: Take a moment to measure out all of your ingredients before you begin the melting process. This practice is often referred to as “mise en place” in culinary terms, and it truly makes a world of difference. Having your chocolate chips, peanut butter, butter, vanilla extract, and especially your vibrant Reeses Pieces ready to go means you can focus on the technique and timing, rather than rushing to measure. This is particularly important when dealing with ingredients that need to be added quickly or in sequence.
- Prepare Your Double Boiler (or Microwave Setup): For melting chocolate, I personally prefer the gentle heat of a double boiler. It gives you more control and reduces the risk of scorching, which can ruin the texture and flavor of your chocolate. If you’re using a double boiler, set it up now: place a heatproof bowl over a saucepan of simmering water, ensuring the bottom of the bowl does not touch the water. If you’re opting for the microwave, have your microwave-safe bowls ready. We’ll be using two separate bowls for our two distinct chocolate layers, so keep that in mind.
Crafting the Peanut Butter Layer – The Irresistible Base of Our Bark
This is where the magic truly begins! The peanut butter layer is the foundation of our delectable Reeses Pieces Peanut Butter Bark, providing that signature creamy, salty-sweet goodness that everyone adores. Taking your time here will ensure a smooth, rich, and perfectly flavored base.
- Melt the Peanut Butter Layer Ingredients: In a medium heatproof bowl (or the top of your double boiler), combine the 1 ½ cups of semi-sweet chocolate chips, ½ cup of creamy peanut butter, and 2 tablespoons of unsalted butter. If you’re using a double boiler, place the bowl over your simmering water. If you’re using a microwave, heat in 30-second intervals, stirring thoroughly after each interval. The key here is low and slow. Chocolate can be finicky, and rushing the melting process can cause it to seize or burn, which we definitely want to avoid! Continue stirring until the mixture is completely smooth and lusciously creamy. It should be free of any lumps of chocolate or butter, showcasing a beautiful, uniform consistency.
- Incorporate Vanilla and Salt: Once your chocolate and peanut butter mixture is perfectly melted and smooth, remove it from the heat. Stir in the 1 teaspoon of pure vanilla extract and the ¼ teaspoon of sea salt. The vanilla deepens the flavor, adding a warm, aromatic note that complements the peanut butter. The sea salt, my friends, is absolutely essential here. It acts as a fantastic flavor enhancer, cutting through the sweetness and bringing out the rich, nutty notes of the peanut butter. Taste a tiny bit if you like – you’ll notice the difference the salt makes!
- Spread the Peanut Butter Layer: Now, carefully pour this warm, inviting peanut butter mixture onto your prepared baking sheet. Using an offset spatula or the back of a spoon, gently spread the mixture evenly across the parchment paper. Aim for a consistent thickness across the entire surface. This ensures that when you break your bark, each piece will have that perfect balance of peanut butter goodness. Work relatively quickly here, as the mixture will start to set as it cools. You want a nice, smooth canvas for our next layer.
- Chill Briefly: Transfer the baking sheet with the peanut butter layer to the refrigerator. Allow it to chill for about 10-15 minutes, or just until it’s firm enough to support the next layer without the two layers mixing together. You don’t want it rock-hard yet, just slightly set. This brief chilling step is important for creating distinct, beautiful layers in your finished Reeses Pieces Peanut Butter Bark.
Creating the Chocolate Topping – The Perfect Complement
The top chocolate layer adds another dimension of flavor and texture, encasing our beloved Reeses Pieces in a sweet embrace. This layer should be equally smooth and appealing, providing a beautiful contrast to the peanut butter base.
- Melt the Milk Chocolate Topping: While your peanut butter layer is chilling, it’s time to prepare the milk chocolate topping. In a separate clean heatproof bowl (or the second top of your double boiler), combine the 1 ½ cups of milk chocolate chips and the 1 tablespoon of unsalted butter. Melt these together using the same gentle method you used for the peanut butter layer – either over a double boiler or in 30-second intervals in the microwave, stirring diligently after each heating. Patience is key here to achieve a silky-smooth, glossy chocolate. Avoid high heat, as milk chocolate is even more prone to scorching than semi-sweet.
- Add Vanilla to the Topping: Once your milk chocolate mixture is completely melted and beautifully smooth, remove it from the heat. Stir in the ¼ teaspoon of pure vanilla extract. This small addition enhances the inherent sweetness and creaminess of the milk chocolate, adding a lovely aromatic finish. Give it a good stir to ensure the vanilla is thoroughly incorporated throughout the rich chocolate.
The Grand Finale: Adding Reeses Pieces and Setting Your Ultimate Bark
This is where our Reeses Pieces Peanut Butter Bark truly comes to life! The addition of those iconic candies not only provides a fantastic textural contrast but also infuses every bite with that unmistakable peanut butter cup flavor, creating a visually stunning and incredibly delicious treat.
- Pour and Spread the Chocolate Topping: Retrieve your chilled peanut butter layer from the refrigerator. Carefully pour the warm, melted milk chocolate mixture evenly over the semi-set peanut butter layer. Using your offset spatula or the back of a spoon, gently spread the chocolate topping to cover the entire surface of the peanut butter layer. Work with a light hand to avoid disturbing the layer beneath. You want a smooth, even coating that creates a beautiful, seamless top for your bark. The contrast in color between the two layers will already be looking quite impressive!
- Generously Sprinkle with Reeses Pieces: Now for the fun part! While the milk chocolate layer is still wet and pliable, generously sprinkle the 1 ½ cups of Reeses Pieces all over the surface. Don’t be shy here; the more the merrier! Press them down ever so slightly with your palm or a clean spatula to ensure they adhere well to the melting chocolate. This step is crucial not only for the flavor and texture but also for the visual appeal of your bark. Each piece of bark should have a good scattering of those iconic orange, yellow, and brown candies. If you like a little extra gourmet touch, this is also the moment to sprinkle a very light dusting of flaky sea salt over the top. The salt perfectly balances the sweetness and elevates all the flavors.
- Chill to Set: Carefully transfer the baking sheet back into the refrigerator. Allow your Reeses Pieces Peanut Butter Bark to chill for at least 2-3 hours, or even better, overnight. This extended chilling time is vital for ensuring both chocolate layers are completely firm and set. If you try to break it too soon, it might be soft and messy. Patience truly pays off here, as a fully set bark will break cleanly and hold its shape beautifully.
- Break into Pieces: Once your bark is thoroughly chilled and solid, remove it from the refrigerator. Lift the entire slab of bark off the baking sheet using the parchment paper handles and place it on a clean cutting board. Now comes the satisfying part! Using your hands, gently break the bark into irregular, rustic pieces. I love the organic look of broken bark, but if you prefer neater shapes, you can use a sharp knife warmed under hot water (and dried) to cut it into squares or rectangles. The varying sizes and shapes make it wonderfully appealing for serving.
- Serve and Enjoy: Arrange your beautiful pieces of Reeses Pieces Peanut Butter Bark on a serving platter and watch them disappear! This treat is perfect for parties, gift-giving, or simply as a delightful indulgence for yourself.
Tips and Tricks for Perfect Reeses Pieces Peanut Butter Bark
Making bark might seem straightforward, but a few expert tips can elevate your Reeses Pieces Peanut Butter Bark from good to absolutely phenomenal. I’ve learned these through plenty of delicious trial and error!
- Quality of Ingredients Matters: While you don’t need to break the bank, using good quality chocolate chips or baking chocolate will genuinely make a difference in the final taste and texture of your bark. Better chocolate melts more smoothly and has a richer flavor profile. For the peanut butter, as mentioned, stick to a classic creamy variety. Natural peanut butters tend to separate oil, which can make your peanut butter layer oily or crumbly instead of smooth and firm.
- Temperature Control is Key for Melting: Whether you use a double boiler or a microwave, always melt chocolate slowly and gently. Overheating chocolate is the quickest way to ruin it. If using a microwave, stir frequently between short bursts of heat to distribute the warmth and prevent hot spots. If using a double boiler, ensure the water is simmering, not boiling vigorously, and that the bowl doesn’t touch the water directly. Steam is your friend for gentle heat, but too much direct heat will cause the chocolate to seize or burn.
- Achieving Even Layers: For a visually appealing and texturally balanced bark, try your best to spread both the peanut butter layer and the chocolate topping evenly. An offset spatula is an invaluable tool for this, allowing you to glide over the surface smoothly. If your layers are too thick in some areas and too thin in others, some pieces of your bark might be overwhelmingly one flavor, or they might break less cleanly.
- Don’t Rush the Chill Time: I know how tempting it is to want to devour your bark immediately, but giving it ample time to chill in the refrigerator is crucial. A fully set bark will have a beautiful snap when broken and will hold its shape at room temperature for longer. If you try to break it when it’s still soft, it will be messy and the layers might separate or smear. For best results, I always recommend at least 2-3 hours, but overnight is truly optimal for the firmest set.
- Storage for Freshness: Once your Reeses Pieces Peanut Butter Bark is broken into pieces, store it in an airtight container at room temperature for up to one week. If your kitchen is particularly warm, or if you prefer a firmer texture, you can store it in the refrigerator. Just be aware that refrigeration can sometimes cause a slight “bloom” on the chocolate (a whitish film), which is harmless but can affect the appearance. Bringing it back to room temperature for about 15-20 minutes before serving will enhance its flavor and texture.
- Gifting Potential: This bark makes an absolutely wonderful homemade gift! Layer the pieces in a decorative tin or cellophane bag tied with a pretty ribbon. It’s a thoughtful, delicious present that almost everyone will appreciate, especially those who adore the classic peanut butter and chocolate combination.
- Flavor Variations (Beyond Reeses Pieces!): While Reeses Pieces are iconic, you can certainly experiment with other toppings! Consider adding chopped roasted peanuts for extra crunch, a drizzle of white chocolate, mini marshmallows, or even crushed pretzels for a salty-sweet twist. Just remember that the peanut butter and chocolate base of this bark is incredibly versatile.
- Dealing with Humidity: Chocolate and humidity are not friends! If you live in a very humid environment, try to make your bark on a less humid day if possible. Humidity can cause chocolate to seize when melting or make your finished bark sticky. Ensuring your tools and bowls are completely dry is also critical. Any water droplets can cause the chocolate to seize.
- Cleaning Up: As chocolate cools, it can be a bit stubborn to clean from bowls and spatulas. I find that the easiest way to clean chocolate-coated utensils is to scrape off as much excess as possible, then fill the bowls with hot water and let them sit for a few minutes. The hot water will gently melt the remaining chocolate, making it much easier to wash away.
I hope these detailed instructions and helpful tips guide you to creating the most incredible Reeses Pieces Peanut Butter Bark. It’s a truly satisfying treat to make, and even more satisfying to share (or keep all to yourself!). Enjoy every single bite of this delightful confection!
Conclusion:
And there you have it! We’ve reached the sweet finale of our culinary adventure. If you’ve been following along, you now possess the knowledge and inspiration to create something truly magical in your kitchen. This isn’t just another dessert; it’s a celebration of simple pleasures, an ode to that irresistible combination of creamy peanut butter and rich chocolate, elevated by the joyful crunch of colorful candies. What makes this recipe an absolute must-try isn’t just its incredible flavor, though that alone would be enough. It’s the sheer ease with which you can whip up a batch, transforming basic ingredients into a show-stopping treat that looks far more complicated than it actually is. It’s perfect for those moments when you need a decadent dessert but are short on time, or when you simply want to impress without the stress. Every bite offers a delightful textural contrast and a symphony of sweet and salty notes that will leave you reaching for just one more piece, I guarantee it.
I truly believe that once you experience the pure joy of making and tasting this delightful creation, it will become a cherished staple in your baking repertoire. There’s something profoundly satisfying about crafting a dessert that brings smiles to so many faces, and this recipe absolutely excels at that. The vibrant colors of the candies against the smooth chocolate and peanut butter base make it visually appealing, perfect for any occasion from a casual family treat to a festive holiday gathering. It’s the kind of confection that sparks conversation and creates lasting memories.
Serving Up Sweetness: How to Enjoy Your Reeses Pieces Peanut Butter Bark
Now that you’ve mastered the art of making this incredible sweet treat, let’s talk about how to best enjoy it! While simply breaking off a piece and savoring it on its own is a perfectly valid and highly recommended approach, there are countless ways to incorporate your homemade bark into various settings. Imagine serving small, elegant shards alongside your after-dinner coffee or tea, providing a sophisticated yet comforting end to a meal. It also makes for an absolutely stellar addition to any dessert platter, standing out with its vibrant hues and irresistible aroma. For your next movie night, skip the pre-packaged snacks and elevate the experience with a bowl of this homemade goodness – trust me, it’s a game-changer! Furthermore, consider packaging smaller portions of the Reeses Pieces Peanut Butter Bark in pretty bags or decorative tins as thoughtful, homemade gifts for friends, family, or teachers. It’s a personal touch that shows you truly care, and who wouldn’t appreciate such a delicious, handcrafted present? It holds up well at room temperature for several days, making it an excellent candidate for gifting or for making ahead of a party. You could even crush a few pieces and sprinkle them over vanilla ice cream for an ultimate sundae experience!
Unleash Your Inner Chef: Creative Variations
One of the beautiful aspects of bark recipes is their incredible versatility, and this one is no exception. While the classic combination is undeniably perfect, don’t hesitate to get creative and put your own spin on it! For a different flavor profile, try using dark chocolate instead of milk chocolate for a richer, more intense base, or even white chocolate for a creamier, sweeter foundation. You could also experiment with a blend of chocolates – perhaps a swirl of milk and dark for a marbled effect. Think about adding other crunchy elements: chopped pretzels for an extra salty kick that perfectly complements the peanut butter, or even a sprinkle of sea salt flakes over the top before it sets to enhance all the flavors. If you’re feeling adventurous, consider a layer of caramel or even marshmallow fluff swirled into the chocolate before adding the candies. Another idea is to incorporate different types of nuts, like chopped peanuts, almonds, or even pecans, for an added layer of texture and flavor. Don’t be afraid to mix and match your favorite candies too; while Reese’s Pieces are central to this particular recipe, you could certainly add mini M&M’s, sprinkles, or other small chocolate candies for an even more festive look. The possibilities are truly endless, allowing you to tailor this treat to your exact preferences or to suit any holiday or occasion.
So, what are you waiting for? I wholeheartedly encourage you to roll up your sleeves, gather your ingredients, and dive into making this wonderful recipe. It’s an experience that’s just as enjoyable as the eating itself. I absolutely cannot wait to hear about your experience! Please, please, please try this recipe out in your own kitchen. Take pictures, tell me about any creative variations you came up with, and share your triumphs (and any learning moments!) with me. Your feedback and stories are what truly make this culinary community thrive. Don’t be shy – let me know what you think!
Your Culinary Journey Awaits!
I am genuinely excited for you to discover the simple joy and incredible taste of this homemade bark. It’s more than just a recipe; it’s an invitation to create, to share, and to savor the sweet moments in life. Happy baking, my friends!
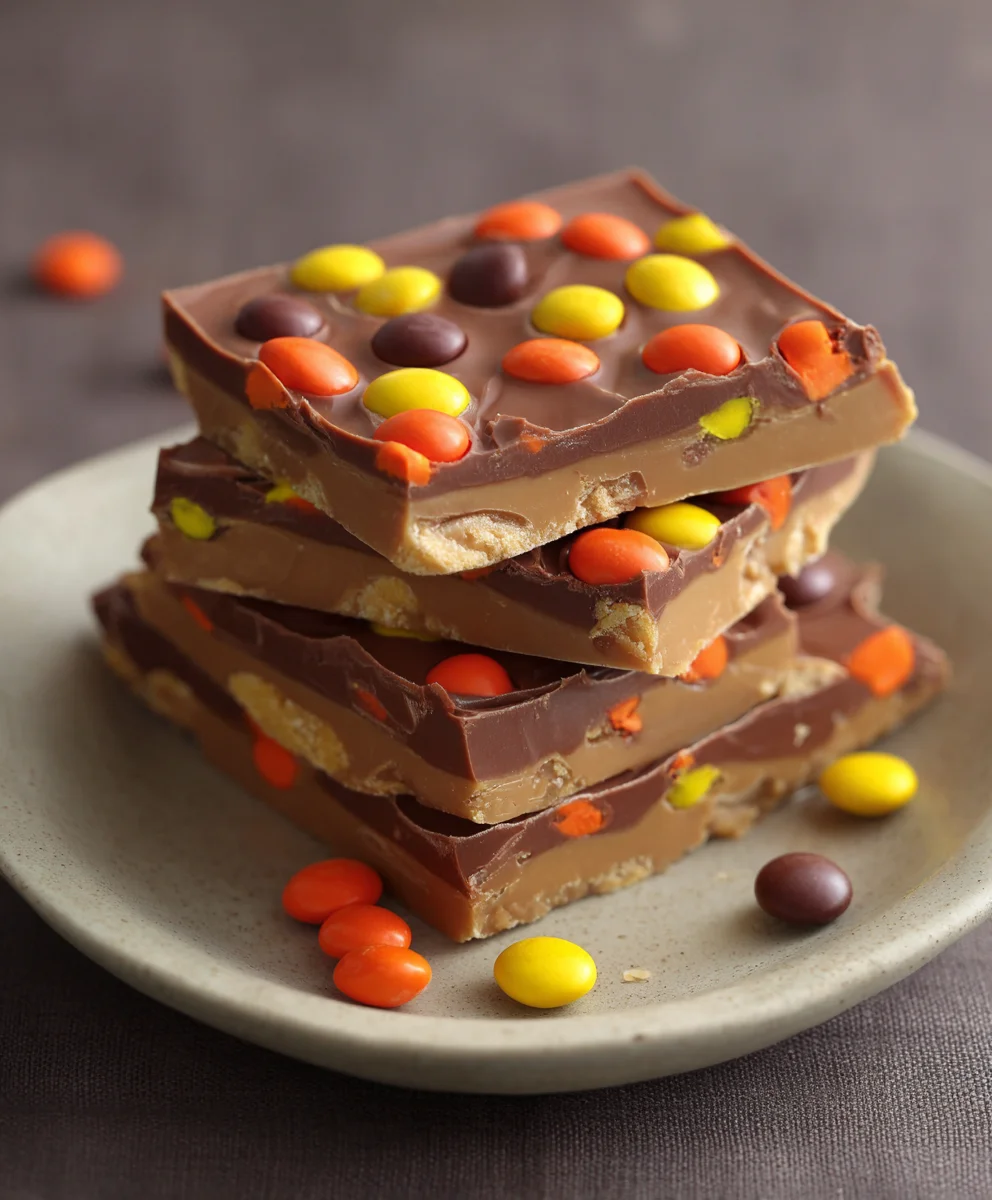
Reeses Pieces Peanut Butter Bark
An easy, no-bake, three-layer chocolate bark featuring a creamy peanut butter center and a generous topping of crunchy Reese’s Pieces. This irresistible treat perfectly blends sweet, salty, and classic peanut butter cup flavors, ideal for parties, gifts, or a delightful indulgence.
Ingredients
-
1 ½ cups (9 oz / 255g) semi-sweet chocolate chips
-
½ cup (4 oz / 113g) creamy peanut butter
-
2 tablespoons (30g) unsalted butter
-
1 teaspoon non-alcoholic vanilla extract
-
¼ teaspoon sea salt
-
1 ½ cups (9 oz / 255g) milk chocolate chips
-
1 tablespoon (15g) unsalted butter
-
¼ teaspoon non-alcoholic vanilla extract
-
1 ½ cups (7.5 oz / 210g) Reeses Pieces candies
-
Optional: Flaky sea salt for garnish
Instructions
-
Step 1
Line a 9×13-inch baking sheet with parchment paper, allowing it to extend slightly over the edges. Measure all ingredients and prepare your double boiler or microwave setup. -
Step 2
In a heatproof bowl, combine 1 ½ cups semi-sweet chocolate chips, ½ cup creamy peanut butter, and 2 tablespoons unsalted butter. Melt gently over a double boiler or in a microwave (30-second intervals, stirring after each) until completely smooth. -
Step 3
Remove the melted mixture from heat. Stir in 1 teaspoon non-alcoholic vanilla extract and ¼ teaspoon sea salt. Pour and spread this mixture evenly onto the prepared baking sheet. Chill in the refrigerator for 10-15 minutes, or until slightly firm. -
Step 4
In a separate clean heatproof bowl, combine 1 ½ cups milk chocolate chips and 1 tablespoon unsalted butter. Melt these together using the same gentle method (double boiler or microwave) until silky-smooth. -
Step 5
Remove the melted milk chocolate from heat. Stir in ¼ teaspoon non-alcoholic vanilla extract. -
Step 6
Retrieve the chilled peanut butter layer from the refrigerator. Carefully pour the warm, melted milk chocolate over it and gently spread to cover the entire surface evenly. -
Step 7
While the chocolate topping is still wet and pliable, generously sprinkle 1 ½ cups Reeses Pieces candies all over the surface. Press them down lightly to ensure they adhere. Optionally, sprinkle a very light dusting of flaky sea salt for an extra gourmet touch. -
Step 8
Transfer the baking sheet back to the refrigerator and chill for at least 2-3 hours, or preferably overnight, until the entire bark is completely firm and set. -
Step 9
Once thoroughly chilled and solid, lift the entire slab of bark from the baking sheet using the parchment paper handles. Place it on a clean cutting board and break it into irregular, rustic pieces (or use a warm knife to cut into neat shapes). -
Step 10
Arrange your beautiful pieces of Reeses Pieces Peanut Butter Bark on a serving platter and enjoy this delightful confection!
Important Information
Nutrition Facts (Per Serving)
It is important to consider this information as approximate and not to use it as definitive health advice.
Allergy Information
Please check ingredients for potential allergens and consult a health professional if in doubt.


Leave a Comment